How to Block a Knitted Blanket: Easy 3 Methods
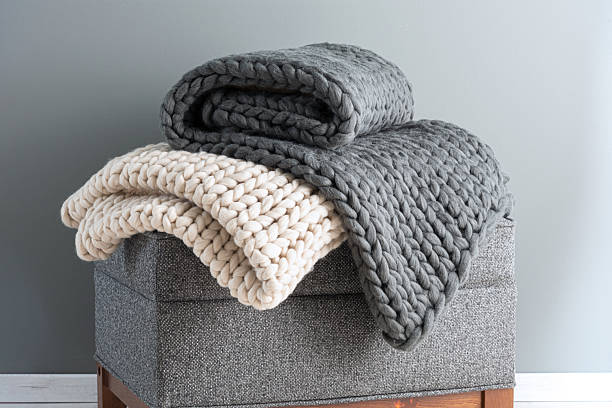
Blocking is the quiet finishing touch that turns a knitted blanket from a handmade piece to a professional one. After the last stitch is cast off, the yarn still carries the memory of tension and uneven loops. Moisture and gentle shaping allow fibers to relax, settle, and reveal their proper form.
Edges straighten, stitches align, and the blanket drapes smoothly. How to Block a Knitted Blanket involves a mindful process where moisture and time work together to enhance texture and shape. This approach is especially valuable for natural fibers like wool or cotton, which bloom and shift when treated.
Lace motifs open, textured patterns stand out, and the blanket takes on a polished softness. Skipping blocking often leaves curled corners and uneven fabric, while a carefully blocked blanket lies flat, feels supple, and showcases the maker’s care.
Also Read: How to Read Knitting Patterns? Beginners Guide
Materials and Tools Needed for Blocking
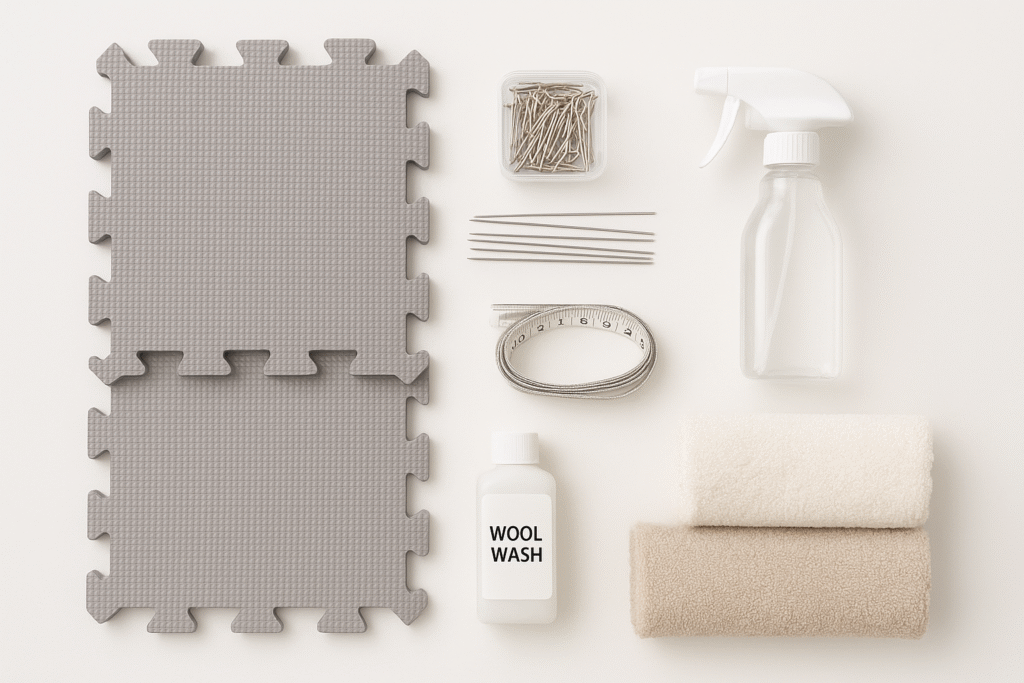
Gather the right tools before blocking to ensure accuracy and professional results. Each tool shapes, dries, and protects the blanket, turning your project into a polished, lasting piece. Using the wrong tools can cause uneven shaping, curling, or slow drying. Prepare properly before starting:
Essential Blocking Tools
Also Read: How to Measure Circular Knitting Needles? Beginners Guide
Budget-Friendly Alternatives
Budget alternatives: yoga mats, play mats, or even a towel-covered bed can replace blocking mats. Use glass-head sewing pins (if stainless) in place of specialty T-pins.
Also Read: How to Finish a Knitting Project: A Complete Guide
How to Block a Knitted Blanket: Step-by-Step Methods
Blocking a knitted blanket is essential for achieving professional results, especially with large-scale projects where uneven tension, curled edges, or distorted stitch patterns become more pronounced.
This comprehensive guide covers three proven blocking methods, each tailored to specific fiber types and project requirements. Understanding which technique suits your blanket ensures optimal drape, shape retention, and visual clarity.
Method 1: Wet Blocking a Knitted Blanket
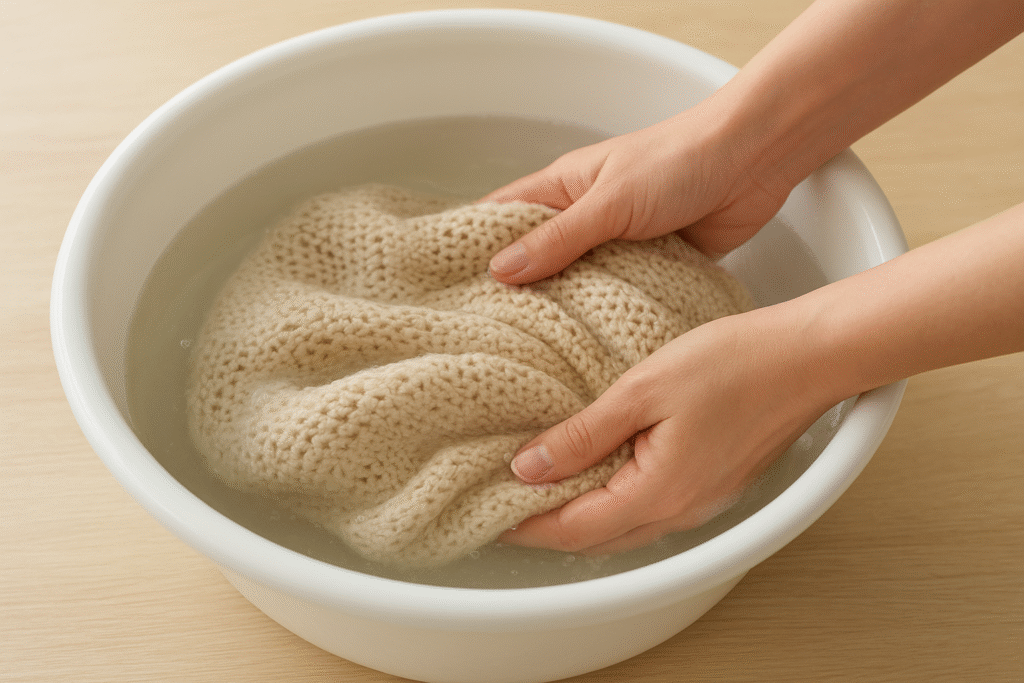
Step 1: Prepare the Soak
Fill a clean basin, bathtub, or large plastic bin with lukewarm water—never hot, as heat can cause felting in wool or shrinkage in natural fibers. Add a capful of gentle wool wash or pH-neutral detergent specifically formulated for delicate knits.
Avoid standard laundry detergents, which contain harsh chemicals that strip natural oils and damage fiber integrity. Swirl the water gently to distribute the soap evenly.
Pro Tip: For particularly delicate or hand-dyed yarns, add a tablespoon of white vinegar to the water to set colors and prevent bleeding.
Step 2: Submerge the Blanket
Gently lower the knitted blanket into the water, pressing it down slowly until fully submerged. Avoid agitation, wringing, or excessive handling, as this can cause felting in wool, distort stitch structure, or create permanent creases.
Allow the blanket to soak undisturbed for 15–20 minutes. For heavily textured patterns like cables or bobbles, extend the soak to 25–30 minutes to ensure complete fiber relaxation.
Expert Insight: The water should feel cool to the touch by the end of the soak. This indicates the fibers have released their tension and are ready for reshaping.
Step 3: Remove Extra Water
Drain the basin and gently press the blanket against the sides to release excess water. Never lift it while fully saturated, as the weight can stretch and distort the fabric. Carefully transfer the blanket to a clean, absorbent surface.
Lay it flat on several thick towels, then roll the towels and blanket together like a burrito. Press firmly (but don’t twist or wring) to absorb moisture. Repeat with fresh towels if the first set becomes too saturated.
Critical Warning: Never hang a wet knitted blanket—gravity will pull the fibers out of shape irreversibly.
Step 4: Move to Blocking Surface
Transfer the damp blanket to interlocking foam blocking mats, a clean carpet covered with waterproof sheeting, or a large table protected with plastic and towels. Gently smooth and stretch the blanket into its intended shape, paying close attention to squaring corners and aligning edges. Use a tape measure to verify dimensions and ensure symmetry.
Professional Technique: For blankets with repeating motifs or lace patterns, count rows and stitches to ensure even distribution across the entire surface.
Step 5: Secure the Blanket
For straight edges, thread blocking wires (flexible, rustproof wires) through the edge stitches to create perfectly even lines. For curved edges, scalloped borders, or intricate lace, use rustproof T-pins or stainless steel blocking pins spaced 2–3 inches apart. Pin through the outer edge stitches, not the yarn itself, to avoid leaving visible holes.
Gently stretch the fabric to open up lace patterns and define stitch details without over-stretching.
Advanced Tip: Use a blocking guide or printed template beneath transparent blocking mats to maintain precise measurements and symmetry.
Step 6: Let It Dry Completely
Leave the blanket pinned and undisturbed in a well-ventilated area away from direct sunlight or heat sources. Drying time varies based on fiber content, blanket thickness, and humidity, typically 24–48 hours for medium-weight blankets and up to 72 hours for chunky or heavily textured pieces.
The blanket must be completely dry before unpinning to ensure the fibers set permanently in their new shape.
Humidity Consideration: In high-humidity environments, position a fan nearby (not directly on the blanket) to improve air circulation and prevent mildew.
Best for: Wool, alpaca, merino, cotton, linen, bamboo, and other natural fibers that respond well to moisture and reshaping.
Also Read: How to Join in Round in Knitting: Comprehensive Guide
Method 2: Spray Blocking a Knitted Blanket
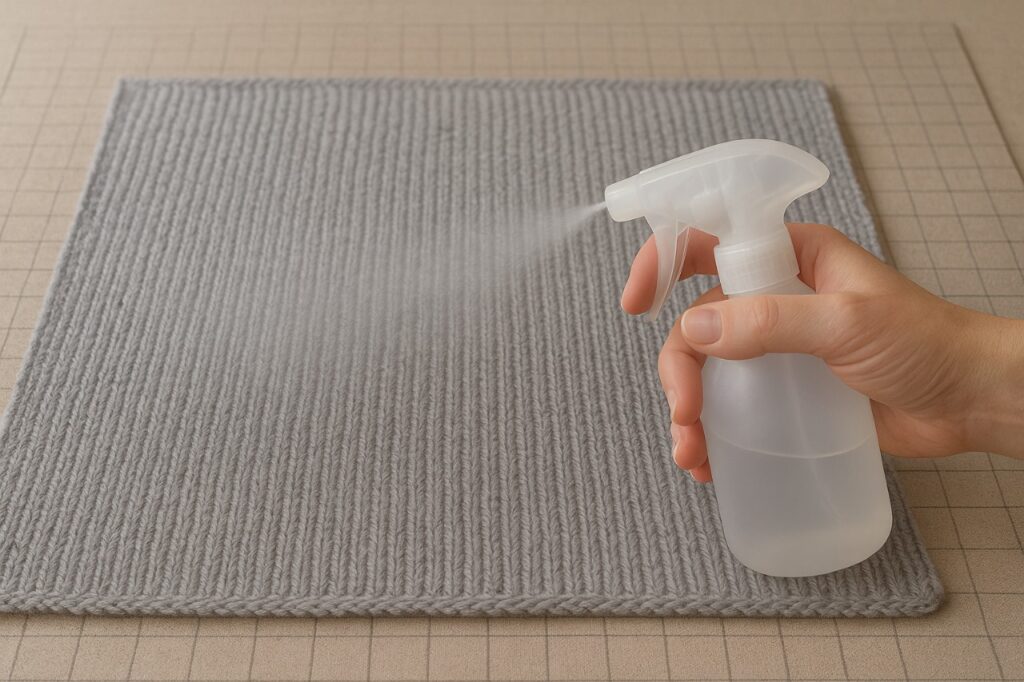
Spray blocking offers a faster, less labor-intensive alternative to full wet blocking, making it ideal for touch-ups, lightweight projects, or situations where full submersion isn’t practical. This technique works by lightly dampening the surface fibers, allowing them to relax just enough to accept reshaping without the prolonged drying time of wet blocking.
Quick Spray Blocking Steps
1. Lay the blanket flat
Position the blanket on blocking mats or a clean, flat surface. Smooth out wrinkles and adjust edges to approximate the desired final shape.
2. Mist evenly with water until damp
Fill a clean spray bottle with lukewarm water—optionally add a few drops of wool wash for added fiber conditioning. Spray the entire surface evenly, working in sections to ensure consistent dampness. The fabric should feel moist to the touch but not soaking wet. Focus extra mist on areas with curled edges or uneven stitches.
3. Shape edges, pin securely, and leave to dry
Gently stretch and pin the blanket using T-pins or blocking wires, maintaining even tension throughout. Allow 12–24 hours for complete drying, checking periodically to ensure the fabric hasn’t shifted.
Efficiency Note: Spray blocking works best for refreshing previously blocked pieces, correcting minor imperfections, or quickly setting lightweight cotton or linen blankets.
Best for: Lace blankets, lightweight cotton or linen projects, acrylic-cotton blends, or re-blocking pieces that have lost their shape after washing.
Also Read: How Do I Block a Knitted Sweater? Step-by-Step
Method 3: Steam Blocking a Knitted Blanket
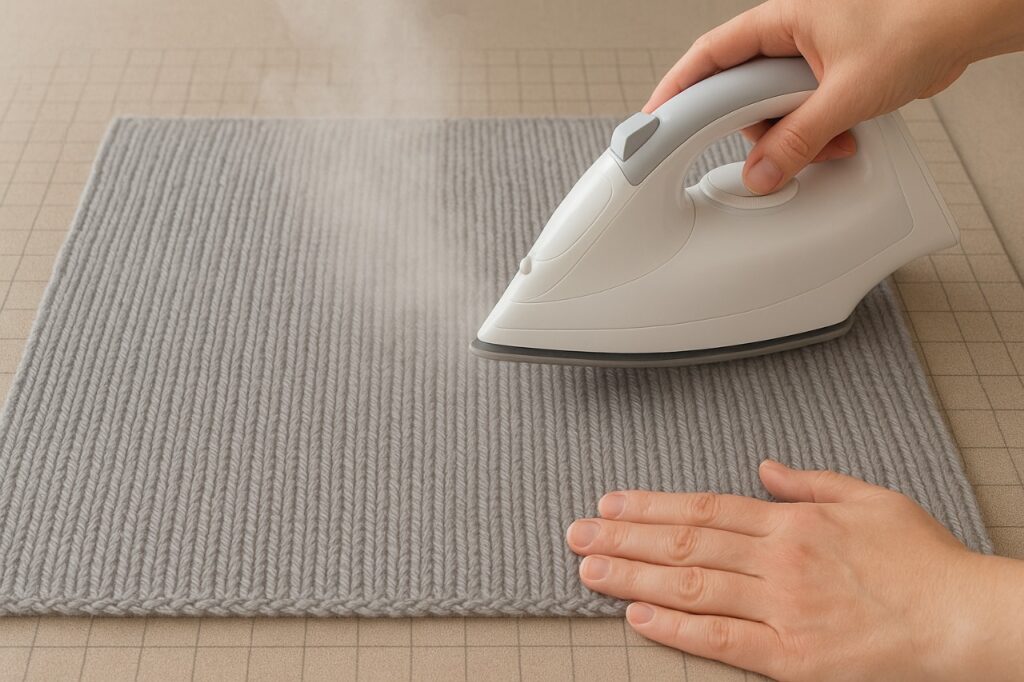
Steam blocking uses heat and moisture vapor to relax synthetic and blended fibers that don’t respond well to water immersion. This method is faster than wet blocking and particularly effective for acrylic yarns, which can become permanently set when exposed to steam heat—a property known as “killing” the acrylic.
Steam Blocking Process
1. Place the blanket flat on a safe surface
Lay the blanket on a heat-resistant surface such as blocking mats, an ironing board (for smaller sections), or a table covered with a heat-safe pad. Smooth the fabric and pre-shape edges as much as possible.
2. Hover a steam iron or garment steamer above (never touch the fabric)
Set your iron to the steam setting or use a dedicated garment steamer. Hold the device 1–2 inches above the fabric surface.
Never allow the iron’s soleplate to make direct contact, as this can scorch, flatten, or melt synthetic fibers. Move slowly across the entire blanket, allowing steam to penetrate the fibers and relax tension. You should see the fabric soften and lose its curl or stiffness.
3. Allow steam to relax fibers, then pin if needed
Immediately after steaming each section, gently reshape and pin the edges if precision is required. For acrylic blankets, the heat “sets” the new shape quickly, so work in manageable sections. Allow the blanket to cool completely (15–30 minutes) before unpinning.
Critical Caution: Over-steaming or direct contact with heat can permanently flatten textured stitches like cables, ribbing, or seed stitch. It can also cause acrylic fibers to lose their structure entirely, resulting in a limp, lifeless fabric. Always test on a swatch first.
Safety Warning: Steam causes burns—keep hands, face, and body at a safe distance, and never steam while wearing loose clothing or jewelry that could catch.
Best for: 100% acrylic blankets, acrylic-wool blends, polyester, and synthetic fibers that resist water absorption. Also effective for quick touch-ups on any fiber type.
Not Recommended For: Delicate natural fibers like mohair, cashmere, or fine merino, which can be damaged by heat. Stick to wet blocking for these materials.
Also Read: How to Knit a Gauge Swatch: Quick Guide
Blocking Different Yarn Types
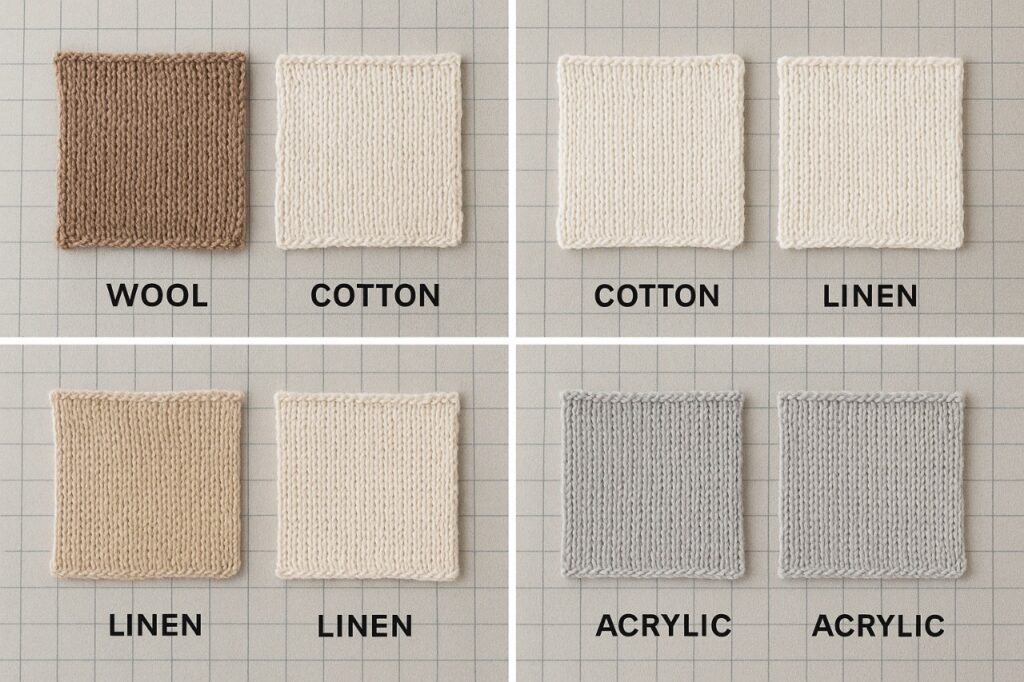
How to Block a Knitted Blanket effectively begins with understanding how different yarn types respond to blocking, ensuring the best results for your specific project.
Wool
Cotton
Linen
Acrylic
Blends
Also Read: How to Change Colors While Knitting? Beginners Tips
Tips for Blocking Large Blankets in Small Spaces
Working with large blankets in limited space doesn’t have to be impossible. Here are practical solutions for small-space blocking:
Also Read: Best Knitting Machine for Blankets in 2025: Top Picks
Common Mistakes to Avoid When Blocking Blankets
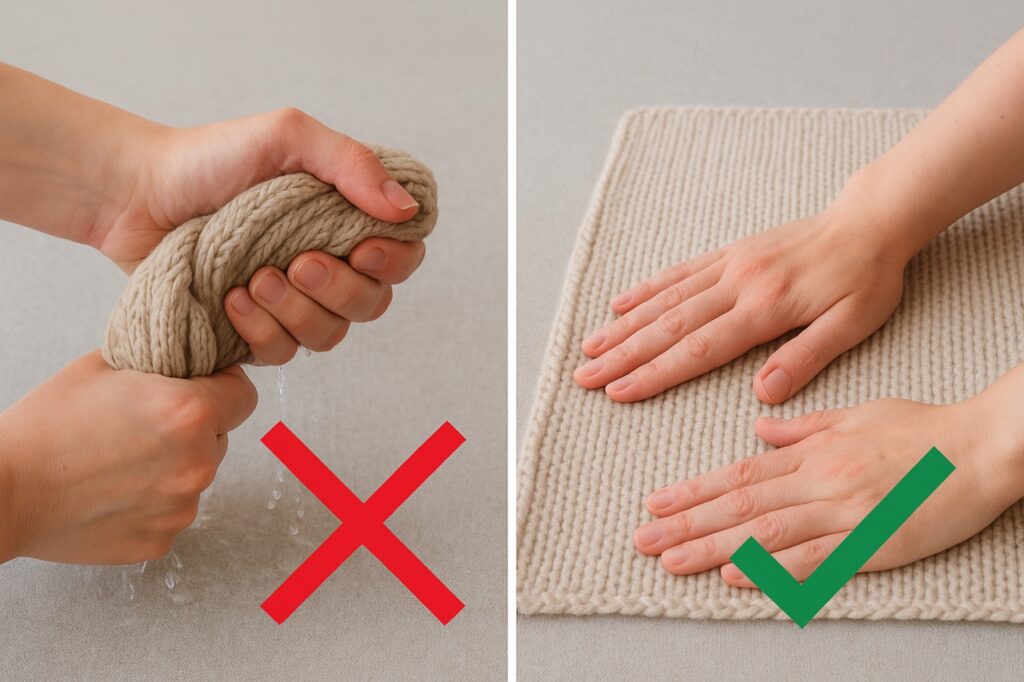
Even skilled knitters occasionally make errors that undermine the blocking process. One of the most damaging is twisting or squeezing a soaked blanket to remove excess water, which stretches the fibers and distorts the overall shape.
Draping a damp blanket over a rail or line may seem convenient, but gravity pulls the fabric downward, leaving it misshapen. Attention to water temperature and soap choice is just as significant. Hot water or harsh detergents can shrink or felt natural fibers permanently.
Pinning also requires care; using too many pins, placing them unevenly, or relying on rusty ones can result in holes, marks, or discoloration. Fine, rust-proof pins spaced evenly offer the safest option. Lastly, protect surfaces such as floors or tables from water runoff during blocking to prevent stains or damage.
Also Read: How to Pick Up Knit Stitches In Knitting? Two Methods
Quick Blocking Reminders
When blocking blankets, never twist or wring out water, and avoid hanging a damp piece, as weight will distort the shape. Use lukewarm water with mild soap to prevent shrinking or felting. Pin edges with fine, rust-proof pins, spacing them evenly, and always protect floors or tables from water runoff to prevent damage.
How to Block a Knitted Blanket: Troubleshooting
Common Issues and Solutions
Also Read: How to Fix a Dropped Stitch: A Complete Guide for Knitters
How to Care for a Blocked Blanket
Once a blanket has been carefully blocked, proper care is essential to preserve its shape and appearance. Always store blankets folded or rolled rather than hanging, as weight can stretch the fabric over time.
Gentle washing with a mild, fiber-appropriate soap and minimal agitation helps maintain the yarn’s strength and texture. Re-blocking is recommended after washing to smooth out the fabric and restore structure.
Wool and other natural fibers benefit most from this step, while acrylic blankets often require little maintenance; usually, a light machine wash and a tumble on low heat will reset their shape.
Protect blankets from pets, sharp objects, and moisture to avoid snags, damage, or warping, ensuring the piece remains beautiful and lasting for years.
Also Read: How Do You Weave in Ends in Knitting? Step-by-Step
Frequently Asked Questions
Conclusion: How to Block a Knitted Blanket
How to Block a knitted blanket is more than just a finishing step—it is what elevates the project from a handmade to a professional level. Whether using wet, spray, or steam blocking, each method relaxes fibers, enhances stitch definition, and shapes the fabric into its best form.
With the right tools, careful technique, and attention to detail, every blanket can achieve a smooth, well-balanced finish. Avoiding common mistakes and tailoring the approach to the yarn type ensures long-lasting results.
A properly blocked blanket not only improves appearance and function but also highlights the dedication invested in every stitch. With patience and care, the finished piece will provide warmth, beauty, and lasting value for years to come.
Every stitch finds its true beauty once the blanket is properly blocked.
Also Read: How to Do a Long Tail Cast On Knitting? Easy Guide