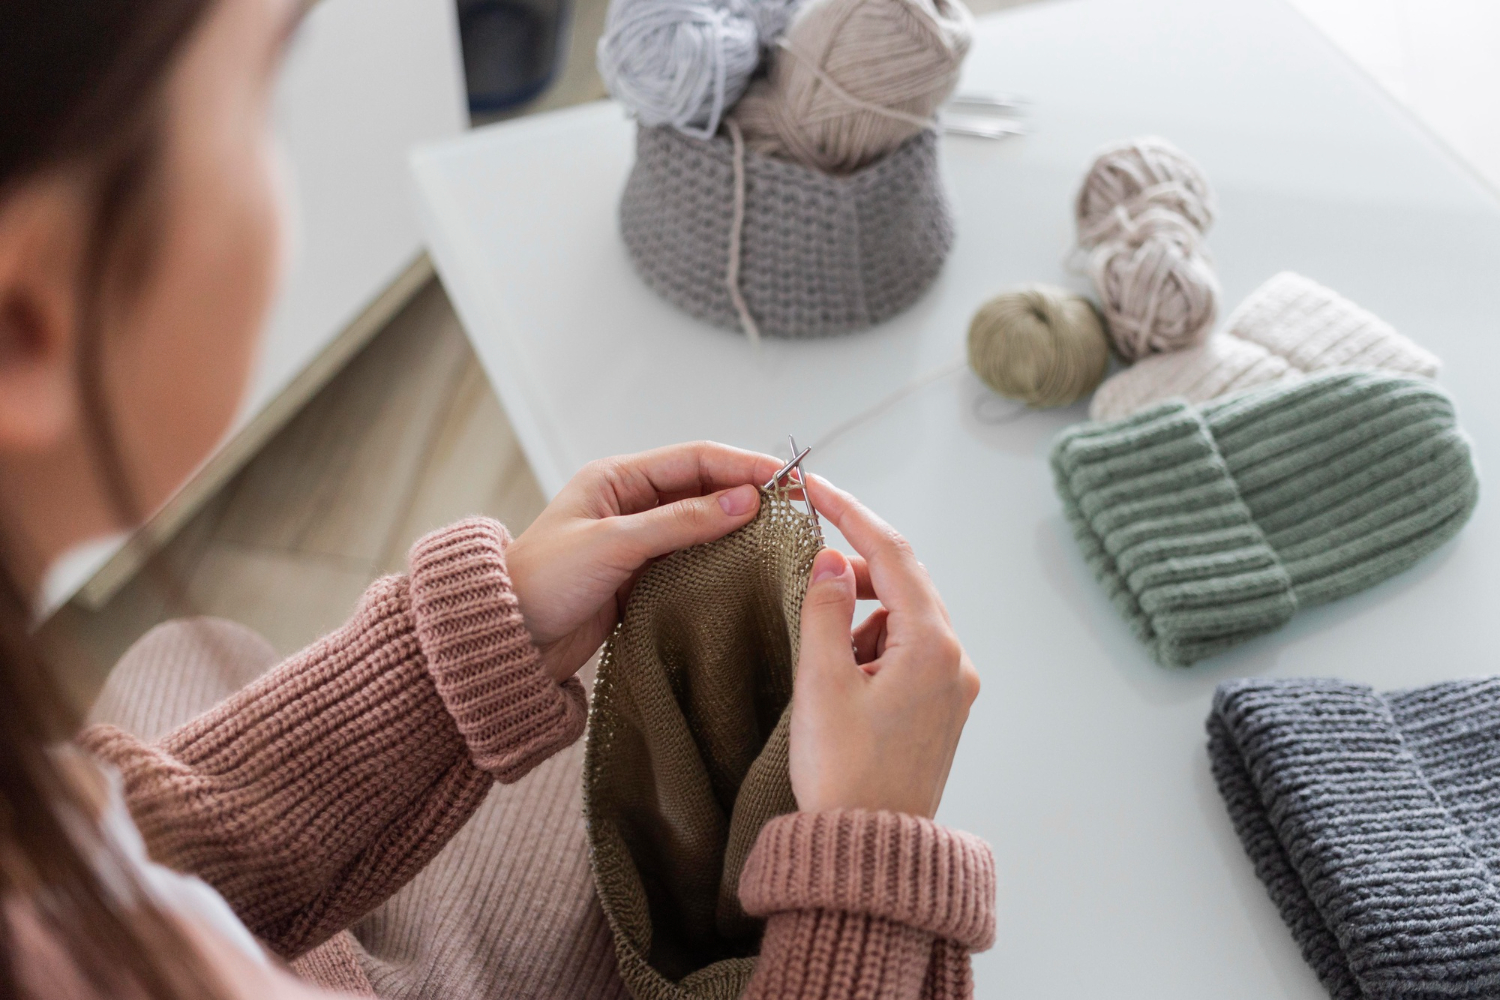
How to Bind Off Knitting: Easy Ultimate Guide
Knowing how to bind off knitting correctly is what turns a nearly finished project into a polished, wearable piece. Binding off in knitting is the final step that secures your live stitches, prevents unraveling, and creates a clean, balanced edge that holds its shape over time.
When done well, the bind-off edge looks smooth and flexible. When done poorly, it can feel tight, uneven, or distract from the beauty of the knitting.
This guide shows you how to finish your knitting in a clear, friendly way. You’ll start with the basic method most patterns use, then learn about stretchy, ribbed, and sewn ways to finish projects that need more stretch.
Whether you’re finishing a scarf, sweater, socks, or a warm hat, you’ll learn to finish your knitting with confidence so your work looks neat, feels good, and looks well-made instead of rushed.
Also Read: How to Finish a Knitting Project: A Complete Guide
What Does Bind Off Mean in Knitting?
In knitting, binding off, also called casting off, means securing your live stitches so they won’t unravel once you remove the needles. Binding off creates a stable, finished edge by locking each stitch into place while still allowing the fabric to stretch naturally—when the correct bind-off method is used.
You’ll encounter several terms in knitting patterns that all refer to the same finishing process:
- bind off
- BO
- cast off
- Knitting, how do I cast off
Although the wording varies, the goal is always the same: to complete your knitting cleanly and prevent stitches from coming undone. Mastering how to bind off knitting properly is essential for comfortable garments, flexible edges, and professional-looking results—especially on items like sweater necklines, hat crowns, and sock cuffs where stretch matters.
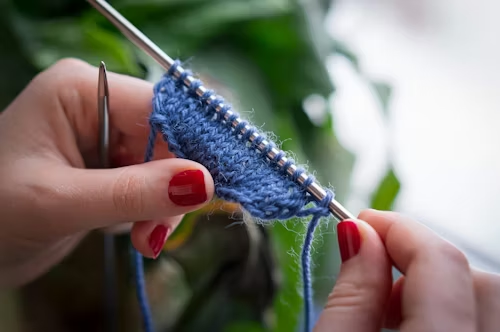
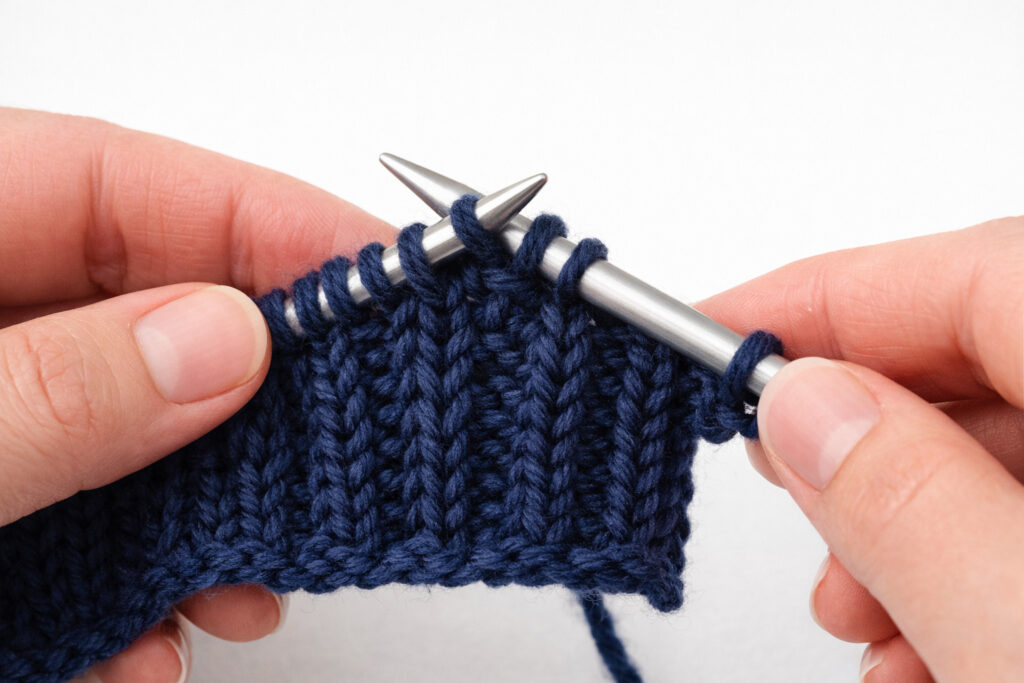
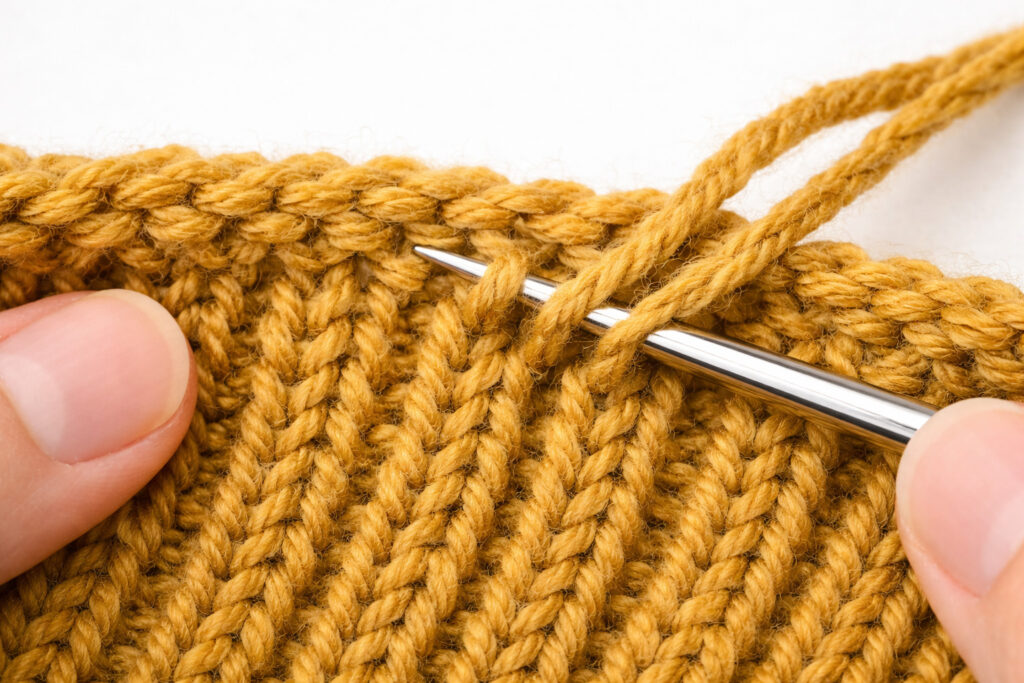
Basic Bind-Off: Easiest for Beginners
The standard bind off is the most common and beginner-friendly way to finish a knitting project. Knowing how to bind off knitting correctly ensures your edges are secure, neat, and flexible. It works perfectly for stockinette stitch, scarves, dishcloths, and other flat pieces.
Step-by-Step Standard Bind-Off
- Knit the first two stitches.
- Insert the left needle into the first stitch on the right needle.
- Lift that stitch up and over the second stitch and let it drop off the needle.
- Knit one more stitch.
- Pass the previous stitch over the new stitch.
- Repeat until one stitch remains.
- Cut the yarn, leaving an 8-inch tail, and pull it through the final loop.
Pro tip: Gently tug on the working yarn while binding off to keep edges even. Practicing on scrap yarn first takes only a few minutes and helps you feel the motion naturally.
Also Read: How to Cast on Knitting with Two Needles: A Complete Guide
Bind-Off Purlwise (For Wrong-Side Rows)
When your pattern ends on a purl row, or if you want a textured edge that matches ribbing or seed stitch, use a purlwise bind off:
- Purl two stitches.
- Lift the first stitch over the second.
- Purl one stitch and repeat across the row.
This method preserves the bumpy texture of your pattern and creates consistent edges.
Tips for Stretchy Edges
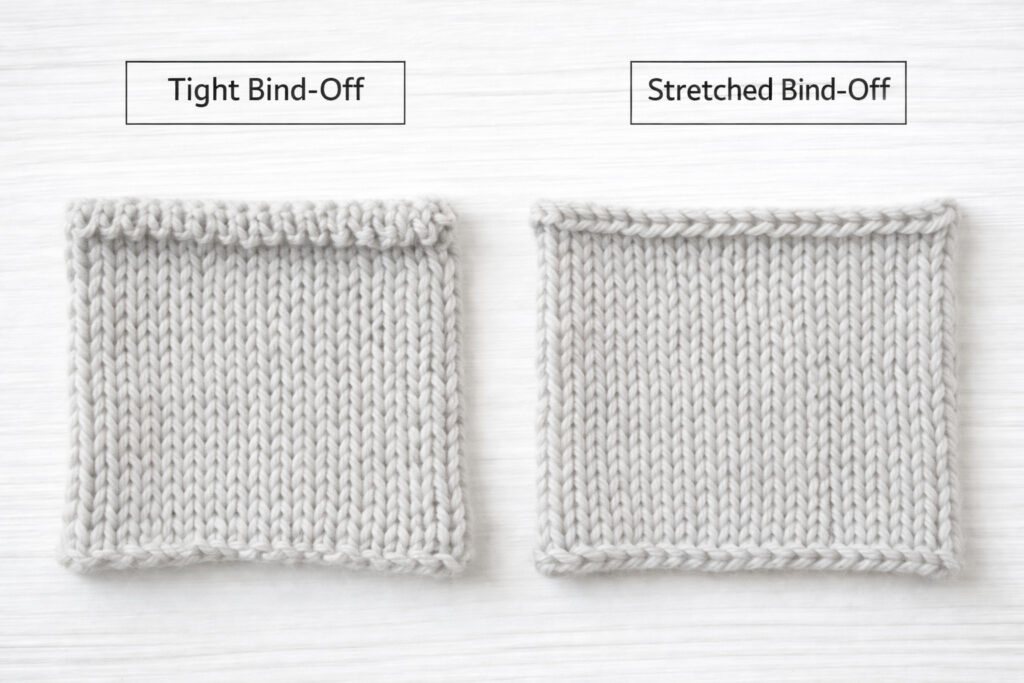
A bind-off edge that’s too tight can make cuffs, sock tops, or hat openings uncomfortable. To create a more flexible finish:
- Use a needle one or two sizes larger than your working needles.
- Keep stitches relaxed; don’t pull yarn too tightly.
- Gently stretch the bound-off edge as you work.
- Block your piece after finishing by soaking and pinning to shape.
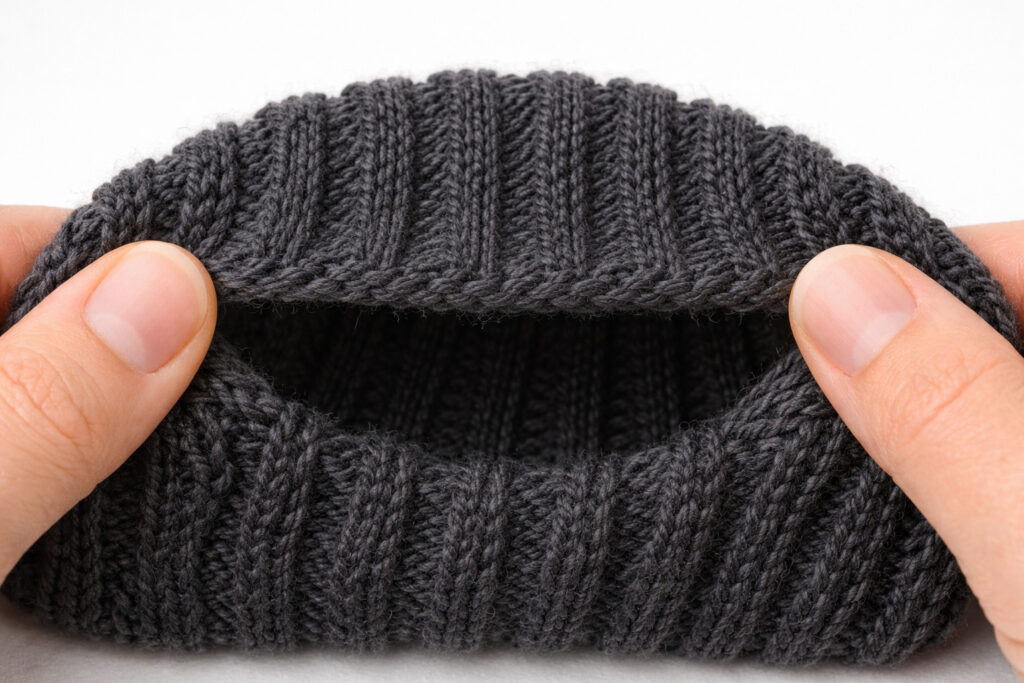
For hats, aim for about 20% stretch so the edge fits comfortably over the head.
Also Read: How Do I Block a Knitted Sweater? Step-by-Step
Bind Off in Pattern: Keeping Your Ribbing and Textures Consistent
For projects featuring ribbing, seed stitch, moss stitch, or other textures, a standard bind-off can appear uneven or tight. Learning to bind off in pattern maintains the same texture and flexibility.
Why Bind Off in Pattern Matters:
- Keeps knit and purl columns aligned
- Preserves stretch in cuffs, necklines, and ribbed edges.
- Prevents puckering or uneven hems
Step-by-Step Instructions
- Identify your stitch pattern (knits vs. purls).
- Follow the pattern while binding off: knit the knits, purl the purls.
- Pass the first stitch over the second as usual.
- Keep your stitches a little loose so the edge stays flexible.
- Finish: cut yarn and weave in ends.
Example (1×1 Ribbing): K1, P1, lift first stitch over the second. Repeat.
Pro Tip: Try a stretchier bind-off if you want more give, especially for cuffs or hat edges.
Also Read: How to Read Knitting Patterns? Beginners Guide
Stretchy Bind-Off Techniques (For Flexible Edges)
When a regular bind-off feels too tight, a stretchy bind-off makes cuffs, sock tops, hats, and ribbing more comfortable to wear. These methods make your edges stretchy, tidy, and polished.
1. Simple Stretchy Bind Off
A beginner-friendly method that adds stretch without complicated steps:
Steps:
- Knit two stitches.
- Slip both stitches back onto the left needle.
- Knit them together through the back loop.
- Knit one more stitch.
- Repeat across the row.
Best for: Ribbing, cuffs, scarves, and other garments that need gentle flexibility.
Pro tip: Relax your tension while binding off to keep edges even.
2. Suspended Bind Off
Gives a softer, stretchier edge while still looking neat.
Steps:
- Slip one stitch.
- Knit the next stitch.
- Lift the slipped stitch over the knitted stitch.
- Continue across the row.
Best for: Hats, cuffs, and ribbing that require moderate stretch.
Pro tip: Gently stretch each stitch as you go for maximum flexibility.
3. Sewn Bind Off (Ultra-Stretchy)
Great for socks, projects started from the toe, and necklines. It looks like regular knitting and gives the most stretch without needing extra needles.
Steps:
- Thread a tapestry needle with your yarn tail.
- Insert purlwise through two stitches.
- Insert knitwise back through the first stitch.
- Drop the first stitch.
- Repeat across the row.
Best for: Sock tops, ribbing, or any edge that requires extreme stretch.
Pro tip: Works like Kitchener stitch without extra needles—perfect for professional finishes.
4. Bind-Off in Pattern for Ribbing
For 1×1 or 2×2 ribbing, following the knit and purl pattern makes sure the edge looks like the rest of the fabric.
Tips:
- Knit the knit stitches, purl the purl stitches.
- Use a stretchy bind-off method (simple or sewn) to maintain flexibility.
- Do not use a regular bind-off, as it can make the ribbing too tight and alter the fabric’s shape.
Also Read: How to Knit a Moss Stitch: Best Expert Guide
5. Decorative & Specialty Bind-Offs
Make your project more fun and still finish it safely:
Picot Bind Off: Bind off two stitches, cast on three, bind off five—perfect for baby clothes or scarves.
3-Needle Bind Off: Join two pieces by binding off together—ideal for shoulders.
Tubular Bind Off: Excellent for 1×1 ribbing; yields a smooth, professional edge for cowls and sleeves.
Tip: Choose the decorative bind-off style based on the project type—picot for blankets, tubular for ribbed cowls, and 3-needle for seamless joins.
Summary:
Picking the right bind-off is important for how your project works and looks. For stretchy edges, use simple stretchy, suspended, or sewn bind-offs. Use fancy bind-offs for special touches. Learning these ways helps your projects feel good and look great.
Advanced Bind-Off Variants: Stretch, Strength, and Style
Sewn Bind-Off (Ultra-Stretchy) – Maximum stretch for socks, hats, or necklines.
Japanese Bind-Off – Crisp, neat edge with moderate elasticity; ideal for lace or shawls.
ZigZag Bind-Off – Alternating height/slant for textured fabrics or statement scarves.
Suspended / Slip-Stitch Bind-Off – Gentle, slightly elastic edge for fitted hats, cuffs, or stretchy hems.
Pro Tip: Always test advanced bind-offs on a small swatch for stretch, tension, and appearance.
Common Bind Off Knitting Mistakes (And How to Fix Them)
Even experienced knitters can run into problems when finishing their projects. Knowing how to bind off knitting correctly ensures your edges are neat, flexible, and professional-looking. Here are the most common mistakes—and how to fix them.
Mistake 1: Edge Is Too Tight
A tight bind-off can make cuffs, sock tops, or hat openings uncomfortable and difficult to wear.
How to fix it:
- Switch to a stretchy bind-off method such as the simple stretchy, suspended, or sewn bind-off.
- Use a needle one or two sizes larger than your working needle.
- Relax your tension while binding off; avoid pulling the yarn too tightly.
Even small adjustments make a noticeable difference in flexibility and comfort.
Mistake 2: Uneven Loops
Uneven stitches along your bind-off row create bumpy, inconsistent edges that distract from the rest of your work.
How to fix it:
- Maintain consistent stitch size throughout the bind-off.
- Don’t tug the yarn after each stitch; let each stitch flow naturally.
- Practice on a small swatch to develop a smooth, even rhythm.
Also Read: How to Count Rows in Knitting: A Complete Guide
Mistake 3: Flared or Wavy Edge
Edges that flare outward or ripple can distort ribbing, hems, and seams.
How to fix it:
- Try a suspended bind-off for a softer, more elastic edge.
- Avoid over-stretching stitches as you bind off.
- Use gentle blocking after binding off to shape the edge neatly.
When to Use Each Bind-Off Method
Choosing the right bind-off method is just as important as knowing how to bind off knitting. Here’s a simple guide based on project type:
Scarf or flat pieces: Use the standard bind-off for a firm, clean edge.
Also Read: How to Block a Knitted Scarf: 5 Easy Steps
Sweater hems or cuffs that need stretch: Choose a stretchy bind-off for flexibility.
Socks or toe-up projects: The sewn bind-off provides maximum stretch while maintaining a professional finish.
Ribbed cuffs: Bind off in pattern (knitting the knits and purling the purls) to maintain texture and stretch.
Hats and other fitted items: A stretchy or suspended bind-off keeps the fit comfortable without tightening.
Using the right bind-off method ensures your finished piece looks polished and functions as intended.
How to Weave in Ends After Binding Off Knitting
Finishing your bind-off isn’t complete until you secure the yarn tails. Proper weaving keeps edges neat, prevents unraveling, and gives a professional appearance.
Best practices:
- Thread the yarn tail through 5–8 stitches on the wrong side of the work.
- Split the plies of the yarn to hide the tail invisibly.
- Avoid bulky knots; instead, gently pull the tail snug so it disappears within the stitches.
Following these steps ensures your bind-off edges remain secure, tidy, and durable over time.
Also Read: How Do You Weave in Ends in Knitting? Step-by-Step
FAQs About How to Bind Off Knitting
Final Thoughts: Mastering How to Bind Off Knitting
Mastering how to bind off knitting is a crucial skill that transforms your project from unfinished to polished and professional. The bind-off is not just a final step; it defines the look, stretch, and durability of your work. When done correctly, your edges will lie flat, stretch where needed, and maintain their shape through wear and washing.
Whether you’re learning how to bind off knitting for the first time or refining your technique, the key principles are simple:
Match the bind-off method to the project: use stretchy bind-offs for cuffs, sock tops, and hats; standard bind-offs for scarves and flat pieces; and sewn or pattern-specific bind-offs for ribbing and toe-up designs.
Maintain relaxed tension: Avoid pulling the yarn too tightly, as this can tighten edges and distort your fabric.
Take your time: Don’t rush the final row. Spending a few seconds to ensure each stitch is smooth can make a noticeable difference in your finished piece.
Remember, a clean, well-executed bind-off not only secures your stitches but also elevates your knitting from functional to professional. With practice, attention to detail, and the right technique, you will consistently create edges as beautiful as the rest of your work.
Pro tip: Always test new bind-off methods on a swatch first. This simple step helps you gauge elasticity, tension, and overall appearance before committing to the final project.