How to Block a Knitted Scarf: 5 Easy Steps
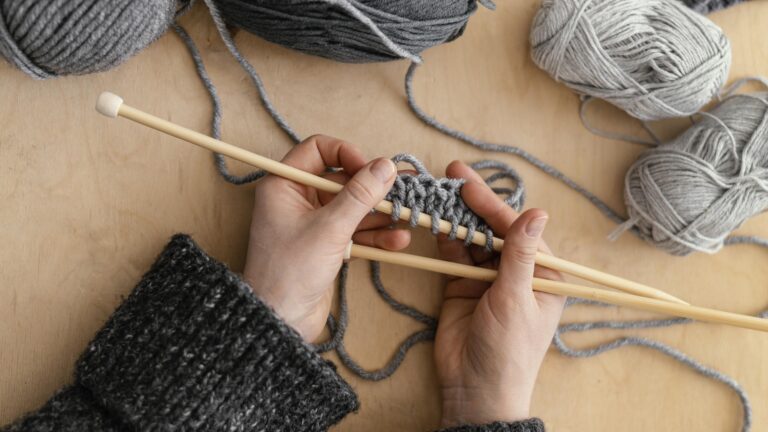
Like many crafts, knitting takes time to master. Early projects rarely look perfect: outlines may seem dull, edges curled, and stitches irregular. Blocking, a gentle technique, transforms these flaws. It relaxes the fibers into shape, enhancing the piece’s look and revealing the knitter’s effort. Blocking is often a vital finishing step for many projects.
How to Block a Knitted Scarf. The process is simple yet transformative. Blocking is the last step in finishing a knitted piece. To block a scarf, start by wetting or steaming it until damp. Lay it flat on a towel or blocking board, then gently shape it to your desired dimensions.
Pin edges in place, smoothing out curls and uneven stitches. Let the scarf dry completely in this shape. Blocking is essential for natural fibers like wool, as it ensures the fabric holds its shape when dry. This method can highlight lace patterns and turn a crinkled piece into one that drapes beautifully, ready to wear or gift.
Also Read: How to Finish a Knitting Project: A Complete Guide
What Is Blocking in Knitting?
Blocking is the final step in finishing a knitted piece. Using steam and water, you set the shape and size of your work, much like pressing a garment. This is especially important for natural fibers like wool, which hold their shape when dry.
While the fabric is damp, you can shape it to:
- Highlight lace patterns
- Even out stitches
- Smooth curled edges
- Achieve proper dimensions
Many knitters are surprised by how blocking can turn a crinkled, uneven piece into something beautifully draped and ready to wear or give as a gift.
Also Read: How to Count Rows in Knitting: A Complete Guide
Benefits of Blocking (Appearance, Shape, Stitch Definition)
Blocking is a method to control and shape the structure of a knitted piece after it has been fully knitted. It involves wetting or steaming the fabric to stretch it, pinning it, and then leaving it to dry. This process relaxes the yarn, making the piece look and feel better while helping you achieve the desired result.
Also Read: The Best Knitting Machines For Crafters
Why Block a Knitted Scarf?
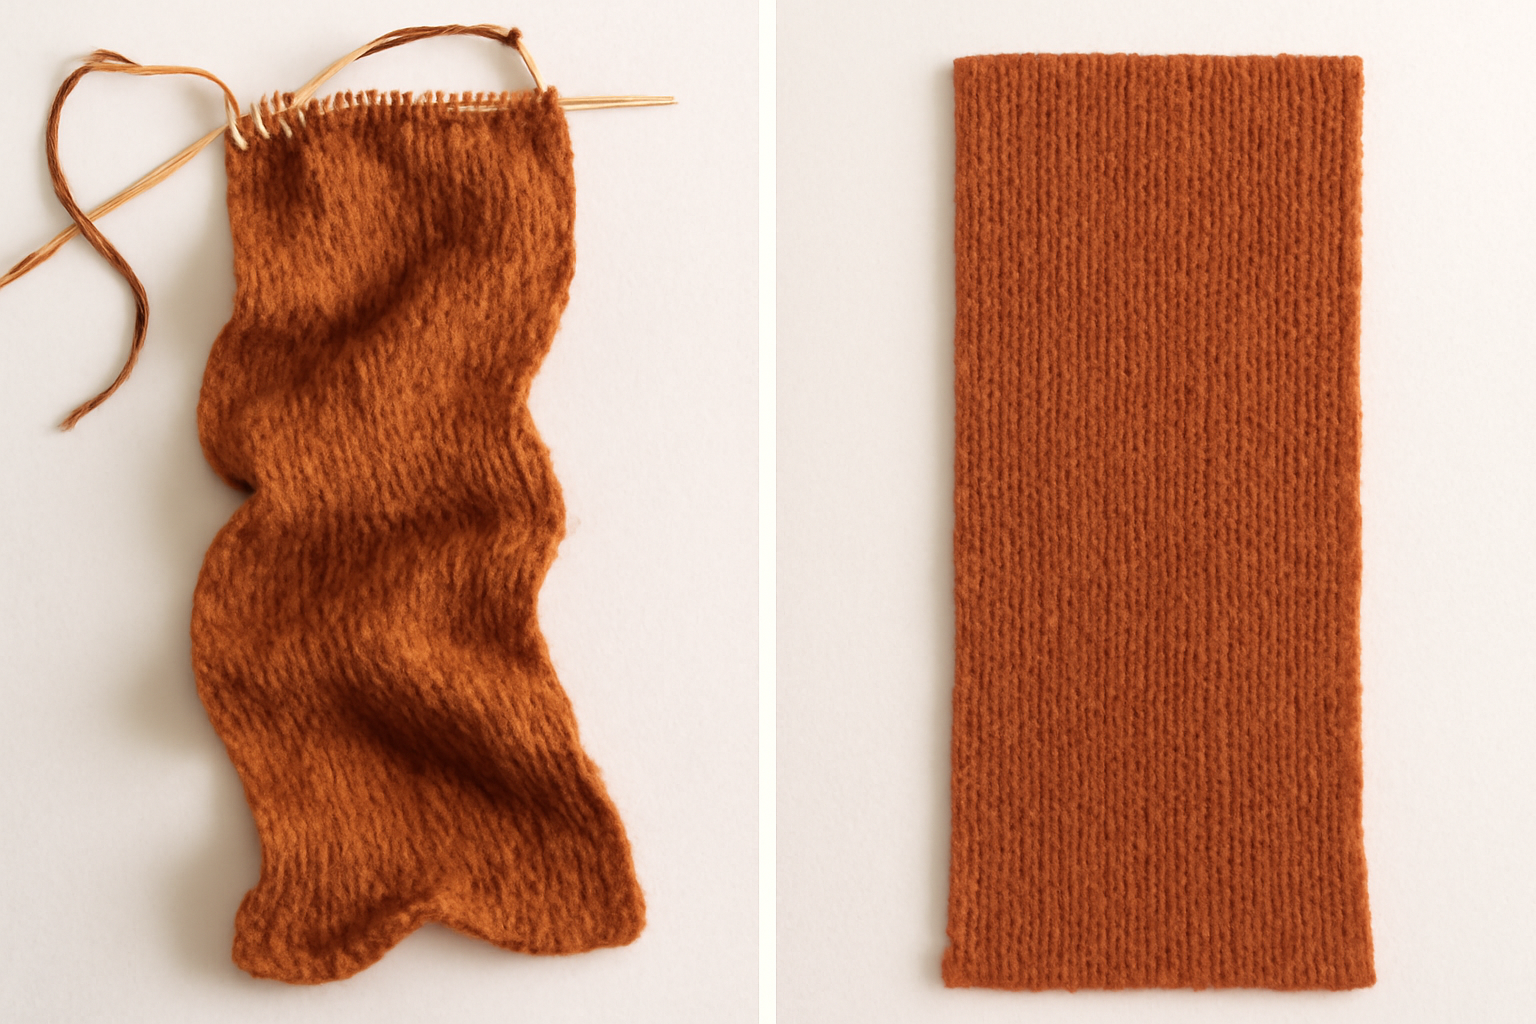
Taking the scarf off the needles isn’t the final step. Blocking is a key step that makes a big difference. Your scarf might look uneven or bunched up when you finish knitting. Blocking helps even out the yarn and makes it look smoother. That means your scarf will look better, feel softer, and drape more nicely. It will look good, feel silky, and be soft to touch.
More than just looks, blocking helps preserve shape and size over time. It keeps the scarf from curling or bunching. It means your scarf will look the way you want, whether you use it or wear it. Skipping this step risks losing the final polish that knitting deserves.
Also Read: How to Add New Yarn to Knitting? Step-by-Step
Materials Needed for Blocking a Knitted Scarf
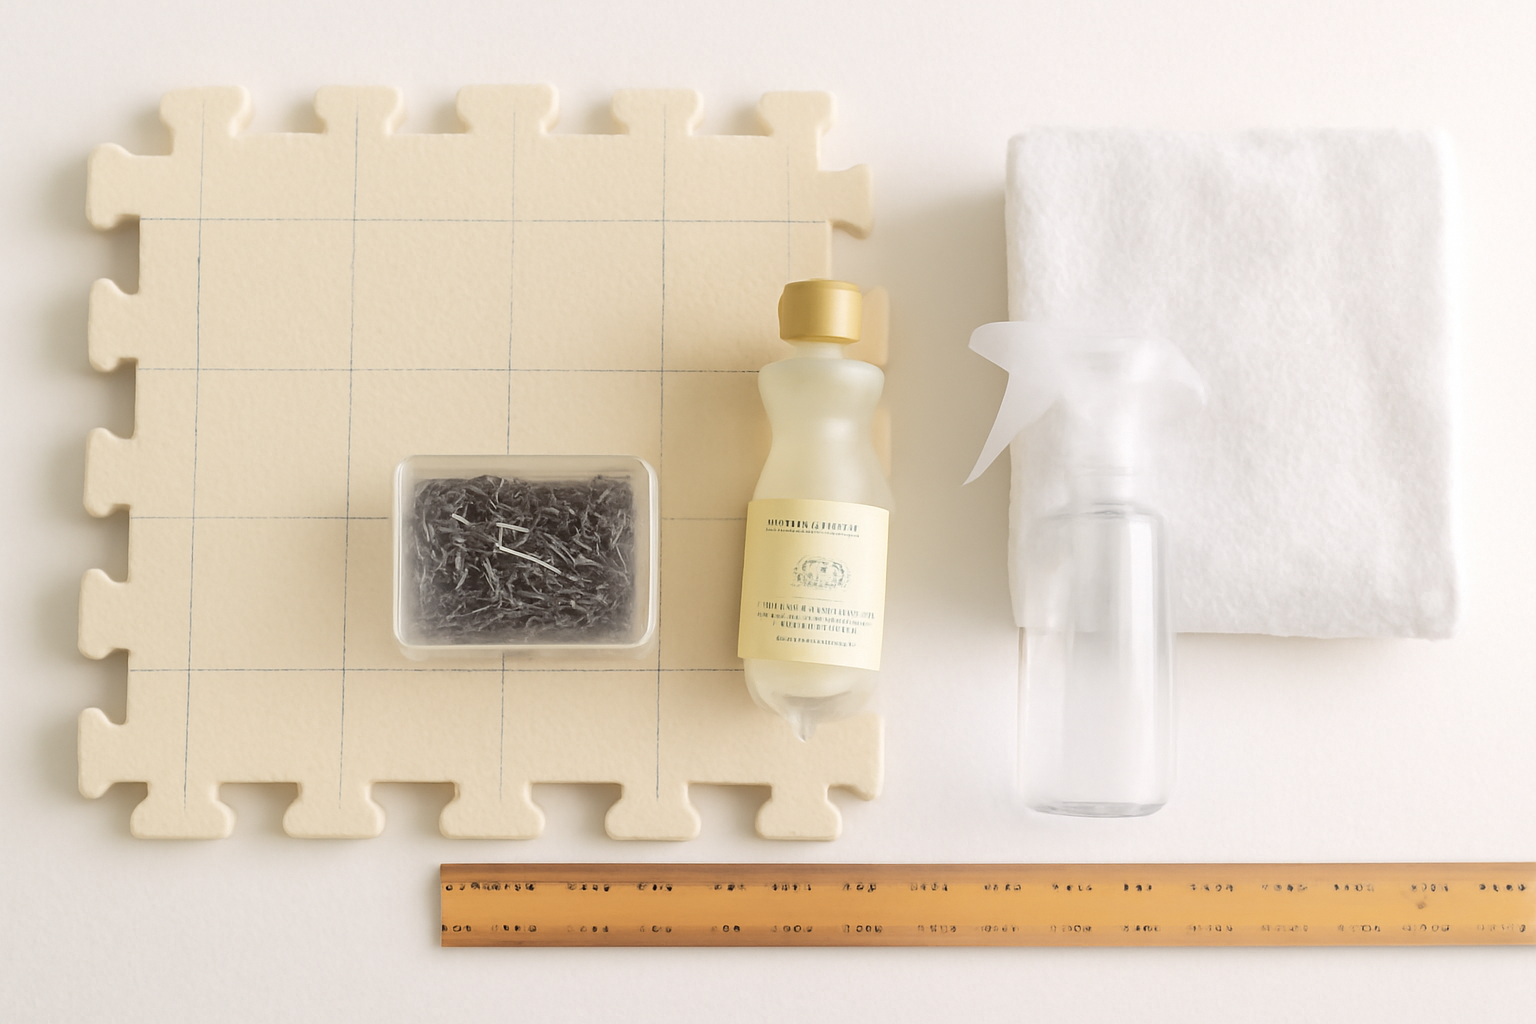
1. Blocking Surface
Blocking Mats (Recommended)
- Made from foam and flexible for easy storage
- Often come in interlocking pieces for various sizes
- Some feature measurement grids for uniform stretching
Alternative Surfaces
- Thick towels: Absorb moisture and provide a stable base
- Yoga mats: Prevent pins from slipping out easily
- Clean carpet: Cover with a towel or sheet to protect your scarf
Also Read: Best Knitting Bags 2025: Ultimate Guide
2. Pins for Securing Shape
T-Pins (Best Choice)
- Long, strong, and steady
- Wide top prevents over-insertion
- Thin design minimizes holes in fabric
- Available in various materials
Alternative Pins
- Straight pins: Suitable, but with less holding power
- Sewing pins: Work, but may bend over time
- Safety pins: Last resort option, less effective
3. Cleaning Solutions
Wool Wash Detergent (Preferred)
- Gentler on delicate fibers
- Often contains lanolin for softness
- No harsh chemicals or strong scents
Mild Detergent
- pH-balanced formulas for delicate items
- Avoid products with strong fragrances
- Never use harsh laundry detergents
4. Steam Blocking Equipment (Optional)
- Hold the scarf above, never touch it directly
- Excellent for synthetic fibers
- Quick method for reshaping
Spray Bottle
- Creates a gentle mist for spritz blocking
- Best for acrylic and cotton fibers
- Less intensive than full soaking
Also Read: The Best Interchangeable Knitting Needles
How to Block a Knitted Scarf: Step-by-Step Guide
In knitting, blocking is the final step in working on a knitted garment, such as a scarf. Before starting, it’s important to understand how to block a knitted scarf correctly, beginning with knowing the type of yarn you are using. For wool yarns, the wet blocking method works best.
Place the scarf in a basin filled with lukewarm water and a wool wash mix, allowing it to sit for about thirty minutes. This gentle approach helps release tension in the yarn and prepares it for shaping. After soaking, carefully lift the scarf from the water, supporting its weight to prevent stretching.
Gently press out excess water, but avoid wringing, which can distort the stitches. Roll the scarf in a clean towel, press lightly, and repeat as needed to remove additional moisture.
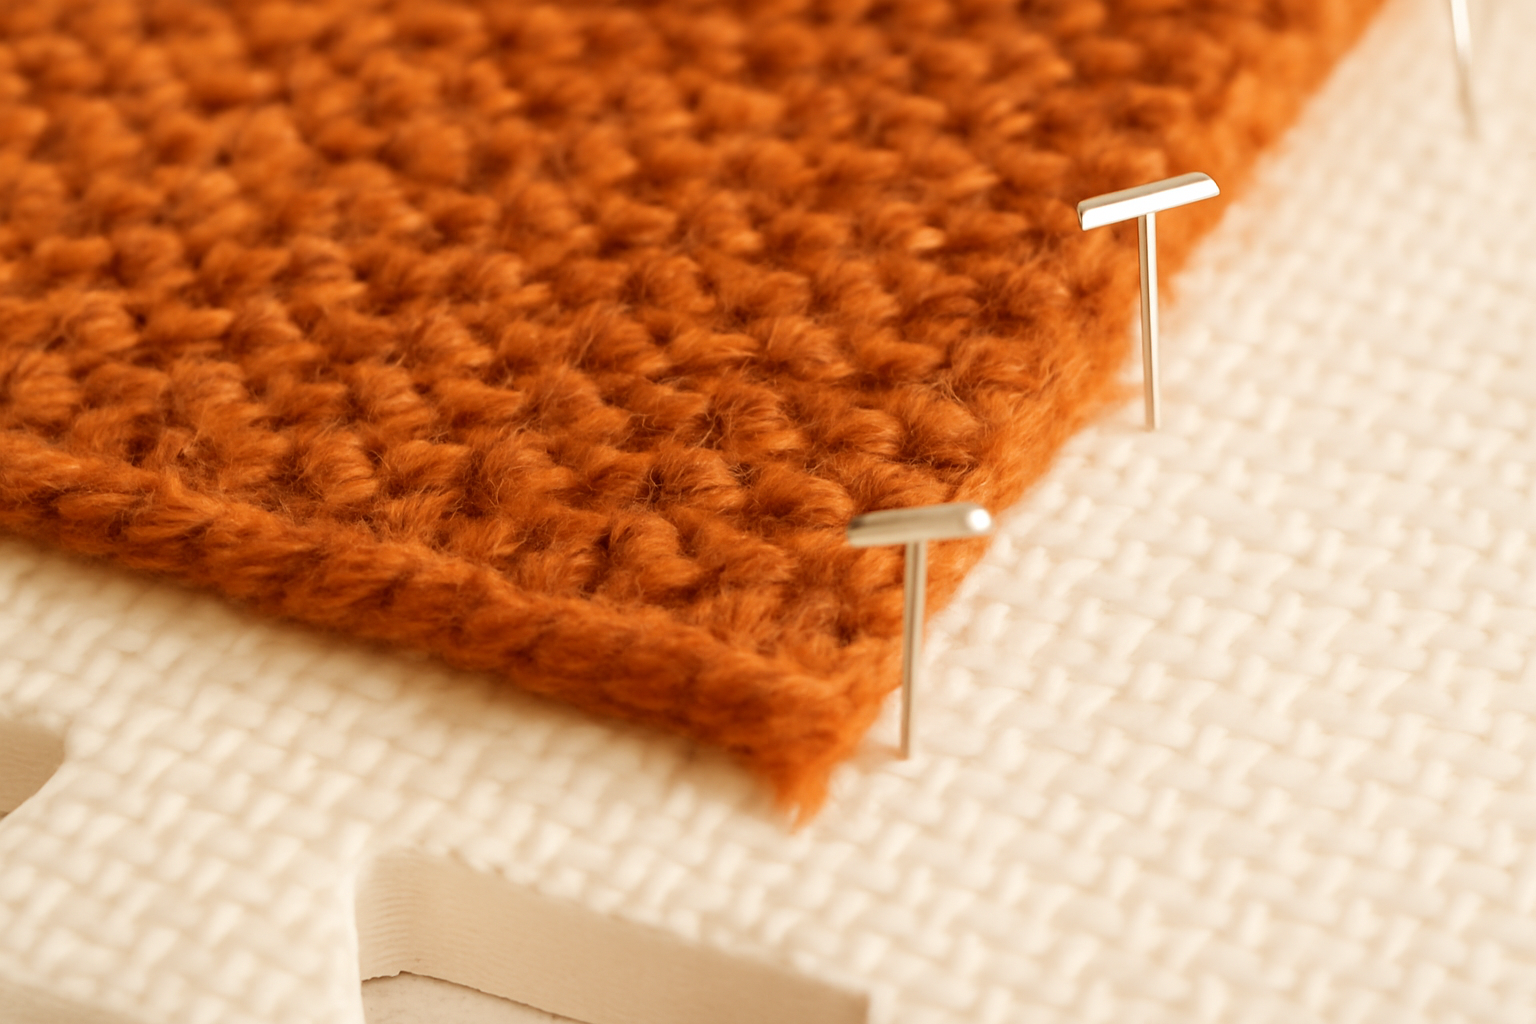
Next, lay the scarf flat and stretch it to your desired dimensions. Using T-pins, secure the edges every few inches. Patience is key for a perfectly blocked piece, so avoid direct heat and allow the scarf to air-dry completely for 24–48 hours.
Also Read: How to Do a Long Tail Cast On Knitting? Easy Guide
Different Techniques for Different Needs
The wet blocking method is a global favorite for wool because it requires soaking. That is the best way to relax the yarn and is ideal for evening out stitch tension. This method is both practical and gentle, providing a beautiful drape and a soft feel. Most scarf wearers will appreciate the gentle yet effective results.
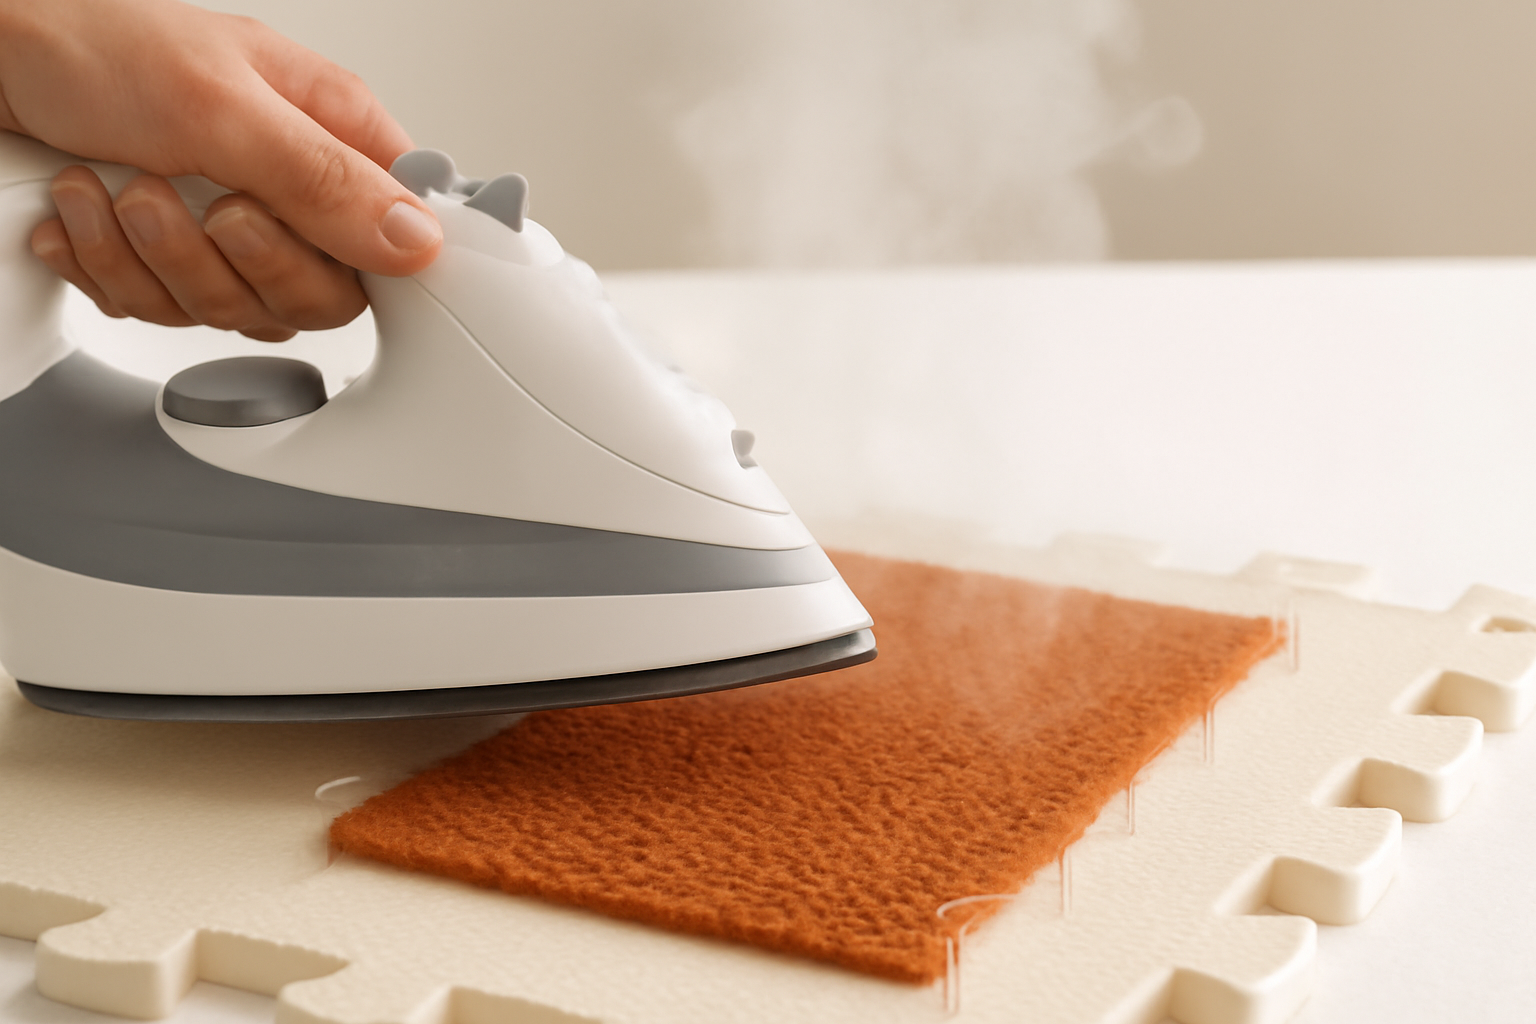
If you are using yarns made from materials like acrylic, it can help to use steam blocking. Soaking works well for wool because it keeps its shape, but not for acrylic. Instead, pin the scarf to your work surface and use a steamer or an iron with steam, holding it a few inches above the scarf.
The steam and heat will help the acrylic yarn loosen up and take on the new shape. This method works for many types of yarn, but with acrylic, be careful not to let the steam directly touch the scarf.
Also Read: How to Change Colors While Knitting? Beginners Tips
Adjusting to Different Patterns and Yarns
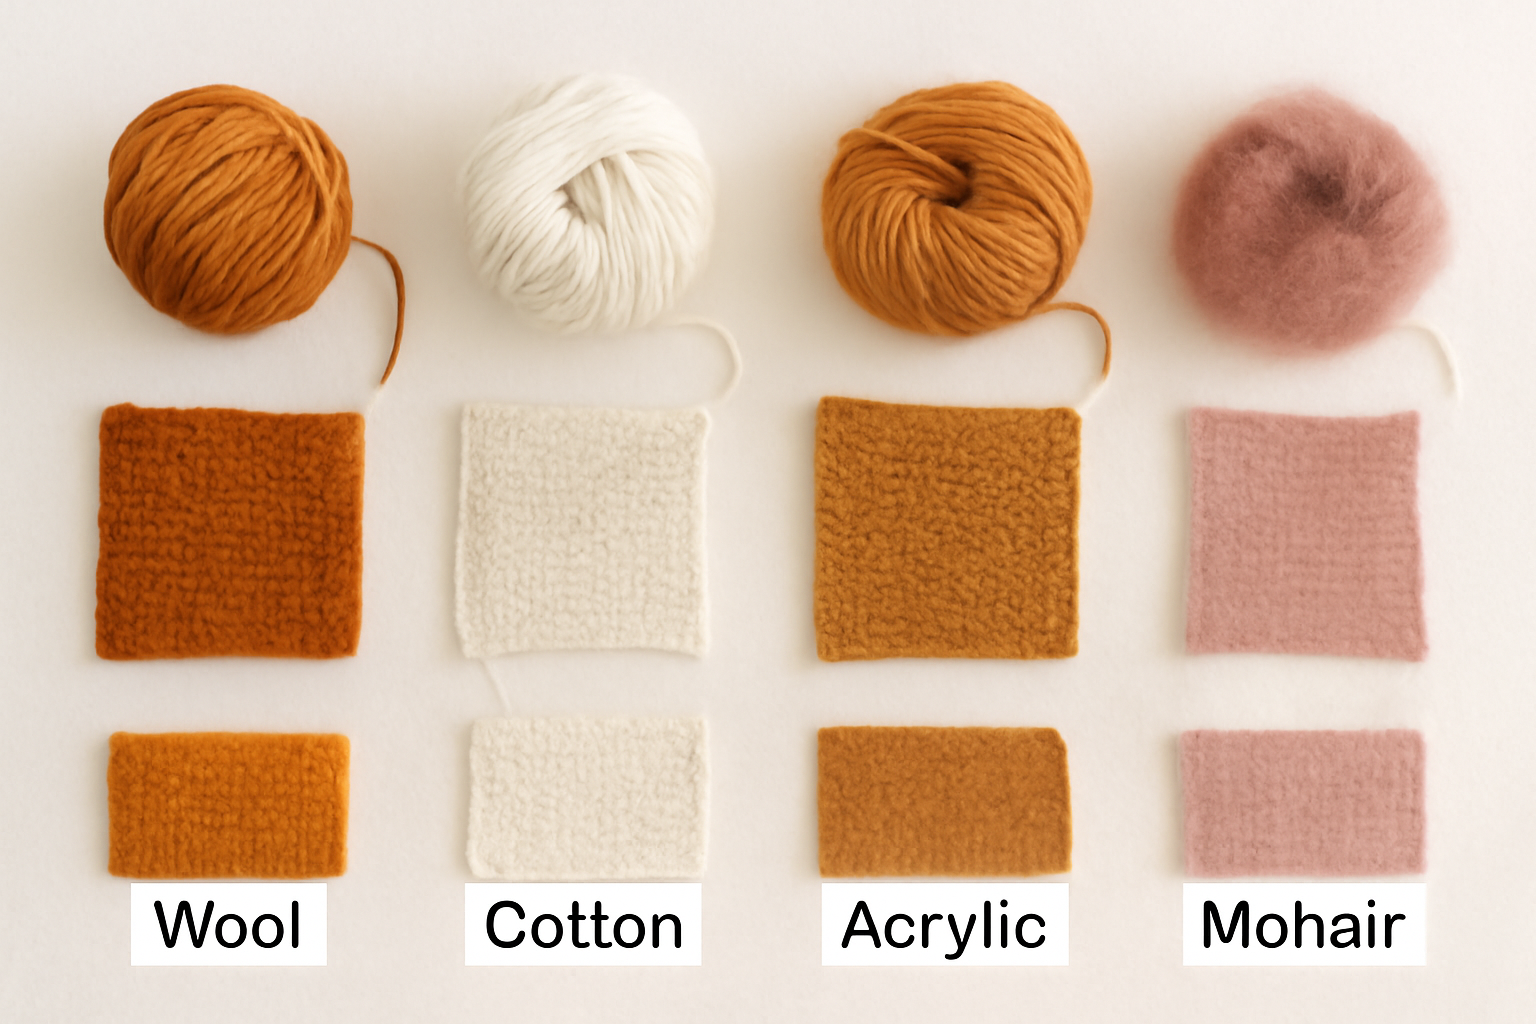
The blocking method varies depending on the fiber content. Wool responds very well to moisture and makes a good candidate for wet blocking, as do mohair, alpaca, cashmere, and other animal fibers that benefit from gentle soaking.
For yarns made from cotton or linen, wet blocking or spray blocking is the most effective method for achieving a smooth finish. Understanding how to block a knitted scarf properly ensures that each type of fiber is treated appropriately, preserving shape, texture, and drape.
Since these yarns are not as stretchy as wool, you will need to pull them a little tighter when pinning to achieve the desired shape. That differs from synthetic yarns, such as acrylic. Acrylic yarns do not keep their shape well. They are often set with steam, but you need to be careful not to melt them. When done right, this makes the fabric soft and drapey
Also Read: How to Read Knitting Patterns?
Troubleshooting Common Blocking Problems
Addressing common problems with blocking, particularly with knitted scarves, requires attention to detail and adjustments tailored to the interaction between fiber and fabric. Here’s an authoritative and thorough review of common problems and solutions of blocking.
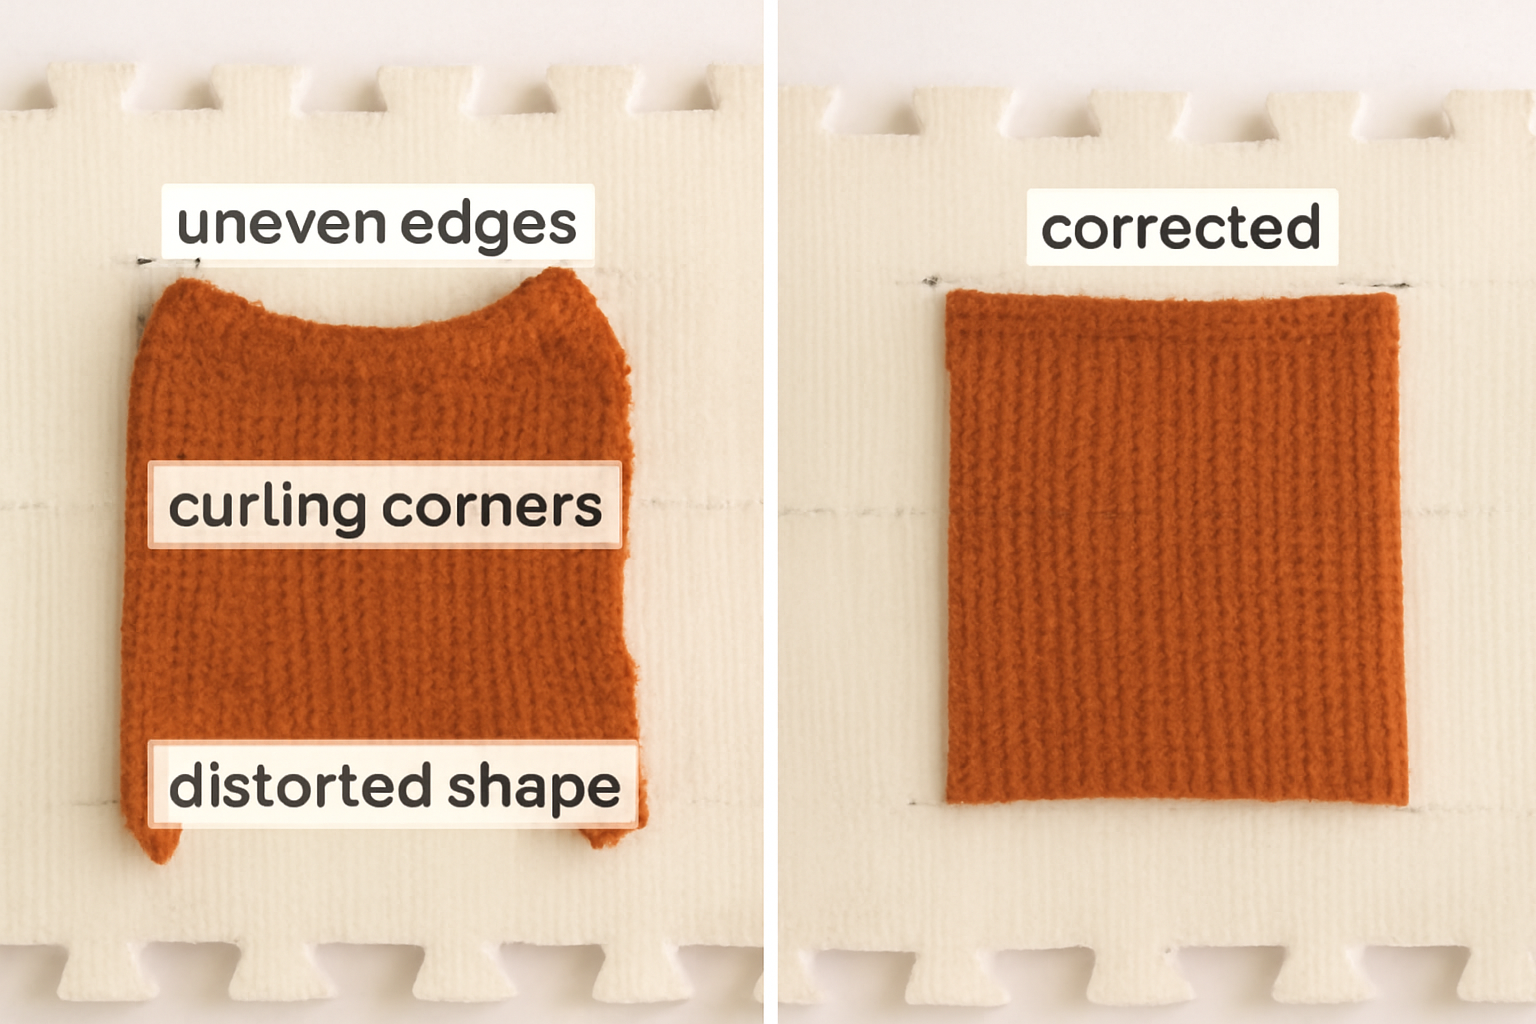
Uneven Edges
Wavy, curly, and asymmetrical borders or edges are often caused by inconsistent tension during knitting or uneven pin placement during blocking. Here’s how to fix it:
- Ensure the project is flat and symmetrical when pinning
- Use a blocking mat with grid lines to ensure the scarf is aligned
- Fix curl problems with steam blocking while the scarf is pinned flat
- To make the edges smooth, apply T-pins or blocking wires to the edges, keeping equal distances to achieve evenly distributed tension
- For stubborn curls, steam blocking with a pressing cloth gives better results
Also Read: How to Fix a Dropped Stitch
Distorted Shape
Stretching, skewing, or uneven edges all describe the exact final shape:
- Delicate and loosely knitted garments often require extra care to prevent excessive strain during wet blocking
- Over-soaked garments often require a reset block, which entails setting realigned edges or shaping with careful soaking to a set temperature
- Smoothed edges are best held down with pinning
- Use measuring tools to verify the proportions for width and length on multiple spots
Also Read: How to Join Circular Knitting? Beginner’s Guide
Fibers That Resist Relaxing
Some fibers, like blends of synthetic materials or tightly spun yarns, may be too stubborn to reshape or stiffen stubbornly after blocking:
- In such cases, steam blocking may be better than wet blocking. Let the steam from an iron hover over the fabric and don’t touch it; the steam should relax the fibers
- Soaking animal fibers, such as wool, for more extended periods (20-30 minutes) allows the fibers to relax and regain their original shape
- Drying for 24-48 hours helps the fabric retain its desired shape after natural drying in the open air
Fibers Revert to Their Original Shape Upon Unpinning
If unpinned, the scarf reverts to its pre-blocked shape:
- Strong blocking for a prolonged period may be necessary in highly humid climates
- Strong re-blocking tension, achieved through wires or heavier pins, usually helps make the shape more permanent
- In other situations, lightly misting the piece and re-shaping with weights (not pins) may help encourage better draping
Damaged Fibers, Or Bleeding If Color
Incorrect and harsh handling can result in incorrect blocking and mishaps, including temperature issues, weak fibers, and bleeding dye.
- When using hand-dyed yarns, ensure colorfastness by testing a small patch of the swatch
- When washing wool from alpacas and merinos, avoid hot water. Lukewarm is fine, but hot is not
- Don’t scrub too hard on damp strands. They are more delicate and prone to damage, such as being twisted or snapped
To get the desired result, specifically, enhance the blocking method to the yarn, fabric thickness, and finishing touches. Remember that blocking is not universal. It takes a lot of time, the right equipment, patience, and precise tweaks to get it right.
How to Care for Your Blocked Scarf
To maintain your scarf’s beautiful blocked appearance:
Washing
- Hand wash in cold water with wool-friendly soap
- Never wring or twist the fabric
- Gently press out excess water
Drying
- Wrap in a towel to remove moisture
- Lie flat on a soft surface
- Shape gently one final time
- Allow to air dry completely
Storage
- Store flat or loosely folded
- Avoid hanging heavy scarves
- Use cedar blocks or lavender sachets for natural protection
Also Read: How Do You Weave in Ends in Knitting? Step-by-Step
Frequently Asked Questions
Conclusion
Blocking your scarf is like the sprinkle of magic at the end of your craft time. It turns your stitches into a flat-out gorgeous, cuddly masterpiece. Think of it as the last hug your scarf gets before it hugs someone else. That perfect, smooth, ready-for-the-world finish is worth the extra time.
Learning how to block a knitted scarf properly ensures your work holds its shape, lies flat, and highlights the texture and pattern you’ve carefully created. When it’s dry and ready to go, you can wear it yourself or gift it, and you’ll never second-guess your work. To keep that lovely, just-blocked scarf looking sharp, treat it right.
Hand wash it in cold water with a wool-friendly soap, and pretend the water’s a sleepover—no wringing or twisting. Just press out the water, then gently wrap it in a towel to dry. Lay it flat on a soft surface, and fluff it into the right shape one last time.
A little extra kindness like this means your scarf will stay smooth and perfectly formed, showcasing your talent and steady, patient hands for many cozy seasons to come.
Also Read: How to Knit a Hat with Straight Needles?