How to Cast Off Knitting Right: Easy Guide
How to cast off knitting is the final step that secures live stitches and prevents your work from unraveling. Also known as binding off, this technique creates a clean, stable edge that matches the function of your project.
Whether finishing a scarf, blanket, or garment edge, choosing the correct cast-off method ensures proper stretch, durability, and a professional appearance.
Casting off turns active stitches into a stable chain, creating a clean boundary for hems, necklines, or blanket edges. Done correctly, it provides firmness without stiffness and flexibility without distortion.
What Is Casting Off in Knitting?
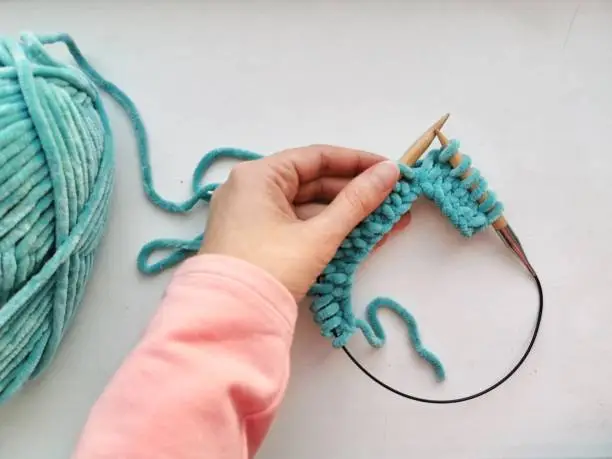
Casting off is the final step in knitting. It secures the last row of live stitches, so your work does not unravel, creating a finished edge that stays in place. This technique is also known as binding off, and both terms describe the same process.
When you cast off, stitches are looped over one another to form a stable chain along the edge of the fabric. This edge holds the shape of the piece while allowing the right amount of stretch, depending on how the cast-off is worked.
The purpose of casting off is to:
- Stabilize the fabric so stitches do not slip out
- Maintain clean, even stitch definition
- Control how much the edge stretches
Also Read: How to Cast on Knitting with Two Needles: A Complete Guide
The cast-off edge becomes a permanent part of the design. If it is too tight, the fabric can pull in and feel stiff. If it is too loose, the edge may flare or look uneven. Learning to balance firmness and flexibility is key to producing neat, long-lasting results.
Why Casting Off Matters More Than Beginners Expect
Many beginners focus mainly on learning knit and purl stitches, but casting off plays an equally important role in how a finished project looks and functions.
A well-executed cast-off affects:
- Fit – especially at cuffs, hems, and necklines
- Durability – edges experience the most wear during use and washing
- Appearance – uneven bind-offs can distract from otherwise tidy knitting
- Function – different projects need different levels of stretch
For example, a sock cuff needs enough elasticity to stretch comfortably over the foot, while a blanket edge benefits from a firmer, more structured finish. Choosing the right cast-off method is just as important as selecting the stitch pattern or yarn.
Also Read: How to Finish a Knitting Project: A Complete Guide
Beginner Tip
If you are new to knitting, start with the standard cast-off method. It is easy to learn, works for most projects, and helps you develop even tension before exploring more advanced variations.
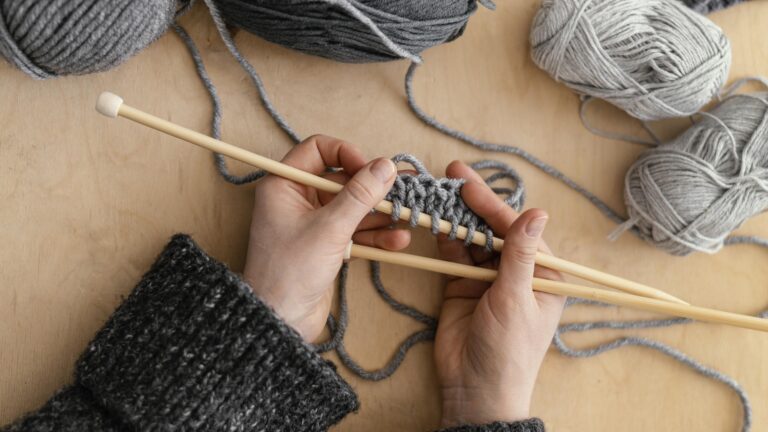
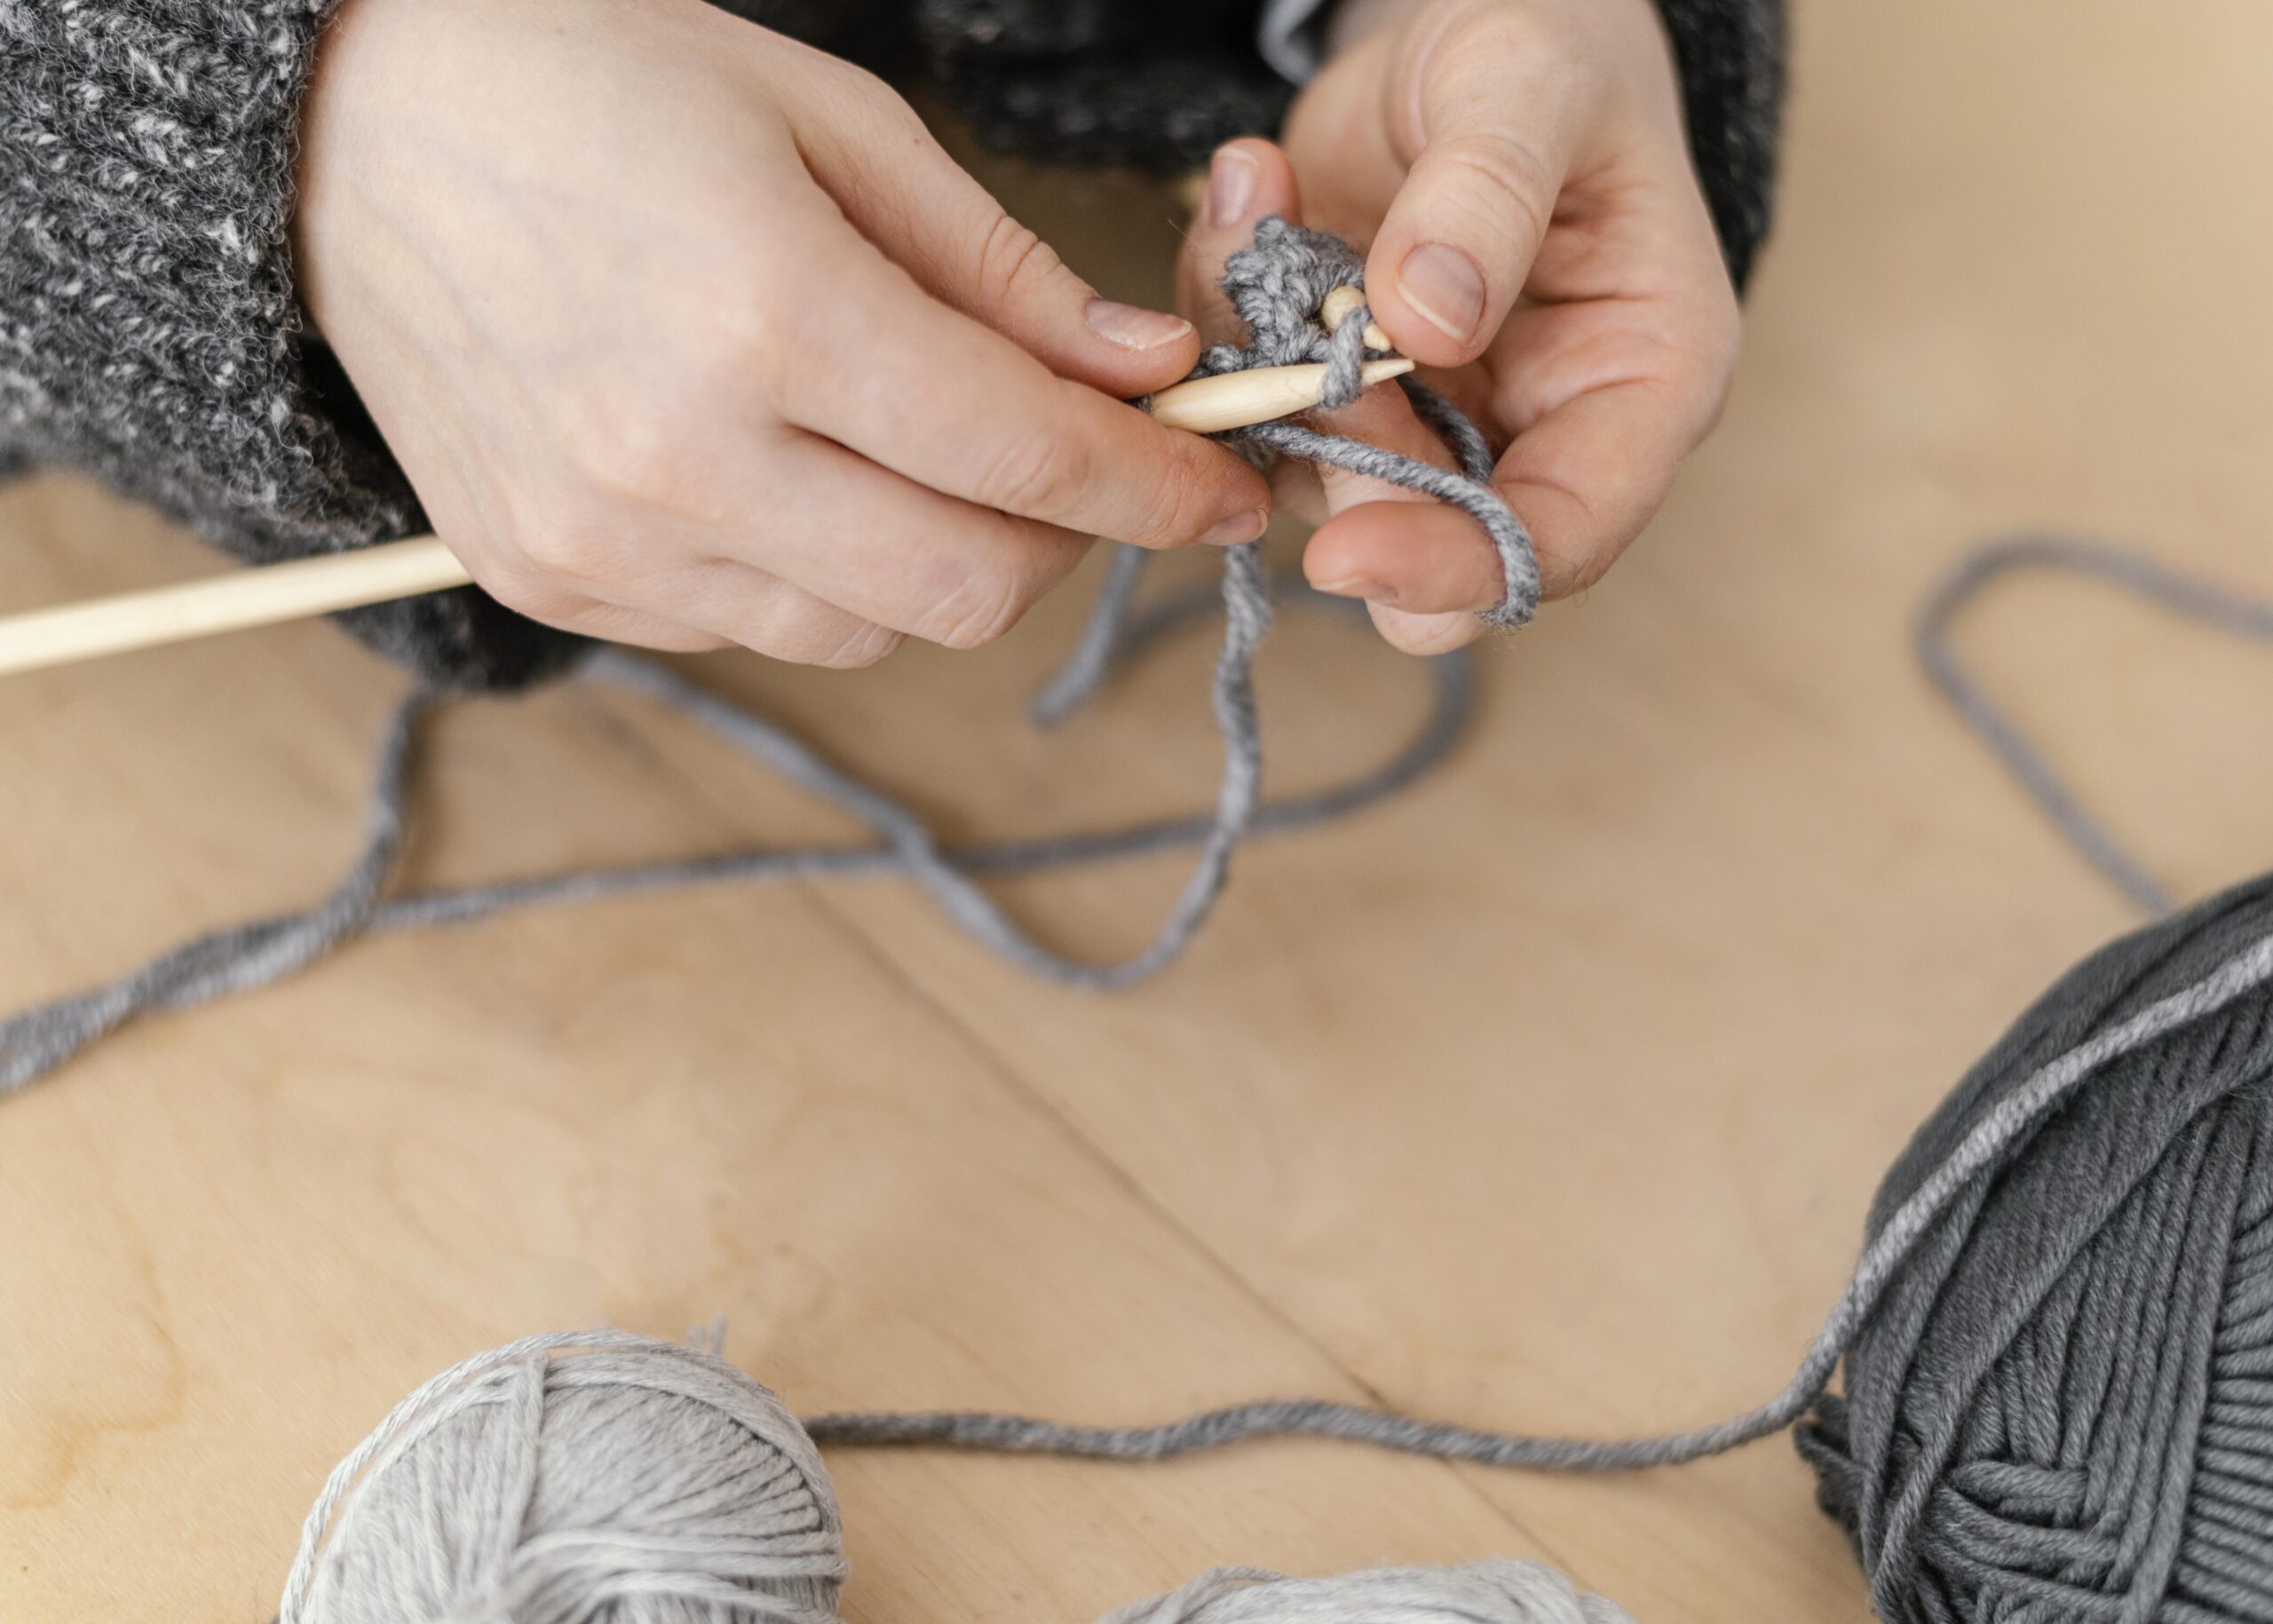
Tools and Materials Needed
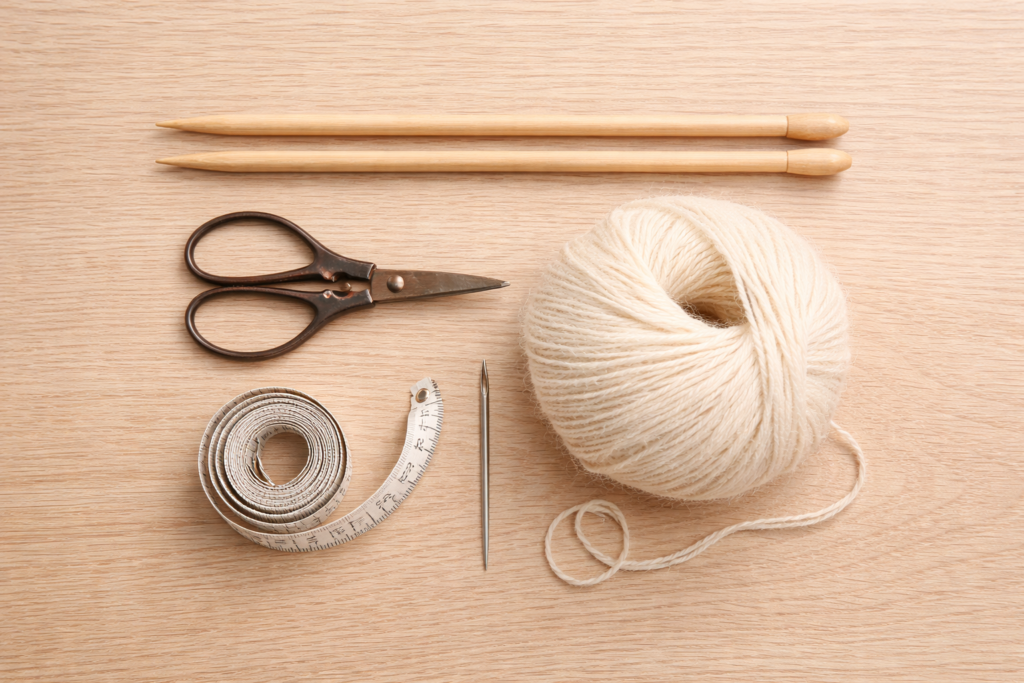
You do not need special equipment to cast off knitting, but preparation helps ensure a neat, even edge.
Essentials
- Knitting needles (the same size used for the project)
- Working yarn
- Scissors
- Yarn or tapestry needle for weaving in ends
Optional but Helpful
- One needle size larger for a looser bind-off
- Stitch markers for patterned edges
- Measuring tape to check edge tension
Also Read: What Size Needles for Beginner Knitting: 6 Easy Tips
Beginner note: Smooth yarns are easier to work with when learning to cast off. Fuzzy or textured yarns can make it harder to see stitches and control tension.
Step-by-Step: Standard Cast-Off Method
The standard cast-off is the most commonly taught method and works well for most flat knitting projects. It creates a tidy, moderately firm edge that is easy to control and suitable for beginners.
When to Use It
- Scarves
- Dishcloths
- Blankets
- Structured garment edges
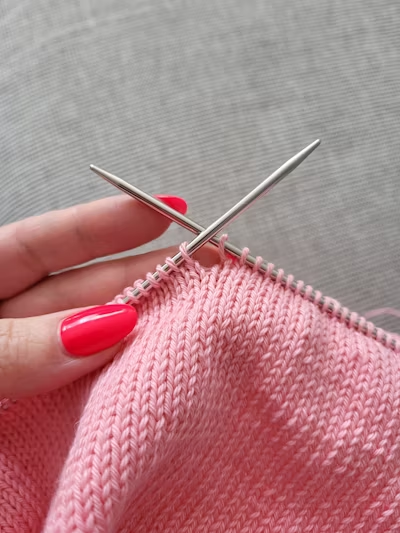
How to Bind Off Knitting (Standard Method)
- Knit the first two stitches as usual.
- Insert the left needle into the first stitch on the right needle.
- Lift that stitch up and over the second stitch, dropping it off the needle.
- Knit one more stitch.
- Lift the previous stitch over the new stitch.
- Repeat across the row until only one stitch remains.
- Cut the yarn, leaving a tail, and pull it through the final stitch to secure.
This method creates an edge that resembles a chain and blends well with your knitting, giving your project a neat, even finish.
Also Read: How to Do a Long Tail Cast On Knitting? Easy Guide
Casting Off Knit vs. Purl Stitches
Some patterns instruct you to bind off in pattern. This means working knit and purl stitches as they appear in the fabric.
How to Cast Off Purl Stitches
- Purl the stitch instead of knitting it
- Lift the previous stitch over the new stitch as usual
Binding off this way helps keep ribbing and textured stitches looking the same, so the edge does not get flat or twist.
Beginner tip: Practice this method on scrap yarn first. A few minutes of practice helps build even tension and confidence.
Troubleshooting Common Cast-Off Problems
Even experienced knitters occasionally run into issues when casting off. Most problems come down to tension control, which directly affects how the finished edge looks, stretches, and wears over time. Understanding the cause makes correction straightforward.
Tension Control: The Most Common Cast-Off Issue
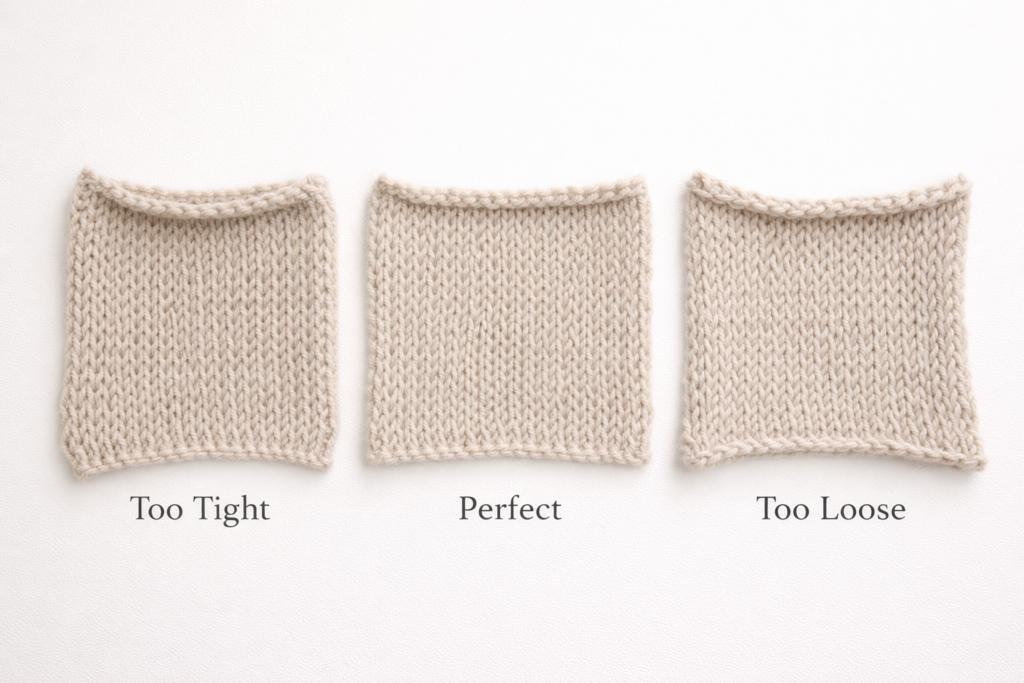
If a bind-off looks uneven, feels uncomfortable, or distorts the fabric, tension is almost always the culprit.
Signs Your Bind-Off Is Too Tight
- The edge pulls inward or curls.
- Ribbing loses its natural stretch.
- The fabric will not stretch to match the body.
How to Fix It:
- Use a needle one size larger for the bind-off row.
- Leave extra space between stitches before lifting one over another.
- Avoid pulling the yarn tight after each stitch.
A tight bind-off is common for beginners and often improves immediately with a larger needle or slower pace.
Signs Your Bind-Off Is Too Loose
- The edge flares outward.
- Loops look uneven or sloppy.
- The edge lacks structure or stability.
How to Fix It:
- Gently snug the yarn before lifting the previous stitch over.
- Keep the loop size consistent rather than tightening suddenly.
- Block the finished piece flat to help even out minor looseness.
Loose edges are easier to correct than tight ones, especially after blocking.
Also Read: How to Block a Knitted Scarf: 5 Easy Steps
Fixing Specific Cast-Off Problems
Uneven or Messy Chain Edge
Uneven chains usually result from inconsistent knitting tension.
Solution:
- Slow down and focus on forming each stitch evenly.
- Keep your hands relaxed and movements steady.
- Practice on scrap yarn to build muscle memory
Puckering in Ribbing
Ribbed edges can pucker if bound off too firmly or without regard to stitch pattern.
Solution:
- Bind off in pattern (knit the knits, purl the purls)
- For high-stretch areas, consider a stretchy or tubular bind-off
Dropped Stitches While Casting Off
Dropped stitches can occur if a stitch slips off the needle before it is securely in place.
Solution:
- Use a crochet hook to pick up the dropped loop.
- Ladder it up carefully to the bind-off edge.
- Resume binding off once the stitch is secure.
Bulky or Visible Yarn Ends
Poor finishing can undermine an otherwise clean bind-off.
Solution:
- Weave in ends along the bind-off edge using a yarn needle.
- Follow the direction of the stitches to hide the tail.
- Avoid pulling tightly to prevent puckering.
Also Read: How to Fix a Dropped Stitch: A Complete Guide for Knitters
Professional Bind-Off Tips to Remember
- Tension matters more than speed.
- Use tools (larger needles, markers) when needed.
- Match the bind-off method to the project’s function.
- Always test stretch before finishing.
A well-executed cast-off should feel natural, lie flat, and support the garment’s purpose—whether that’s structure, stretch, or durability.
Stretchy Bind-Off Methods (When You Need More Flexibility)
Some knitting projects need more stretch at the edges than standard finishing provides. A stretchy bind-off lets the fabric expand without breaking stitches or changing shape. This is most important for clothes and accessories that fit close to the body.
When to Use a Stretchy Bind-Off
Stretchy bind-offs are recommended for:
- Sock cuffs and toes
- Hat brims
- Sweater necklines
- Fitted hems and cuffs
Using a standard cast-off in these areas can make the edge feel tight, restrictive, or uncomfortable.
Simple Stretchy Bind-Off
This method is easy to learn and works well for most projects needing flexibility.
How to Work a Basic Stretchy Bind-Off

- Knit the first two stitches.
- Lift the first stitch over the second, as in a standard bind-off.
- Knit the next stitch, but do not pull the yarn tightly.
- Lift the previous stitch over the new stitch.
- Continue across the row, keeping the stitches relaxed.
- Cut the yarn and pull it through the final stitch.
Key tip: Keep the loops slightly larger than usual. This extra space creates stretch.
Stretchy Bind-Off for Ribbing (Bind Off in Pattern)
For ribbed edges such as 1×1 or 2×2 ribbing, binding off in pattern maintains elasticity and prevents puckering.
How It Works
- Knit knit stitches
- Purl purl stitches
- Lift the previous stitch over as usual
This method preserves the natural stretch of ribbing and keeps the edge consistent with the rest of the fabric.
Three-Needle Bind-Off
The three-needle bind-off is more advanced but useful when both strength and stretch are needed.
Best For
- Shoulder seams
- Sock toes
- Joining two live edges
This method joins two sets of stitches as you bind off, creating a flexible and durable seam.
Common Stretchy Bind-Off Mistakes
Edge Still Feels Tight:
- Stitches were pulled too snug
- Try using a needle one size larger
Edge Looks Uneven:
- Inconsistent loop size
- Slow down and check tension regularly
Edge Flares Too Much:
- Bind-off is overly loose
- Reduce loop size slightly or switch methods
Choosing the Right Stretchy Bind-Off
There is no single best stretchy bind-off. The right choice depends on:
- Yarn elasticity
- Stitch pattern
- Where the edge will sit on the body
As a general rule:
- Use simple stretchy bind-offs for beginners
- Use bind-off in pattern for ribbing
- Use three-needle bind-off for seams
Beginner Tip
If you are unsure which method to use, practice on a small swatch. Gently stretch the edge with your hands. If it expands and returns without strain, the bind-off works correctly.
Tips for Ribbing and Special Yarns
Ribbed edges need more stretch than flat knitting, so finishing them correctly makes a big difference. If you bind off ribbing too tightly, the edge can feel stiff and uncomfortable. For beginners, the safest approach is to bind off in pattern, meaning knit the knit stitches and purl the purl stitches as they appear.
This simple method helps ribbing keep its natural stretch and prevents puckering. It works well for cuffs, hems, and simple necklines.
Yarn choice also affects how your cast-off looks and feels. Thicker yarns should be worked slowly to keep the edge even. Lightweight or lace yarns need a looser bind-off so the fabric can open up properly after blocking.
Some yarns are easier to work with than others:
- Wool and wool blends stretch easily and are forgiving if tension is uneven.
- Cotton yarn has very little stretch, so avoid pulling the yarn tight when casting off.
Beginner tip: If you are unsure, practice your bind-off on a small swatch first. Gently stretch the edge with your hands—if it stretches and returns smoothly, the tension is right.
Also Read: How to Knit a Moss Stitch: Best Expert Guide
Advanced Cast-Off Variations for Refined Finishes
Once the basics are comfortable, advanced cast-off methods offer greater control over structure, stretch, and appearance. These techniques are especially useful for garments and high-detail projects.
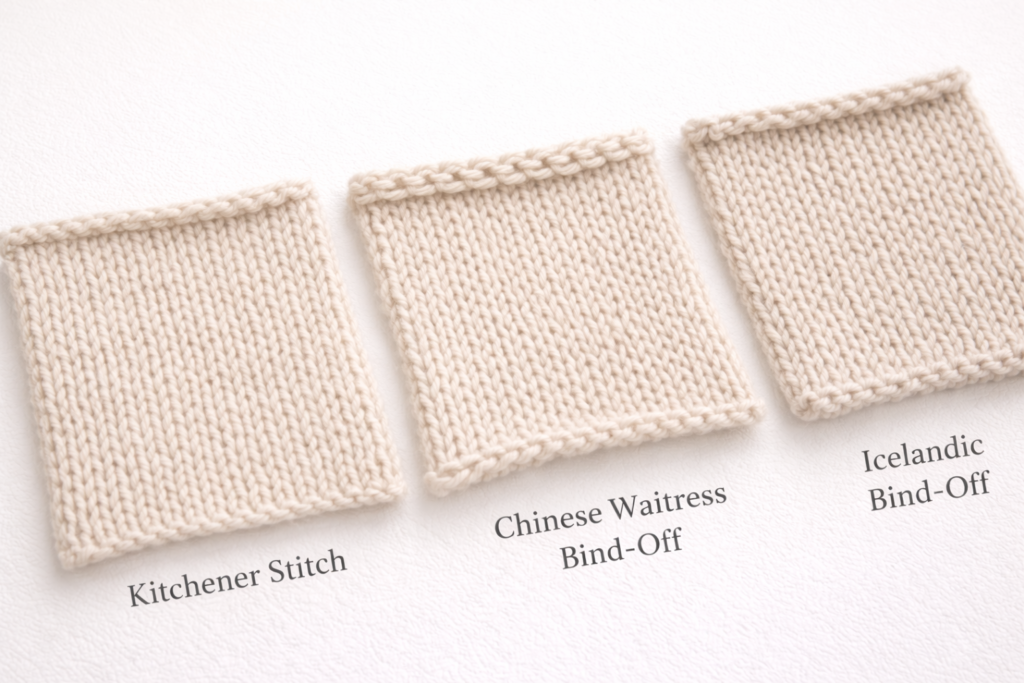
Kitchener Stitch (Grafting)
The Kitchener Stitch is a finishing technique used to join two sets of live stitches so seamlessly that the join appears to be regular knitting. It is most commonly used for sock toes, underarms, and other areas where a smooth, invisible finish is important.
Instead of binding off, stitches are woven together with a yarn needle using a repeating knit–purl sequence across two needles. When done correctly, the joined area blends into the surrounding fabric, with no ridges or seams.
For beginners, the Kitchener Stitch may feel slow at first, but it produces professional results not possible with a standard cast-off. Following the steps carefully and keeping even tension are key to success.
Best used for:
- Sock toes
- Seamless garment joins
- Projects where comfort and appearance matter
Although it takes practice, mastering the Kitchener Stitch is a valuable skill that improves the quality of finished knitting projects.
Chinese Waitress Bind-Off
The Chinese Waitress Bind-Off creates a neat double-chain edge that adds subtle decoration without making the fabric bulky. The finished edge looks slightly thicker and more defined than a standard bind-off, making it ideal when you want the edge to be visible as a design feature rather than hidden.
This bind-off works especially well for:
- Scarves
- Shawls
- Decorative borders
- Flat projects where a clean, textured edge is desired
Because the stitches are worked in a controlled, repeating motion, the edge remains tidy and durable while still lying flat.
Icelandic Bind-Off
The Icelandic Bind-Off produces a strong yet flexible edge with a slightly rustic appearance. It is often used with garter stitch and textured patterns where structure and durability are important.
This method is well-suited for:
- Blankets
- Outerwear
- Traditional or rustic-style accessories
- Projects that need a firm edge without stiffness
The resulting bind-off holds its shape well and stands up to wear, making it a reliable choice for larger or heavier knitted items.
Also Read: What is Garter Stitch in Knitting? Easy Knitting Explained
Video Resources and Practice Strategies
Visual instruction is especially helpful when learning how to cast off knitting accurately. Video tutorials allow knitters to observe hand movements, tension control, and stitch placement in real time.
Look for demonstrations that include:
- Slow-motion walkthroughs of the standard bind-off
- Close-up views of stretchy bind-off techniques
- Three-needle bind-off tutorials for shoulder seams
Regular practice is essential. Working small swatches—about 20 rows per method—builds muscle memory and confidence without risking a full project. Reviewing your edges after blocking and seeking feedback from knitting communities can further refine the technique.
Mastery comes from repetition, observation, and thoughtful method selection. With consistent practice, cast-off edges become not just functional but a defining feature of high-quality knitting.
Frequently Asked Questions About How to Cast Off Knitting
Conclusion: Mastering How to Cast Off Knitting the Right Way
Learning how to cast off knitting correctly transforms your work from unfinished fabric into a polished, usable piece. While it may seem like a small step, casting off determines how your project fits, stretches, and holds up over time. A well-chosen bind-off supports the structure of the fabric, protects your stitches, and complements the purpose of the item you’ve made.
For beginners, the standard cast-off method provides a reliable foundation. It is easy to control, works for most flat projects, and builds the tension awareness needed for more advanced techniques. As your skills grow, exploring stretchy bind-off methods allows you to adapt your finishing to garments, accessories, and areas that require flexibility without distortion.
The most important takeaway is that casting off is not a one-size-fits-all technique. The right method depends on the yarn, stitch pattern, and how the finished edge will be used. Paying attention to tension, practicing on swatches, and testing stretch before finishing will consistently lead to better results.
With patience and practice, casting off becomes a confident, intentional step rather than an afterthought. When done well, it gives your knitting durability, comfort, and a professional finish—qualities that define high-quality handmade work.