How to Knit Flat on Circular Needles: Easy 4-Step Guide
Learning how to knit flat on circular needles gives knitters greater control, comfort, and flexibility than many expect when first moving beyond straight needles. Although circular needles are often associated with knitting in the round, they are equally effective—and in many cases more practical—when used for flat knitting worked back and forth in rows.
When knitting flat on circular needles, the technique is the same as traditional flat knitting. The only difference is that the stitches rest on a flexible cable rather than a rigid second needle. This small change improves weight distribution, stitch capacity, and ergonomics. For beginners, it can reduce hand and wrist strain. For experienced knitters, it makes managing wide or heavy projects easier and more consistent.
This guide explains how to knit flat with circular needles step by step, addresses common misconceptions, and explores practical troubleshooting techniques often overlooked in shorter tutorials.
Whether you are knitting a scarf, blanket, sweater panel, or shawl, understanding how to knit flat on circular needles will help you work more comfortably, maintain even tension, and achieve cleaner, more professional results.
What Does Knitting Flat Mean?
Knitting flat means working stitches back and forth in rows, turning the work at the end of each row. This method differs from knitting in the round, where you work stitches in a spiral to make a tube without turning.
If you use circular needles to knit flat, the way you knit stays the same. You work one row from one end to the other, turn your work, and knit back the other way. The cable just helps hold extra stitches and keeps your fabric from bunching up. It does not change the way you make your stitches, the size, or the tightness of your fabric.
Because of these similarities, patterns written for straight needles can be used without modification when knitting flat on circular needles.
Also Read: How to Read Knitting Patterns? Beginners Guide
What Are Circular Needles?
Circular knitting needles have two short tips joined by a thin cable. They come in different types, like bamboo, metal, or carbon fiber, and cable lengths usually range from 16 to 60 inches.
Although circular needles are primarily used for knitting in the round, they also offer key benefits for flat knitting. The cable provides ample space for a large number of stitches and helps distribute the project’s weight more evenly. This reduces strain on your hands and wrists, increases comfort, and makes it easier to manage wider, heavier projects.
Circular needles are commonly used for:
For these reasons—greater comfort, less strain, and easier stitch handling—many experienced knitters use circular needles as their main tool, even when working only on flat projects.
Needle Selection: Material, Length, and Best Uses
Choosing the right circular needles for flat knitting is not just about size—it also matters what the needles are made of and how long the cable is. The best choice depends on your project, yarn type, and personal comfort.
Needle Material: Which Works Best?

Bamboo or Wood
Metal
Carbon Fiber
Also Read: The Best Interchangeable Knitting Needles
Needle Length
Selecting the correct cable length improves comfort and stitch management:
- 16–24 inches: Scarves, dishcloths, narrow panels
- 32–40 inches: Sweater pieces, shawls, medium-sized blankets
- 40–60 inches: Large blankets, wide garments, and afghans
A longer cable doesn’t affect your stitch size, but it prevents crowding and improves comfort when working with large panels.
Materials Needed for Knitting Flat on Circular Needles
Before beginning a project, it is helpful to assemble the following supplies:
Essential Tools
- Circular knitting needles (length selected based on project width)
- Yarn appropriate for the chosen needle size
- Scissors
- Tapestry needle for weaving in ends
- Stitch markers (optional)
Choosing the Right Needle Length
Selecting the correct cable length improves comfort and stitch management:
- 16–24 inches: Scarves, dishcloths, narrow panels
- 32–40 inches: Sweater pieces, shawls, medium-sized blankets
- 40–60 inches: Large blankets, wide garments, and afghans
A longer cable doesn’t affect your knitting, but makes it more comfortable and ergonomic to spread out stitches.
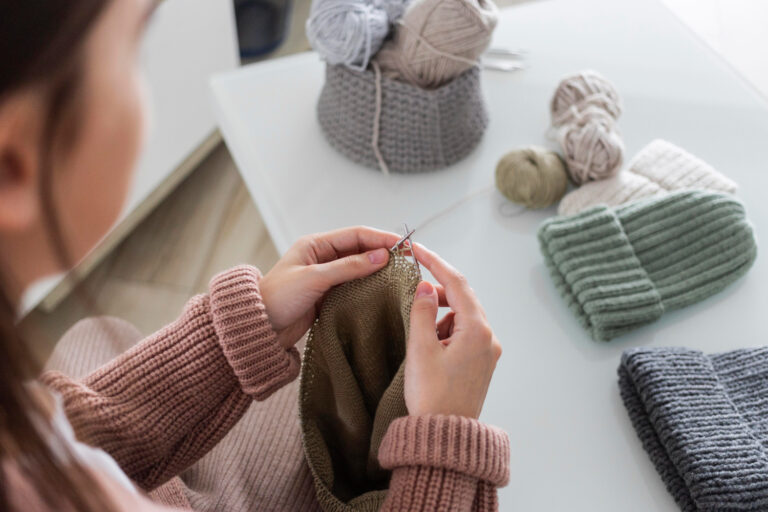
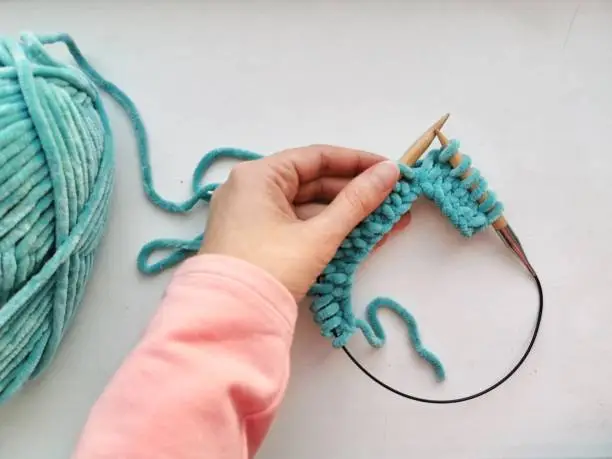
How to Knit Flat on Circular Needles (Step-by-Step Guide)
This knitting flat circular needles tutorial walks through the process in clear, repeatable steps. For practice, cast on 25–30 stitches before starting a full project.
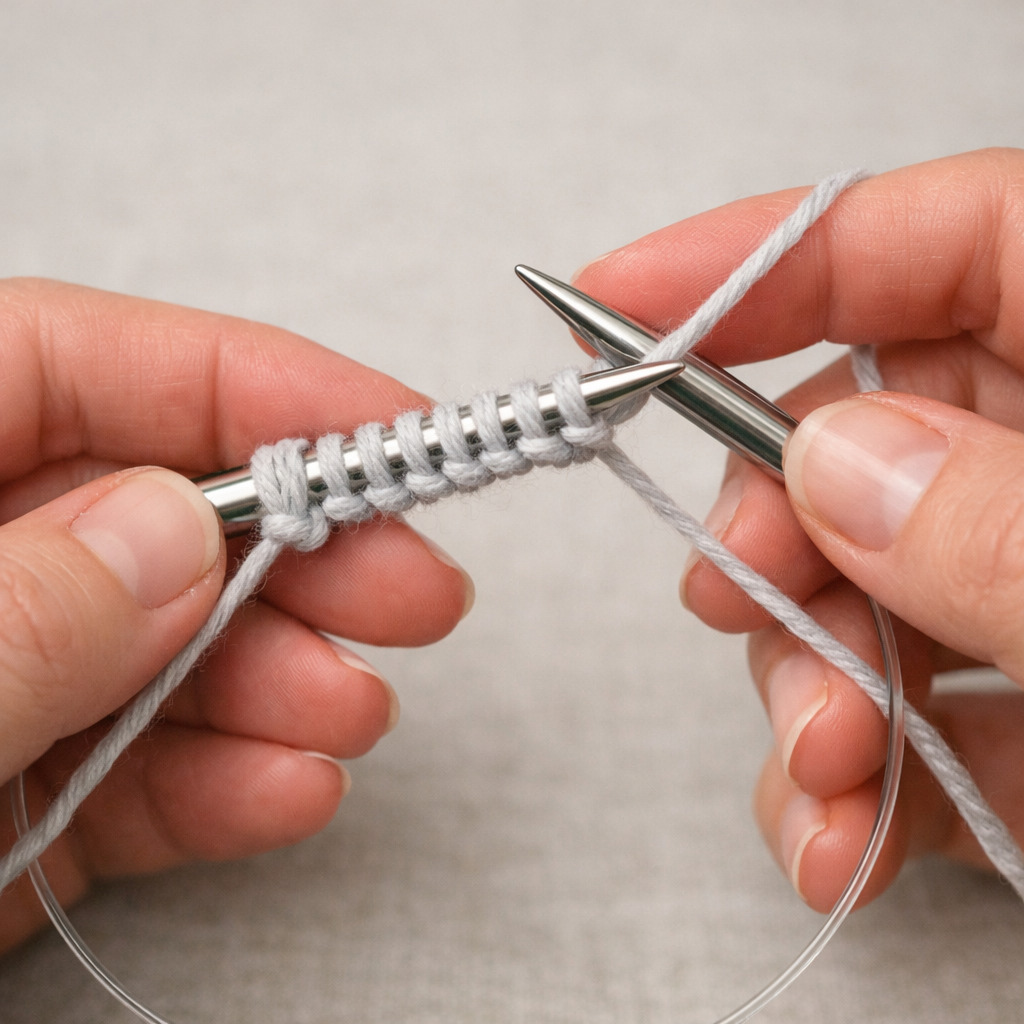
Step 1: Cast On Stitches
Casting on when knitting flat on circular needles is identical to casting on with straight needles.
- Place a slip knot onto one needle tip.
- Use your preferred cast-on method; the long-tail cast-on is commonly recommended.
- Cast stitches directly onto the needle tip, leaving space before the cable begins.
- Slide the stitches gently onto the cable, keeping them evenly spaced.
Maintaining an even, relaxed cast-on helps prevent edge puckering in flat knitting.
Also Read: How to Do a Long Tail Cast On Knitting? Easy Guide
Step 2: Knit the First Row
- Hold the needle with cast-on stitches in your left hand.
- Insert the right needle tip into the first stitch.
- Knit or purl as directed by your pattern.
- Continue across the row until all stitches are worked.
The cable simply holds the inactive stitches and does not affect stitch formation or tension.
Step 3: Turn the Work and Continue Knitting Flat
After completing the row:
- Stop at the end of the row.
- Turn the work as you would with straight needles.
- Switch needle hands.
- Begin the next row according to the stitch pattern.
Turning the work at the end of each row is essential. Do not join the stitches, as this would result in knitting in the round rather than knitting flat on circular needles.
Step 4: Bind Off and Finish
- Knit two stitches.
- Lift the first stitch over the second to bind off.
- Repeat across the row.
- Cut the yarn and pull it through the final loop.
Once bound off, weave in yarn ends and block the piece as required for a clean, professional finish.
Also Read: How Do You Weave in Ends in Knitting? Step-by-Step
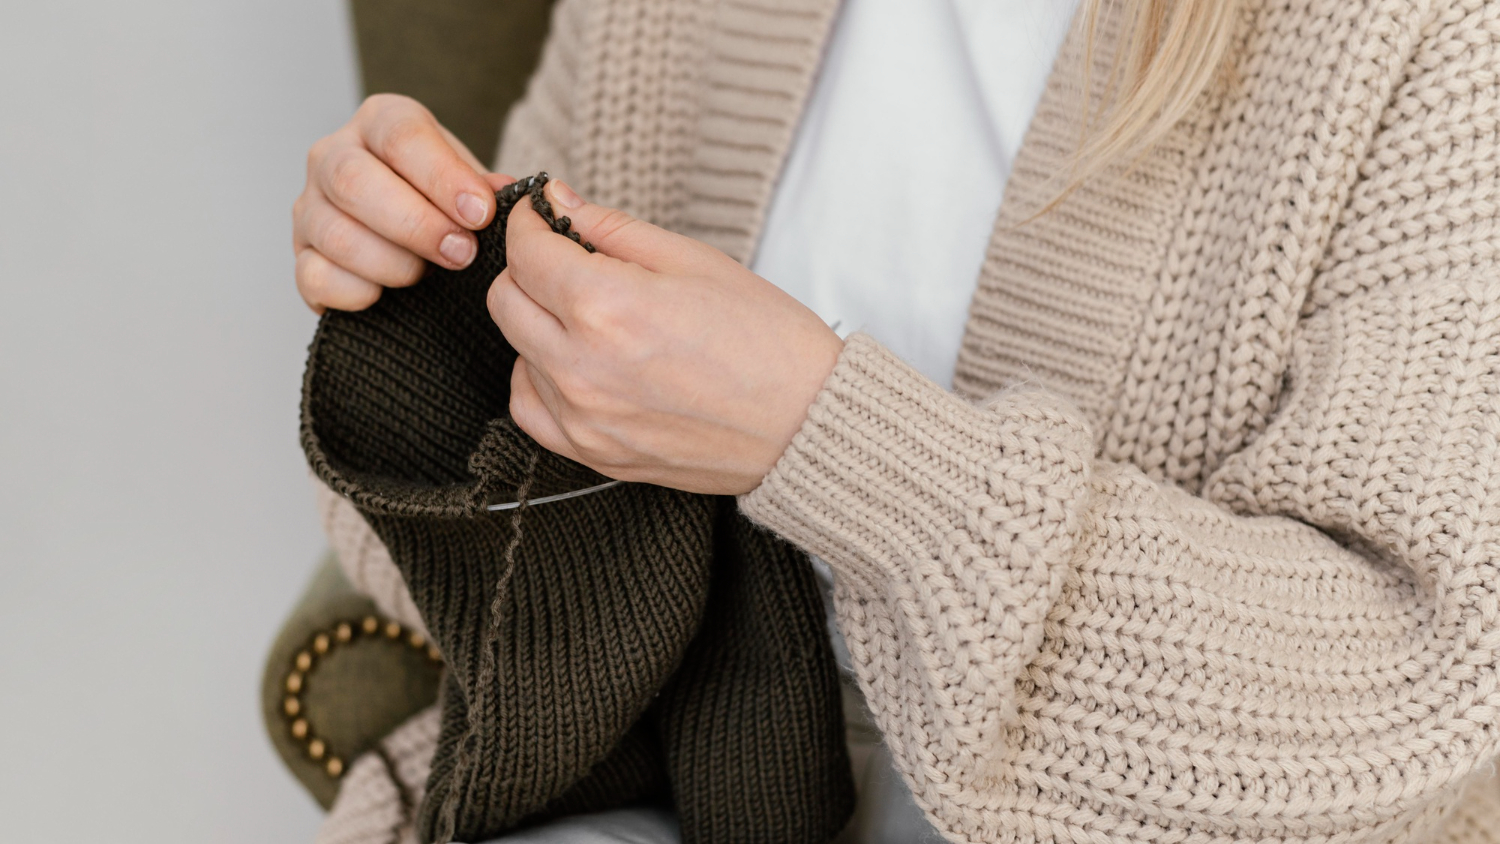
Real-World Projects Using Circular Needles for Flat Knitting
To understand how to knit flat on circular needles, it helps to see practical examples of projects where this technique is ideal.
1. Scarf or Cowl
Also Read: How Long Does It Take to Knit a Scarf? Time Guide
2. Sweater Panels
3. Baby Blanket
Also Read: Best Yarn for Blanket Knitting| Expert Guide 2025
As you can see, circular needles make flat knitting more comfortable, stable, and fun—plus, you can handle lots of stitches with ease!
Why Use Circular Needles for Flat Knitting?
Using circular needles for flat knitting offers several practical advantages over traditional straight needles, particularly for larger or heavier projects. Although the knitting technique remains the same, the tool itself improves comfort, control, and flexibility.
Advantages of Knitting Flat on Circular Needles
1. Better Weight Distribution
When knitting flat on circular needles, the bulk of the project rests on the flexible cable rather than hanging from rigid needle ends. This reduces strain on the hands, wrists, and forearms, especially during long knitting sessions.
2. Increased Stitch Capacity
Circular needles can hold hundreds of stitches without crowding, making them ideal for blankets, wide garments, and shawls that exceed the capacity of straight needles.
3. Improved Portability
Projects knit flat on circular needles fold naturally around the cable. This makes them easier to transport and reduces the risk of stitches sliding off during travel.
4. Reduced Risk of Dropped Stitches
Flexible cables prevent stitches from slipping off the needle ends, which is a common issue with straight needles—particularly when working with smooth yarns.
5. Ergonomic Benefits
Many knitters report reduced shoulder, elbow, and wrist discomfort when switching from straight needles to circular needles for flat knitting.
Disadvantages of Circular Needles (and How to Fix Them)
Cable Twisting
Solution: Allow stitches to hang freely every few rows to release built-up twist.
Stiff or Kinked Cables
Solution: Warm the cable with your hands or briefly soak it in warm (not hot) water to relax the material.
Learning Curve
Solution: Practice knitting flat on circular needles with a small swatch before starting a full-size project.
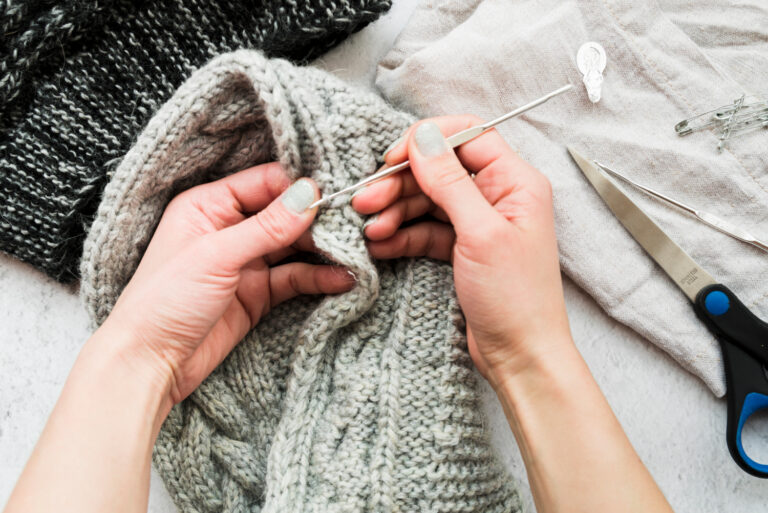
Common Mistakes and Troubleshooting When Knitting Flat on Circular Needles
Even experienced knitters can encounter minor issues when learning how to knit flat on circular needles, particularly during the early rows of a project. Understanding why these problems occur—and how to correct them—helps maintain consistent tension, clean edges, and balanced fabric throughout the work.
Accidentally Knitting in the Round
If the fabric begins to form a tube rather than a flat panel, the stitches were unintentionally joined. When knitting flat on circular needles, the work must be turned at the end of every row.
To avoid this issue, always stop when the last stitch of the row has been worked, turn the fabric, and switch needle hands before beginning the next row. It can be helpful to visually confirm that the working yarn is positioned on the correct side before continuing.
Twisted Stitches
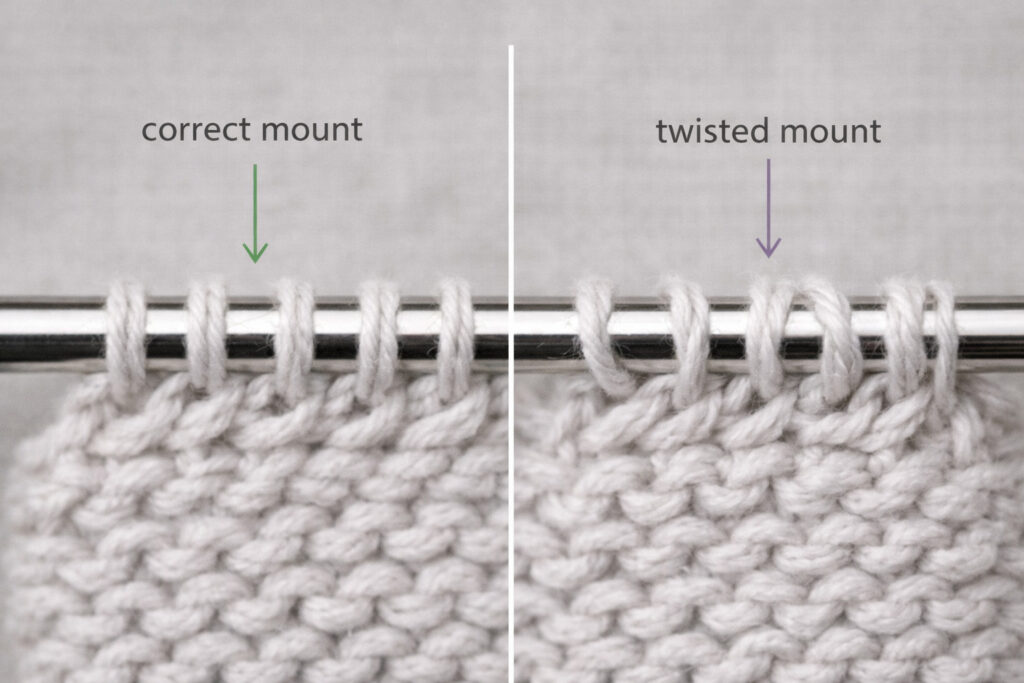
Twisted stitches most often occur in the first row if the cast-on edge is uneven or if stitches are mounted incorrectly on the needle. Before knitting the first row, take a moment to ensure that all stitches face the same direction and are not twisted around the needle.
Correcting twisted stitches early is essential. Once several rows have been worked, twists can lock into the fabric, distorting stitch definition and overall drape.
Uneven Tension Along Row Edges
Uneven tension frequently appears at the beginning of rows, especially when turning the work. This can create loose or tight edge stitches, affecting the appearance of the finished piece.
To maintain even tension, slide stitches closer to the needle tips before forming the first stitch of each row and avoid pulling the working yarn too tightly. Consistent hand positioning and relaxed yarn control help create uniform stitches across the entire row.
Laddering Near Needle Tips
Laddering refers to small gaps that appear between stitches, often near the needle tips. This issue may occur when switching between needle materials, adjusting grip, or changing tension after turning the work.
Prevent laddering by maintaining steady tension at the first stitch after turning and ensuring that the working yarn is snug—but not tight—around the needle. Over time, muscle memory develops, and laddering becomes less frequent.
Final Tip for Troubleshooting Success
When problems persist, knitting a small practice swatch can help identify tension inconsistencies or mounting issues before they affect a full project. Addressing these details early leads to cleaner edges, better stitch definition, and more professional results when knitting flat on circular needles.
Also Read: How to Fix a Dropped Stitch: A Complete Guide for Knitters
Tips for Beginners Knitting Flat on Circular Needles
- Start with bamboo or wooden needles for better grip and stitch control.
- Use light-colored yarn to make stitches easier to see
- Practice with a small garter stitch swatch before starting a project.
- Choose longer cables to prevent stitches from bunching.
- Avoid very slick yarns until tension becomes consistent.
Also Read: What is Garter Stitch in Knitting? Easy Knitting Explained
These steps help beginners build confidence as they learn circular needle flat knitting techniques.
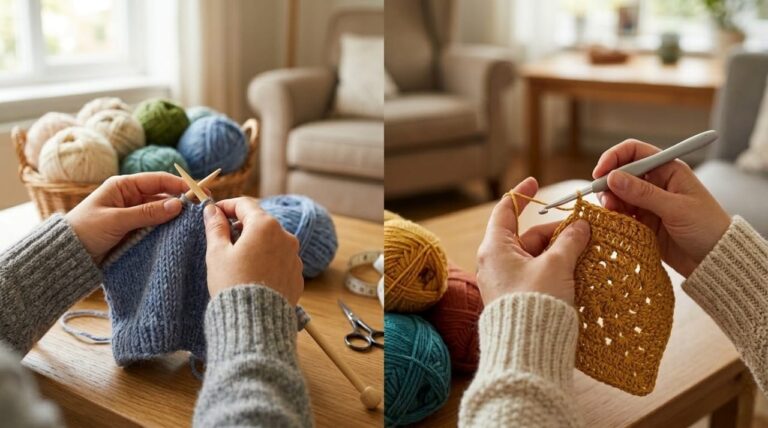
Knitting Flat vs. Knitting in the Round
To knit flat on circular needles, work back and forth in rows, turning at the end of each row. Knitting in the round means working continuously in a spiral without turning, joining stitches for a seamless tube. Each method affects fabric construction, finishing, and pattern flexibility.
When knitting flat, work back and forth in rows and turn your work at the end of each row. This results in a flat fabric that usually requires one or more seams when assembled. By turning the work, you gain flexibility for stitch patterns using both right-side and wrong-side rows. Manage textured patterns, cables, and structured garments more easily with flat knitting.
Knitting in the round creates a seamless tube, reducing finishing time and the need for side seams. It’s ideal for hats, socks, cowls, and seamless garments. Since all rounds face the right side, adjust stitch patterns if converting from flat instructions. Circular needles work for either method; choose based on your project needs for structure and efficiency.
Pattern Conversion Insights
Many patterns written for straight needles can be used without modification when knitting flat on circular needles, but there are a few important differences to watch for:
1. Do Not Join
If the pattern starts with “join in the round,” do not do this. When knitting flat on circular needles, you must turn your work at the end of each row.
2. Read Instructions Carefully
Some patterns include instructions such as “Work in the round.” For flat knitting, treat those rows as back-and-forth rows instead.
3. Adjust Stitch Count
If you are converting a pattern from flat to round (or vice versa), be aware of:
- Right-side vs wrong-side instructions
- Shaping increases/decreases
- Row repeats vs round repeats
4. When to Use a Marker
Markers are optional for flat knitting, but they can help:
- Mark row boundaries
- Track pattern repeats
- Manage increases and decreases
Related Techniques and Skill Progression
Once you know how to knit back and forth on circular needles, you can learn new ways to use the same tools and skills. These methods help you make more types of projects.
Transitioning Between Flat and Round Knitting
Many clothes and accessories use both flat and circular knitting. For example, sweater panels are made flat and joined at the shoulders, while yokes and sleeves are usually knit in the round to avoid seams.
Knowing when to switch between flat and round knitting saves time and work. If a pattern calls for a seamless body or a round shape, circular needles let you move easily from flat pieces to round knitting.
Magic Loop vs. Flat Circular Knitting
Magic loop is a way of knitting small round pieces with a long circular needle. It is very useful for socks, sleeves, and hats, and uses the same type of cable as flat knitting.
Magic loop is not for flat knitting, but it has several advantages, such as:
- Letting you make small items without using double-pointed needles
- Consistent tension across rounds
- Easy management of stitch count and cable length
Learn both methods to gain flexibility and prepare for a wider range of patterns.
Also Read: How to Join Circular Knitting? Beginner’s Guide
Next Steps for Skill Progression
After mastering flat knitting on circular needles, you can expand into:
- Intarsia colorwork
- Cables and textured patterns
- Shaping techniques such as increases and decreases
- Seamless construction methods
Master the basic skills first, then use these techniques with circular needles.
Also Read: How to Change Colors While Knitting? Beginners Tips
FAQs About: How to Knit Flat on Circular Needles
Final Thoughts: How to Knit Flat on Circular Needles
Mastering how to knit flat on circular needles is a highly practical upgrade that improves comfort, control, and efficiency—especially for large or complex projects. Although the technique remains the same as traditional flat knitting, circular needles offer clear advantages: better weight distribution, higher stitch capacity, reduced hand strain, and improved project management.
These benefits make circular needles the preferred tool for wide blankets, shawls, sweater panels, and other heavy or high-stitch-count items.
Once you learn to turn your work, keep tension even, and pick the right needle length, circular needles then become an essential tool. They lower the risk of dropped stitches, prevent edge distortion, and make long knitting sessions easier on your hands and wrists.
If you are a beginner or experienced knitter, knitting flat on circular needles expands your skills and increases your versatility. Try this technique on your next project to see the improvement in comfort, speed, and fabric quality.