How to Knit SSK Stitch: Easy Guide for Beginners
If you are new to knitting, pattern abbreviations can feel confusing at first. One of the most common ones you will encounter is SSK. Learning how to knit SSK stitch is important because it explains how designers shape knitted fabric with intention, not guesswork. Instead of simply decreasing stitches, SSK controls the direction of fabric movement, helping garments fit and drape correctly.
SSK stands for slip, slip, knit. It is a decrease that turns two stitches into one while creating a left-leaning angle. This direction is essential. By leaning to the left, the decrease allows the fabric to curve smoothly rather than twist or pucker, resulting in clean lines and balanced shaping in well-constructed knitting projects.
Why Learning How to Knit SSK Stitch Matters
When you begin working from written knitting patterns, abbreviations like SSK can be confusing. Understanding how to knit the SSK stitch is important because it introduces purposeful shaping rather than just stitch reduction. This decrease teaches how fabric is guided to form clean lines and a balanced structure.
The SSK stitch, short for slip, slip, knit, is a standard left-leaning decrease. As all decreases, it turns two stitches into one, but its direction is what makes it valuable. By angling to the left, SSK creates smooth, controlled shaping that designers rely on for garments such as sweaters, shawls, socks, hats, and lace projects. It is commonly paired with a right-leaning decrease, such as K2TOG, to keep both sides of the fabric visually even.
For beginners, mastering SSK makes patterns easier to read and execute. When worked correctly, it helps the fabric lie flat, keeps edges neat, and produces shaping that looks intentional rather than forced. Over time, this skill builds confidence and lays the groundwork for more advanced garment construction.
Also Read: How to Read Knitting Patterns? Beginners Guide
What Is SSK in Knitting?
When knitters talk about how to knit SSK stitch, they are referring to a specific decrease that combines two stitches into one while creating a left-leaning line in the fabric. SSK stands for slip, slip, knit, and it is the most commonly used left-leaning decrease in modern knitting patterns.
In SSK knitting, each stitch is slipped individually before being knit together through the back loop. This small but important step rearranges the stitch legs so the finished decrease lies flatter and angles gently to the left. Because of this structure, SSK stitch knitting is used to visually mirror K2TOG, the right-leaning decrease worked on the opposite side of the fabric.
Designers rely on SSK decrease knitting in areas where symmetrical shaping matters, including:
Also Read: How to Knit a Hat with Straight Needles? Beginner’s Guide
When worked correctly, the SSK decrease blends smoothly into stockinette stitch and prevents twisting or distortion along shaped edges. Mastering how to knit SSK stitch ensures your projects look intentional, balanced, and professionally finished.
SSK vs K2TOG: Why Do Knitting Patterns Use Both?
K2TOG and slip, slip, knit (SSK) are both single decreases that turn two stitches into one. The key difference is direction. K2TOG creates a right-leaning decrease, while SSK produces a left-leaning decrease. Used together, they keep shaping lines clean, balanced, and visually consistent.
Designers typically place K2TOG on the right edge of a shaping line and SSK on the left edge, letting the decreases frame the fabric’s center. This pairing is especially important in garments like sweaters, raglans, and sock gussets, where symmetrical shaping improves fit and appearance.
It is possible to substitute one decrease for another, but doing so often changes the look of the finished piece. On smooth yarns or light colors, mismatched decrease directions can look uneven or jagged. Using SSK and K2TOG together ensures the fabric slopes naturally and the shaping blends smoothly into stockinette stitch.
Direction and Use Comparison
| Feature | SSK | K2TOG |
|---|---|---|
| Direction of lean | Left-leaning decrease | Right-leaning decrease |
| Typical placement | Left edge of shaping | Right edge of shaping |
| Appearance | Subtle, smooth slope | Clean, defined slope |
| Pattern abbreviation | ssk | k2tog |
| Common use | Necklines, raglans, gussets | Mirrors SSK on the opposite side |
Materials You Need
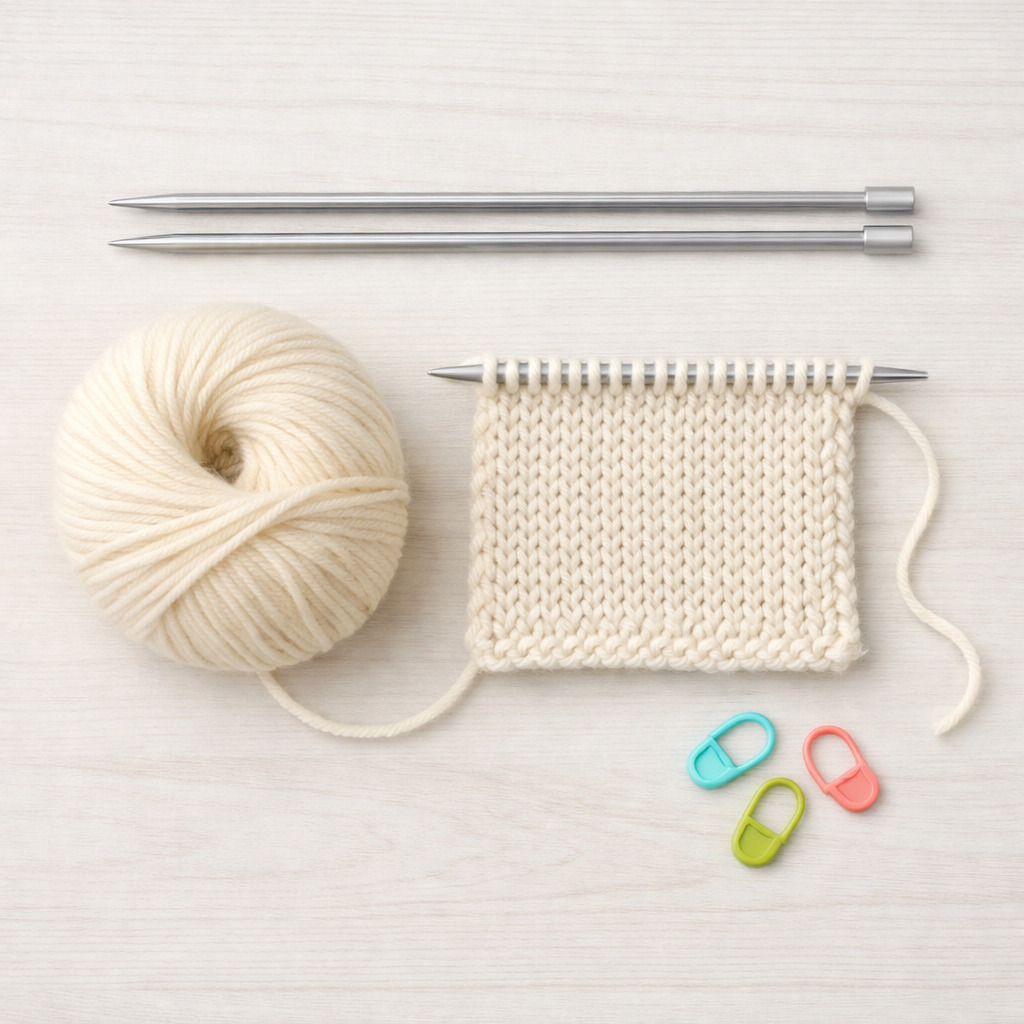
For most SSK knitting for beginners projects, you do not need any special tools beyond your everyday knitting supplies. Keeping materials simple makes it easier to focus on learning the decrease itself rather than managing extra equipment.
You will need:
- Knitting needles in the size recommended for your yarn
- Smooth, light-colored yarn so the decrease is easy to see
- A small stockinette swatch to practice on before working SSK in a garment
- Optional: stitch markers to mark where each SSK decrease will be placed
Also Read: What Size Needles for Beginner Knitting: 6 Easy Tips
Avoid fuzzy or very dark yarn when practicing. A clear stitch definition helps you see how the stitches change as you work the decrease, making it easier to recognize correct stitch orientation and tension.
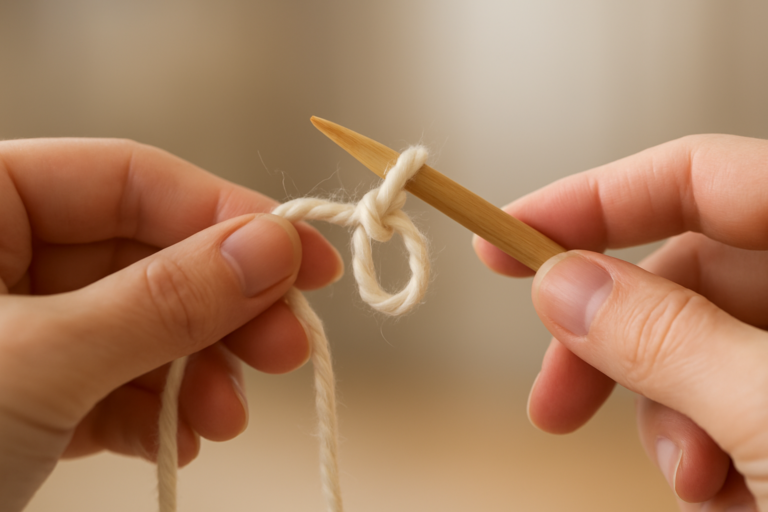
How to Knit the SSK Stitch Step by Step
The SSK decrease is most often worked on the right side (RS) of the stockinette stitch, which is where knitting patterns typically place shaping instructions. Before beginning, confirm that your working yarn is positioned at the back of the fabric, as it would be for a standard knit stitch. This setup is essential for forming the decrease correctly.
Proper preparation reduces two of the most common beginner problems with this stitch: twisted decreases and uneven tension. Taking a moment to check needle and yarn placement before starting leads to a cleaner, more consistent result.
Standard SSK Method (Works for All Knitting Styles)
The following method produces the classic left-leaning SSK decrease used in most modern patterns:
- Knit to the point in the row where the pattern instructs you to make the decrease.
- Slip the next stitch knitwise from the left needle to the right needle.
- Slip the following stitch knitwise in the same manner. At this stage, two stitches have been repositioned on the right needle, but not worked.
- Insert the left needle into the front legs of both slipped stitches, moving from left to right.
- Knit the two stitches together through the back loops, treating them as a single stitch.
Once completed, the decrease should appear as one stitch that clearly leans to the left. When worked consistently over multiple rows, SSK decreases align vertically and create a smooth, continuous shaping line that blends naturally into the surrounding fabric.
Also Read: How to Fix a Dropped Stitch: A Complete Guide for Knitters
Beginner Tip
If the stitch feels tight or difficult to pull through, pause before completing the knit-through-the-back-loop step. A slow, deliberate motion helps maintain even tension and prevents distortion of the decrease.
English-Style SSK (Throwing Method)
In English-style knitting, the yarn is held in the right hand, and the final appearance of the SSK decrease depends largely on controlled yarn movement.
Hold the working yarn comfortably and follow the standard SSK steps exactly. Take extra care during the knit-through-the-back-loop step, where uneven tension is most likely to occur. Aim for consistent yarn tension rather than pulling tightly, which can exaggerate the decrease.
Many knitters find that slowing down during this final step significantly improves the smoothness and uniformity of the decrease.
Continental-Style SSK (Picking Method)
In continental knitting, the yarn is held in the left hand, and the right needle guides most of the motion.
Slip both stitches knitwise with the yarn resting at the back over your left index finger. Insert the needle through the back of the slipped stitches using a small, precise movement to catch the yarn. Avoid lifting or rotating your entire hand; minimal movement helps maintain consistent tension.
Because continental knitting often produces a slightly looser gauge, careful control at this stage can greatly improve the appearance and consistency of the decrease line.
Common Beginner Checks (Before Continuing)
Before moving on with your project, take a moment to examine the decrease:
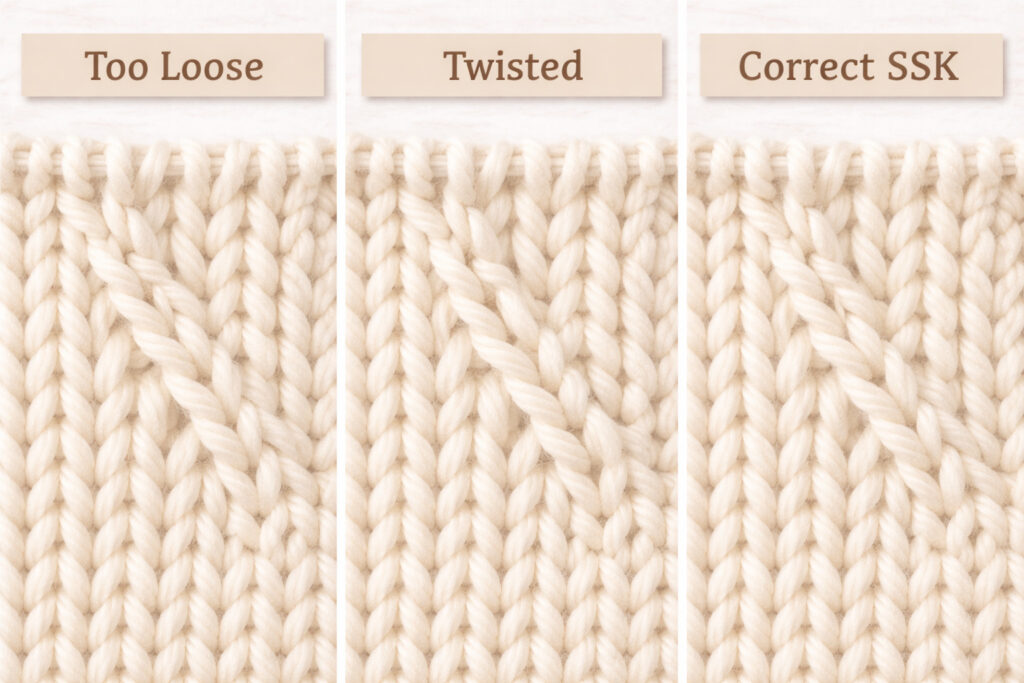
- The stitch should lean clearly to the left, not sit straight or appear twisted
- The size of the decrease should closely match the surrounding stitches
- The fabric should lie flat, without puckering or pulling
If the decrease does not meet these checks, undo the stitch and try again. Practicing the SSK decrease on a small swatch builds muscle memory and confidence, making it easier to execute cleanly in garments and patterned work.
Also Read: What is Garter Stitch in Knitting? Easy Knitting Explained
SSK Alternatives and Improved Versions (Better Left-Leaning Decreases)
Many knitters feel that standard SSK looks slightly looser or more open than K2TOG. This is especially true for beginners or those working with slippery yarn. That’s why improved SSK methods and alternatives exist. These variations aim to produce a flatter, crisper decrease line that matches the look of a right-leaning decrease.
Improved SSK (Neater Left-Leaning Decrease)
An improved SSK is designed to make the decrease lie flatter and reduce the stretched look of the top stitch.
Improved SSK Steps
- Slip the first stitch knitwise.
- Slip the second stitch purlwise.
- Return both slipped stitches to the left needle.
- Knit them together through the back loop.
Why it works
By slipping the second stitch purlwise, the stitch sits more aligned, and the resulting decrease looks less loose. This creates a cleaner shaping line, especially in smooth yarn or light colors.
Slip-Knit-Pass (SKP) and Similar Left-Leaning Decreases
Some older patterns use SKP (slip one, knit one, pass slipped stitch over) to create a left-leaning decrease. While SKP is slightly more angular and visible than SSK, it still serves the same shaping purpose.
SKP Steps
- Slip one stitch
- Knit the next stitch.
- Pass the slipped stitch over the knit stitch.
When SKP works best
SKP is often used in vintage or classic patterns and can give a slightly stronger shaping line. In modern knitting, many knitters prefer SSK for a smoother look.
When to Use SSK in Your Knitting
Knowing how to knit the SSK stitch is only half the skill. Knowing when to use it is what makes your finished garment look professional.
Shaping Necklines
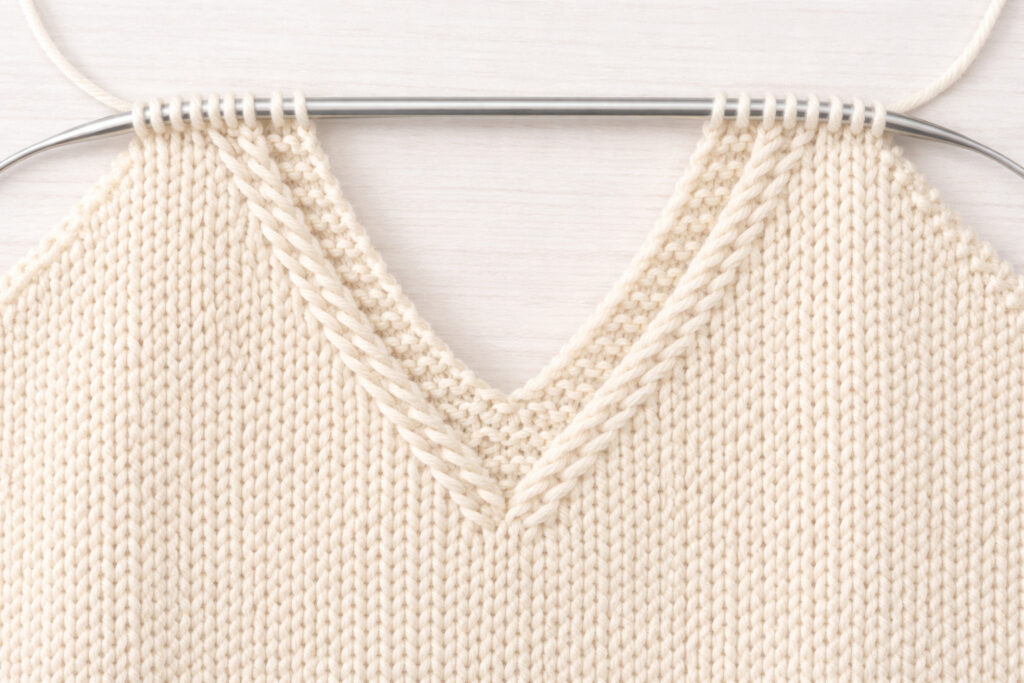
SSK is commonly used on the left side of V-necks and scoop necks, with K2TOG mirroring it on the right. This creates a clean, symmetrical opening.
Raglan Seams
In top-down sweaters, SSK is placed on one side of the raglan line, while K2TOG is placed on the other. This forms tidy, angled seams that look deliberate and smooth.
Sleeve and Waist Shaping
When decreasing along the side seams or underarms, SSK creates a subtle, continuous line that blends into stockinette or ribbing.
Why Designers Specify SSK Instead of Another Decrease
You may wonder why patterns often insist on SSK rather than allowing any left-leaning decrease.
Designers choose SSK because:
- It matches lace chart direction.
- It creates consistent tension.
- It behaves predictably in shaping.
- It blends smoothly in stockinette.
Understanding how to knit SSK stitch exactly as written ensures your project matches the designer’s intended fit and look.
Practical Tips for Neater SSKs
Even a small adjustment can make SSK decreases look much cleaner. These practical tips focus on tension, stitch placement, and consistency to help your decreases blend smoothly into the fabric.
1. Swatch Different SSK Methods
Work a small swatch using standard SSK, then try an improved SSK method. Compare them side by side and choose the one that best matches your K2TOG.
Why this matters: Different knitters naturally pull yarn differently. Swatching reveals which SSK style suits your tension and yarn.
2. Tighten Only After the Decrease
Instead of pulling hard while knitting the two stitches together, gently snug the yarn on the next stitch.
Result: This prevents the decrease from becoming too tight or distorted, which is a common beginner issue.
3. Keep Your SSKs Stacked
Use stitch markers or column tracking to place SSK in the same column each time.
Why it helps: Stacked decreases create a clean shaping line. Without this, your decrease row may look uneven or “jagged.”
4. Practice on Swatches Before Using SSK in Garments
Before working SSK into a sweater or shawl, practice on a small swatch.
Benefit: You build muscle memory and reduce mistakes in areas like necklines, sleeves, and raglan shaping.
5. Compare SSK vs K2TOG Side by Side
Work both decreases in the same swatch to see how they behave with your yarn.
This helps you decide:
- Which decrease looks cleaner
- Which one blends better with your stitch pattern
- Whether to use an alternative decrease in dense textures
6. Pay Attention to Yarn and Needle Material
Smooth yarn and a slippery needle surface can improve stitch flow, especially for beginners.
Tips:
- Avoid fuzzy yarn at first
- Try metal needles for smoother motion
- Use a lighter-colored yarn to clearly see stitch definition
7. Fixing Common Beginner SSK Issues
SSK Looks Loose or Open: Try a tighter tension on the next stitch instead of pulling during the decrease.
SSK Looks Twisted or Not Leaning: Make sure you slip stitches knitwise and knit through the back loop.
SSK Looks Too Tight: Relax your tension, especially during the final knit-through-the-back-loop step.
Final Note
With a little practice and the right technique, your SSK decreases will become smooth, consistent, and professional-looking. The more you practice, the more natural it becomes. Soon it will feel as easy as a regular knit stitch.
Frequently Asked Questions About the How to Knit SSK Stitch
Conclusion: Mastering How to Knit SSK Stitch with Confidence
Learning how to knit SSK stitch gives you control over the direction and structure of your knitting, turning shaping into a deliberate design choice rather than an accidental outcome. This left-leaning decrease plays a key role in creating clean lines, balanced garments, and professional-looking finishes.
By understanding what SSK does in knitting, practicing the steps with care, and choosing the variation that best suits your knitting style, you gain greater command over your fabric. As SSK becomes as familiar as K2TOG, more complex projects—such as raglan sweaters, shaped cardigans, and lace shawls—become easier to approach with confidence.
While SSK knitting may feel technical at first, consistent practice makes it second nature. Over time, it becomes one of the most reliable and satisfying techniques in your skill set, supporting both precise shaping and polished results across a wide range of knitting projects.