How to Read Knitting Patterns?
When I picked up my first pair of knitting needles, I assumed learning stitches would be the most difficult part of knitting. Instead, I stared at a pattern full of abbreviations, numbers, and symbols that felt difficult to understand. I spent more time interpreting instructions than knitting.
Looking back at my early projects, this was the challenge I faced most often: making sense of knitting patterns before following them accurately. Over time, as I worked on sweaters, blankets, socks, and small handmade gifts, reading patterns became one of the most practical skills I developed.
In this guide, you’ll learn how to read knitting patterns step by step. We’ll go through common abbreviations, gauge, charts, repeats, sizing, and practical tips to help you avoid mistakes and follow any pattern with greater confidence.
Also Read: How to Add Stitches When Knitting?
What Is a Knitting Pattern?
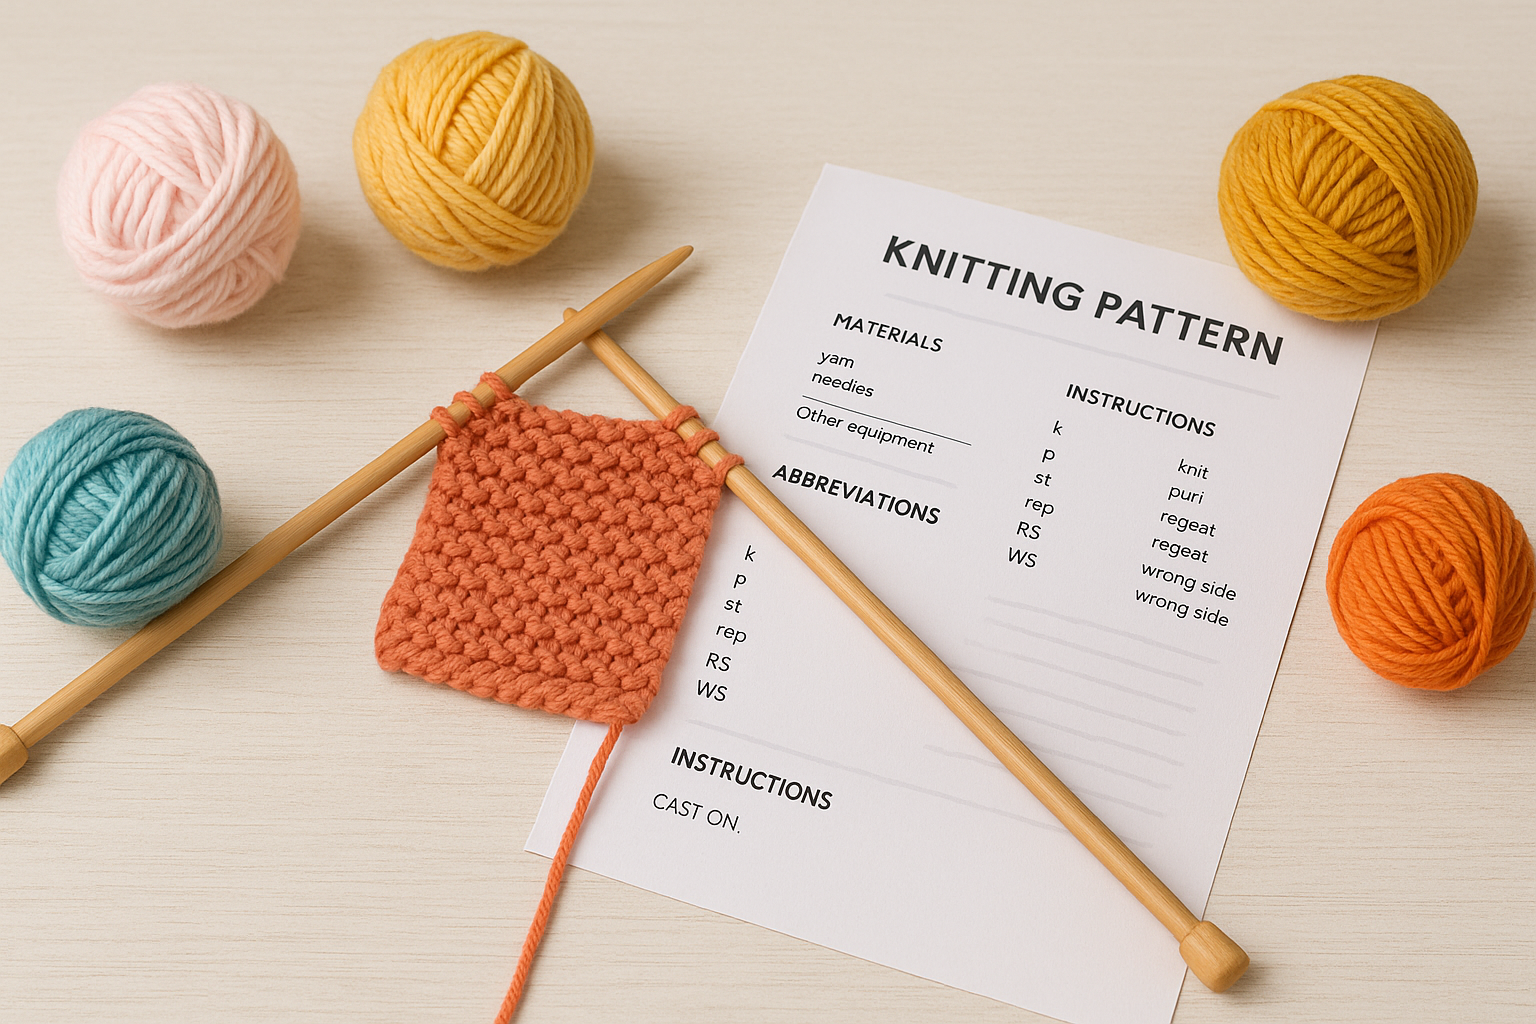
A knitting pattern is a set of written or charted instructions that guide a knitter through the process of creating a specific item. It outlines everything from the type of yarn and needles needed to the precise sequence of stitches required to form the fabric and shape the finished object.
A knitting pattern is a blueprint that ensures the finished project matches the designer’s intention. The pattern provides structured instructions for completing the project, dividing the project into easy-to-follow steps and ensuring consistent results across projects.
How to Read Knitting Patterns?
Before you can confidently knit a sweater, blanket, or pair of socks, you need to understand how knitting patterns are organized. At first glance, a pattern appears as a collection of abbreviations, numbers, and symbols. Every section has a specific purpose. Learning to read these details helps you choose the right materials, follow instructions accurately, and reduce common errors.
Think of a knitting pattern as a roadmap. It does not just tell you which stitches to make. It provides information about yarn, needle sizes, finished measurements, gauge, and construction methods. Reviewing these details before casting on helps reduce avoidable mistakes later in the project
Knitting Pattern Basics: Materials & Size Information
Every knitting pattern begins with essential details, and understanding them before you cast on can save time, money, and frustration. It is recommended to read the full pattern before starting Row 1.
Early in my knitting journey, I skipped the materials section and bought yarn that looked similar to the designer’s recommendation. The finished cardigan was much heavier than intended and lost its shape after a few wears.
The information at the top of a pattern is as important as stitch instructions of a pattern is as important as the stitch instructions.
What You’ll Find at the Top of Every Pattern
Materials List
This section tells you exactly what you’ll need for the project, including:
If you substitute yarn, always match the recommended weight and check the gauge before starting.
Finished Measurements
These measurements refer to the completed project, not your body size. Garment patterns usually include:
Comparing these measurements with your own helps you choose the correct size and achieve the fit you want.
Skill Level
Most knitting patterns are labeled as:
If you’re exploring knitting patterns for beginners, selecting projects that match your current skill level will make the learning process more enjoyable and increase your chances of success.
Designer Notes
Many designers include helpful tips that shouldn’t be overlooked. You might find advice about yarn substitutions, blocking techniques, stitch patterns, or special construction methods that make the project easier to complete.
Taking five minutes to read these sections before casting on will help you understand the pattern, gather the right supplies, and avoid many mistakes that frustrate new knitters.
Understanding Tension (Gauge) – The Most Critical Element
If there is one key concept in knitting, it is gauge. It’s this: the gauge swatch should not be skipped. Gauge is the most important measurement in any knitting pattern, and ignoring it is one of the quickest ways to end up with a project that doesn’t fit.
What Is Knitting Gauge?
Gauge, also called tension, tells you how many stitches and rows should fit within a specific measurement, usually 4 inches (10 cm).
For example:
Gauge: 22 stitches and 30 rows = 4 inches (10 cm) in stockinette stitch
Why Gauge Matters
Every pattern is designed around a specific gauge. If your stitches are tighter than the designer’s, your garment will be smaller. If a loser, it will be larger and may lose its intended shape.
Skipping the gauge often leads to sizing issues in finished projects. I skipped the gauge swatch because I was eager to start a sweater. After weeks of knitting, I found it fit more like a child’s size than an adult’s.
The yarn was thicker than recommended, and I never checked my tension. That sweater became a decorative pillow cover instead of something I could wear.Since then, I never begin a project without knitting a swatch first.
How to Check Your Gauge
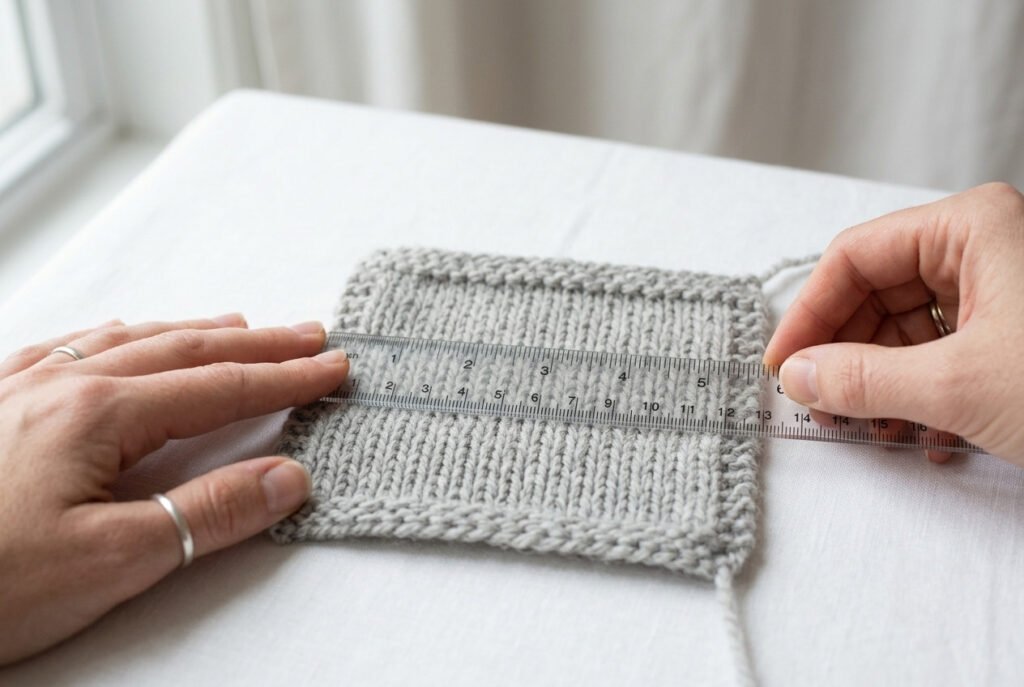
Follow these steps before casting on:
- Knit a swatch that measures at least 6 inches (15 cm) square.
- Wash and block it exactly as you plan to treat the finished project.
- Lay the swatch flat and measure the center, not the edges.
- Count both the stitches and rows within a 4-inch (10 cm) section.
- Compare your results with the pattern gauge.
How to Adjust Your Gauge
Checking the gauge before starting helps prevent sizing issues, unnecessary rework, and disappointing results. This small step makes a big difference, especially for sweaters, cardigans, and fitted garments.
Knitting Abbreviations Master List (K, P, CO, BO, and More)
One of the biggest challenges for new knitters is understanding pattern abbreviations. At first, they can appear unfamiliar, but once the basics are understood, knitting patterns become easier to follow.
Essential Knitting Abbreviations
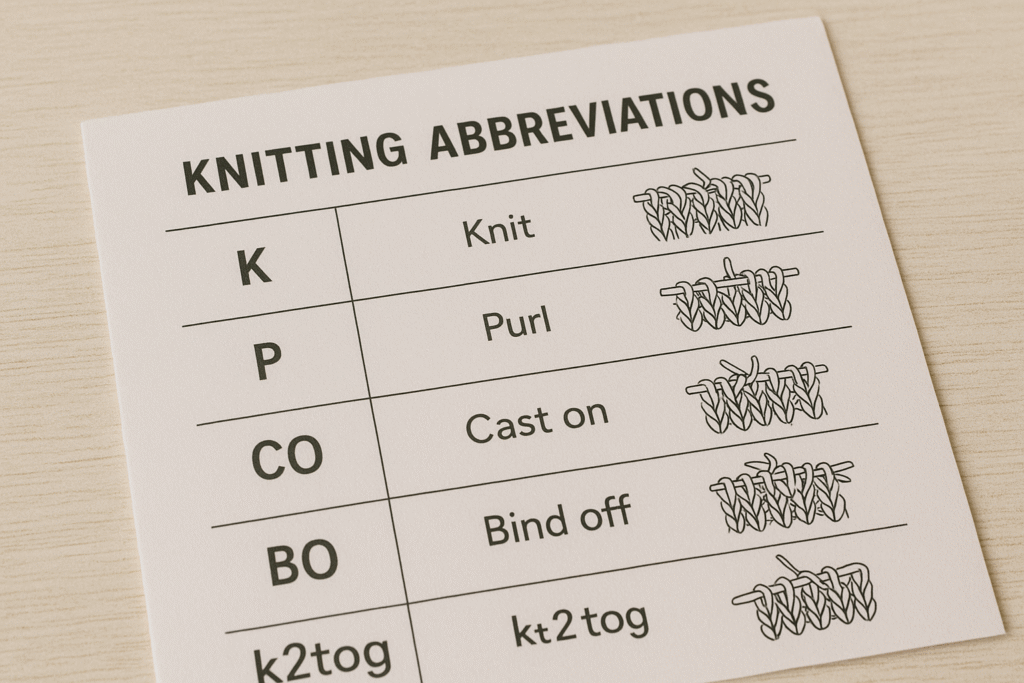
| Abbreviation | Meaning | Purpose |
| K or Knit | Knit stitch | Creates the basic knit stitch |
| P or Purl | Purl stitch | Creates the reverse stitch |
| CO | Cast On | Adds stitches to the needle |
| BO | Bind Off | Finishes the project edge |
| St or Sts | Stitch or Stitches | Individual loops on the needle |
| Row | Row | One complete pass across the work |
| Rnd | Round | One complete circle in round knitting |
These are the abbreviations you’ll see in almost every beginner pattern.
Common Increase and Decrease Abbreviations
| Abbreviation | Meaning |
| K2tog | Knit two stitches together |
| P2tog | Purl two stitches together |
| SSK | Slip, slip, knit |
| YO | Yarn over |
| M1 | Make one increase |
| M1L | Make one left increase |
| M1R | Make one right increase |
Understanding these terms will help you shape sleeves, necklines, hats, and lace patterns with confidence.
Edge and Finishing Terms
| Abbreviation | Meaning |
| RS | Right side of the fabric |
| WS | Wrong side of the fabric |
| Sl | Slip stitch |
| PM | Place marker |
| SM | Slip marker |
These instructions help you keep track of repeats, pattern sections, and shaping details.
UK vs. US Knitting Terms
Most modern knitting terminology is similar worldwide, but you’ll occasionally notice regional differences.
| US Term | UK Term |
| Bind Off | Cast Off |
| Yarn Over | Yarn Forward (some older patterns) |
| Gauge | Tension |
Whenever you’re using an international pattern, check the designer’s notes before you begin to avoid confusion.
Vintage Knitting Pattern Terminology
If you enjoy older knitting books or heirloom patterns, you may come across unfamiliar language.
Common vintage terms include:
I love collecting vintage knitting books and keep a cheat sheet beside me when I use them. The techniques haven’t changed much, but the wording has.
How to Read Written Pattern Instructions (Row-by-Row)
Once you understand knitting abbreviations, the next step is learning how to follow written pattern instructions. Every knitting pattern is divided into rows or rounds, with each line telling you what to do in sequence.
When I first started knitting, I focused on one stitch at a time and often lost my place. Over time, I learned that reading the entire row before picking up my needles made projects easier and reduced mistakes.
Understanding the Basic Format
A typical instruction looks like this:
Row 1: K7, P3, K7
This means:
The numbers show how many stitches to work, and commas separate each step.
Another Simple Example
You may also see:
CO 40 sts
This simply means:
Then the pattern might continue with:
Row 1: K2, P2 across
Row 2: P2, K2 across
Understanding Repeats
Pattern designers use repeats to avoid repeating the same instructions.
For example:
Row 3: K2, P2 to end
You may also see brackets:
Row 4: K5, [P3, K3] × 2, P5
Break it into smaller sections:
Reading repeats one section at a time makes complex patterns easier to understand.
Reading Direction
For written knitting patterns, read each instruction from left to right.
Flat Knitting
When knitting back and forth on straight or circular needles:
Although the fabric is turned after every row, instructions are still read from left to right.
Knitting in the Round
When knitting in the round, every round is worked from the right side of the fabric.
Follow each instruction in order without turning your work.
Common Pattern Instructions
You’ll frequently encounter instructions such as:
Work 4 rows in stockinette stitch
This means:
Another common instruction is:
Repeat Rows 1–8 until piece measures 10 inches.
After years of knitting sweaters, blankets, and accessories, these habits have saved me countless hours:
Following written instructions becomes easier once you stop interpreting every stitch individually and start seeing each row as a series of organized steps. With practice, you will read knitting patterns naturally and confidently, no matter how simple or complex the project.
Reading Knitting Charts: Grid Basics & Direction
Many lace, cable, and colorwork projects use charts instead of written instructions. Although charts may seem intimidating at first, they are simply visual maps that show exactly where every stitch belongs.
When I first tried a lace shawl, I avoided the chart and relied on the written instructions. After highlighting each row and learning the reading direction, I realized charts were faster and easier to follow than paragraphs of text. Now I reach for the chart first whenever a pattern includes one.
What Is a Knitting Chart?
A knitting chart is a grid that represents your fabric stitch by stitch. Instead of reading sentences, you follow symbols arranged in rows and columns.
Every chart follows the same basic structure:
Once you understand these basics, complex stitch patterns become easier to visualize.
How to Read Knitting Charts for Beginners
The direction you read depends on whether you’re knitting flat or in the round.
Flat Knitting
For projects worked back and forth:
This matches the natural direction your knitting progresses.
Knitting in the Round
For hats, cowls, and other circular projects:
Since you always work on the right side of the fabric, the reading direction remains the same.
Common Knitting Chart Symbols
Although every designer may use slightly different symbols, these are among the most common:
| Blank square | Knit stitch (right side) |
| ○ or • | Purl stitch |
| / | Left-leaning decrease |
| \ | Right-leaning decrease |
| — | Yarn over |
| Cable symbol or twist | Cable cross |
| × | Crossed stitches or special stitch (check legend) |
Always refer to the chart legend, as symbols can vary between designers and publications.
Why the Chart Legend Matters
Most modern knitting patterns include a legend that explains every symbol used in the chart. Never assume a symbol means the same thing in every pattern.
If a chart lacks a legend, check the designer’s website or pattern notes before starting. Confirming the symbols can prevent hours of frustration later.
Tips for Following Knitting Charts
After years of knitting lace shawls and cable sweaters, I’ve found a few habits that make charts much easier to read:
Using a row marker is a useful method because it keeps my eyes on the correct row and prevents me from accidentally repeating or skipping stitches.
Common Beginner Mistakes
If you’re new to charts, avoid these common errors:
Once you understand the grid layout and reading direction, charts become one of the fastest and most accurate ways to follow a knitting pattern. Many experienced knitters prefer charts because they provide a clear visual guide that is easier to scan than long blocks of written instructions.
Understanding Repeats (*, {}, [], and Parentheses)
Repeats are a key concept in knitting patterns. Instead of repeating the same instructions, designers group stitches into repeat sections, making patterns shorter, easier to read, and less repetitive.
When I first started knitting, the repeat instructions looked intimidating. I reread the same line several times because I wasn’t sure where to start or stop. Once I learned to break each instruction into smaller sections, making complex patterns easier to understand.
Why Knitting Patterns Use Repeats
Repeats organize stitch patterns and reduce unnecessary text. Instead of writing knit 2, purl 2 twenty times, a designer writes it once and tells you how many times to repeat the sequence.
Learning this system makes reading knitting patterns faster and less confusing.
Understanding the Asterisk (*)
The asterisk is the most common repeat symbol.
Example:
*K2, P2; repeat from * across
This means:
You may also see:
K2, P2 × 4
which means:
Understanding Parentheses ( )
Parentheses group stitches that should be repeated a specific number of times.
Example:
(K2, P2) five times
Understanding Brackets [ ]
Brackets work similarly but often organize larger stitch sections.
Example:
[K3, P2] three times
Understanding Braces { }
Some designers use braces for larger repeated sections or multiple-row pattern repeats.
Formatting varies between designers, so always check the pattern notes or legend before beginning.
How to Read Numbers After Repeats
You’ll often see instructions such as:
[K3, P1] × 2
This simply means:
Breaking long instructions into smaller sections makes them easier to understand.
Real Pattern Example
Consider this instruction:
Row 5: K3, (P2, K2) three times, P2, K3
Here’s how to work it:
Working through the row, section by section, is easier than interpreting the entire instruction at once.
Common Beginner Mistakes
Many knitters accidentally:
To avoid these problems:
After years of knitting sweaters, blankets, and socks, I’ve found that slowing down for a few seconds to understand a repeat saves more time than fixing mistakes later.
Once repeats become familiar, you’ll stop seeing patterns as long strings of abbreviations and start recognizing them as small, organized building blocks.
That’s the moment reading knitting patterns begins to feel natural, and even advanced projects become much less intimidating.
Figuring Out Your Size in Multi-Size Patterns
Most modern knitting patterns include multiple sizes in one document. While this makes a pattern suitable for many knitters, it can feel confusing if you’re seeing grouped numbers for the first time.
Once you understand the format, choosing the correct size becomes straightforward.
Understanding Multi-Size Pattern Formatting
Most patterns list sizes like this:
S (M, L, XL, XXL)
The instructions then provide matching numbers:
CO 48 (54, 60, 66, 72) stitches
This means:
Follow the number that matches your chosen size and ignore the others.
How to Choose the Right Size
Before casting on, compare your measurements with the pattern’s size chart.
Follow these simple steps:
- Check the finished measurements provided by the designer.
- Measure your bust or chest at the widest point.
- Compare your measurement with the pattern size chart.
- Consider the intended fit:
Selecting a size based on measurements rather than clothing labels usually produces a better fit.
Tracking Your Size Throughout the Pattern
Whenever the pattern provides multiple numbers, use the one in the same position as your selected size.
For example:
Sleeve length: 6 (7, 8, 9) inches
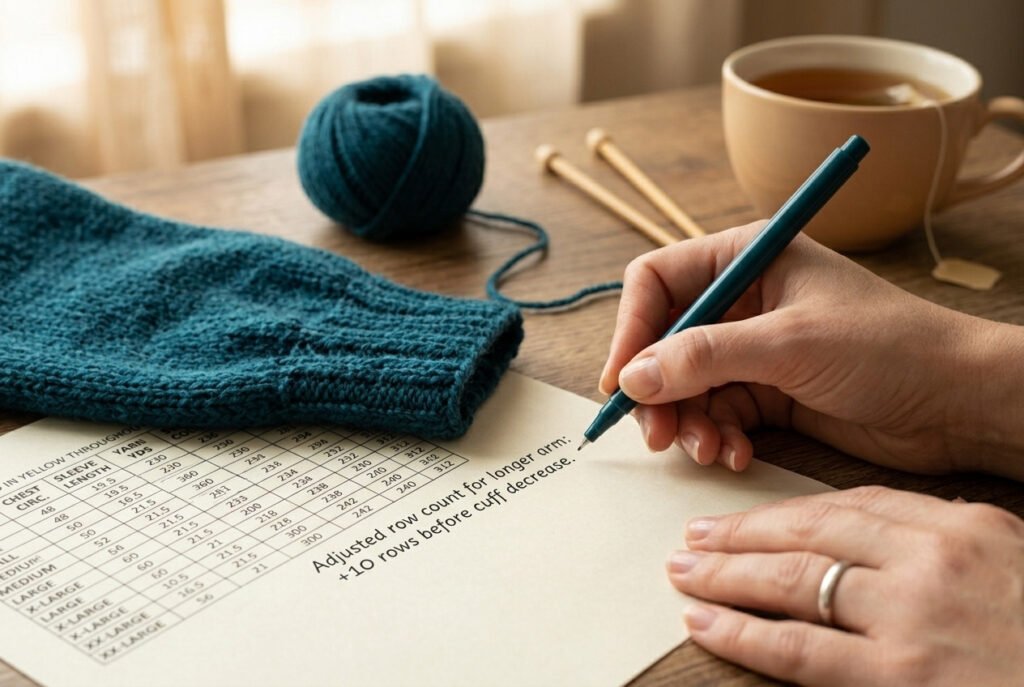
My Favorite Trick
Before I start any garment, I highlight every number for my chosen size with a yellow marker.
This helps reduce the need for frequent double-checking and makes long patterns easier to follow, especially when shaping sleeves or working multiple sections.
Common Beginner Mistakes
One mistake I made early on was switching sizes halfway through a sweater. The body was knitted using the Large instructions, but I followed the Medium numbers for the sleeves. They looked fine individually, but didn’t match at the shoulders.
Now I pause before every new section to confirm I’m using the correct size.
Quick Tips for Success
To avoid sizing mistakes:
Once you understand how multi-size knitting patterns are organized, following them becomes second nature. Instead of feeling overwhelmed by rows of numbers, you’ll quickly find the information you need and knit with greater confidence.
Why Learning to Read Knitting Patterns Matters

Starting to knit can seem overwhelming due to the numerous abbreviations and numbers used in patterns. However, learning how to read these instructions is crucial for maximizing the knitting experience. Understanding how to decipher these instructions is the basic key to .
It moves beyond simply following visual cues or basic stitches to truly comprehending the structure and design intent of any knitted piece, empowering the creator to create precisely what they envision. Beyond simply following along, truly reading a knitting pattern allows for adaptation and customization.
Once you grasp the underlying logic, you can adjust sizes, modify stitch patterns, or even combine elements from different designs to personalize your creations. This deeper understanding transforms you from a follower of instructions into a confident creator, capable of troubleshooting, experimenting, and bringing unique textile visions to life.
Common Mistakes When Reading Knitting Patterns
Even experienced knitters occasionally misread a pattern. The difference is that they recognize mistakes early and know how to fix them before they affect the entire project.
When I first started knitting garments, I assumed I could skip some optional steps and figure things out as I went. I ended up frogging hours of work because I overlooked simple instructions. Learning to recognize these common mistakes will save you time, yarn, and frustration.
Most Common Knitting Pattern Mistakes
| Skipping the gauge swatch | It feels like an unnecessary extra step | Always knit, block, and measure a swatch before starting |
| Choosing the wrong size numbers | Multiple sizes are listed together | Highlight your size throughout the pattern |
| Misreading repeats | Asterisks, brackets, and parentheses look similar | Read the entire instruction and count stitches after each repeat |
| Ignoring designer notes | Beginners jump straight to Row 1 | Read the complete pattern before casting on |
| Using the wrong yarn substitute | Similar colors are mistaken for similar yarns | Match yarn weight, fiber content, and gauge |
| Reading charts in the wrong direction | Right-side and wrong-side rows are confusing | Mark the active row with a ruler or sticky note |
| Misunderstanding abbreviations | Similar abbreviations like K2 and K2tog are easy to confuse | Keep a knitting abbreviations cheat sheet nearby |
| Losing track of rows | Long repeats become difficult to follow | Use a row counter, stitch markers, or highlight completed rows |
| Ignoring vintage terminology | Older patterns use different language | Check unfamiliar terms before beginning |
The Biggest Mistake: Ignoring Gauge
Of all the mistakes I’ve made over the years, skipping the gauge swatch was the most expensive.
I once spent nearly three weeks knitting a wool sweater with beautiful cable panels, only to discover it was several inches too small because my tension didn’t match the designer’s.
That project taught me a lesson I still follow: spending 30 minutes knitting a swatch is better than spending weeks knitting a garment that doesn’t fit.
Simple Habits That Prevent Mistakes
Before every project, I follow the same checklist:
These habits take minutes and prevent most pattern-reading mistakes.
Reading knitting patterns is a skill that improves with every project. Instead of rushing through instructions, slow down and treat the pattern like a roadmap. Understanding abbreviations, repeats, charts, and sizing before you begin will make your knitting experience smoother and more enjoyable.
Adapting & Customizing Patterns for Your Needs
One of the most rewarding parts of knitting is making a project your own. Once you understand how to read knitting patterns, you can confidently customize them to match your style, measurements, and yarn without changing the design.
I rarely knit a sweater exactly as written. I usually add an inch to the sleeves since I like folding the cuffs over my hands in winter. That small adjustment makes every garment feel more comfortable and personal.
Changing Yarn Weight
Yarn substitution is a common pattern modification, but it should be done carefully.
Before changing yarn, check the following:
- Match the yarn category (fingering, sport, DK, worsted, bulky, or super bulky).
- Compare the recommended gauge with your new yarn.
- Knit and block a gauge swatch before starting the project.
- Check the fiber content, since wool, cotton, and acrylic behave differently after washing.
Even if two yarns have the same weight, they can produce different results. Always knit a swatch.
Adjusting Length
Many knitting patterns are easy to customize for height or preference.
You can:
Make changes within repeating stitch sections when possible to maintain the pattern design.
Modifying the Size
Sometimes your ideal fit falls between sizes in a pattern. Adjust the size by:stitches per inch using the gauge swatch.
- Determine how many extra inches you need.
- Multiply inches by stitches per inch.
- Ensure the final stitch count works with the pattern repeat.
For example, if a stitch pattern repeats every four stitches, your new stitch count must also be divisible by four.
Simple Customizations That Work Well
Once you’re comfortable reading knitting patterns, you can personalize almost any project by:
Quick Reference: Knitting Terms & Measurements Glossary
Keeping a small glossary nearby makes it easier to understand unfamiliar instructions and follow new patterns with confidence.
| Cast On (CO) | Creates the starting stitches |
| Bind Off (BO) | Finishes the knitting securely |
| Gauge | Number of stitches and rows within a measured area |
| Repeat | Work the same instruction again |
| Right Side (RS) | The front or visible side of the fabric |
| Wrong Side (WS) | The back or inside of the fabric |
| Yarn Over (YO) | Creates an increase and decorative eyelet |
| Stitch Marker | Helps identify sections or repeats |
| Blocking | Washing and shaping finished knitting |
| Frogging | Unraveling stitches to correct mistakes |
Common Yarn Weights
Understanding yarn weight is important when following a pattern.
After years of knitting sweaters, blankets, and accessories, I’ve learned that keeping a printed glossary and abbreviation cheat sheet beside my project saves time and reduces mistakes. Even experienced knitters check terms or measurements occasionally. Don’t hesitate to reference one when working through a new pattern.
FAQs: How to Read Knitting Patterns?
Final Thoughts
Reading knitting patterns becomes easier with every project. Experienced knitters begin by decoding unfamiliar abbreviations, symbols, and stitch counts, but with practice, those instructions become second nature.
After years of knitting sweaters, blankets, and socks, I have found a few simple habits that make every project smoother:
Whether you are working through knitting patterns for beginners or trying your first detailed sweater, confidence comes from understanding the instructions rather than memorizing them.
Learning how to read knitting patterns helps improve the outcome of future projects. It makes it easier to follow new designs and understand unfamiliar instructions.
Your next step is simple: choose an easy pattern, read it from start to finish before casting on, and look up any unfamiliar terms. The more patterns you read, the more natural they become. Soon, you will be able to pick up almost any project and knit with confidence.
Also Read: How to Join in Round in Knitting?