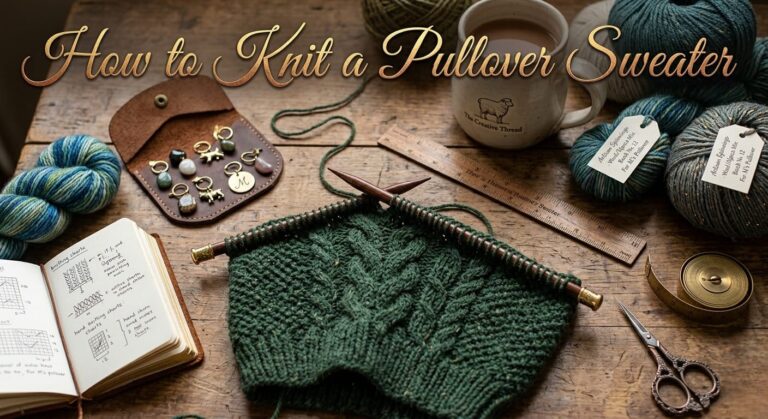
How to Use Stitch Markers for Knitting: Easy Guide
Understanding how to use stitch markers for knitting can significantly improve accuracy and confidence at every stage of a project. These small tools solve common challenges such as losing your place, miscounting stitches, or overlooking shaping instructions. For beginners, they simplify learning; for experienced knitters, they streamline complex patterns and maintain consistency.
Stitch markers act as visual reference points placed on the needle or within the fabric. They help identify pattern repeats, mark round transitions, highlight increases or decreases, and maintain stitch counts without frequent recounting. With regular use, they become an intuitive part of the knitting process rather than an added step.
In this guide, you’ll learn the practical foundations of stitch markers—what types are available, how to position and move them correctly, and how to apply them effectively across different knitting styles and project types.
What Are Stitch Markers and Why Do They Matter
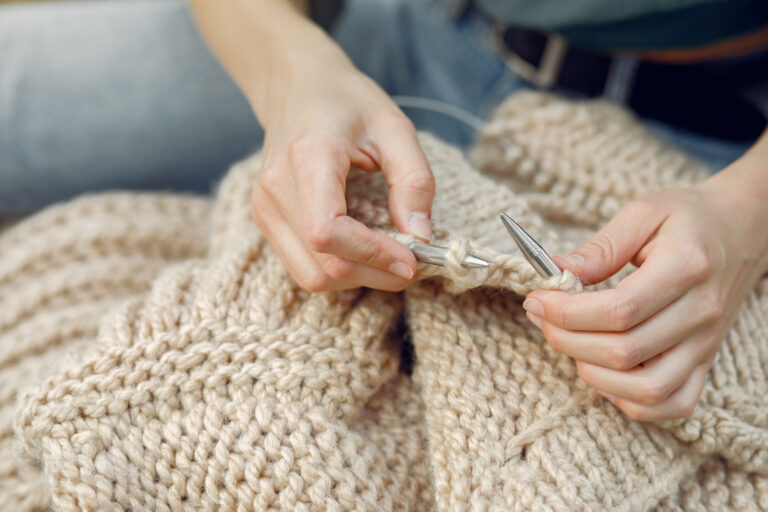
A stitch marker is a small knitting accessory—usually a ring or clip—placed on the needle or directly into the fabric to highlight a specific point in your work. Unlike pins, knots, or improvised markers, stitch markers do not interfere with stitch formation or tension. They either move up the needle as you knit or remain fixed in the fabric, serving as reliable visual reference points.
Stitch markers are essential because most knitting patterns rely on structure and precision. Whether you are shaping a garment, maintaining lace or cable repeats, or working in continuous rounds, small counting errors can quickly affect the overall result. Stitch markers reduce this risk by allowing knitters to track key locations visually, minimizing interruptions and maintaining workflow.
Also Read: How to Read Knitting Patterns? Beginners Guide
By shifting the mental load from constant counting to simple visual confirmation, stitch markers help knitters work more efficiently and accurately. This is especially valuable in complex projects where consistency and placement determine fit, symmetry, and pattern clarity.
Stitch markers are particularly helpful when:
- Working patterns with repeating stitch sections
- Knitting in the round without a visible seam
- Managing multiple increases or decreases across a row
- Returning to a project after a pause and re-orienting quickly
Used correctly, stitch markers function as quiet guides—keeping your work organized while allowing your focus to remain on technique, rhythm, and craftsmanship.
Also Read: How to Count Rows in Knitting: A Complete Guide
Types of Stitch Markers in Knitting
Stitch markers come in several designs, each suited to specific knitting techniques, yarn weights, and project needs. Understanding the differences helps knitters choose the most effective option instead of treating markers as interchangeable tools. The right marker improves flow; the wrong one can interrupt tension or snag yarn.
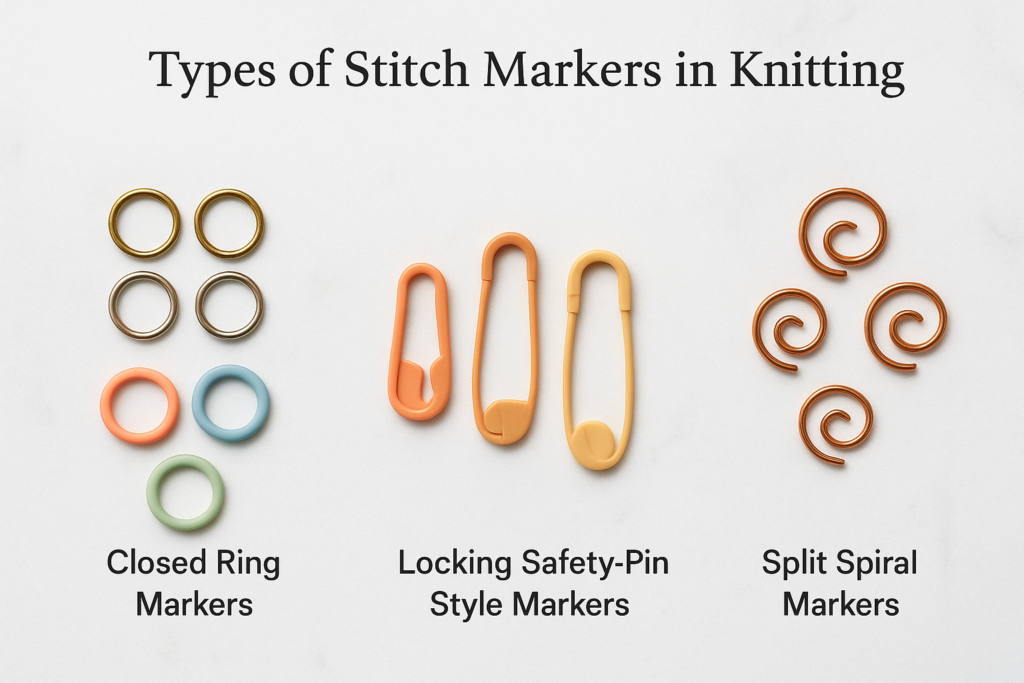
Ring Stitch Markers
Ring stitch markers are closed loops that slide freely along the knitting needle. They are placed between stitches and move upward as the fabric grows. Because they have no opening, they must be added when stitches are transferred onto the needle, not clipped on mid-row.
These markers are widely used for:
- Marking pattern repeats
- Indicating the beginning or end of a round
- Separating stitch sections in flat or circular knitting
Ring markers work best when their diameter closely matches the needle size. A smooth surface is important when working with fine yarns or detailed stitch patterns.
Also Read: How to Measure Circular Knitting Needles? Beginners Guide
Locking Stitch Markers
Locking stitch markers open and close like a small safety pin. Unlike ring markers, they can be attached directly to a stitch or slipped onto the needle at any point. This flexibility makes them one of the most versatile tools.
They are commonly used for:
- Tracking rows or pattern progress
- Marking increases, decreases, or shaping points
- Identifying mistakes to correct later
Because locking markers can be removed without disturbing stitches, they are helpful in garment construction and long-term projects.
Split or Removable Stitch Markers
Split stitch markers resemble a small spiral or hook that slides into the fabric rather than sitting on the needle. These markers stay in place until removed, making them ideal for reference points that should not shift as the work progresses.
They are particularly effective for:
- Counting rows in flat knitting
- Marking completed pattern sections
- Highlighting key fabric locations
Split markers are often preferred when reviewing work after several rows or when stepping away from a project.
Choosing the Right Stitch Marker
Selecting the correct type depends on how the marker will be used. Needle-based markers work best for pattern structure, while fabric-attached markers excel at tracking progress or corrections. Many knitters keep a combination of styles on hand to match different techniques and yarn types.
Using the appropriate stitch marker improves accuracy and reduces interruptions, allowing knitting to remain smooth, rhythmic, and focused.
How to Place and Slip Stitch Markers Step by Step
Correct placement is essential for stitch markers to work as intended. When positioned properly, they stay aligned with the fabric structure and require minimal attention as you knit.
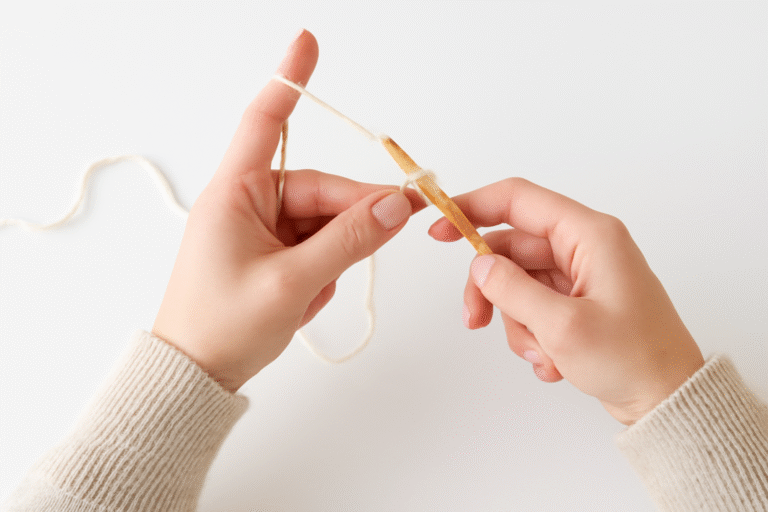
How to Place a Stitch Marker
To place a marker in knitting, work stitches up to the exact point you want to highlight. This may mark a pattern repeat, a shaping section, or the start of a round.
- Slip the stitch marker onto the right-hand needle.
- Continue knitting as instructed.
The marker sits between stitches and moves upward naturally as the fabric grows, maintaining its position without affecting tension.
Also Read: How to Cast on Knitting with Two Needles: A Complete Guide
How to Slip a Stitch Marker
When you reach a marker while knitting, it should be moved rather than worked.
- Transfer the marker from the left needle to the right needle.
- Do not knit or purl the marker.
- Continue with the next stitch.
This technique, commonly referred to as slip marker knitting, keeps the marker in its intended place and prevents it from being knitted into the fabric.
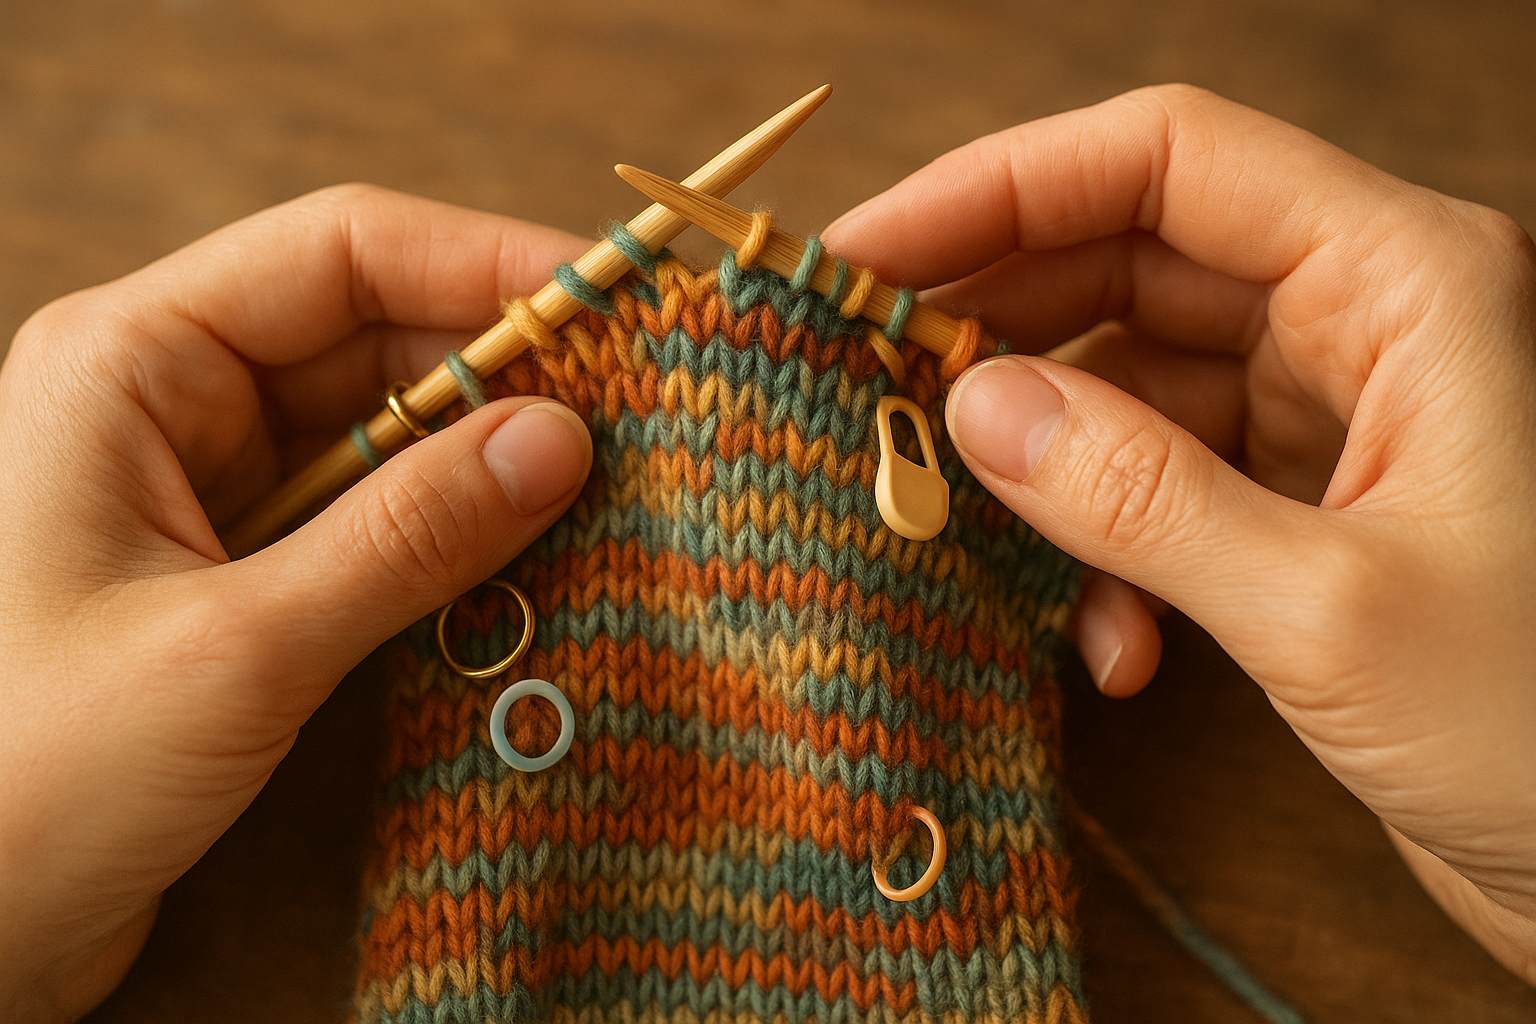
Using Markers in the Round vs Flat Knitting
In circular knitting, stitch markers usually indicate the beginning of a round, helping maintain accurate stitch counts and pattern alignment. In flat knitting, markers are often placed within rows to separate stitch sections or track shaping points.
The method of placing and slipping markers remains the same in both styles—the difference lies in what the marker represents.
Also Read: How to Connect Circular Knitting: Easy Guide
Common Uses for Stitch Markers
Stitch markers are highly adaptable tools that support accuracy, efficiency, and clarity throughout a knitting project. While beginners often start by using them sparingly, experienced knitters rely on markers to manage complex construction, pattern logic, and long-term projects with confidence.
Below are the most practical and widely used ways stitch markers improve both simple and advanced knitting.
Marking the Beginning of a Round
When knitting in the round, there is no visible seam to indicate where one round ends and the next begins. A stitch marker placed between the first and last stitch clearly defines this transition point and prevents unintentional spiraling.
Many knitters use a distinct color or style for the beginning-of-round marker so it remains instantly recognizable, especially in projects with multiple markers.
Also Read: How to Knit a Hat with Straight Needles? Beginner’s Guide
Tracking Pattern Repeats
Stitch markers are invaluable for patterns with repeating stitch sequences, such as lace, cables, or textured motifs. Placing markers between repeats divides long rows into manageable sections, making it easier to spot errors early rather than several rows later.
If a yarn over is missed or a cable twist is incorrect, the mistake is usually contained between two markers—saving time and reducing frustration.
Managing Increases and Decreases
Garment shaping depends on the precise placement of increases and decreases. Stitch markers clearly identify where shaping should occur, ensuring symmetry and consistent sizing.
They are especially useful for:
- Raglan sweater construction
- Sleeve shaping
- Hat crowns
- Balanced increases, such as paired make-one stitches
Also Read: How to Add Stitches When Knitting: A Complete Guide
Markers remove guesswork and help knitters maintain even shaping across rows or rounds.
Counting Stitches, Rows, and Sections
On long cast-ons or wide projects, stitch markers can be placed every 10 or 20 stitches to simplify counting and confirm totals at a glance. Locking markers attached to fabric edges are often used to track completed rows, short-row turns, or pattern sections.
This method eliminates constant recounting and makes it easier to resume work after a break.
Identifying Mistakes and Fix Points
When an error is noticed but cannot be corrected immediately, a removable or locking marker can be clipped into the fabric at the exact location. This allows knitting to continue uninterrupted while preserving a clear reference point for later repair.
Markers are also useful for highlighting dropped stitches, laddering, or areas that require reinforcement during finishing.
Also Read: How to Fix a Dropped Stitch: A Complete Guide for Knitters
Supporting Lace, Cables, and Colorwork
In lace and cable knitting, markers segment complex charts into readable sections, making pattern alignment easier to maintain. In colorwork, different marker colors can identify color changes, motif boundaries, or transition points.
Using varied marker colors for different functions—such as one color for cables and another for round starts—adds clarity without additional notes.
Advanced and Creative Uses for Stitch Markers
Beyond standard applications, stitch markers can be adapted in creative ways:
- Stack multiple markers to track row counts within pattern repeats.
- Clip markers into short-row turning points
- Mark matching rows on separate pieces to assist with seaming
- Thread waste yarn through dropped stitches as a temporary holder.
Some knitters even attach small written notes to markers for complex projects, reinforcing pattern logic without disrupting workflow.
Best Stitch Markers for Beginners and Different Projects
Selecting appropriate stitch markers is an important early decision that directly affects accuracy, ease of learning, and overall knitting efficiency. For beginners, the primary goal is not variety or decoration, but functional reliability. Well-chosen stitch markers support correct technique, reduce common errors, and allow knitters to focus on stitch formation rather than constant correction.
Markers that are poorly suited to the project or yarn can interfere with tension, snag fibers, or create unnecessary confusion. For this reason, understanding what features matter most is essential.
Essential Features of Beginner-Friendly Stitch Markers
Stitch markers intended for beginners should be designed to assist learning, not complicate it. The most effective options consistently share these characteristics:
- Clear visibility: High-contrast colors make markers immediately recognizable within the fabric
- Lightweight construction: Markers should not distort stitches or pull on the needle
- Smooth, rounded edges: Prevent yarn splitting and fiber damage
- Simple operation: Easy-to-open locking mechanisms or flexible rings reduce handling errors
Markers that are oversized, heavy, or intricately shaped often hinder progress rather than help.
Recommended Stitch Marker Types for Beginners
A small, functional selection is sufficient for most early projects.
Locking stitch markers are widely considered the most practical choice for beginners. They can be attached directly to stitches or fabric, repositioned easily, and removed without unravelling work. This makes them particularly effective for tracking rows, marking shaping points, and identifying errors.
Flexible ring stitch markers, typically made from plastic or silicone, are best suited for needle-based marking. They slide smoothly over needles and are commonly used to indicate the beginning of a round or separate pattern sections.
Split or removable markers are useful once basic skills are established, particularly for marking rows or fixed reference points within the fabric.
Matching Stitch Markers to Project Requirements
As projects vary in structure, marker choice should adapt accordingly:
- Flat projects (scarves, blankets): Locking markers for row counting and progress tracking
- Circular projects (hats, socks): Smooth ring markers for defining round transitions
- Garments: A combination of ring and locking markers to manage shaping and sections
- Fine yarn or lace: Small, snag-free markers with polished finishes
Also Read: How Long Does It Take to Knit a Sweater? Complete Guide
Beginners do not need extensive collections. A limited assortment encourages proper technique and reduces distraction.
Common Errors When Choosing Stitch Markers
New knitters often select markers based on appearance rather than function. Decorative or novelty markers may be visually appealing, but frequently cause problems, including:
- Snagging delicate yarns
- Obscuring stitch definition
- Creating uneven tension due to excess weight
Functional markers should always take priority during skill development.
Progressing Beyond Beginner Stitch Markers
As experience increases, knitters naturally refine their preferences. Advanced projects may require specialised markers for lace charts, colorwork alignment, or complex garment construction. At that stage, marker selection becomes informed by technique and project demands rather than trial and error.
For beginners, consistency and simplicity remain the most effective tools.
Troubleshooting Stitch Marker Mistakes
Even experienced knitters occasionally encounter issues with stitch markers. Most problems are easily preventable or correctable with proper technique. Understanding common mistakes ensures markers remain effective guides rather than obstacles.
Marker Falls Off the Needle
Cause: Ring markers that are too large for the needle or slippery yarn.
Solution:
- Select markers that fit snugly without stretching stitches.
- For slippery yarn or bulky needles, use locking markers that clip securely.
- In circular knitting, place the beginning-of-round marker just after the first stitch to reduce end-of-needle slipping.
Forgetting to Slip the Marker
Cause: Accidentally knitting the marker into the fabric instead of transferring it between needles.
Solution:
- Stop immediately upon noticing the error.
- Carefully undo the stitch without disturbing the surrounding stitches.
- Reposition the marker correctly on the needle.
- Develop a consistent habit of noticing markers at the start of each row or round.
Overuse or Misplacement of Markers
Cause: Placing too many markers can clutter the work and disrupt workflow.
Solution:
- Use markers strategically for key points: pattern repeats, round beginnings, and shaping sections.
- Remove markers once their purpose is served to reduce visual clutter and maintain smooth knitting.
- Consider stacking or using different colored markers to differentiate multiple functions without over-marking.
Yarn Snags or Tension Issues
Cause: Rough or decorative markers can catch fibers; markers that protrude may create uneven tension or ladders.
Solution:
- Opt for smooth, polished metal, silicone, or lightweight plastic markers for delicate yarns.
- Ensure ring markers are slim enough to sit neatly under the yarn thickness.
- Tug gently after each row to check for snagged yarn.
Fabric Markers Shifting or Losing Alignment
Cause: Markers attached to the fabric may drift during knitting or shaping.
Solution:
- Use locking markers or thread waste yarn through the stitch for temporary holding.
- After increases or decreases, remove, work the stitch, and replace the marker to maintain position.
- For complex patterns, assign distinct colors to different functions (e.g., orange for cables, green for round start).
Advanced Tips for Experienced Knitters
Once comfortable, stitch markers can support more complex techniques:
- Combine markers with written notes for large projects.
- Use markers as visual checkpoints during long rows or pattern repeats.
- Place temporary markers when experimenting with new techniques or lace/cable patterns.
- Stack multiple markers to track row progress in multi-row repeats.
With practice, marker placement becomes intuitive, integrating seamlessly into the knitting workflow rather than requiring conscious thought. Proper use of stitch markers ensures consistent tension, accurate pattern execution, and efficient progress across any project.
Also Read: How to Knit a Gauge Swatch: Quick Guide
Frequently Asked Questions
Conclusion: How to Use Stitch Markers for Knitting
Stitch markers are indispensable tools that transform knitting from a task of constant counting into a precise, enjoyable, and efficient craft. Whether you are a beginner learning foundational techniques or an experienced knitter tackling complex lace, cables, or garment shaping, the correct use of stitch markers ensures accuracy, consistency, and smooth workflow.
Choosing the right type, whether ring, locking, or removable, for your project, yarn, and technique lets markers function seamlessly to support pattern tracking, row counting, and error prevention. Proper placement and slipping techniques, along with strategic use, reduce mistakes, save time, and maintain tension, helping you produce clean, professional results.
Beyond basic uses, stitch markers serve advanced purposes such as tracking multi-row repeats, marking short-row turns, color changes, or aligning pieces for seaming. With consistent practice, markers become intuitive extensions of your knitting process, guiding your hands and eyes through even the most complex patterns.
Ultimately, mastering how to use stitch markers in knitting empowers you to work with confidence, precision, and creativity. By integrating these small yet powerful tools into your practice, every project—simple or intricate—becomes more manageable, accurate, and enjoyable.
Also Read: How to Knit a Moss Stitch: Best Expert Guide