How to Slip a Stitch in Knitting: Easy 6 Steps
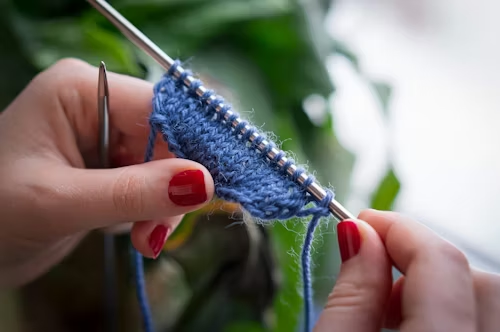
Learning how to slip a stitch in knitting is one of the easiest ways to make your work look neater, more polished, and more professional. Slipping a stitch means moving a stitch from the left needle to the right without knitting or purling it, resulting in tidier edges, smoother fabric, and striking textured or colorwork patterns.
For new knitters, slipping stitches helps build good habits that result in more even tension and neater edges. For experienced knitters, it becomes a valuable tool for shaping, reinforcing fabric, and making patterns stand out, all while keeping knitting simple.
This guide explains when to slip stitches, how to slip knitwise or purlwise, and the effect of yarn placement. You’ll learn to use slipped stitches confidently in any project.
What Is a Slip Stitch in Knitting?
A slip stitch is a stitch that you move from the left needle to the right needle without knitting or purling it. When you slip a stitch, you do not make a new yarn loop. The old loop stays the same, so it looks a little taller in the fabric.
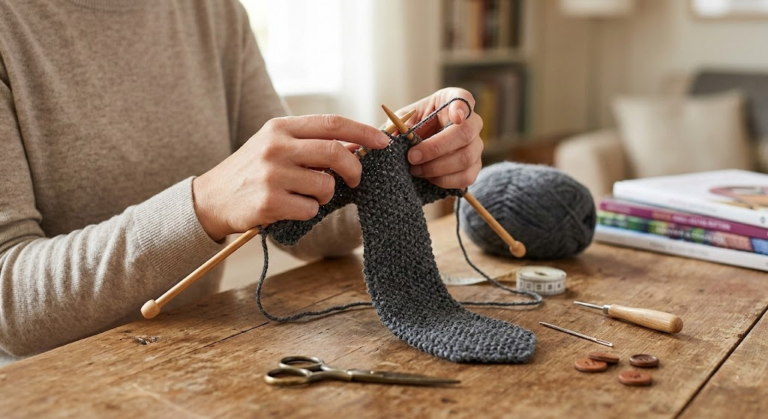
When you slip a stitch, you are not working it, so this changes how the fabric behaves rather than the number of stitches. That is why slip stitches are often used for neat edges, adding texture, or strengthening certain parts of a project. In easy patterns like garter stitch or stockinette, slipping the first stitch of each row makes clean, even borders. This helps when joining pieces and gives your finished work a neat look.
In knitting patterns, you may see instructions such as:
These instructions tell you how to put the needle in and where the yarn should go when you slip a stitch. Knowing this helps you avoid twisted stitches, loose edges, or extra loops.
Slip stitches are commonly used in:
For beginners, slipping a stitch is often one of the first skills used to help keep edges even. For knitters with more experience, this simple trick can shape your work or add new looks without making the project harder.
Also Read: How to Read Knitting Patterns? Beginners Guide
Why Learning to Slip a Stitch Matters in Knitting
Knitting designers intentionally slip stitches to control fabric behavior, not just its appearance. When you learn how and when to slip stitches, you control the structure, strength, and finish of your projects.
You use slipped stitches to create smooth, professional-looking edges. You strengthen areas that get frequent wear, such as sock heels. Improve color contrast without carrying long floats. Add texture without increasing the stitch count. Maintain even tension across rows.
Unlike increases or decreases, slipping a stitch keeps the number of stitches on your needle the same. This consistency makes slip stitch techniques especially useful in structured knitting patterns where shape, alignment, and durability matter.
Also Read: How to Add Stitches When Knitting: A Complete Guide
Slip Knitwise vs Slip Purlwise: Key Differences
When a pattern tells you to slip a stitch, how you slip matters. The main ways are knitwise and purlwise, each affecting the stitch differently.
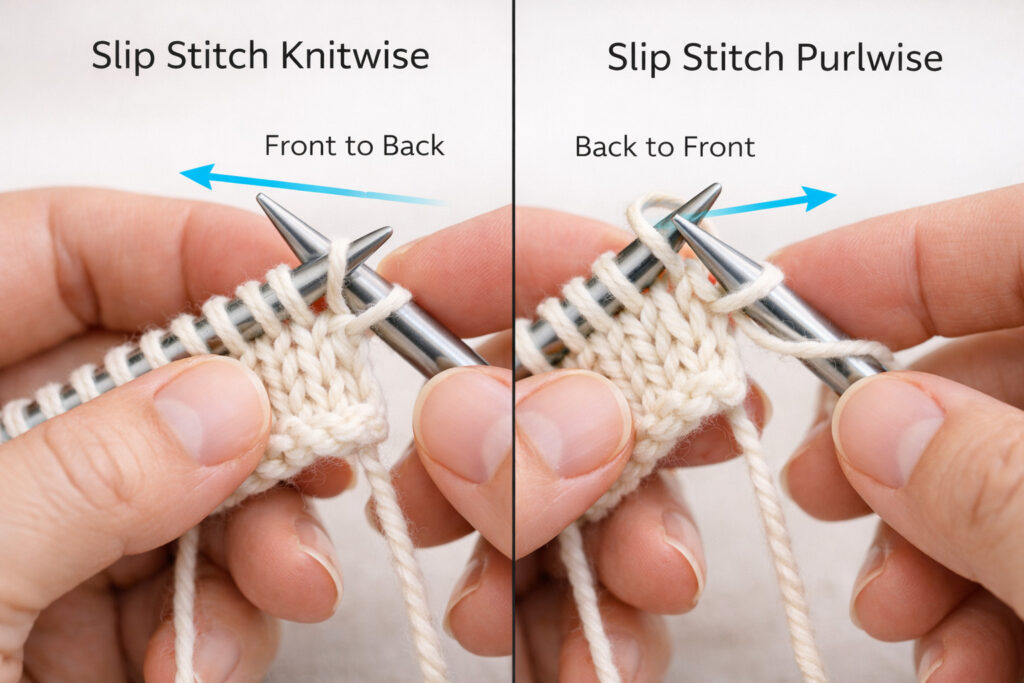
Slip Stitch Knitwise
Slipping a stitch knitwise means you insert the right needle into the stitch as if you were about to knit it, moving from the front (the side facing you) to the back of the stitch.
How it works:
Slipping knitwise twists the stitch, useful in certain decreases, decorative edges, and structured patterns. Unintentional use may distort fabric.
Slip Stitch Purlwise
To slip purlwise, insert the needle as if to purl, back to front.
How it works:
Most knitting patterns assume stitches are slipped purlwise unless otherwise stated. This method preserves stitch orientation and is the safest choice for clean edges and beginner projects.
Understanding Yarn Placement
Understanding how to slip stitches also involves paying attention to yarn position. Yarn placement is as important as needle direction.
Yarn in Back (abbreviated WYIB) means holding the working yarn behind your needles. This is commonly used on the side of the fabric that faces outward (right side) and creates smooth, elongated stitches along the edge.
Yarn in Front (abbreviated WYIF) means bringing the working yarn to the front side of the needles. This is typically used on the inward-facing side (the wrong side) of the fabric, or to create special decorative slip-stitch effects.
If a pattern says slip 1 wyib, keep the yarn behind the needles as you slip. If it says slip 1 wyif, bring the yarn to the front before slipping the stitch.
Incorrect yarn placement is a common beginner mistake, but it is easy to fix once it is understood.
Step-by-Step Guide: How to Slip a Stitch Correctly
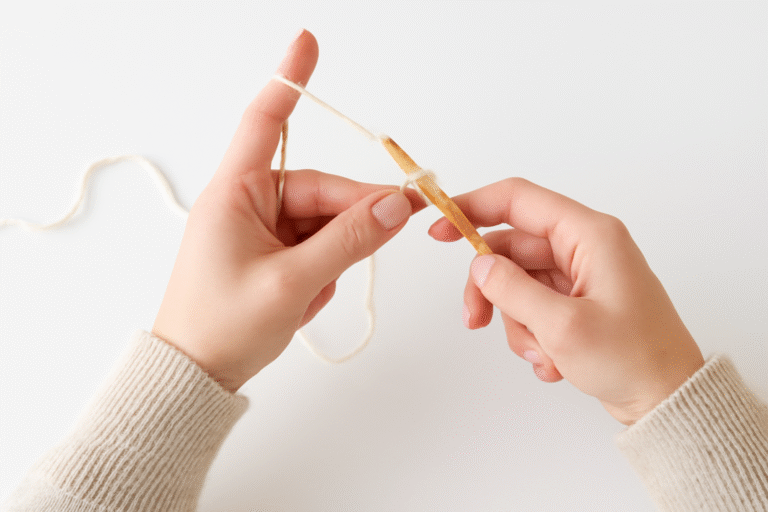
Slipping a stitch is simple, but doing it correctly depends on needle direction and yarn placement. Follow these steps slowly at first, then increase speed as the motion becomes familiar.
What You’ll Need to Practice
Also Read: How to Cast on Knitting with Two Needles: A Complete Guide
Using medium-sized needles and yarn makes it easier to see how the stitch moves and how the yarn behaves.
Step 1: Read the Pattern Instruction First
Before slipping a stitch, always check whether the pattern specifies:
If the pattern simply says “s l 1”, it usually means slip purlwise with the yarn in the correct position for the row.
Step 2: Slip a Stitch Knitwise
Use this method only when the pattern calls for it.
- Hold the yarn in the back of the work
- Insert the right needle into the first stitch as if to knit (front to back)
- Slide the stitch onto the right needle without wrapping the yarn
- Let the stitch drop off the left needle
Slipping knitwise slightly twists the stitch. This is useful for certain decreases, decorative edges, or structured stitch patterns, but it should not be used by default.
Step 3: Slip a Stitch Purlwise
This is the most common and beginner-friendly method.
- Move the yarn to the front or back as directed
- Insert the right needle as if to purl (back to front)
- Transfer the stitch directly to the right needle
- Keep the stitch untwisted and continue knitting
Most knitting patterns assume stitches are slipped purlwise unless otherwise stated.
Step 4: Slipping the First Stitch for Clean Edges
For flat projects like scarves, dishcloths, or blankets:
This creates smooth, chain-like edges that lie flat, making seaming much easier.
Step 5: Watch Yarn Placement Carefully
Incorrect yarn placement is the most common beginner mistake.
Always move the yarn before slipping the stitch, not after.
Step 6: Practice and Observe the Fabric
Work 8–10 rows, then bind off loosely. Look closely at:
Try slipping stitches knitwise on one swatch and purlwise on another to see the difference clearly. This hands-on comparison helps the technique click faster.
Also Read: How to Count Rows in Knitting: A Complete Guide
Tools and Tension Tips for Slipping Stitches
Using the right tools makes learning slip stitches much easier—especially for beginners.
Choose smooth needles to help stitches slide without snagging. Metal needles, including circulars or brands like Addi, are ideal because the yarn glides effortlessly. This reduces hand strain and helps maintain even tension while you practice.
When slipping a stitch, always keep your grip relaxed. Tight slipped stitches can pull the fabric inward, causing puckered edges or uneven columns. A good habit is to consciously loosen your hands after every slipped stitch, especially at the beginning of rows.
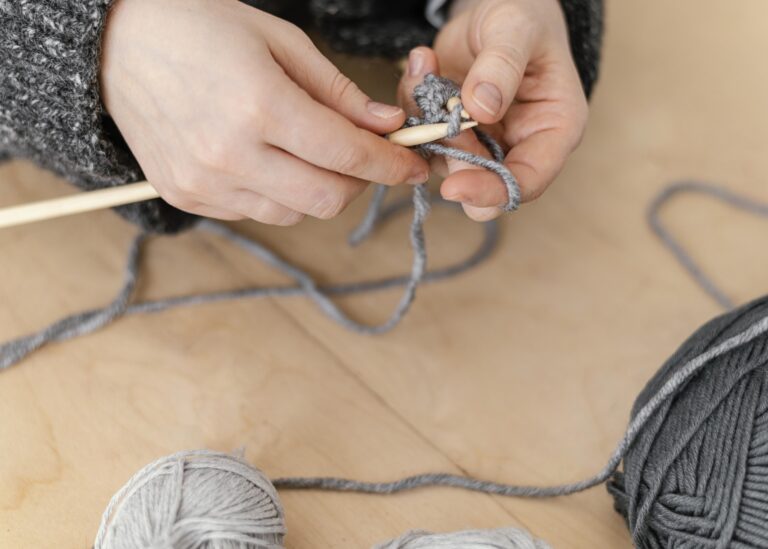
Practice on scrap yarn before committing to a project. Light-colored, smooth yarn makes it easier to see stitch orientation and yarn placement. Try slipping every other stitch across a row to observe how slip stitches create a woven, textured look—even without changing colors.
Pro tip: Always block your swatch after washing. Blocking reveals how slip stitches settle into neat vertical columns, helping you judge your true tension.
Also Read: How to Block a Knitted Scarf: 5 Easy Steps
Common Slip Stitch Mistakes (And How to Fix Them)
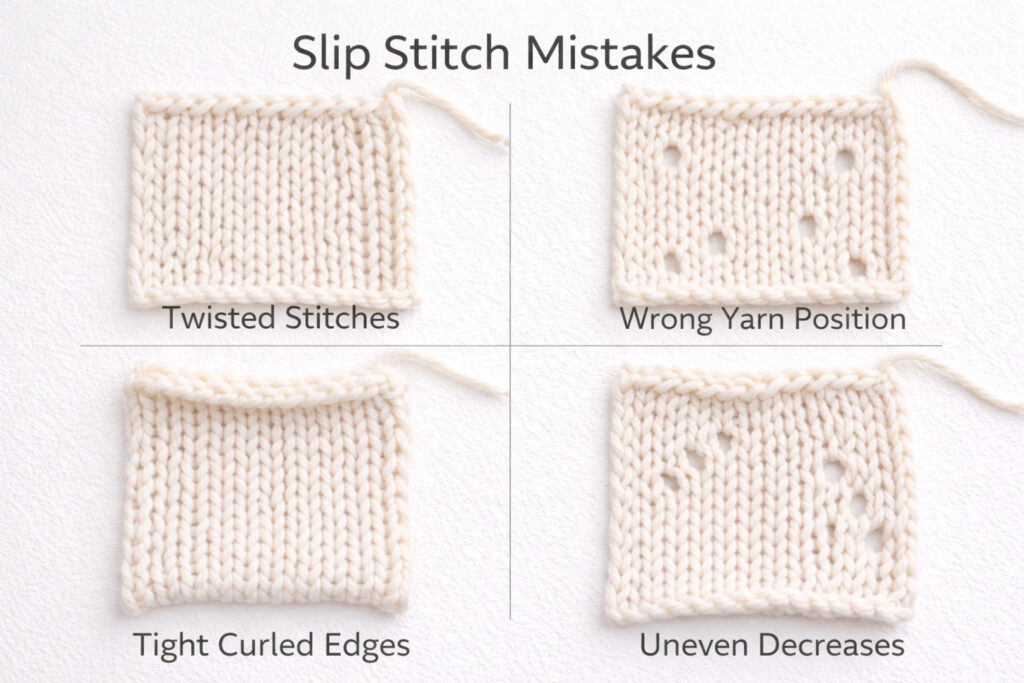
Twisted Stitches
If your fabric looks tight, rope-like, or uneven, you may be slipping stitches knitwise when the pattern expects purlwise.
Fix: Unless stated otherwise, slip stitches purlwise. This keeps the stitch orientation correct and prevents twisting.
Also Read: How to Fix a Dropped Stitch: A Complete Guide for Knitters
Yarn in the Wrong Position
Loose strands, unexpected holes, or long floats often happen when the yarn is held incorrectly during a slip.
Fix: Pause before slipping the stitch and confirm whether the yarn should be in front (wyif) or in back (wyib). One quick check prevents rows of mistakes.
Tight or Curled Edges
Pulled-in edges usually mean the slipped stitch was worked too tightly.
Fix: Slip the stitch loosely and avoid tugging the yarn afterward. Consistent tension at row beginnings is key to clean selvedges.
Uneven Decreases Near Slipped Stitches
If decreases like SSK look crooked next to slipped stitches, tension, or stitch orientation is likely inconsistent.
Fix: Slip the first stitch knitwise, return it to the left needle, then knit two together through the back loops. This creates a clean, left-leaning decrease that matches surrounding stitches.
Slip Stitch Patterns Beginners Can Try
Once you’re comfortable with the basics, slip stitch patterns add texture without complexity.
Linen Stitch creates a dense, woven fabric by slipping every other stitch. It’s reversible and excellent for scarves and washcloths.
Mosaic Knitting (Beginner Level) uses slipped stitches to carry color across rows while knitting with only one color at a time. This is perfect for learners exploring colorwork without having to manage floats.
Farrow Rib combines slipped stitches with knit and purl sections to create a thick, stretchy fabric ideal for cowls and blankets.
Skip Stitch Patterns elongate stitches for airy, modern textures—great for warm-weather garments.
Cast on about 30 stitches and work 30–40 rows of each pattern to clearly see how slipped stitches behave in real fabric.
Also Read: How to Knit a Moss Stitch: Best Expert Guide
Tips From Long-Term Knitting Experience
Experienced knitters rely on a few habits to keep slip stitches clean and consistent:
These small habits prevent frustration and build confidence quickly.
Also Read: How to Use Stitch Markers for Knitting: Easy Guide
How Slip Stitches Improve Knitted Edges
One of the most useful applications of slip stitches is edge control.
Slipping the first stitch of every row creates a neat, chain-like selvedge that:
Also Read: What Is Edge Stitch in Knitting? Easy Guide
For flat knitting, this technique is often the first reason knitters learn how to slip a stitch correctly.
Slip Stitches in Colorwork Knitting
Slip-stitch colorwork allows knitters to create bold patterns with just one color per row. Instead of carrying floats across the back, slipped stitches pull color from previous rows upward, keeping the fabric warm and stable.
This technique is commonly used in:
Mastering slip stitches before attempting colorwork ensures clean patterns and even tension throughout the project.
Also Read: How to Change Colors While Knitting? Beginners Tips
Advanced Slip Stitch Techniques
Once you understand the basics, slip stitches become a powerful design and construction tool rather than just a simple maneuver. Advanced techniques use slipped stitches to control fabric height, hide floats, refine edges, and improve tension across complex knitting patterns.
Slip Stitches in Brioche and Structured Fabrics
In brioche-style fabrics and related textured knitting, slip stitches are used to build height and elasticity. Typically, a stitch is slipped purlwise with the yarn in front, then the next stitch is knit, and the slipped stitch is passed over. This stacks yarn across rows, creating the signature deep ribs and plush texture brioche is known for.
Because slipped stitches in brioche remain unworked for multiple rows, consistent yarn placement is critical. Even slight tension changes can distort the fabric, which is why many knitters practice this technique on swatches before starting garments.
Also Read: How to Knit a Gauge Swatch: Quick Guide
Slip Stitches in Fair Isle and Stranded Knitting
In stranded colorwork, slip stitches can be used strategically to manage floats. By slipping selected stitches, the carried yarn is drawn closer to the fabric surface, helping anchor long floats and reduce snagging on the inside of the work.
This approach is especially useful in areas with wide color spacing, such as yokes or borders. Slipped stitches subtly secure floats without adding bulk or disrupting the pattern’s visual rhythm.
Creating Invisible Edges in Stockinette
For clean, nearly invisible edges on flat stockinette knitting, many advanced knitters slip the first and last stitches of right-side rows knitwise with the yarn held in back. This technique tightens the edge structure while maintaining the fabric’s smooth face.
When worked consistently, this method produces edges that:
This is particularly effective for scarves, panels, and garments that will be seamed later.
Also Read: How to Finish a Knitting Project: A Complete Guide
Pairing Slip Stitches With Yarn Overs
Slip stitches can also be combined with yarn overs to create elongated stitches and decorative lace effects without forming large eyelets. Instructions such as slip 1, yarn over allow the yarn to travel across the stitch, adding vertical length and visual drama while maintaining fabric stability.
This technique is commonly used in modern lace, brioche hybrids, and textured shawls where airflow and stretch are desired without open holes.
Tension Control for Continental Knitters
For knitters using the continental style, tension control becomes especially important with slipped stitches. A common advanced method is to lightly anchor the working yarn under the slipped stitch as it passes over the needle. This creates automatic tension regulation, reducing loose floats and improving stitch consistency across rows.
This habit is subtle but highly effective in patterns that involve frequent slipping or multi-row slipped stitches.
Why Slipping Stitches Matters for Your Projects
Mastering how to slip a stitch in knitting directly affects the appearance and durability of finished projects.
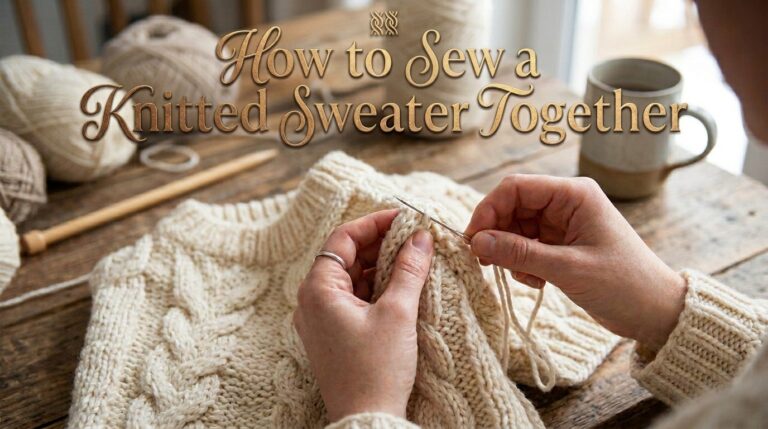
In socks, slip stitches reinforce heels and gussets, improving wear resistance and structure. In sweaters, they create professional-quality hems, stable necklines, and clean seams. In modular or patchwork blankets, slip stitches improve alignment and reduce distortion at joins.
Beyond aesthetics, slip stitches also streamline finishing. Clean edges, stable fabric, and predictable tension reduce the need for heavy blocking or corrective seaming, saving significant time at the final stages of a project.
Because slip stitches appear across techniques—ranging from simple selvedges to advanced brioche and colorwork—knitters who understand them deeply can adapt patterns more confidently and troubleshoot issues faster.
This is why comprehensive guides on how to slip a stitch in knitting consistently perform well: knitters return to them for clarification, refinement, and pattern-specific problem-solving as their skills grow.
FAQs: About How to Slip a Stitch in Knitting
Conclusion: How to Slip a Stitch in Knitting
Slipping a stitch is an understated yet influential knitting technique. It requires no extra tools, yet shapes fabric structure, edge quality, durability, and clarity. Understanding slip stitches lets knitters make informed choices—moving beyond instructions.
From clean selvedges to reinforced heels, colorwork to textured fabrics, slip stitches feature across all skill levels and styles. Their value is consistency: preserving stitch count while reshaping the fabric. This power shines in structured designs, garments, and projects needing control and durability.
By learning to slip knitwise or purlwise, watching yarn placement, and practicing even tension, knitters build strong habits. These improve every project, not just those needing slip stitches. Over time, the technique becomes intuitive, supporting skills like brioche, mosaic knitting, and tailored construction.
Mastering how to slip a stitch in knitting means understanding fabric behavior—not just steps. With this knowledge, slipping a stitch becomes a reliable tool that elevates the quality, longevity, and professionalism of your knitting.
Also Read: What is Garter Stitch in Knitting? Easy Knitting Explained