How Do You Make a Slip Knot for Knitting? Easy Guide
Every knitter knows that the slip knot is the secret handshake of the craft. It might look like just a simple loop, but it locks the yarn onto the needle and sets the whole piece in motion. If the slip knot is even a little off, the entire base of the knitting wobbles, throwing the tension and the appearance of the fabric out of whack.
Getting the slip knot right, once and for all, is the starter ribbon for every new knitter. It keeps the first set of stitches from going out of control, allowing the knitter to relax and focus on the task at hand. When the first loop is neat and the tug is just right, the rest of the project follows suit and ends up looking like it walked off the shelf at a fancy store.
Also Read: How to Add Stitches When Knitting?
What Exactly Is a Slip Knot?
A slip knot is a loop that sits on your needle and can be easily tightened or loosened. Unlike a knot that won’t budge, this one is adjustable and helps you start your project smoothly, allowing you to achieve the correct tension before you begin stitching.
The slip knot is the first knot you make before putting stitches on the needle. It grabs the working yarn and holds it, giving you a solid starting point. If you need to start over, just pull it loose and try again, making it perfect for new knitters!
Why the Slip Knot Matters
It’s a stretchy loop that holds onto the needle but can be easily adjusted. You can slide it along the yarn and pull it snug from the very first row. This flexibility helps keep the stitches even and the project at the proper tension.
You use a slip knot right at the start, regardless of what you’re planning to knit—perhaps a cozy scarf, a warm sweater, or a large blanket. Once the knot is on the needle, you can begin casting on stitches, and your project can take off. The loop is tight enough to prevent the yarn from slipping off, and it provides the first stitch with something to hook onto, keeping your work secure.
Also Read: How to Cast on Knitting with Two Needles
Step-by-Step Instructions (Easy Guide)
When you start knitting, making a slip knot is usually the first thing you do. Although it may seem straightforward, it’s crucial because it provides your project with a solid and clean foundation. No matter whether you’re a righty or a lefty, you can pick it up fast, and you’ll be ready to keep going on whatever you’re making.
Learning to tie a slip knot the right way is about more than just following steps; it’s about feeling confident knowing you can handle your yarn and needles. In this section, we’ll show you how to do it clearly, so anyone, regardless of their experience, can start with a tight and stretchy ring.
Slip Knot for Right-Handed Knitters

If knitting is your hobby, you must have formed a slip knot many times. If you are right-handed, you will find that creating a slip knot is a simple and intuitive process. Begin by taking the yarn such that the tail end dangles freely and the working yarn is issuing from the ball. Make a loop with the working yarn with the tail crossing over the working yarn.
Subsequently, with your right hand, pierce the loop with your right-hand needle from the front to the back. With the needle positioned in this way, catch the working yarn using the tip of the needle and pull back through the loop that you made. Slightly pull both the tail and working yarn to tighten the loop formed around the needle. That is the slip knot you obtain.
Slip Knot for Left-Handed Knitters
If you knit left-handed, making a slip knot is just as easy once you adjust the way you move your hands slightly. Start by letting the tail of the yarn hang down while the working yarn goes back to the ball. Make a small loop, but this time cross the working yarn over the tail, not under it.
Now, take your left-hand needle and slide it through that loop from the front to the back. Keep it in place and use the needle tip to grab the working yarn, pulling it through the loop you just made. Don’t tug too hard; just give a gentle pull on both the tail and the working yarn so the knot sits snug on the needle but can still slide a little. You’ll end up with a neat slip knot, all set for your first stitches.
Alternative Slip Knot Methods
Most people make a slip knot with their fingers. With practice, you may want quicker and more controlled methods. One helpful trick is to use the needle itself, making it easier to start neatly without struggling to work the yarn by hand.
Using a Knitting Needle Method
Using the needle instead of your hand often gives you a more accurate slip knot. If you’ve had loose or twisted loops, you’ll notice the difference quickly. This method provides a neat, even loop from the start, which is helpful in large projects where small mistakes add up.
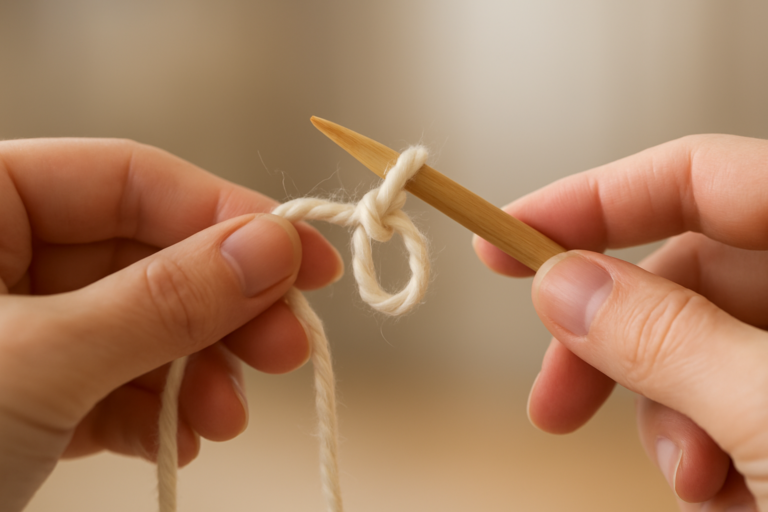
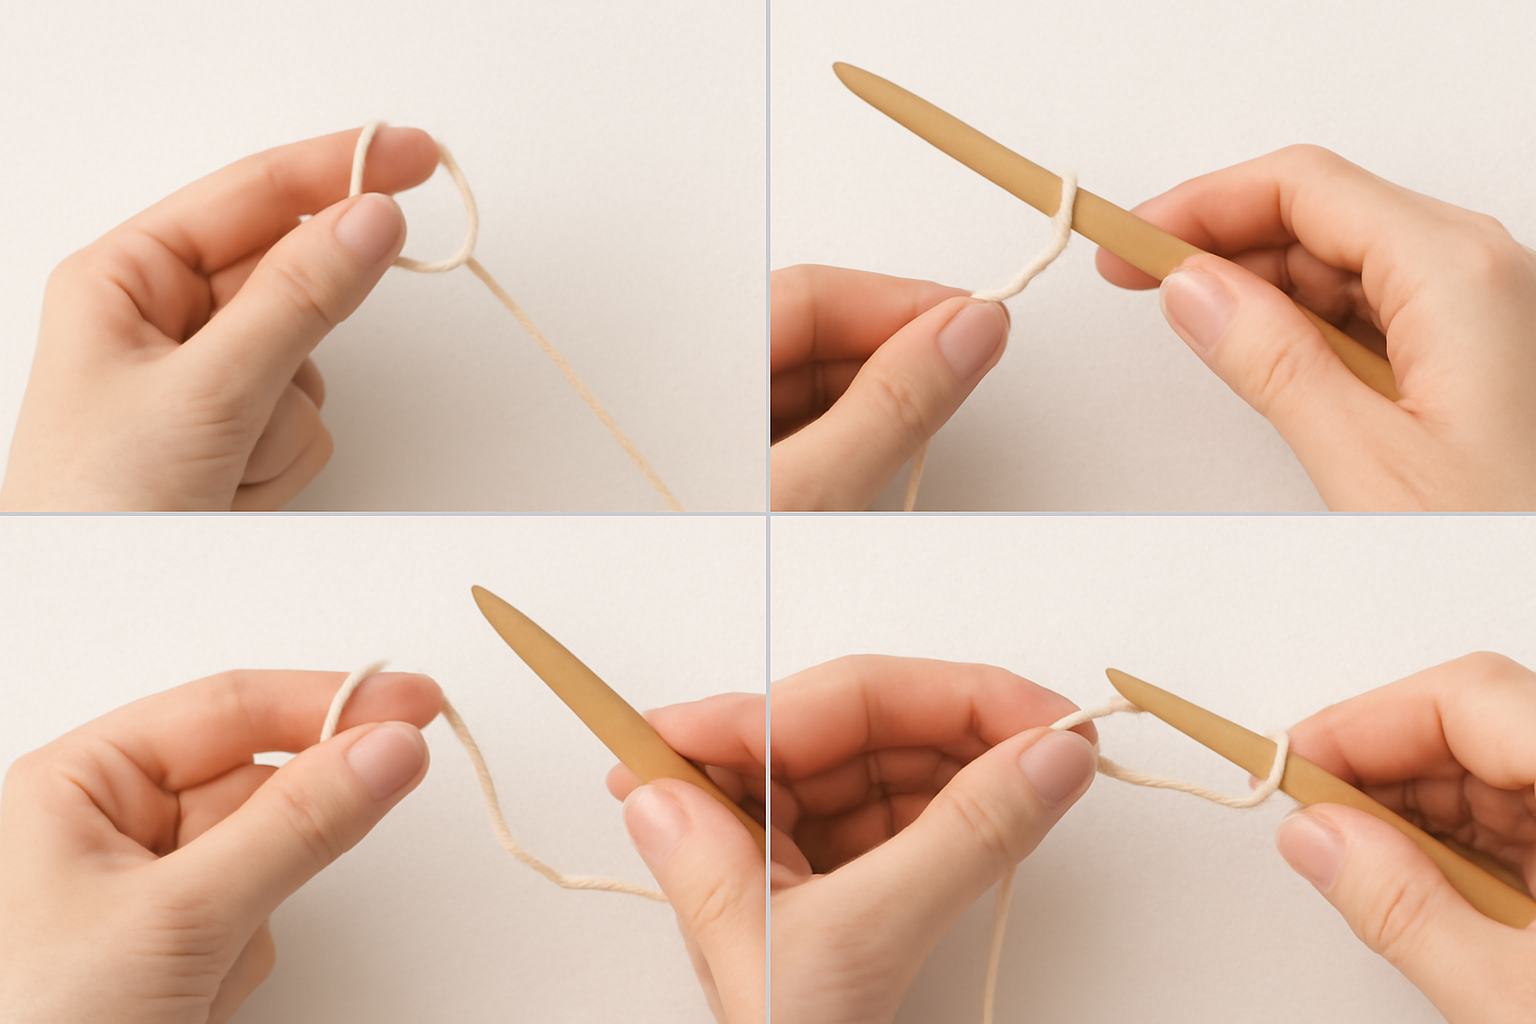
To make a slip knot with a knitting needle, start by holding the yarn in your left hand. Make sure the end is free and let the yarn roll smoothly off the ball; this helps prevent tangling. Next, pick up an empty knitting needle with your right hand. You are now ready to begin forming the slip knot with the needle.
Step-by-Step Needle Method:
- Create the loop: Bring the yarn across the needle from front to back, allowing it to cross itself and form a loop.
- Pull the stitch: Slide the needle under the new loop, then lift it up and gently pull the working yarn so the loop tightens into a knot that can slide.
- Place and pull: Slide the slip knot to the end of the needle to give it room, and then pull it tight enough to keep it in line, but not so tight that it won’t slide when you’re ready to start knitting.
Alternative Slip Knot Methods (using knitting needles)
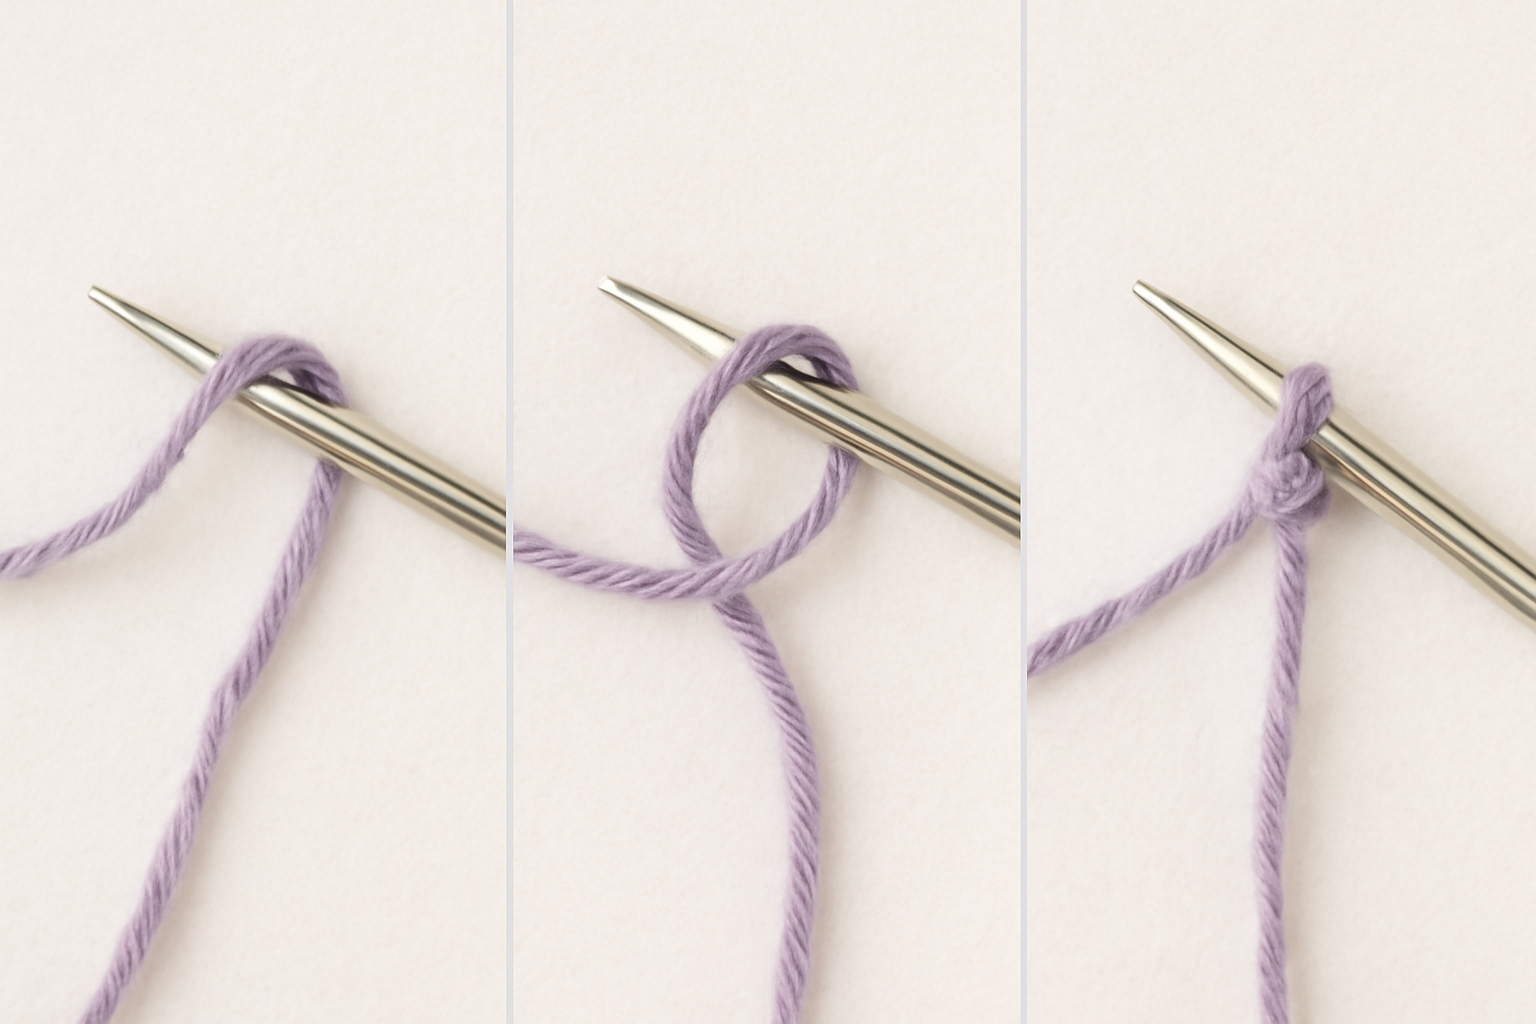
- Pick up one of your knitting needles in your opposite hand.
- Loop the Yarn: Lay the working yarn over the needle. Let a little bit of yarn—just a few inches—hang loose at the end. You’ll use that tail later to finish the edge.
- Make the First Loop: With the yarn on the needle, take the working yarn (the one that’s feeding from the ball) and wrap it around the needle one more time to the right. That gives you a new loop that sits next to the one already there.
- Move from the Knot: Now, use the point of the knitting needle to lift the first loop you just draped. Slide that loop over the second one and off the needle’s tip.
- Tighten and Fix: After the first loop is off, you’ll see only one loop still on the needle. Gently pull the working yarn and the tail at the same time to snug it up and secure it in place.
Ensure the knot is tight enough not to come undone but still loose enough to move up and down the needle without getting stuck. That little bit of wiggle room is what lets the slip knot work the way it should.
Common Mistakes and Troubleshooting
1. Pulling the Tail Instead of the Working Yarn
Issue: Many beginners mistakenly pull the yarn tail (loose end) through the loop to form the slip knot.
Why It’s Wrong: This creates a non-adjustable loop or a loose knot that may untie.
Fix: Always pull the working yarn—the part attached to the yarn ball—through the loop to form the slip knot.
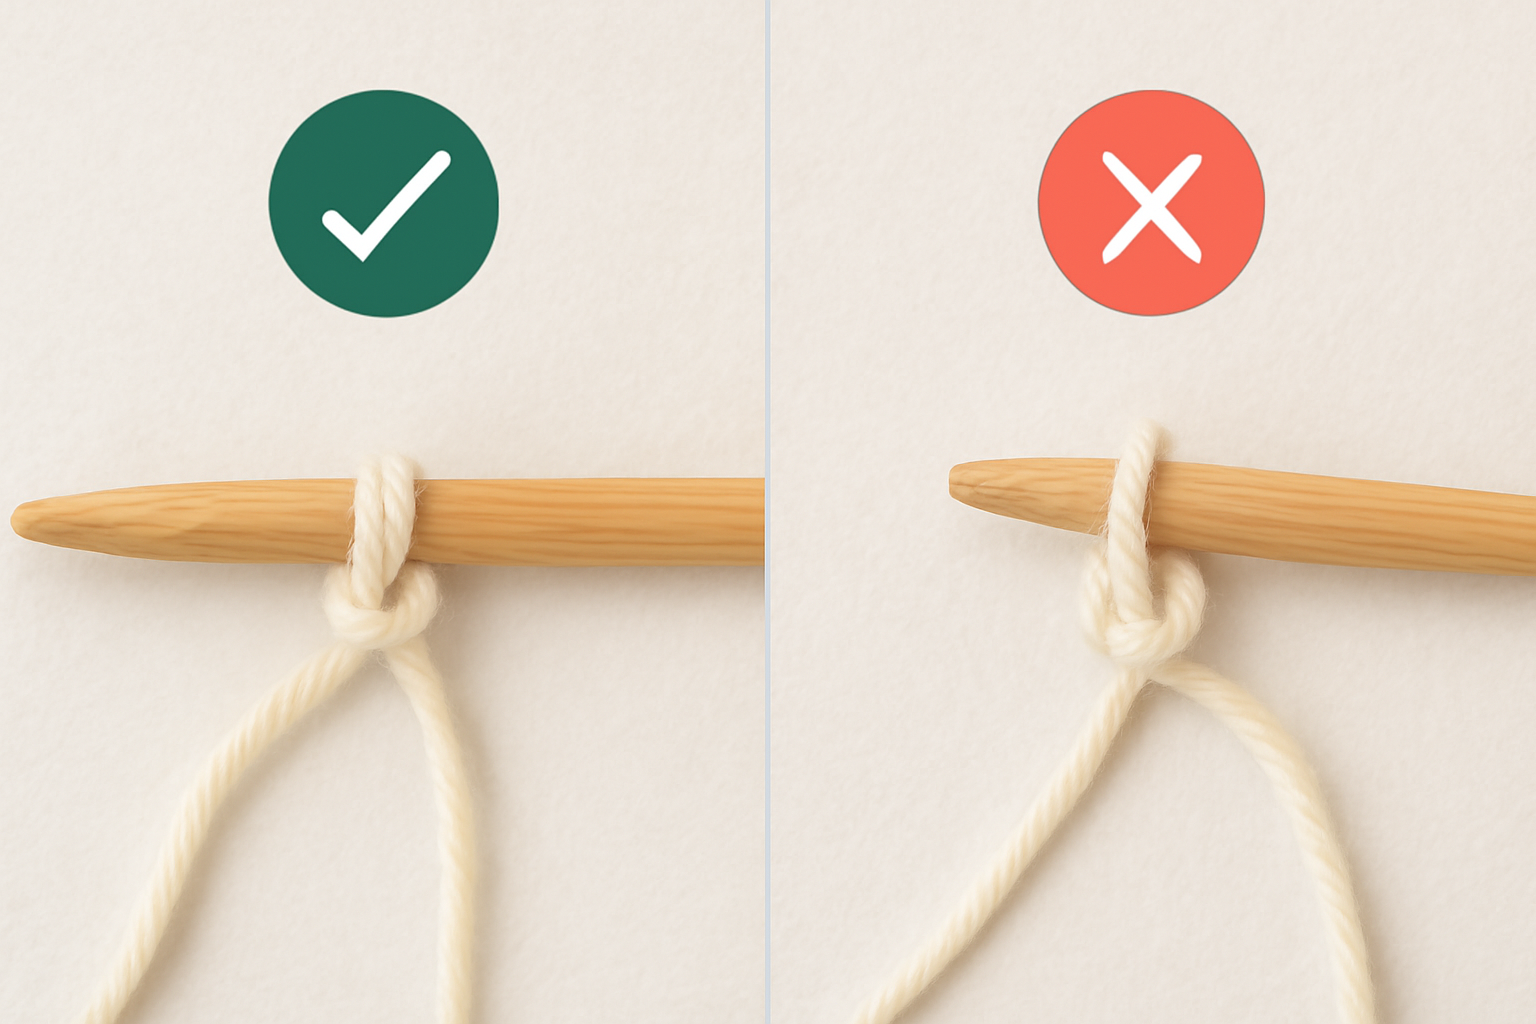
2. The Knot Is Too Tight on the Needle
Issue: The loop is pulled too snugly around the knitting needle.
Why It’s Wrong: This makes it difficult to knit the first row and can cause tension distortion.
Fix: Leave the loop snug but not tight—it should glide smoothly along the needle.
3. Tail Left Too Short
Issue: Cutting or starting with a very short tail (less than 6 inches).
Why It’s Wrong: Leaves no yarn for weaving in ends or casting on stitches.
Fix: Always leave 6–8 inches of yarn before making your slip knot.
4. Loop Formed Backwards
Issue: The loop is twisted in the wrong direction.
Why It’s Wrong: Can result in a backward knot that doesn’t slide correctly.
Fix: Ensure the tail crosses over the working yarn from front to back before pulling through.
5. Knot Not Holding or Comes Undone
Issue: The loop pulls out or collapses when tension is applied.
Why It’s Wrong: Indicates the knot was not adequately secured.
Fix: After placing the loop on the needle, pull both ends gently to tighten the base of the knot without distorting the loop.
6. Using a Complicated Method
Issue: Overthinking the process or using unnecessary steps.
Why It’s Wrong: Makes a simple knot overly complex, increasing the chances of mistakes.
Fix: Use the basic overhand loop method—easy, fast, and reliable.
Also Read: How to Fix a Dropped Stitch
Quick Troubleshooting Guide
- If the knot doesn’t slide, you likely pulled the tail yarn instead of the working yarn. Redo it using the correct string.
- If the loop tightens uncontrollably, don’t pull only one end; instead, constantly adjust both ends together to prevent it from tightening further.
- If your loop feels uneven or lopsided, take a second to remake it, ensuring smooth motion and equal yarn tension.
- If the knot slips off the needle, hold the loop gently in place until you begin casting on, and keep a slight tension on the working yarn.
- If you can’t see what’s happening, use a lighter-colored or thicker yarn for practicing. It’s helpful to understand the loop structure.
Also Read: How to Count Rows in Knitting
Slip Knot FAQs (Beginner Questions)
Final Thoughts
Getting the slip knot right is one of the first big wins for any new knitter, like earning your first badge. It’s not just some ordinary loop; it’s the sturdy, adjustable starting point from which every future stitch will grow. With just a little practice, your hands will begin tying it on autopilot, and that small success will boost your confidence for the entire project.
That humble knot may seem tiny, but it opens the door to a lifelong hobby that’s both enjoyable and environmentally friendly. As you stick with knitting, you’ll unlock a whole universe of textile magic, from trying out new cast-on methods to learning exciting stitch patterns and finally reading complete knitting charts with ease. Every beautiful piece begins with that simple slip knot, your very first step into a world of creativity, comfort, and craft.
Also Read: How to Read Knitting Patterns?