How to Cast on Knitting with Two Needles: A Complete Guide
Knitting is a wonderfully creative hobby, beginning with a crucial first step: cast on. This initial edge sets the foundation for the entire project. While various methods exist, learning “how to cast on knitting with two needles” is an invaluable skill that offers unique advantages for a wide array of projects, laying a sturdy yet flexible groundwork for the stitches.
This method, often referred to as the “knitted cast-on,” is distinct from other techniques, such as the popular long-tail cast-on. It involves creating new stitches directly from existing ones, mimicking the action of knitting itself. Understanding this technique not only broadens the knitting repertoire but also gives us greater control over the final look and feel of the knitted fabric.
Also Read: How to Join in Round in Knitting?
What Is the Two-Needle Cast-On Method?
The two-needle cast-on is a technique where both knitting needles are used during the setup row to create a looser, more elastic edge. Unlike the more common single-needle methods, which can sometimes result in a tight or uneven first row, this approach distributes the stitches more evenly between the two needles, offering greater control and flexibility.
This method is not only ideal for garments that require stretch, such as sleeves, cuffs, or socks, but also provides a more polished, uniform starting row. It is beneficial for beginners who tend to cast on too tightly or struggle with yarn tension. While slightly more involved than other beginner cast-on techniques, it is easy to master with a small quantity of practice.
Why Use Two Needles for Casting On?
Casting on two needles is particularly beneficial when aiming for an edge that is neither too tight nor too loose. A common beginner mistake is pulling stitches too snugly on the cast-on row, which leads to puckering or curling in the fabric. The use of two needles naturally adds spacing, giving the fabric a more relaxed and professional appearance.
Moreover, using two needles prevents strain on the yarn, especially when working with delicate fibers like alpaca or merino. For projects that require flexibility, such as ribbed collars or lace shawls, this technique is a game-changer. It offers structure without rigidity and is a gentle introduction to more advanced cast-on styles.
Materials Needed
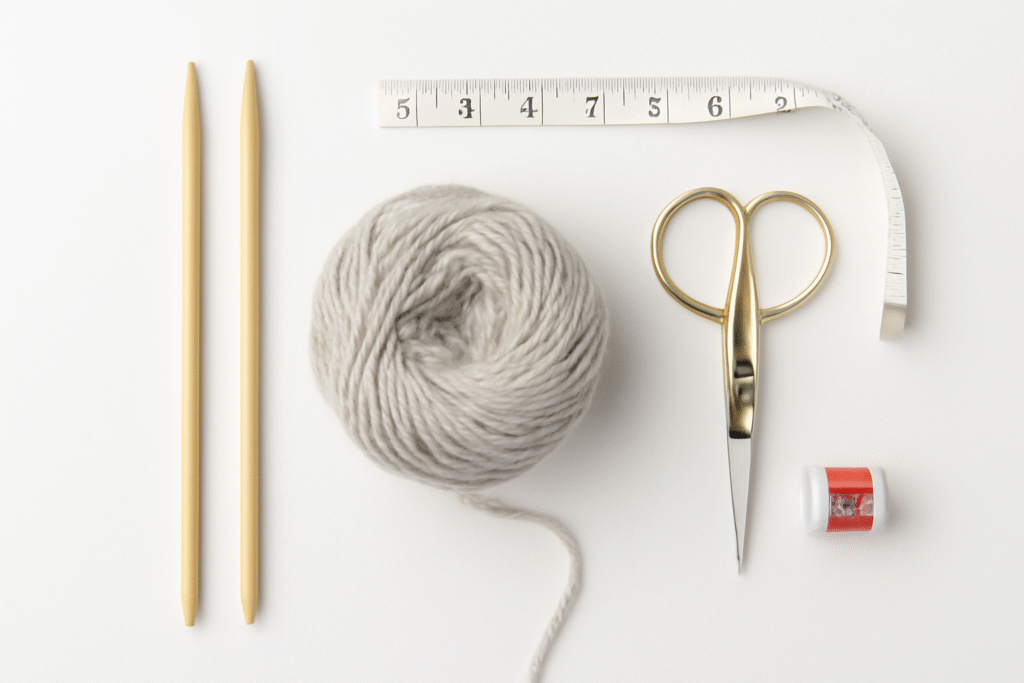
Before the start, gather the basic materials required for knitting, including the right tools to help make the learning process smooth and enjoyable.
- Two knitting needles (straight or circular, depending on the project)
- Yarn suited to the project (medium-weight or worsted is best for beginners)
- Scissors: A sharp, clean pair is essential for cutting yarn cleanly without fraying
- Tape measure or ruler (optional, for measuring the length of the tail)
- Stitch counter or notebook (to track the number of cast-on stitches)
Choosing the Right Needles and Yarn
Selecting appropriate needles and yarn plays a vital role in shaping the cast-on edge effectively. When working with the two-needle cast-on method, it is generally recommended to use a pair of needles that match the size suggested in the knitting instructions.
Some experienced knitters may intentionally switch to a slightly larger or smaller needle to fine-tune stitch tension, an advanced method used to alter the fabric’s gauge. Ensuring that the yarn weight corresponds to the needle size is also crucial, as an imbalance can result in overly loose or tight stitches, which may affect the overall drape and appearance of the knitted piece.
Needle Size Recommendations
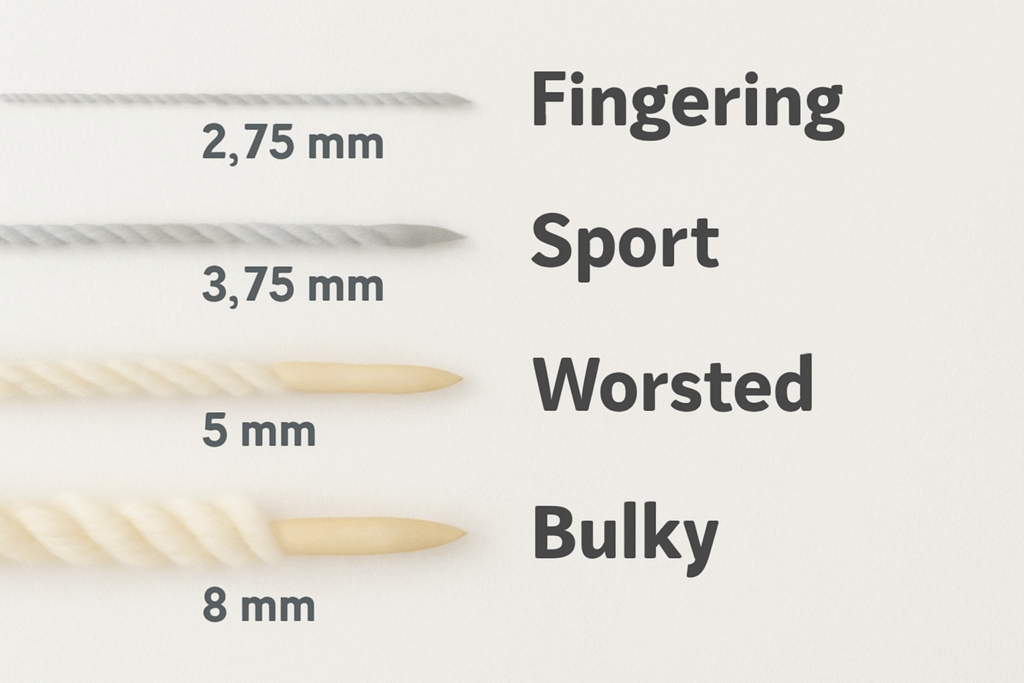
The needle size should match the yarn weight; however, when using the two-needle method, it is common to use a second needle that’s the same or slightly smaller in size. It helps keep the cast-on edge tidy.
- Fingering weight yarn: Use needles with a diameter of 2.25mm to 2.75mm
- DK yarn: Use 3.5mm–4.5mm needles
- Worsted weight yarn: Use 4.5mm–5.5mm needles
- Bulky yarn: Use 6mm–8mm needles
Also Read: How to Read Knitting Patterns?
How to Cast On Knitting with Two Needles?
Mastering the “how to cast on knitting with two needles” method is straightforward with clear, step-by-step instructions. This technique involves creating new stitches by effectively “knitting” them onto the needles, building a foundation row that is both flexible and secure. Practice each step slowly to develop a consistent rhythm and tension, which are key to a neat and even cast-on edge.
Step 1: Make a Slip Knot
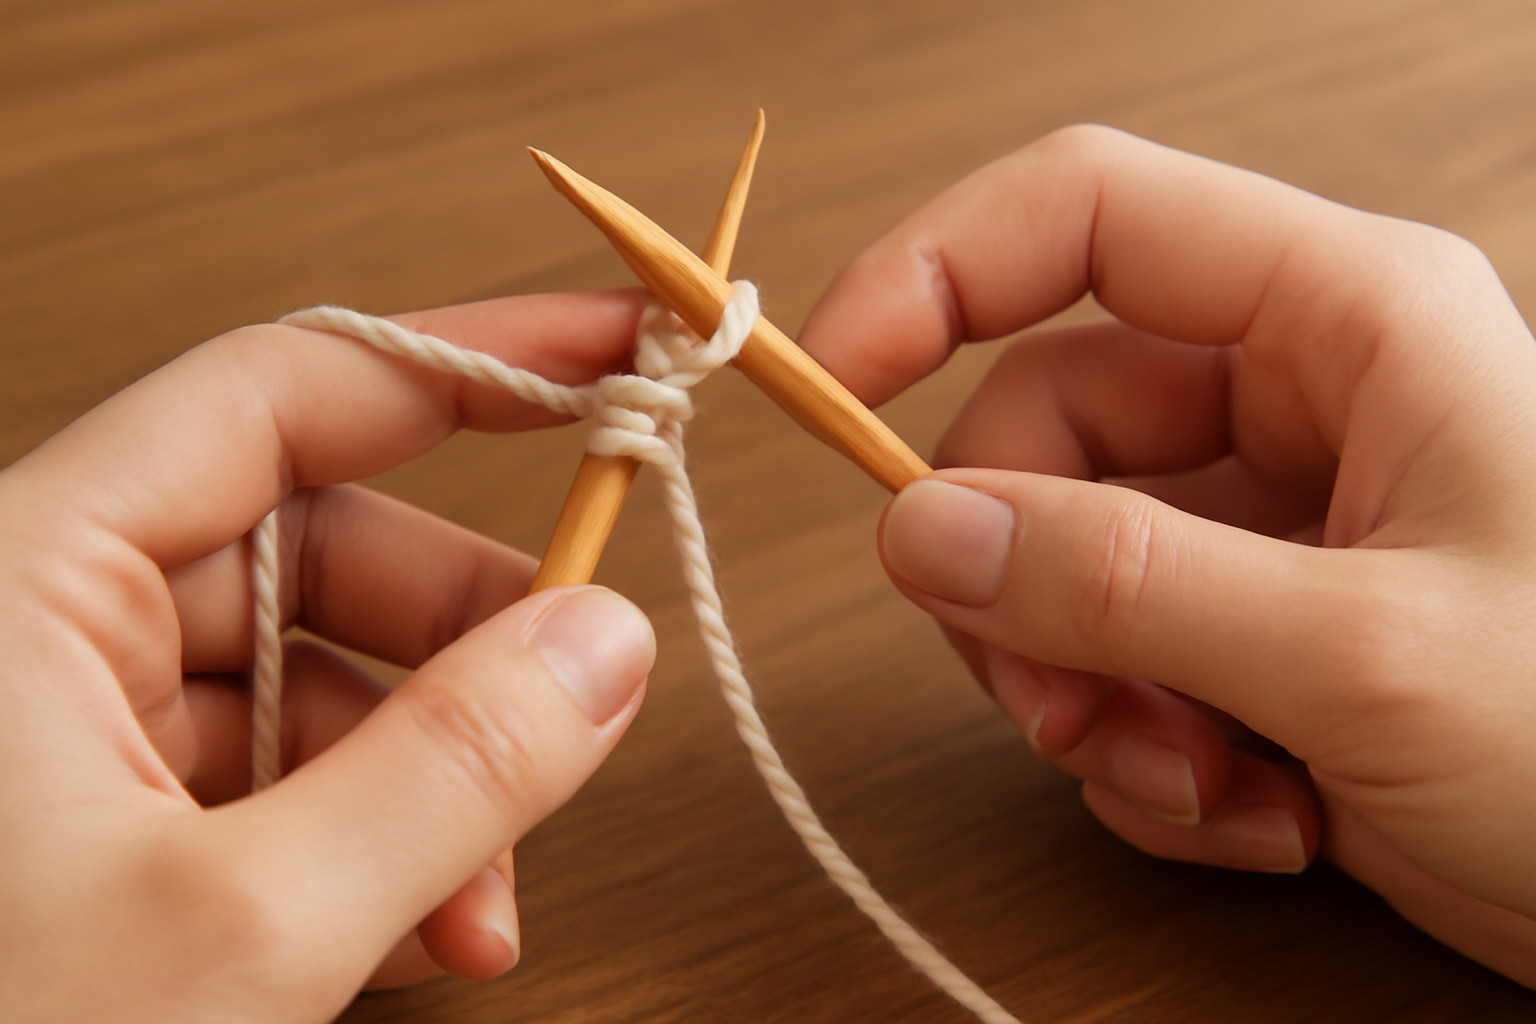
To begin the two-needle cast-on, the first step is to create a slip knot, which will serve as the initial stitch on the needle. Start by forming a loop with the yarn, making sure the working yarn (the portion coming from the ball) is positioned behind the tail end. Insert a knitting needle through the loop, then use the needle to catch the working yarn and pull it through the loop. Gently tighten the slip knot onto the needle by pulling on both the working yarn and the tail, ensuring it is not too tight. This knot should slide easily along the needle.
The first slip knot serves as the starting point for the cast-on row. Although it is counted as one stitch, its primary role is to provide a secure base for the remaining stitches to build upon. It should be safe enough to stay in place without unraveling, yet loose enough to allow easy manipulation, as excessively tight stitches may hinder progress on the first row.
Step 2: Position the Needles
With the slip knot securely placed on one of the knitting needles, that needle should be held in the left hand. It becomes the holding needle, which will collect all the cast-on stitches. The second knitting needle, known as the working needle, is held in the right hand. It is used to create new stitches by mimicking the standard knitting motion.
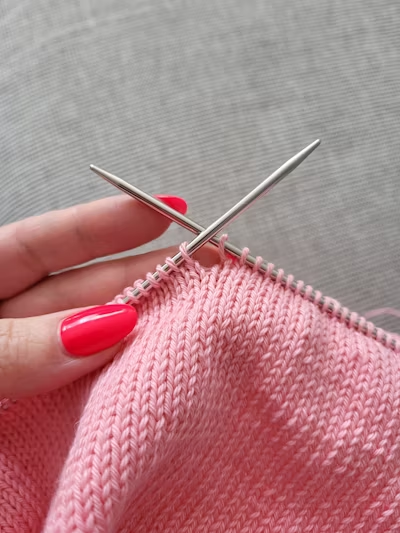
The tip of the right-hand working needle is then inserted into the slip knot on the left-hand holding needle, as though preparing to knit a stitch. The two needles should form an “X” shape, with the correct needle positioned behind the left one. This arrangement is essential for properly creating and transferring the new stitches onto the holding needle.
Step 3: Insert and Wrap the Yarn
To start casting on, hold the right-hand needle in the slip knot on the left-hand needle. Next, wrap the yarn. Bring the working yarn, which is connected to the ball, around the tip of the right-hand needle from back to front in a counterclockwise direction. This is similar to making a standard knit stitch.
Ensure the yarn is wrapped securely but not too tightly, allowing it to move easily. This wrapped yarn will form the next loop, creating a new stitch. Accurate wrapping is essential for forming consistent stitches and keeping even tension along the cast-on row.
Step 4: Create and Transfer the Stitch
After wrapping the yarn around the right-hand needle, gently pull the wrapped loop through the stitch on the left-hand needle. This action creates a new stitch on the right-hand needle while keeping the original slip knot or the previous stitch on the left needle.
Next, move the new loop from the right-hand needle back to the left-hand needle. To do this, insert the tip of the left-hand needle into the new loop on the right-hand needle from front to back, and then slide the right-hand needle out. Gently pull the working yarn to secure the new stitch on the left-hand needle. Now, you have completed one proper cast-on stitch and transferred it, leaving two stitches on the left needle.
Step 5: Continue Until the Target Stitch Count Is Achieved
Using the two-needle cast-on technique, begin by placing the first new loop onto the left needle. Then, insert the right needle between the final two loops on the left needle.
Wrap the working yarn from back to front around the correct needle, then draw it through to create a new stitch. Slip this loop onto the left needle by positioning its tip beneath the loop and gently removing the right needle. Repeat this action consistently until the required number of stitches has been formed.
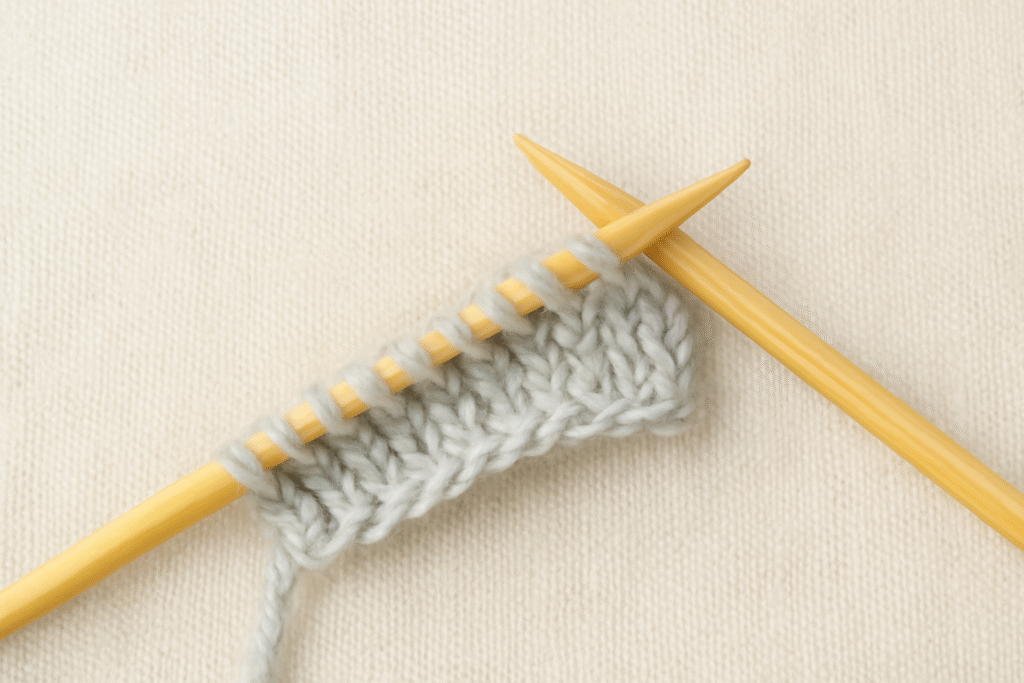
Step 6: Remove the Second Needle
Once the required number of stitches has been cast on for the project, the work is nearly ready to proceed with the first row of knitting. At this stage, all cast-on stitches should be resting evenly on the left-hand needle. The right-hand needle, having fulfilled its role in forming and transferring the stitches, can now be carefully removed.
The right-hand needle should be gently slid out, leaving the cast-on stitches securely positioned on the left-hand needle, fully prepared for the start of the first knitting row. The result is a clean, elastic cast-on edge—an ideal foundation for the fabric that will follow.
Also Read: How Long Does It Take to Knit a Scarf?
Alternative Methods for Casting On With Two Needles
While the standard knitted cast-on is effective, alternative two-needle methods offer unique advantages, enhancing edge properties for projects. These variations provide greater control over stretch and appearance, and many are suitable for knitters who are comfortable with the basics. Exploring these options can significantly improve handmade items, so experimentation is encouraged to find the best fit for your style and needs.
Double Needle Cast On for Stretchy Edges
The term “double needle cast on” is sometimes used interchangeably with this method, especially when emphasizing stretch. This approach is ideal for ribbed cuffs or lace projects where flexibility is key.
Using Same-Size vs. Different-Size Needles
While using two needles of the same size is standard, some knitters use a smaller second needle to gently tighten the cast-on edge. Experiment with both setups to determine which one best suits your project.
Tips for Success and Common Mistakes
Adjusting Tension
Avoid pulling the yarn too tightly after each stitch. The goal is to maintain consistent and flexible stitches. If the edge is curling or too tight, you are likely tugging too hard.
Troubleshooting Loose or Tight Edges
Too loose? Try using slightly smaller needles or adjusting your yarn grip. Too tight? Relax your tension, or try the long-tail method as an alternative. Practice helps find the sweet spot.
When to Use the Two-Needle Cast-On
The two-needle cast-on, also known as the “knitted cast-on,” is more than just a beginner’s technique; it offers flexibility and stability essential for specific knitting projects. This method creates a soft, elastic edge similar to a row of knit stitches, making it ideal for various applications.
Best Projects for This Method
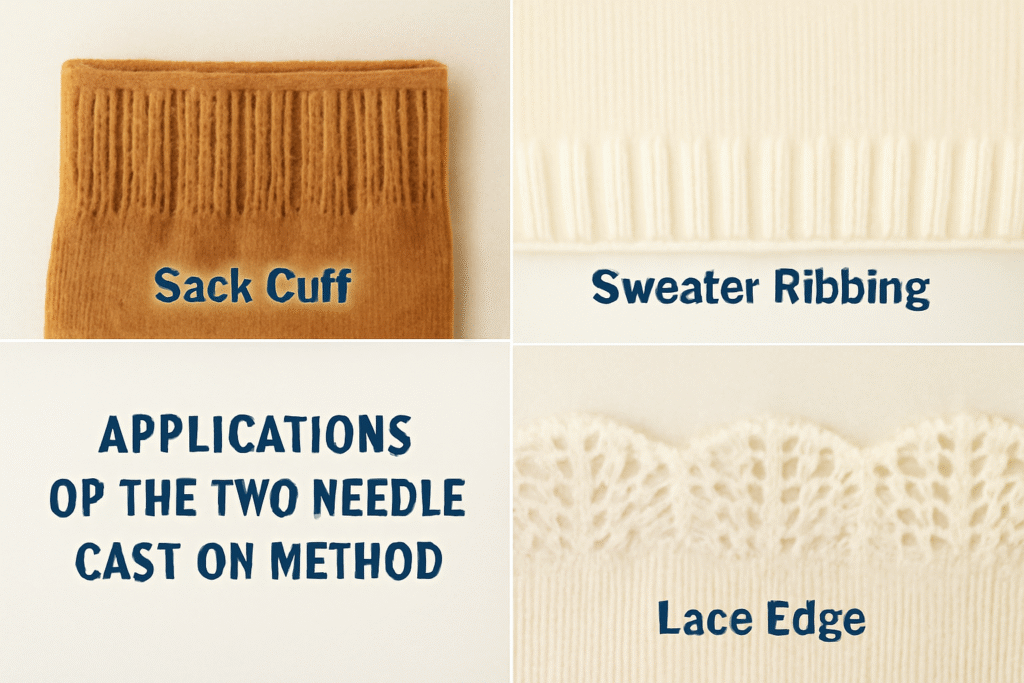
This cast-on method is especially effective for:
The two-needle cast-on is an excellent choice for a variety of projects due to its inherent stretch and neat appearance. It is particularly well-suited for ribbing, such as that found on sweater cuffs, necklines, and hat brims. The elasticity of the two-needle cast-on allows these edges to expand and contract comfortably, providing a snug yet flexible fit that is neither flaring nor restrictive.
Additionally, this method is highly recommended for socks and other items where a stretchy, non-constricting opening is crucial. The cast-on provides enough give for the foot to comfortably enter the sock while snapping back to a neat fit around the ankle. For lace patterns, which often require a soft and pliable edge that does not pull or pucker the delicate fabric, the two-needle cast-on provides a stable yet yielding foundation, allowing the intricate stitchwork to bloom without distortion.
Frequently Asked Questions
Conclusion
Mastering the technique of casting on with two needles is a significant milestone in any knitter’s journey. This versatile method provides a reliable, stretchy, and neat foundation, which is essential for a wide range of projects, from delicate lace to cozy socks.
Grasping the underlying principles and advantages of the technique provides a valuable method for improving both the durability and comfort of handcrafted garments. With a few practice sessions, this method can easily become your go-to for stretchy edges and clean starts.
Also Read: How to Add Stitches When Knitting?