How to Connect Circular Knitting: Easy Guide
Circular knitting is a popular technique for creating seamless round projects like hats, sleeves, and cowls—without any side seams. Mastering. How to Connect Circular Knitting properly ensures your work looks professional, smooth, and free of gaps or ladders.
To connect circular knitting, gather your tools, cast on stitches without twisting, join the round securely, and use advanced methods, such as the seamless join or magic loop for a polished, durable finish.
The key to success lies in starting with a neat, untwisted cast-on and forming a secure join that connects the first and last stitches evenly. Along the way, you’ll learn how to prevent common issues like twisted stitches or loose joins, and explore practical techniques such as the seamless join with an extra stitch and the magic loop method.
Also Read: How to Knit a Hat with Straight Needles?
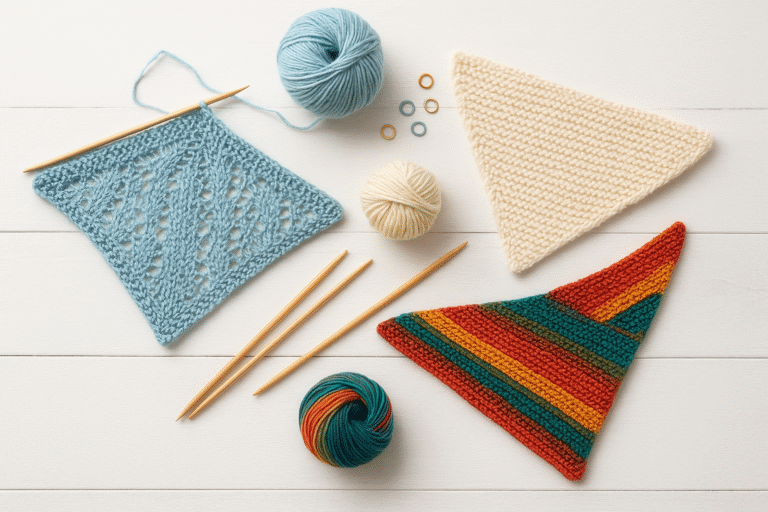
Tools Needed for Circular Knitting

Gather the right tools before starting your project to master how to connect circular Knitting for a smoother experience.
Select circular knitting needles in the size and length that fit your yarn weight and pattern. Opt for a cable with good flexibility so stitches glide smoothly. For small circumferences—such as socks, sleeves, or hats—use double-pointed needles or the magic loop method, which relies on a longer circular needle.
Have locking stitch markers for marking rounds or repeats. Use a blunt-tipped tapestry needle for weaving in ends. A small crochet hook helps quickly pick up dropped stitches. Carry a clear ruler or a gauge tool to check stitch size and maintain consistency.
Keep stitch holders or smooth spare yarn handy for holding live stitches. Use a darning mushroom or flat blocking surface to shape and finish projects cleanly and with precision.
Also Read: How to Read Knitting Patterns? Beginners Guide
How to Cast On for Circular Knitting?
How to connect circular Knitting begins with casting on differently from flat knitting because you’re creating a loop that will later be joined into a continuous round.
Start by casting on the required number of stitches plus one extra stitch—this extra stitch will be used to create a seamless join and prevent any gap at the start.
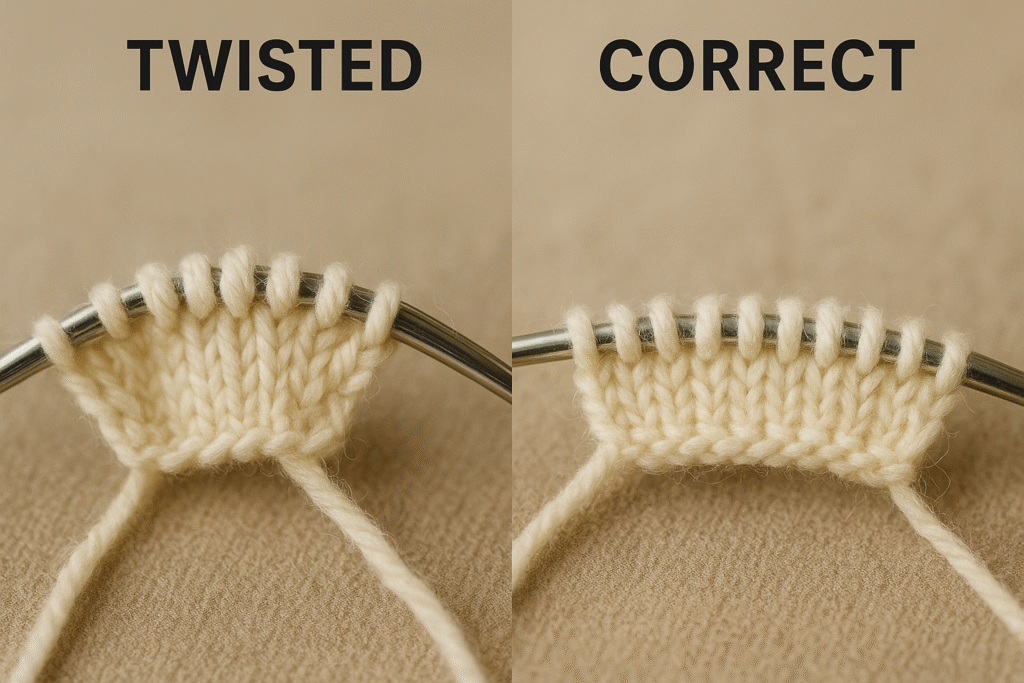
Once you’ve cast on, carefully slide your stitches toward the center of the circular needle’s cable. Make sure none of the stitches are twisted—the smooth edge of the cast-on row should face inward, forming a neat circle around the needle.
When you’re ready to join, your stitches should lie flat and evenly spaced. Double-check that the cast-on edge isn’t twisted before proceeding to your first round—this simple habit ensures your knitting stays smooth and professional from the very beginning.
Also Read: How to Add Stitches When Knitting: A Complete Guide
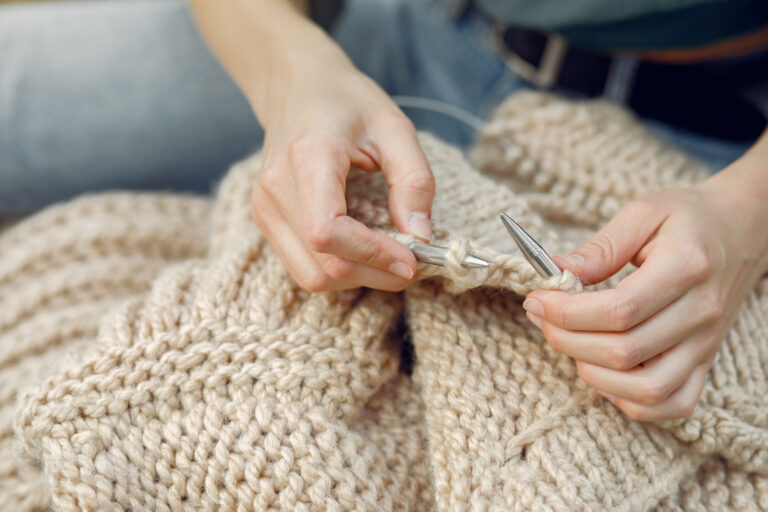
Step-by-Step Guide on How to Connect Circular Knitting
The simplest way to join circular knitting without twisting your stitches is as follows:
Hold the needle with the last cast-on stitch in your left hand. With the correct needle, knit the first stitch on the left needle to start your first round.
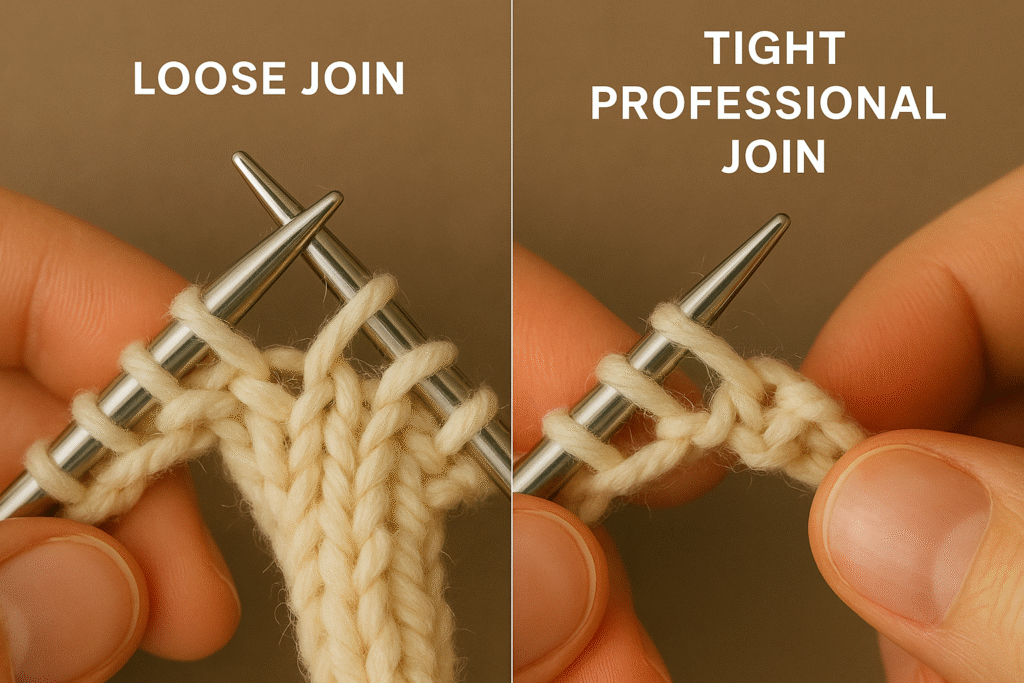
Slip the first stitch you cast on over the stitch you just knitted and pull gently to tighten. This closes the loop, making a seamless join with no gap.
Finally, after closing the loop, place a stitch marker directly at this join point. This marker will help you identify the beginning of each round, making it easier to track your progress and ensuring that every new round starts in the correct place — a key to neat, professional circular knitting.
Also Read: How to Count Rows in Knitting: A Complete Guide
Common Joining Methods in Circular Knitting
How to Connect Circular Knitting Common Joining Methods in Circular Knitting are essential for achieving seamless results in your projects. There are several reliable ways to join circular knitting, and the method you choose depends on your project, yarn, and comfort level. Some joins focus on speed, while others create nearly invisible connections that blend perfectly into your fabric.
Stitch Swap Join
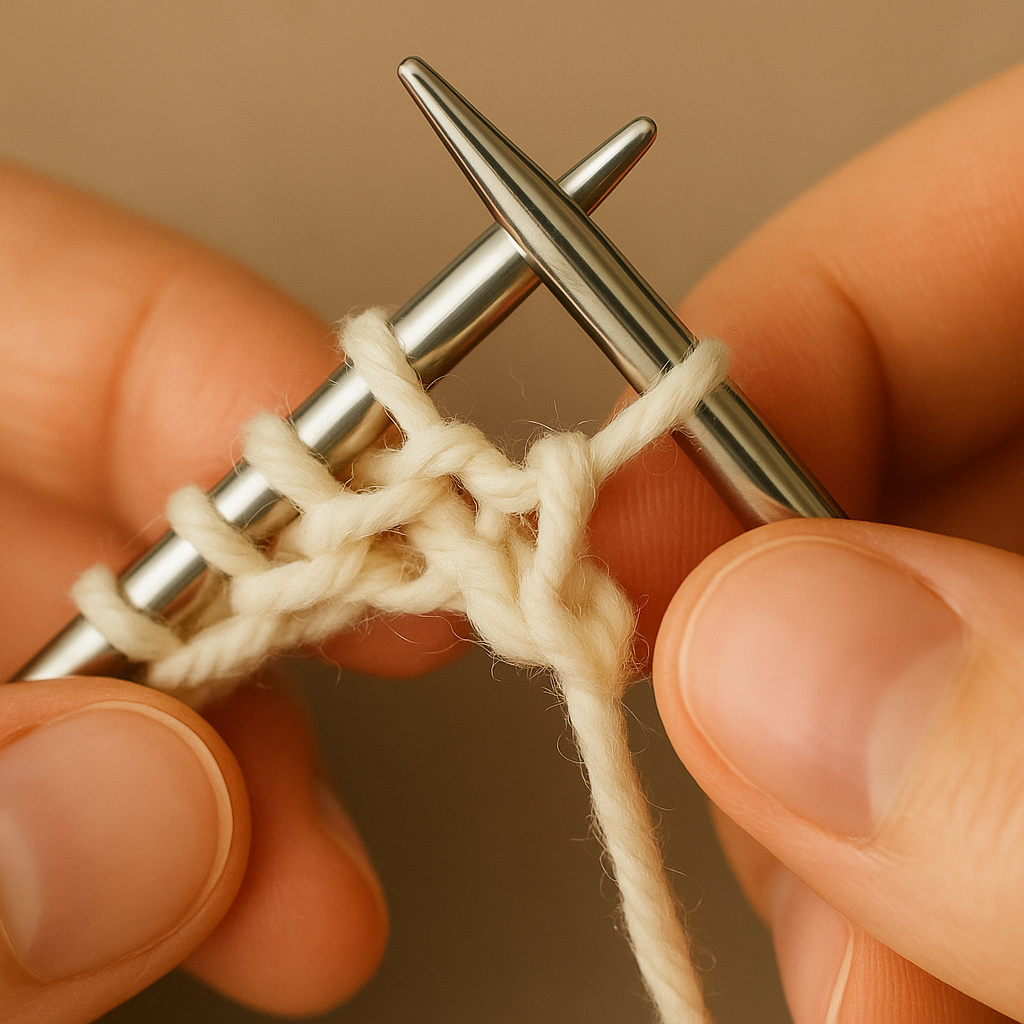
The stitch swap join is a simple and secure method for connecting your knitting in the round. After casting on one extra stitch, slip the last stitch from the left needle onto the correct needle, then pass it over the first stitch and let it drop off the needle. This closes the circle cleanly and prevents gaps at the join.
It’s a neat, beginner-friendly option that works beautifully for most projects and helps maintain even tension across your first few rounds. Don’t forget to place a stitch marker at the join to mark the beginning of your round.
Seamless Join with Extra Stitch (Magic Loop)
This technique is ideal for knitters who want a perfectly invisible start. Begin by casting on one extra stitch, then join in the round carefully without twisting. Slip the extra stitch over the first stitch, pulling gently to snug the join.
When paired with the magic loop method, this join works wonderfully for small circumferences like socks, sleeves, or mittens. It prevents laddering and creates a smooth, continuous fabric. Though it takes a little practice, it produces professional results worth the effort.
Using an Extra Loop or Tail Join
For yarns that are slippery or projects that need a firm edge, you can use the cast-on tail to secure your first round. After casting on, thread the tail through a tapestry needle and weave it through the first few stitches, or knit the first stitch tightly over the tail to anchor it.
Alternatively, you can insert a temporary loop of scrap yarn at the join to hold tension while knitting the first few rounds. Once the fabric is stable, remove the loop and close the tiny gap with the tail. Both variations create a secure, flexible join that stays tidy and strong.
Tips to Avoid Gaps and Laddering When Joining
How to connect circular Knitting successfully involves mastering techniques to avoid gaps and laddering when joining.
Before joining in the round, always check that your stitches aren’t twisted. Spread the cast-on edge flat on your table and trace along the stitches to ensure they all face the same direction. Work the first stitch firmly—but not too tight—to close the small gap between the first and last stitches without puckering the fabric.
If you’re using slippery yarn or working at a fine gauge, slide the first few stitches slightly onto the cable to give yourself more room to adjust tension. Use a stitch marker or removable elastic to mark the beginning of your round and keep the join secure while you knit. Recheck tension after the first couple of rounds so you can correct minor unevenness early rather than later.
Fixing Common Joining Mistakes
If you discover a twist after knitting a few rounds, don’t panic. Place your stitches onto a spare circular needle or set of DPNs, untwist the fabric, and reassemble the round to continue without frogging. For visible gaps at the join, gently tighten the first stitch with a crochet hook or use the cast-on tail to weave through the first row to close the opening.
If you notice laddering between needle transitions (especially in magic loop or when using DPNs), redistribute your stitches and snug up the first stitch on each needle. A light duplicate stitch or careful weave-in will often disguise small uneven spots beautifully.
Also Read: How to Fix a Dropped Stitch: A Complete Guide for Knitters
Yarn Joining Techniques for Circular Knitting Projects
When changing colors or adding a new yarn ball, clean joins make a huge difference to your finished look. The Russian join is ideal for seamless transitions—it interlocks both yarn ends without a knot, creating a strong, invisible splice.
If you prefer simpler options, try the tail join (overlapping and weaving tails in later) or the magic knot, which creates a firm, compact join. For best results, leave a short tail to weave in neatly after a few rounds. Maintaining even tension during joins ensures your fabric remains smooth and durable.
Advanced Techniques: Knitting Small Circumferences & Magic Loop
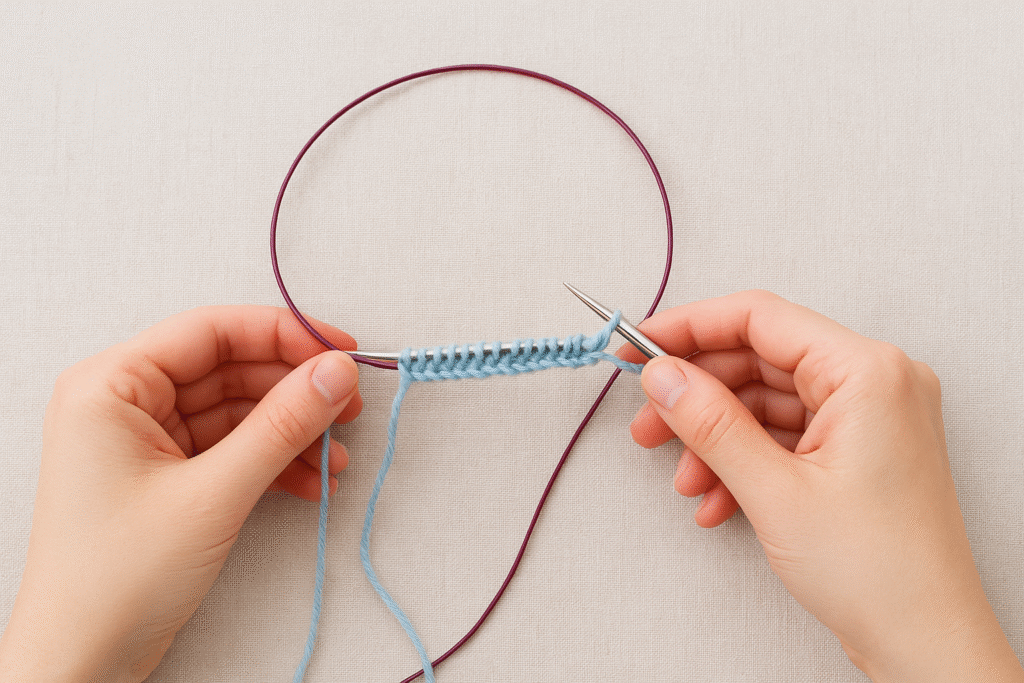
When working on small diameters such as socks, sleeves, or cuffs, the magic loop technique allows you to knit in the round using a long circular needle. By pulling out a loop of the cable, you create two working sections that function like flexible double-pointed needles. This method eliminates the need for multiple DPNs and provides smooth, continuous stitch movement.
To master the magic loop, gently slide the stitches to ensure the working yarn emerges from the correct side, and keep the cable loop long enough to prevent tight bends that distort tension. Consistent practice helps you maintain even stitches at the crossover point of the cable.
For extremely narrow circumferences, such as baby sleeves or sock toes, a short 16-inch circular needle or traditional double-pointed needles may still offer better control and comfort. Experiment with both approaches to find what suits your knitting rhythm best.
Also Read: How Long Does It Take to Knit a Sweater? Complete Guide
Troubleshooting and FAQs
Conclusion
Mastering How to Connect Circular Knitting cleanly depends on a few consistent habits: check for twists before joining, mark the beginning of each round, control the tension of the first stitch, and select a joining method that matches your project’s structure. Practicing these fundamentals on a scrap swatch helps build muscle memory and reduces the need for corrections later.
To take your skills further, explore provisional cast-ons, grafting methods such as the Kitcheller stitch, and advanced yarn joins like the Russian join. Combining these techniques with mindful tension control and finishing practices will help you produce professional-quality circular knits ready for blocking and wear.
Also Read: How Do I Block a Knitted Sweater?