How to Knit a Headband: Easy Beginner Guide
Learning how to knit a headband is one of the fastest and smartest ways to build real knitting skills. A simple ribbed headband teaches tension control, stretch construction, negative ease sizing, and clean finishing — all in a project you can complete in one afternoon.
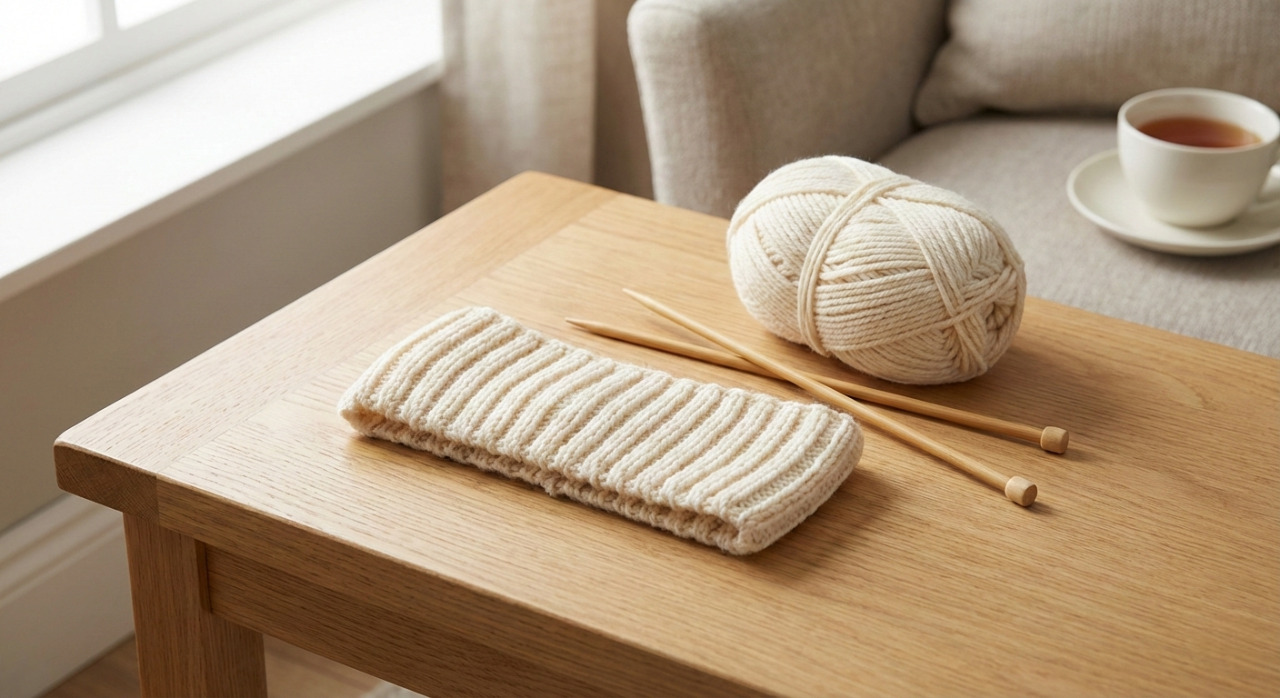
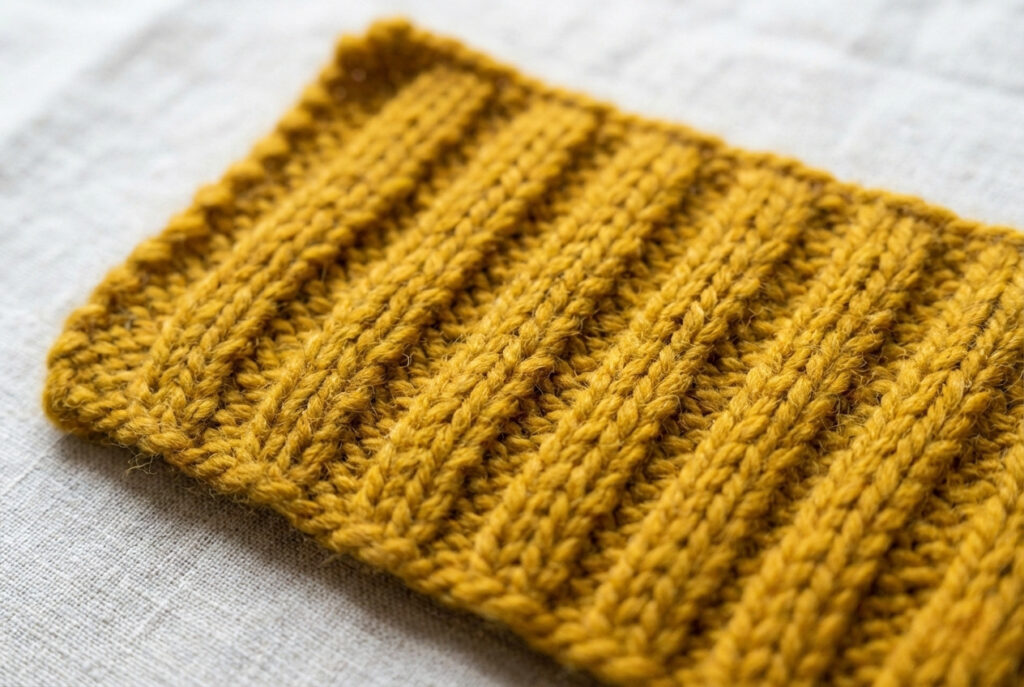
A basic knit headband uses ribbing (knit and purl stitches) to create natural elasticity. Most adult headbands measure 18–22 inches in circumference and are intentionally knit 1–2 inches smaller than the head for a secure fit. With worsted-weight yarn and standard needles, beginners can complete one in 1–3 hours.
Small project. Foundational technique. Professional results.
Why Headbands Are a Foundational Knitting Exercise
When learning how to knit a headband, you’re not just making a small accessory — you’re training core knitting mechanics. A headband may look simple, but structurally, it performs a demanding job. It must stretch without distorting, grip without squeezing, and recover its shape after repeated wear. That balance is not accidental. It is built through controlled tension, fiber elasticity, and thoughtful sizing.
This is why experienced knitters treat headbands as technical exercises, not just beginner projects.
A properly constructed knitted headband teaches three foundational principles:
Scarves hide uneven tension. Hats use shaping to compensate for minor inconsistencies. A headband exposes everything. If your tension is uneven, the fabric ripples. If your bind-off is tight, the band will not stretch comfortably. That immediate feedback accelerates skill development.
For most adults, standard headband measurements are:
Negative ease means the finished headband is intentionally smaller than the head. Stretch provides comfort. Without negative ease, the band will slide rather than stay secure.
Understanding this concept is essential when practising how to knit a headband properly. You are not just knitting to a number. You are knitting for controlled elasticity.
Why a Headband Is the Best First Knitting Project
Many beginners start with scarves because they seem easier. In reality, scarves often delay skill development because mistakes get lost in long rows of fabric.
A headband, however, teaches you how stitches behave under tension.
When you learn how to knit a headband, you practice:
There is a powerful psychological advantage: speed. Most headbands take 1–3 hours to complete. That quick success builds momentum, keeping beginners engaged and confident.
Most adult headbands comfortably fit 18–22 inches around and 3–4 inches wide. Because knitted fabric stretches, your finished measurement should be slightly smaller than the head. That controlled tension creates the polished, professional look that separates handmade from homemade.
Why This Matters for Skill Growth
Mastering how to knit a headband teaches you skills directly transferable to ribbed sweater cuffs, hat brims, sock tops, necklines, and elastic waistbands.
Small project. Foundational technique. Long-term payoff.
Also Read: Top 10 Best Knitting Books for Beginners 2026
Materials and Tools Needed to Knit a Headband Properly
Before learning exactly how to knit a headband, you need to understand something important: materials determine performance more than pattern choice.
A headband must stretch, recover, retain its shape, and sit comfortably on the head. That performance depends largely on fiber selection, needle size, and stitch density. Choosing the right tools from the beginning makes learning how to knit a headband smoother and far more successful.
The good news? You do not need complicated equipment. You just need the right fundamentals.
Best Yarn for Knit Headbands
For most beginners learning how to knit a headband, worsted-weight yarn is ideal. It is thick enough to see your stitches clearly but not so bulky that mistakes become hard to fix.
Recommended Yarn Specifications
| Attribute | Recommendation | Notes |
|---|---|---|
| Weight | DK (3) or Worsted (4) | Balanced stitch definition |
| Yardage | 50–100 yards | Enough for one adult headband |
| Fiber | Wool or wool blend | Elastic recovery |
| Alternative | Acrylic blend | Easy care & washable |
| Bulky Option | Category 5 yarn | Quick chunky finish |
If you want a quick chunky yarn headband pattern, choose bulky yarn and larger needles. Chunky yarn creates bold texture and allows you to finish in under an hour.
Fiber Behaviour Explained (Why Yarn Choice Matters)
Understanding fiber behaviour is part of truly mastering how to knit a headband.
Wool fibers contain microscopic scales that grip under tension. This natural structure gives wool spring memory, heat retention, resilience, and shape recovery. This is why wool blends are ideal for wearable accessories. A headband made from wool will stretch over the head and return to its original shape rather than sag.
Acrylic stretches but lacks long-term memory. Cotton holds structure but has very little elasticity. For wearable headbands that must grip without squeezing, wool blends provide the most balanced performance.
Fiber science is not optional — it directly affects fit, durability, and comfort.
Needle Size Guide
Needle size influences tension, stitch definition, and elasticity.
For most knit headband pattern styles:
Needle Type Options
| Type | Use | Notes |
|---|---|---|
| Straight needles | Flat knitting | Simple and beginner-friendly |
| 16″ Circular needles | Knitting in the round | Seamless finish |
| DPNs | Small circumference knitting | Advanced option |
Circular needles are often preferred because they distribute fabric weight evenly and reduce edge distortion. However, if you are just learning how to knit a headband, straight needles are perfectly fine.
Also Read: The Best Interchangeable Knitting Needles
Essential Tools
Keep your setup simple. You will need a tapestry needle for invisible seaming, scissors, a measuring tape, and optionally stitch markers and a row counter. Nothing fancy is required. The goal when learning how to knit a headband is clarity, not complication.
Beginner-Friendly Setup (Quick Reference)
If you want the simplest possible starting point, use a worsted-weight wool blend with 50–100 yards, US 7 or 8 straight needles for flat knitting, and a yarn needle for finishing. This combination offers the easiest stitch visibility and best elasticity for first-time success.
Why Material Choice Impacts Skill Development
When beginners struggle to knit a headband, the issue is often not the pattern — it is the material. Slippery yarn makes tension inconsistent. Non-elastic yarn makes ribbing feel stiff. Needles that are too small create tight edges.
Good materials make good technique easier.
Once you understand how fiber, needle size, and tension interact, you move from following instructions to understanding construction. And that is where real knitting confidence begins.
Understanding Gauge and Negative Ease
When learning how to knit a headband, gauge is not optional. It is the architectural measurement of your knitting.
Gauge determines if your headband fits comfortably, stretches properly, and maintains its shape over time. Without understanding gauge, even the most beautiful stitch pattern can fail structurally. Professional knitters treat gauge as an engineering problem, not guesswork.
What Gauge Actually Means
Gauge is the number of stitches and rows per unit of measured area in fabric. For example: 20 stitches = 4 inches, and 24 rows = 4 inches (in 1×1 rib).
That measurement is your knitting scale. It tells you how dense or loose your fabric is.
When learning to knit a headband, gauge controls circumference accuracy, stretch capacity, elastic recovery, comfort against the head, and long-term durability.
Why Gauge Matters More in Headbands
Headbands rely on negative ease and stretch to stay in place. Unlike scarves, which tolerate size variation, a headband must grip without slipping, stretch without deforming, and recover after repeated wear.
This balance is why gauge is critical when mastering how to knit a headband.
Ribbing Gauge vs Stockinette Gauge
Always swatch in the stitch pattern you plan to use. Ribbing stretches differently from stockinette stitch. A 1×1 or 2×2 rib expands significantly under tension, while stockinette has less horizontal elasticity. If your pattern uses ribbing (most headbands do), your swatch must be ribbed as well. Gauge changes with stitch structure.
How to Check Gauge for a Headband
- Cast on at least 30 stitches
- Knit 3–4 inches in your chosen stitch pattern
- Lay fabric flat without stretching
- Measure 4 inches across
- Count the stitches inside that span
If you have more than 20 stitches in 4 inches, your knitting is tight — go up a needle size. If you have fewer than 20 stitches in 4 inches, your knitting is loose — go down a needle size.
Because headbands depend on stretch, knitting slightly tighter than your swatch is usually acceptable for better elasticity and structure.
Gauge and Negative Ease
Most adult headbands measure 18–22 inches in circumference and 3–4 inches in width. But your finished piece should be 1–2 inches smaller than the head measurement. This is called negative ease. Gauge determines whether that negative ease feels supportive or restrictive. Understanding this relationship is a major milestone in learning how to knit a headband.
Beginner Perspective (Don’t Overthink It)
If this is your first project, don’t panic. Knit evenly, measure occasionally, and adjust needle size if necessary. Gauge improves naturally with repetition. The key is awareness, not perfection.
Why Gauge Separates Beginners From Skilled Knitters
Beginners follow numbers. Skilled knitters understand fabric behaviour. When you treat gauge as a structural blueprint instead of a suggestion, your headbands fit consistently, stretch correctly, recover properly, and look professionally finished.
And that’s the difference between simply finishing a project and truly mastering how to knit a headband.
Also Read: How to Knit a Gauge Swatch: Quick Guide
Quick Pattern: Classic Ribbed Knit Headband (Flat Method)
Skill Level: Beginner Time: 1–3 hours Yarn: Worsted weight (50–100 yards) Needles: US 7–8 (4.5–5 mm)
Instructions
- Cast on 90 stitches (adjust for size)
- Work K1, P1 across every row
- Continue until the piece measures 2 inches shorter than head circumference
- Bind off loosely (use a larger needle if needed)
- Seam ends using mattress stitch.
Finished size (adult): 18–20 inches circumference, 3–4 inches wide
Step-by-Step: How to Knit a Headband (Flat Method)
This method teaches you how to knit a headband using traditional rib construction. Ribbing creates natural elasticity, allowing the fabric to stretch comfortably and return to shape after wear.
Unlike decorative stitch patterns, ribbing functions like a spring: knit columns compress, purl columns expand. That structure is what makes a headband grip without squeezing. If you understand this section, you understand the mechanics behind most elastic knitting.
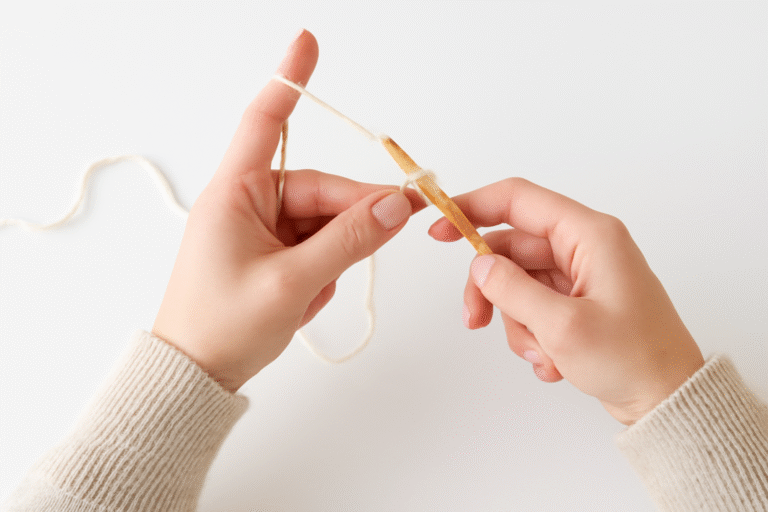
Step 1: Cast On (Foundation for Elasticity)
Cast on 90 stitches using the long-tail cast-on method. Long-tail creates a flexible edge that expands with ribbing. A rigid cast-on edge will restrict stretch and compromise comfort.
Adjust stitch count in multiples of 2: smaller head → 80 stitches; larger head → 100 stitches. Even numbers keep ribbing symmetrical.
Don’t worry if your cast-on edge looks slightly uneven. That’s normal. It evens out after a few rows. This is your foundation for learning how to knit a headband properly.
Also Read: How to Do a Long Tail Cast On Knitting? Easy Guide
Step 2: Establish Rib Structure
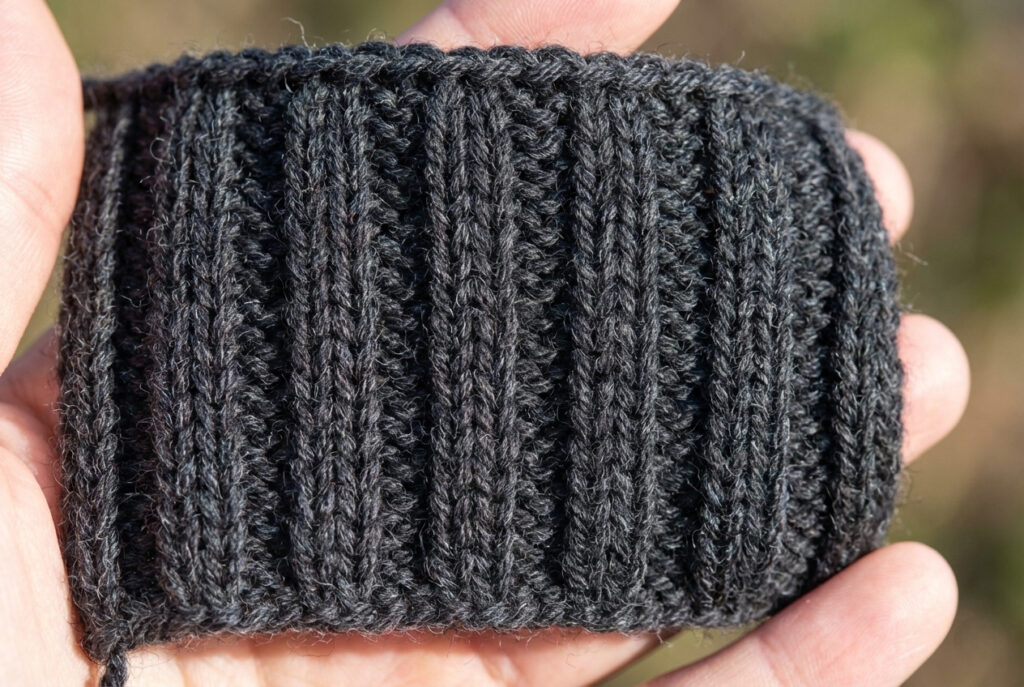
Work this repeat across every row: Knit 1, Purl 1.
That’s it. This creates 1×1 ribbing — the most balanced stretch structure for a knitted headband.
How to Read Your Stitches
If you lose track: a smooth “V” shape indicates a knit stitch, and a small horizontal bump indicates a purl stitch. Let the fabric guide you. Knit the knits. Purl the purls.
Continue until the fabric measures 3.5–4 inches wide. Measure the fabric relaxed, not stretched. Understanding rib behavior is a core milestone in mastering how to knit a headband.
Also Read: How to Read Knitting Patterns? Beginners Guide
Step 3: Knit to Length (Negative Ease Principle)
Continue working in ribbing until your piece measures 2 inches shorter than your head circumference.
Example: Head measures 22 inches → Knit until the piece measures 20 inches.
This intentional reduction is called negative ease. Stretch allows the band to hug the head securely. Too long and it slips off; too short and it causes uncomfortable compression. This balance defines successful headband construction.
Step 4: Elastic Bind-Off (Preserve Stretch)
Bind off loosely. A tight bind-off cancels rib elasticity and defeats the purpose of ribbing.
Professional tip: Use a needle 1–2 sizes larger for binding off to maintain stretch capacity. The bind-off edge should stretch as easily as the cast-on edge. If it doesn’t — it’s too tight.
Also Read: How to Bind Off Knitting: Easy Ultimate Guide
Step 5: Seam Construction (Invisible Finish)
Since this version of how to knit a headband is worked flat, you’ll seam the ends.
Option A: Classic Straight Seam
Align edges neatly, sew using mattress stitch, keep tension even, and weave in yarn tails inside the seam. Mattress stitch disappears into the rib columns when done correctly. A visible seam usually indicates rushed finishing.
Also Read: How to Finish a Knitting Project: A Complete Guide
Option B: Twisted Front Finish (Optional Style Upgrade)
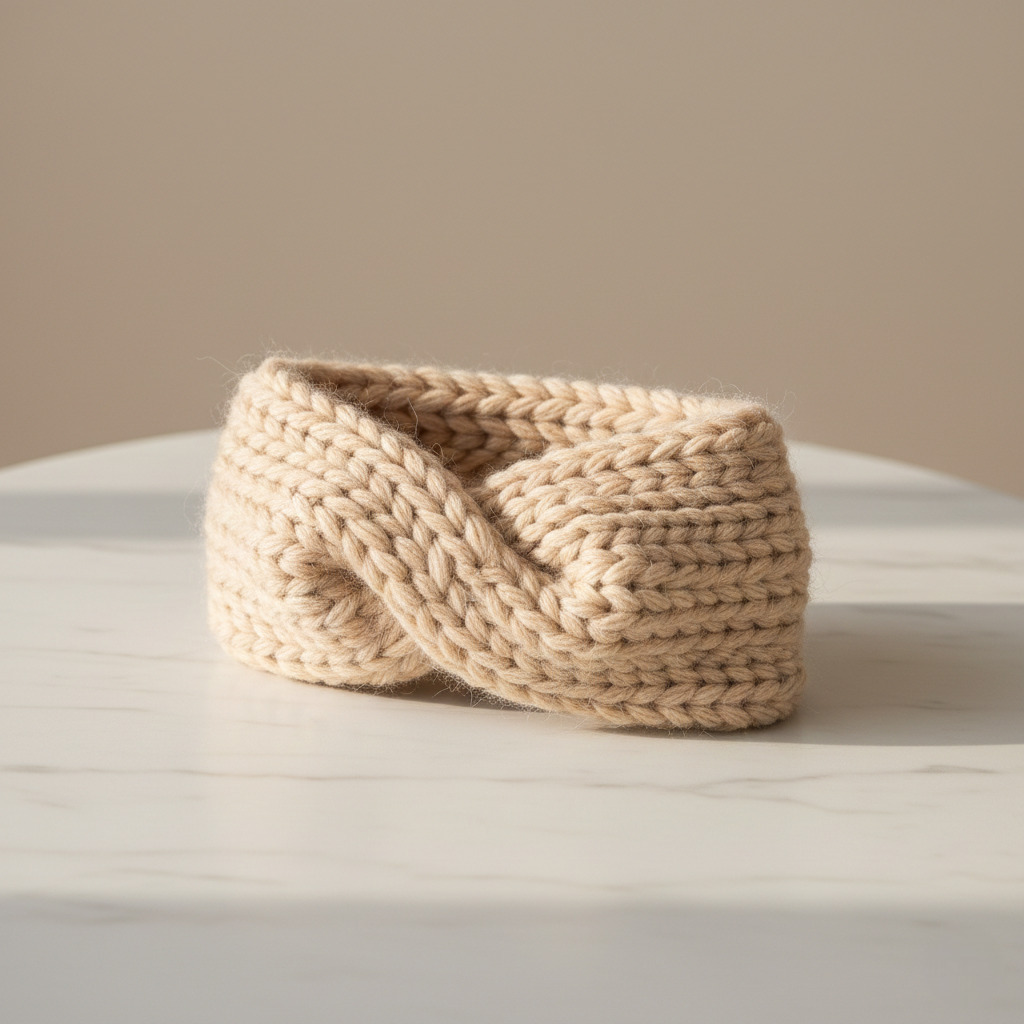
Fold each end in half, twist one end 180 degrees, interlock the folds, and sew through all layers securely. This creates a twisted knit headband effect with no extra knitting required. The twist adds structure and completely hides the seam.
Why This Method Works
This flat rib method is ideal when first learning how to knit a headband because it teaches elastic rib structure, negative ease sizing, stretch-aware finishing, seam precision, and stitch recognition. These are transferable skills used in sweater cuffs, hat brims, sock tops, and necklines.
A headband is not just a project. It’s a controlled training environment.
Beginner Variations You Can Try Next
Once you understand how to knit a headband using ribbing, expanding your skill set becomes easy.
Also Read: How to Add Stitches When Knitting: A Complete Guide
Each variation strengthens your understanding of fabric behaviour.
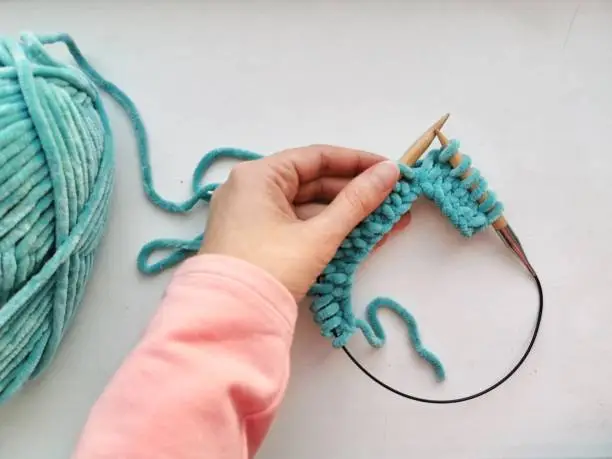
How to Knit a Headband in the Round
Knitting a headband in the round makes a smooth, unbroken fabric that stretches evenly. Unlike knitting flat, using a circular method distributes the stretch evenly around the work. This makes the headband last longer, bounce back better, and feel more comfortable. For knitters who want a neat, store-quality look, this is the best way.
Why Choose Circular Knitting?
Circular knitting is not just easier. It also makes the headband stronger.
Advantages include no seam bulk or ridge at the join, even tension throughout the band, better and more even stretch, longer durability because there is no weak spot at the seam, and a neat, professional look. Making the headband without seams also stops rubbing at the back of your head, so it stays comfortable for longer.
Step-by-Step Instructions
Materials
Step 1: Cast On
Cast on 80 stitches using a stretchy cast-on method (like the long-tail or German twisted cast-on). Before joining, lay stitches flat along the cable and confirm there are no twists in the cast-on edge. Twisting at this stage cannot be corrected later.
Also Read: How to Measure Circular Knitting Needles? Beginners Guide
Step 2: Join the Round
Place a stitch marker to mark the beginning of the round. Knit the first stitch to join. You are now knitting in a continuous circle.
Also Read: How to Join in Round in Knitting: Comprehensive Guide
Step 3: Work the Ribbing
Choose your preferred rib:
Continue until the headband measures 3–4 inches tall. Ribbing is great for headbands because it stretches and shrinks on its own, so it stays in place without feeling too tight.
Step 4: Bind Off
Finish off with a stretchy bind-off to keep the headband flexible. If the ending is too tight, the headband will not feel comfortable or flexible, even if the rest of it stretches well.
Structural Result
This seamless method produces uniform circumference tension, maximum stretch recovery, even gentle pressure, and a neat, store-quality look. For knitters with some experience, this way of making headbands becomes the usual choice.
Twisted Knit Headband (Top-Knot Construction)
The twisted knit headband is one of the most popular and often searched-for styles. It is simple to make but looks fancy. The twist also hides the seam, making it great for flat headbands.
Construction Method
Knit the headband flat in the rib as described earlier. Before seaming, fold one short end in half (like a fan), fold the opposite end in half, interlock the folds, and sew through all four layers securely.
This makes a twist in the middle that makes the headband look more interesting, hides seam visibility, improves stretch, and turns a simple ribbed headband into something that looks like it came from a boutique. It’s an excellent option for gifting or small-shop production.
Advanced Stitch Patterns for Knitted Headbands
Once you are comfortable with basic ribbing, you can try new stitch patterns to make your headband warmer, thicker, and stretchier.
Fisherman’s Rib Headband
Makes deep up-and-down ribs that hold in air.
Pattern:
This stitch keeps you very warm, feels thick and soft, and stretches and bounces back well. Fisherman’s rib is great for winter because it holds warm air between the ribs.
Half Fisherman Rib
A lighter version with a similar look and feel.
This version is less thick but still stretches well.
Seed Stitch Headband
Switching between knit and purl stitches makes a bumpy, even texture.
Seed stitch lays flat on its own, does not curl up at the edges, and stays even all over. It is ideal for knitters who prefer a non-rib texture without edge roll.
Cable Headband (Beginner Cable)
Cables make the fabric pull in a bit in a controlled way. For example, a 4-stitch cable involves crossing 2 stitches over 2 stitches every 6 rows. Because cables make the headband tighter, start with more stitches to keep the right size. Cables add thickness, visual detail, and structural strength.
Brioche Stitch Headband
Brioche makes a ribbed fabric that is extra thick and looks the same on both sides. It uses special stitches to make deep, soft ribs. Benefits include extreme softness, extra warmth from two layers, high elasticity, and a fancy, high-quality look. Brioche acts like a warm, padded fabric and is great for cold weather.
Also Read: How to Knit a Moss Stitch: Best Expert Guide
Yarn Weight Guide for Headbands
The thickness of the yarn changes how well the headband fits and how fast you can finish it.
| Yarn Weight | Best For |
|---|---|
| DK | Lightweight, refined daily wear |
| Worsted | Balanced warmth and elasticity |
| Bulky | Quick project, cozy texture |
| Super Bulky | Statement piece, dramatic texture |
Heavier yarn increases knitting speed but reduces sizing precision. Thinner yarn lets you control the fit better and makes the headband look neater. For most adults, worsted weight offers the best balance.
Blocking: Helping the Yarn Keep Its Shape
Blocking is not just for looks. It helps the headband keep its shape by evening out stitch tension, keeping the ribbing stretchy, helping the headband hang nicely, and making it last longer.
Wool Blocking Method
Soak in lukewarm water for 10–15 minutes, press moisture gently with a towel (do not wring), then lay flat to dry in final dimensions.
Acrylic Blocking Method
Use light steam only and never press the iron directly onto fabric. Steam loosens the stitches without melting the yarn.
Why Blocking Matters
If you skip blocking, the headband will not look as nice or last as long. Blocking is what makes a handmade project look like it was made by a professional.
Also Read: How to Block a Knitted Scarf: 5 Easy Steps
Common Mistakes and How to Fix Them
Even simple projects can show weak spots. Because a headband needs to stretch, bounce back, and fit just right, small mistakes show up after you wear it. Knowing about these problems is what makes the difference between beginner work and a polished, professional look.
1. Twisted Join (Circular Knitting Error)
What happens: When joining in the round, stitches twist around the needle. The fabric spirals permanently.
Why it matters: A twisted join cannot be corrected after several rounds without unravelling.
Prevention: Before joining, lay your cast-on edge flat and ensure all stitches face the same direction. Place the work on a table and visually inspect the edge before knitting the first stitch.
Also Read: How to Fix a Dropped Stitch: A Complete Guide for Knitters
2. Edge Collapse (Too-Tight Bind-Off)
What happens: The edge where you finish off loses its stretch, making the headband squeeze in.
Cause: Finishing off too tightly takes away the stretch from the ribbing.
Fix: Use a needle 1–2 sizes larger for bind-off, or use a stretchy bind-off method. You need to keep the stretch from the start to the end of your knitting.
3. Headband Stretching Out Over Time
If your knitted headband loosens after a few wears, the problem is with how it was made. Primary causes include poor fiber choice, stitches that are too big, and not making the headband slightly smaller than the head. The solution is to pick wool or wool blends that bounce back to their shape.
4. Uneven Rib Columns
Most knitters purl tighter than they knit, which causes uneven rib columns. To correct this, relax your purl hand, practice consistent yarn tension, and wet and shape the finished piece to even out the stitches. Tension improves with repetition — this is skill development, not failure.
Also Read: How to Count Rows in Knitting: A Complete Guide
Precision Sizing Formula (Professional Standard)
Headbands need to be a bit smaller than the head for comfort and to stay in place.
Industry Rule: Head circumference – 1 to 1.5 inches = knit length
Example: 22″ head → knit 20.5–21″
This ensures stable grip, no slippage, and no compression headaches. Too much negative ease causes discomfort; too little causes slipping. Getting the size just right is what makes handmade accessories stand out.
Fiber Performance Comparison for Knitted Headbands
The material you choose affects how well the headband keeps its shape and how long it lasts.
| Fiber | Shape Recovery | Elasticity | Durability | Notes |
|---|---|---|---|---|
| Wool | Excellent | High | High | Best overall |
| Wool Blend | Very Good | High | High | Ideal balance |
| Acrylic | Moderate | Medium | Medium | Washable gifts |
| Cotton | Poor | Low | Low | Warm weather only |
Why Wool Performs Best
Wool fibers have tiny natural scales that pull in and spring back when stretched. This gives wool elastic recovery, shape retention, and thermal insulation. Cotton does not stretch much. Acrylic stretches but does not bounce back as well. If you want a headband that stays snug, wool blends are best.
Customizing Headband Size
Average Finished Circumference
Width Options
Wider bands keep you warmer but need to be made a little tighter to fit well.
Also Read: How to Increase a Stitch While Knitting: Quick Easy Steps
Style Variations to Elevate Your Knit Headband
Once you’ve learned the basics, try different ways to shape and style your headband. Options include cable panels for compression and visual strength, seed stitch texture that lies flat and resists curling, color blocking, stripes, button closures, and bow-style fronts. These changes can turn a simple headband into something special.
FAQs About: How to Knit a Headband
Final Thoughts: Mastering How to Knit a Headband
Learning how to knit a headband is not just about making a small item. It is about understanding how fabric works in a way that is easy to handle.
A headband teaches what larger garments quietly depend on: controlled tension, stretchy ribbed fabric, sizing that makes the headband slightly smaller than your head, how the yarn bounces back to shape, and careful finishing.
Because the project is small, every choice you make is easy to see. If your stitches are too loose or tight, the fit will show it. If you finish too tightly, the headband will not stretch. If the yarn is not stretchy, the headband will lose its shape. This quick feedback helps you learn faster.
This is why experienced knitters often make headbands when trying out new yarns, stitches, or ways to size their work. The project may be small, but it teaches important basics.
When you understand how to knit a headband properly, you also understand why sweater cuffs stay snug, why hat brims grip without slipping, why ribbed necklines recover after stretching, and how yarn choice determines performance. You can use that knowledge when making bigger clothing items.
From a search-and-skill perspective, knitting a headband may seem simple. In reality, it is not. It brings together controlling tightness, understanding yarn, and getting the size right.
If you remember three principles, you will produce consistently professional results:
- Knit with intentional negative ease.
- Think of your stitch size as the foundation of your project, not just a guideline.
- Pick yarns that are stretchy and bounce back to shape.
Everything else — different stitches, textures, twists, or patterns — becomes a way to be creative once you have the basics down.
The headband is small. The skill it builds is not.
Once you master this project, you are not just following instructions; you are creating. You are learning how things are made.