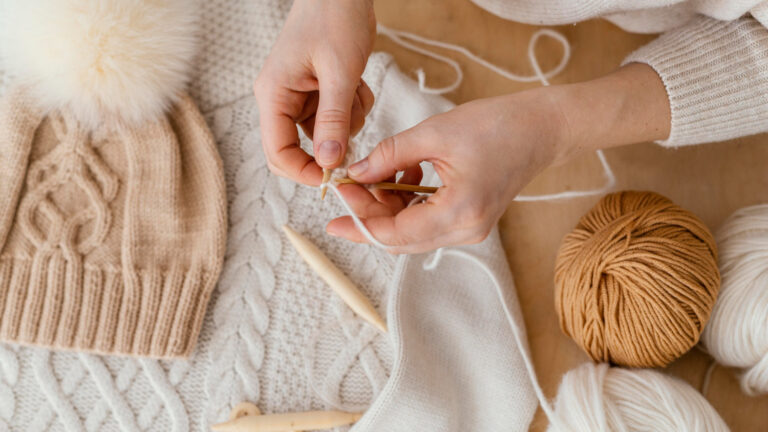
How to Pick Up Knit Stitches In Knitting? Two Methods
Picking up stitches in knitting is a fundamental technique that creates live stitches directly from the edge of an existing fabric. This allows the knitter to seamlessly extend or finish a piece without breaking the yarn. Mastery of this method is essential for adding structural elements such as borders, button bands, collars, and shaping around openings like necklines and armholes.
This technique enhances both the functionality and appearance of a knitted item. Rather than sewing on separate pieces, picking up stitches provides a smooth continuation of fabric, ensuring durability and professional craftsmanship. Understanding this concept is a cornerstone of advanced knitting projects.
Also Read: How to Read Knitting Patterns? Beginners Guide
Why and When to Pick Up Stitches
The decision to pick up stitches is typically driven by the need to build upon an already knitted section. This method is crucial when shaping garments or adding finishing touches such as facings, edging, or decorative trims. For example, button bands on cardigans or neckbands on sweaters are most effectively created by picking up stitches along the edges to ensure a clean, continuous fabric.
Furthermore, picking up stitches facilitates colorwork, ribbing, or other stitch pattern changes on defined sections. It is an indispensable skill for knitters aiming to create garments with precise fit and polished finishes that meet professional standards.
Also Read: How to Finish a Knitting Project: A Complete Guide
Essential Tools for Picking Up Stitches
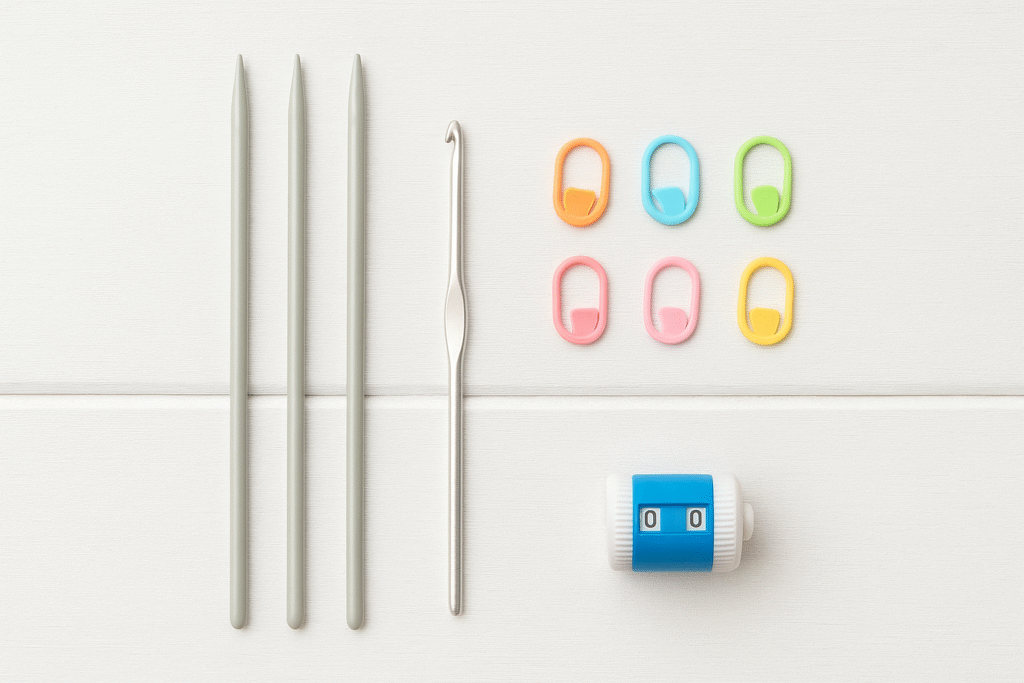
To execute this technique with precision, it is imperative to use the appropriate tools. The knitting needles should match the size used in the original project to maintain consistent stitch tension. This prevents mismatched fabric density and ensures a uniform appearance along the edges.
In addition to needles, a small crochet hook can serve as an invaluable aid, particularly when working along firm or uneven edges where inserting a needle is challenging. Stitch markers and counters are also recommended for tracking stitch placement and maintaining accuracy across complex edges.
Also Read: How to Count Rows in Knitting: A Complete Guide
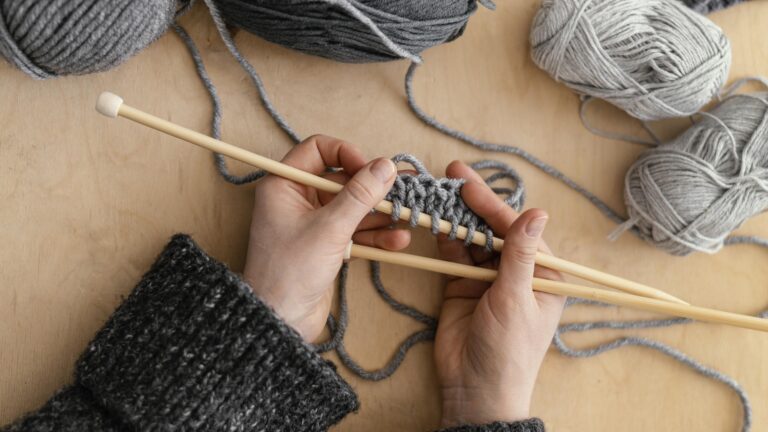
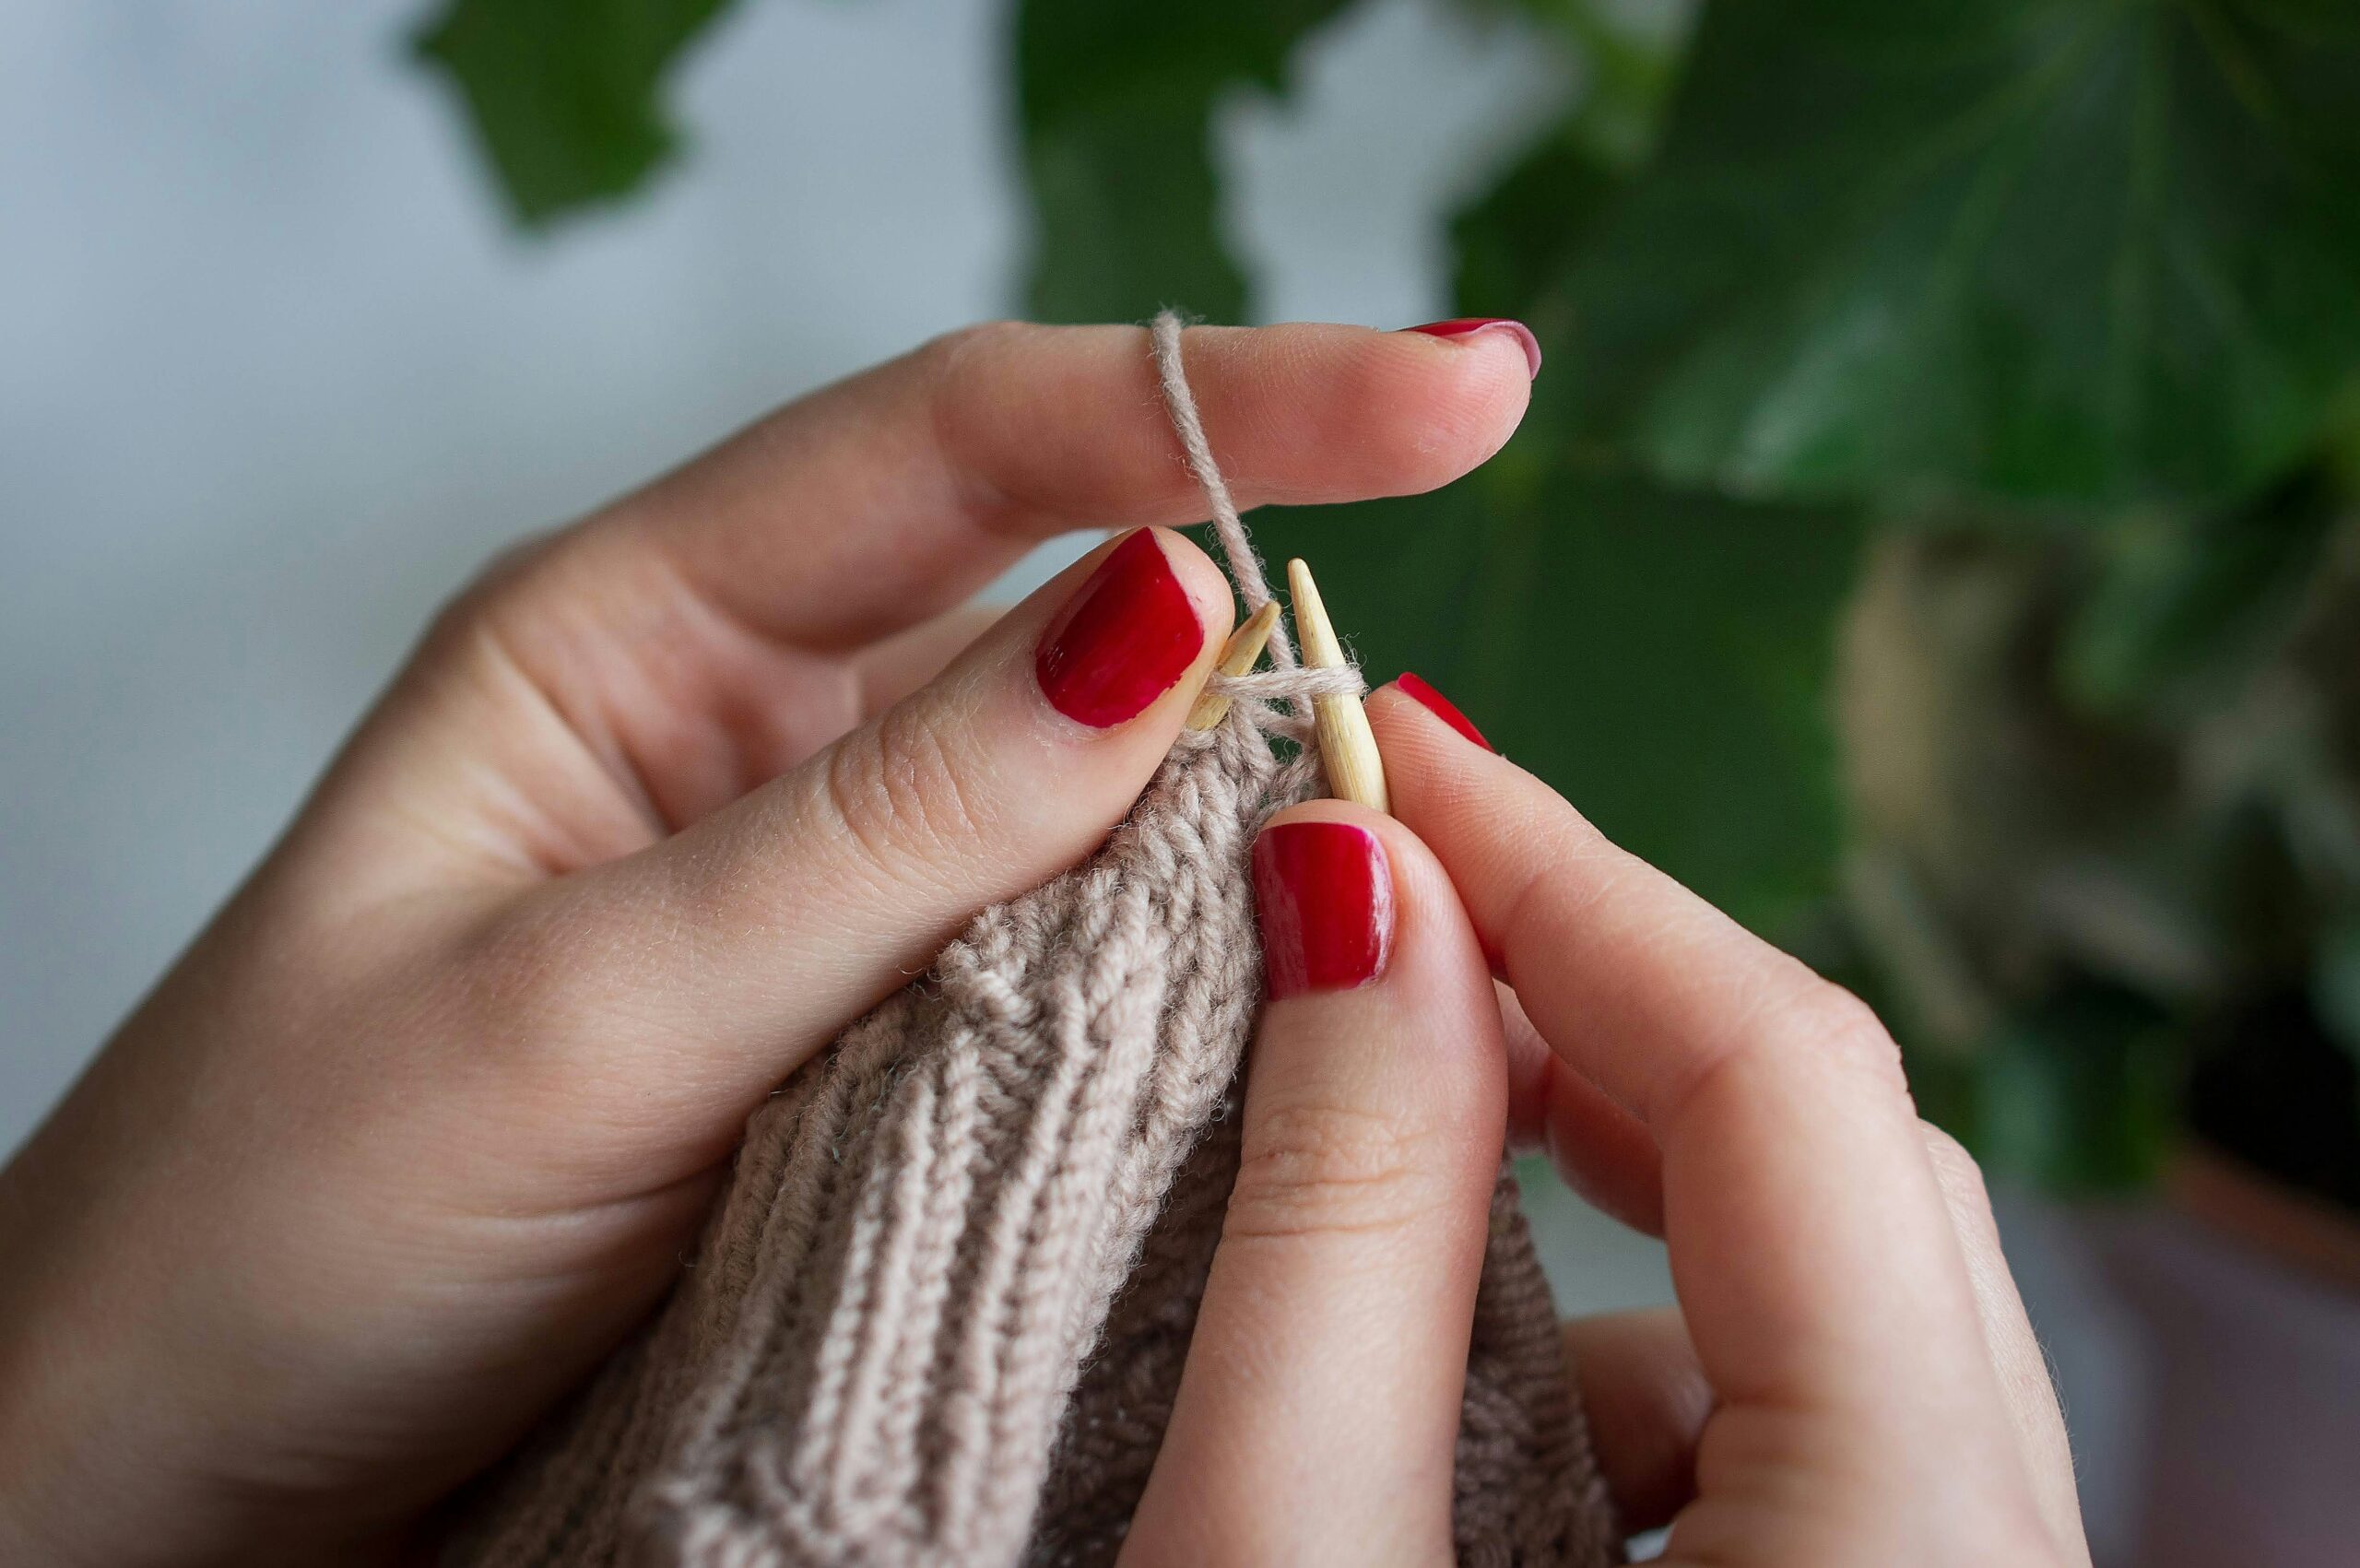
How to Pick Up Knit Stitches?
Begin by positioning your work with the edge to be picked facing upwards. Insert the needle tip under the horizontal strand (or bar) between stitches, carefully following a consistent insertion point along the edge. Wrap the yarn around the needle exactly as you would when making a knit stitch and pull a loop through to form a new, live stitch on your needle.
Maintaining consistency in needle placement and yarn tension throughout this process is critical. Professional results arise from deliberate, steady motions and mindful yarn control. Developing a controlled rhythm and practicing on sample swatches is highly advised before working on a final project.
Also Read: How to Add Stitches When Knitting: A Complete Guide
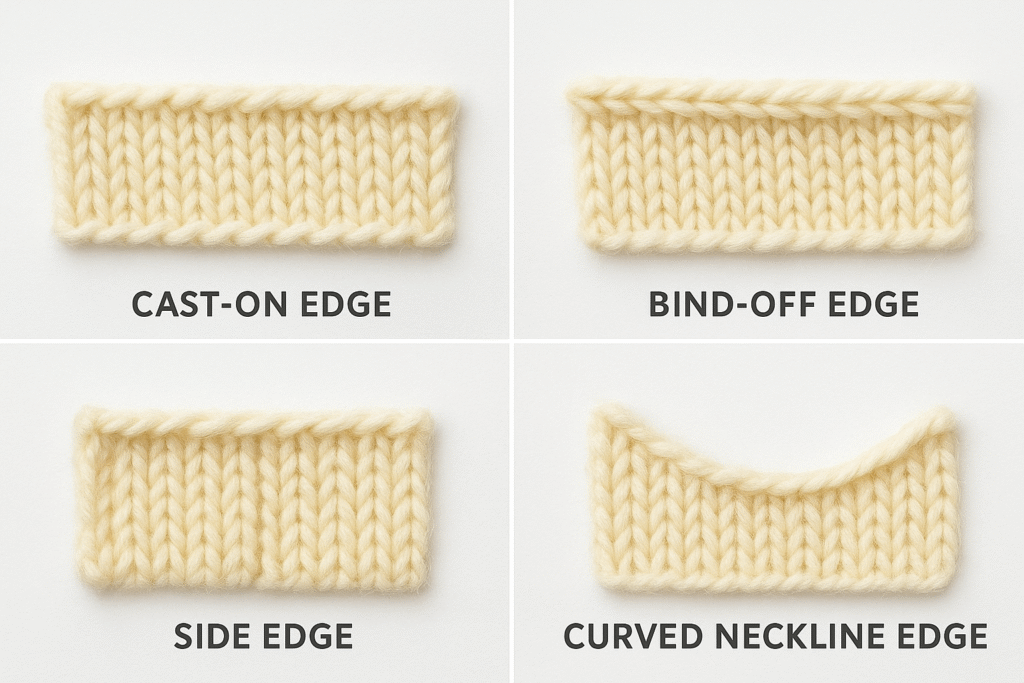
Stitch Pickup Ratios by Fabric Type
Accurate ratios prevent edges from flaring or pulling. Below is a reference guide commonly used by professional knitters:
Stockinette Side Edge
Pick up 3 stitches for every 4 rows. This ratio balances vertical row length with stitch width, ensuring a smooth transition from the existing fabric to your new work.
Garter Side Edge
Pick up 1 stitch for every ridge. This keeps the edge flat without puckering and maintains the characteristic texture of garter stitch.
Ribbing Edge
Match the rib pattern (e.g., k2, p2). This prevents distortion of rib columns and maintains the elasticity that makes ribbing functional.
Cast-On Edge
Pick up 1 stitch per cast-on stitch. This ensures even tension with the foundation row and creates a seamless continuation.
Bind-Off Edge
Pick up 1 stitch per bind-off stitch. Reduce slightly if the fabric pulls, as bind-off edges tend to be tighter than the main fabric.
Curved Necklines and Armholes
Average 2 stitches for every 3 rows. This ratio smooths shaping without stretching and accommodates the curved nature of these garment areas.
Picking Up Stitches Along Different Edge Types
Along a Cast-On Edge
The cast-on edge offers a clear, horizontal bar between stitches that simplifies stitch pickup. For best results, insert your needle under these bars rather than through individual loops to achieve an even tension and stable edge.
Proper control of the yarn tension here prevents loose, floppy stitches or excessively tight, puckered fabric. The goal is a seamless transition that mimics the fabric’s original elasticity and texture, thereby preserving the garment’s structural integrity and visual appeal.
Along a Bind-Off Edge
Picking up stitches on a bind-off edge demands careful attention because of its firmness and tighter construction. The ideal insertion points are the horizontal bars created during the bind-off process. Precise needle placement under these bars results in clean, secure stitches with minimal risk of gaps.
Overly loose tension here often results in holes along the seam, while excessive tightness causes visible puckering. Adjusting the needle size slightly smaller than the working needle can help balance the tension for a polished, professional edge.
Alongside Edges and Slants
Side edges, particularly those with slanting shapes such as raglan lines or neckline curves, present additional challenges in stitch pickup. Accurately following the slant requires carefully observing fabric angles and adjusting where the needle inserts between rows or stitches.
A reliable approach is to adopt a consistent ratio—such as one stitch picked every two rows—to maintain even distribution. This prevents stretched or bunched areas and ensures the new fabric grows organically from the shaped edge, maintaining design integrity.
Also Read: How to Join in Round in Knitting: Comprehensive Guide
Picking Up Stitches Around Curves and Necklines
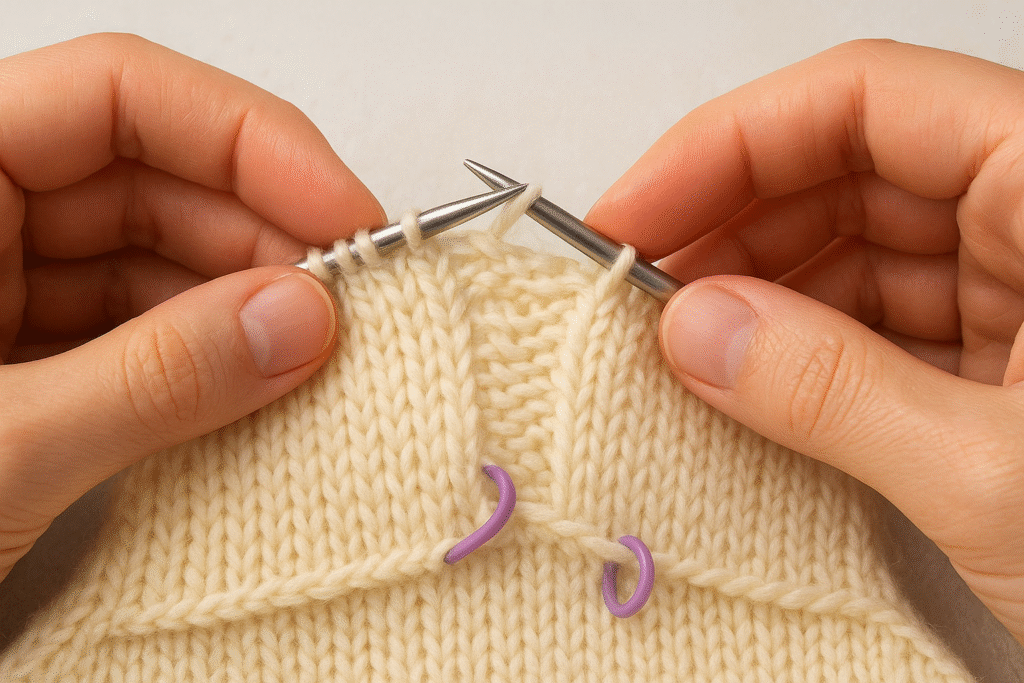
Curved edges require special attention because uneven spacing creates puckering or gaps. A structured approach ensures smooth shaping and professional results.
Step-by-Step Approach for Curves
- Divide the edge into quarters with stitch markers for consistent distribution across the entire curve.
- Use smaller ratios around tight curves (2 stitches every three rows) to avoid bulk and maintain the curve’s natural shape.
- At armholes, increase pickups slightly under the arm to prevent holes in this high-stress area.
- On rounded necklines, alternate ratios (sometimes 3 for four rows, sometimes 2 for three rows) to ease stitches gradually around the curve.
- Always check symmetry by counting both sides of the neckline to ensure balanced shaping.
Two Primary Pickup Methods
Two reliable approaches are often used depending on preference and project requirements:
Pick Up and Knit (Simultaneous Method)
Insert the needle, wrap the yarn, and create a stitch in one smooth motion. With practice, the Pick Up and Knit (Simultaneous Method) can feel quicker and more efficient, though you may want to pay attention to keeping your tension comfortable as you go.
Pick Up, Then Knit Across (Two-Step Method)
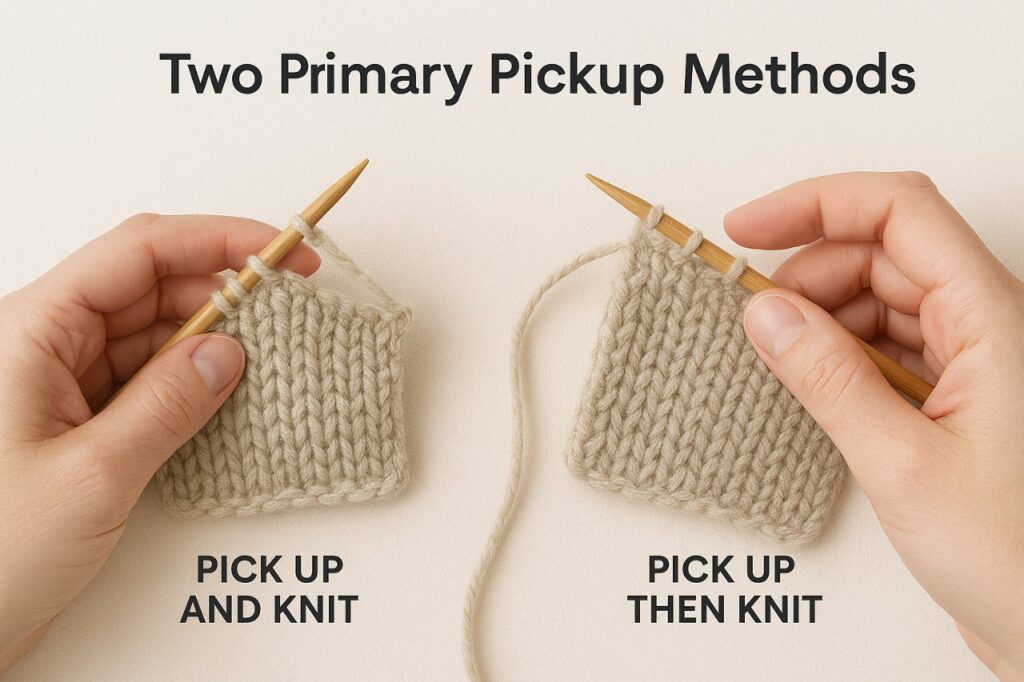
Lift loops first (often with a crochet hook), place them on the left needle, then knit across in a separate step. This produces a neater edge and is especially helpful for beginners or when working with slippery yarns that are difficult to control.
Tips for Maintaining Even Tension
Uniform tension is paramount for stitch pickup to integrate visibly with the existing knitwork. Maintaining moderate yarn tension avoids puckering or overly loose loops that degrade the fabric’s appearance and wearability. Consistent needle size and deliberate hand movement are crucial elements of success.
It is recommended to periodically assess stitch tension visually and by feel, correcting any inconsistencies early in the process. With experience, knitters develop an intuitive feel for maintaining balanced tension across various edges and yarn types.
Counting and Planning Stitches to Pick Up
Accurate stitch counting is fundamental to avoiding distortions caused by picking up too many or too few stitches. Where patterns specify stitch counts, strictly follow those instructions for guaranteed fit and proper shaping.
In the absence of exact instructions, experienced knitters use estimated ratios—such as one stitch per row or every other row—depending on the fabric gauge and edge type. Tools like stitch markers and counters facilitate precision and prevent counting errors during complex or lengthy edges.
Quick Troubleshooting Guide
When problems arise during stitch pickup, these solutions can help:
- Edge feels tight and curls → Use a larger needle for the pickup row to create more relaxed stitches.
- Holes at neckline joins → Pick up through both loops or bars to close gaps completely.
- Too many stitches picked up → Decrease evenly across the first row to achieve the correct stitch count.
- Fabric puckers or pulls → Adjust pickup ratio by reducing the number of stitches picked up per row.
Also Read: How to Fix a Dropped Stitch: A Complete Guide for Knitters
Common Mistakes and How to Fix Them
Common errors include uneven stitch sizes, loose or puckered edges, and unwanted holes. These typically stem from inconsistent yarn tension or incorrect needle insertion points. Tackling these problems starts with unraveling a few stitches and re-picking them up with adjusted tension or needle placement.
When holes or gaps occur, reassessing the stitch pickup ratio or inserting the needle more carefully can correct the issue. Patience and methodical practice are necessary to hone this skill—successful knitters treat these corrections as critical learning moments rather than setbacks.
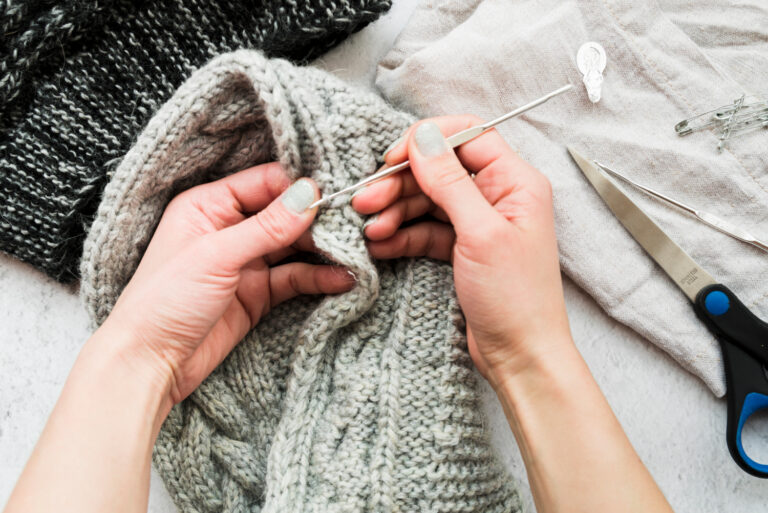
Using a Crochet Hook to Assist
A crochet hook is an excellent auxiliary tool for stitch pickup, especially effective for snagging yarn bars along tight or difficult edges. This approach reduces fabric strain compared to forcing a knitting needle tip through hard-to-access spots.
By gently pulling the yarn through with the hook and then transferring the loop to the knitting needle, knitters can maintain stitch integrity and evenness. This technique is particularly beneficial for beginners or those working with textured or tightly knitted fabrics where needle insertion proves challenging.
Frequently Asked Questions
Conclusion: How to Pick Up Knit Stitches In Knitting?
Picking up knit stitches elevates the quality and finish of any knitting project. This essential skill provides smooth transitions, firm edges, and durable structure in garments and accessories. Whether creating button bands, necklines, or complex shaping, picking up stitches transforms knitting from a basic craft to refined artistry. With the right tools, steady tension control, and thoughtful planning, knitters can avoid common pitfalls and achieve polished, professional results.
Whether using a knitting needle or crochet hook assistance, consistent practice and precision build confidence when working any edge—straight, slanted, or bound off. Combining foundational knowledge with practical application makes picking up stitches second nature, enabling the creation of garments that are both attractive and long-lasting.
Mastering the technique of picking up stitches is truly the gateway to polished, professional knitting, turning every project into a masterpiece worthy of pride and admiration.