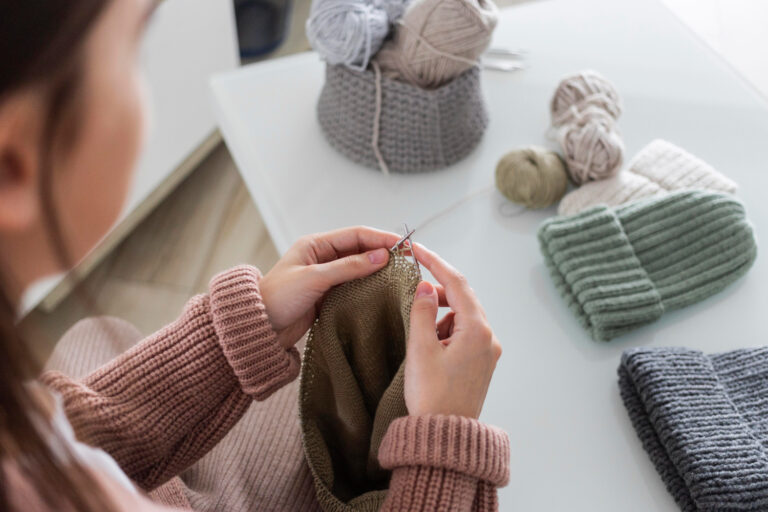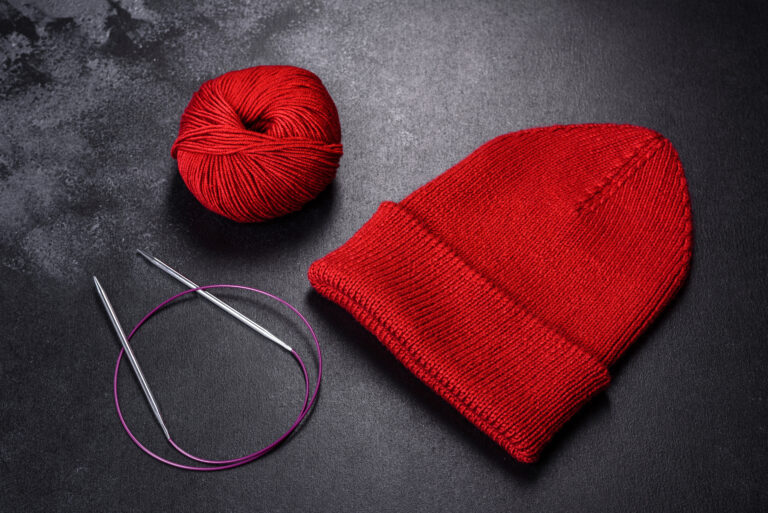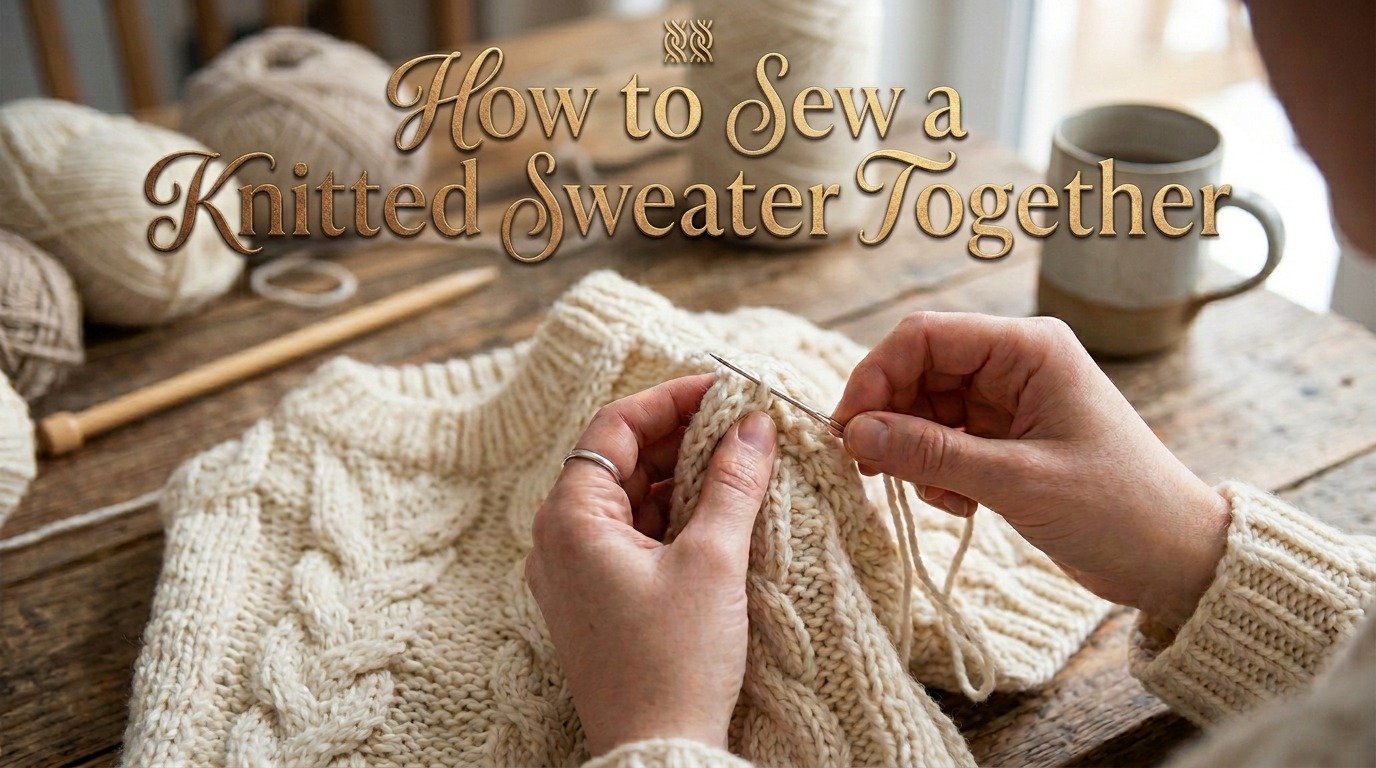
How to Sew a Knitted Sweater Together? Easy Guide
Once you finish knitting your sweater pieces, you move closer to wearing your new garment. However, mistakes often happen at the final step. Learning how to sew a knitted sweater together properly ensures your sweater looks polished and store-quality, not homemade.
When you seam knitted pieces, you join the fabric and add shape, structure, and durability. Using techniques like the mattress stitch, you create clean, flexible seams that move with your sweater and result in a professional finish.
After you invest time in knitting, assembling the pieces completes your project. In this knitting sweater assembly tutorial, you follow step-by-step seaming guidance, from blocking and shoulder seams to sleeves and finishing touches, to make sure your sweater looks and feels professional.
Also Read: How Long Does It Take to Knit a Sweater? Complete Guide
How to Sew a Knitted Sweater Together
Knowing how to sew a knitted sweater together transforms separate panels into a cohesive, wearable piece.
Proper seaming ensures the sweater fits, hangs evenly, and maintains its design. Techniques like the mattress stitch create clean, flexible, nearly invisible joins that blend into the fabric.
With the right tools, preparation, and a structured approach, even complex sweater construction can yield professional-level results, producing a durable, well-shaped, and visually refined garment.
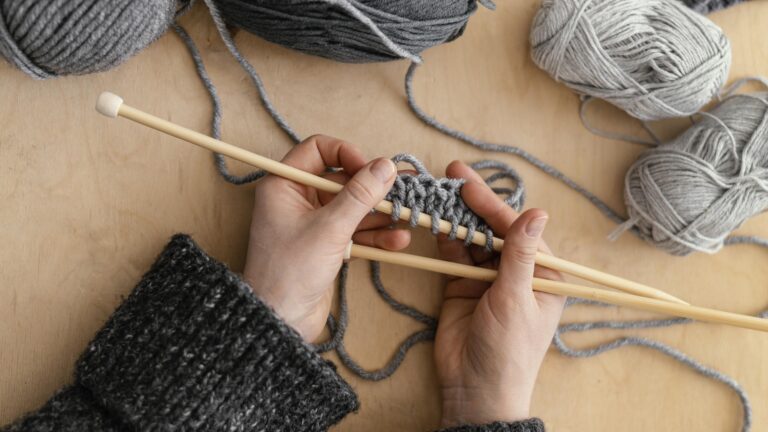
Tools and Materials Needed
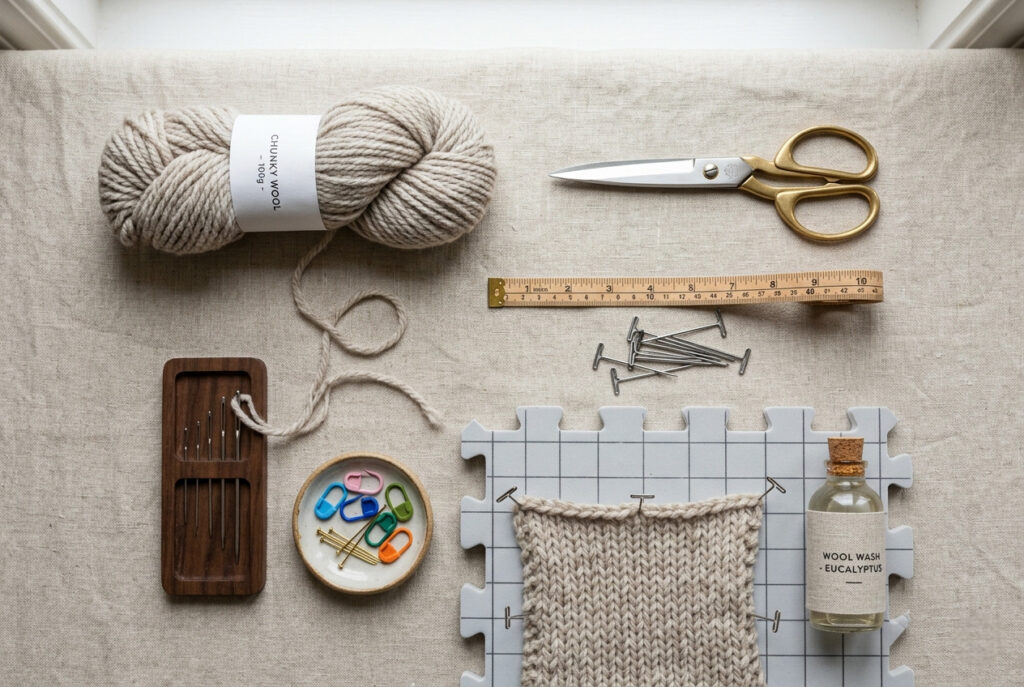
Before starting how to sew a knitted sweater together, gather the right tools. Having the proper materials not only makes the process smoother but also ensures strong, even seams that last.
Essentials
Also Read: How to Use Stitch Markers for Knitting: Easy Guide
Why These Matter
Choosing the right tools directly impacts the quality of your seams. A blunt tapestry needle slides between stitches without splitting fibers, one of the most common beginner mistakes when learning how to sew a knitted sweater together.
Using matching yarn helps create an invisible seam knit sweater, blending the joins seamlessly into your fabric. Stitch markers or pins keep edges aligned while you seam knitting pieces together, preventing shifting and uneven joins.
For larger projects, simple additions like extra pins or even a comfortable workspace setup can make a noticeable difference in accuracy and ease of use.
Blocking Your Pieces First
One of the most overlooked steps in how to sew a knitted sweater together is blocking, and skipping it almost always leads to uneven, puckered seams.
What is Blocking?
Blocking means shaping your knitted pieces to the right size using water or steam. It makes stitches even, smooths the fabric, and makes sure all pieces fit together before sewing.
How to Block
- Soak your knitted pieces in lukewarm water or use steam blocking.
- Gently squeeze out excess water (never wring).
- Lay pieces flat on a towel or blocking mat.
- Pin each piece to the right size and match the edges.
- Let everything dry completely — usually overnight.
Pro Tips from Experience
Blocking is a must, not a choice. If you skip this step, seams will look bad. Uneven fabric causes bumps, twists, and poor fit when sewing pieces together.
Why Blocking Matters
Also Read: How Do I Block a Knitted Sweater? Step-by-Step
When learning how to sew a knitted sweater together, blocking is the key step for a professional look.
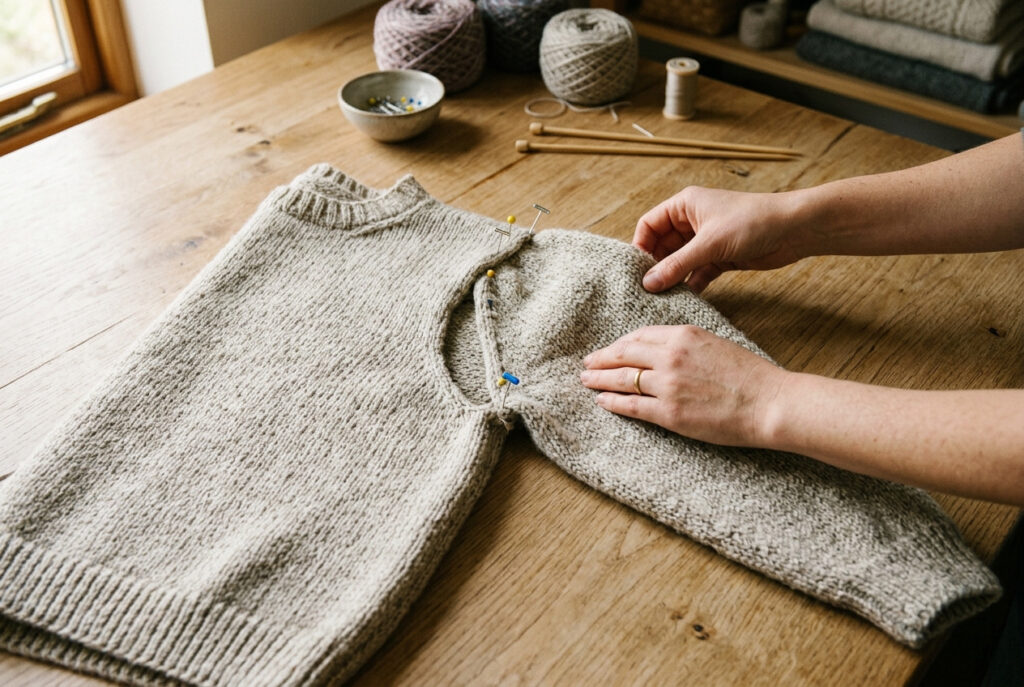
Joining Shoulder Seams
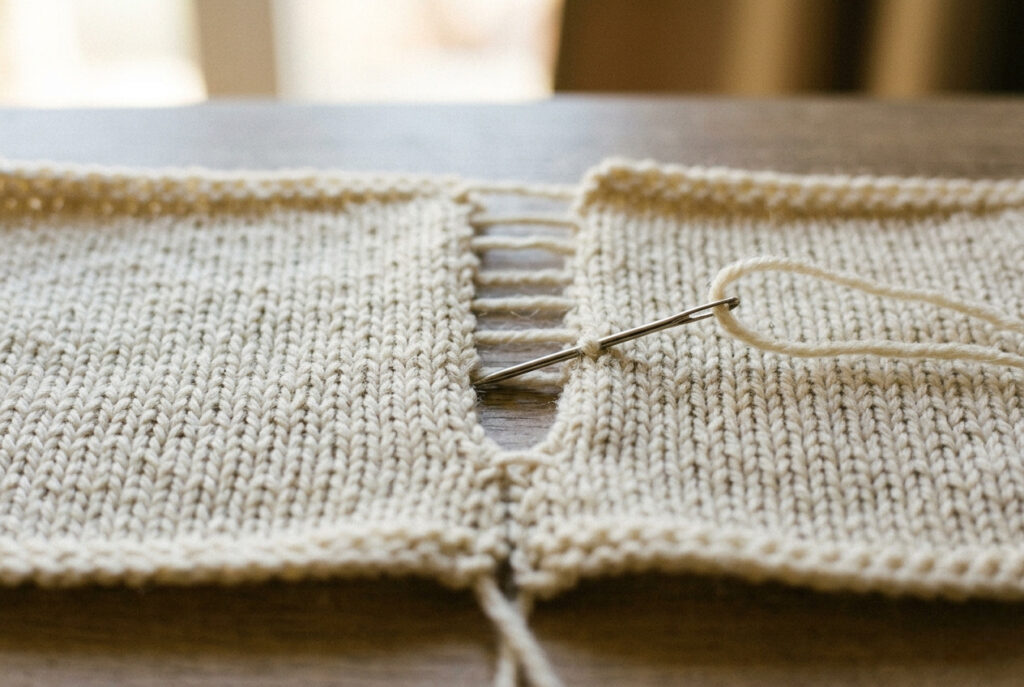
The shoulders are the backbone of your sweater. A clean, well-shaped seam here determines how the garment sits, making this a critical step in how to sew a knitted sweater together.
Best Method: Mattress Stitch
The mattress stitch knitting sweater technique is the most effective way to create a flat, flexible, and nearly invisible seam knit sweater finish.
Step-by-Step Instructions
1. Position Your Pieces Correctly
Lay both shoulder pieces flat, right sides facing up. Align the edges evenly from the neckline to the armhole to ensure a straight and balanced seam.
2. Prepare and Thread the Yarn
Cut a length of yarn about three times the seam length and thread it through a tapestry needle. Use the same yarn as your project for a consistent, seamless finish. For thicker sweaters, you may double the yarn for added strength.
3. Identify the Correct Stitch Bars
Locate the horizontal bars between the edge stitches on both pieces. These bars sit just inside the outer stitches and are used to create a clean, invisible join.
4. Start at the Neck Edge
Insert the needle under one horizontal bar on the first piece, then under the corresponding bar on the second piece. Begin at the neckline to maintain proper alignment.
5. Work in an Alternating Pattern
Continue sewing by alternating between the two pieces, picking up one bar from each side. This creates a ladder-like structure as the base of the seam.
6. Close the Seam Gradually
After every few stitches, gently pull the yarn to bring the edges together. The seam should close smoothly without gaps or puckering.
7. Maintain Even Tension
Keep the tension consistent throughout the process. The seam should lie flat and remain flexible, allowing the fabric to stretch naturally.
8. Check Alignment Regularly
Pause occasionally to ensure the rows are evenly aligned and the seam remains straight. Make adjustments early if needed.
9. Finish the Seam Securely
Once you reach the armhole edge, pass the yarn through the final stitches to secure it. Leave a tail long enough to weave in later during finishing.
Expert Tips for Perfect Results
Also Read: What is Garter Stitch in Knitting? Easy Knitting Explained
Pro Tip: Avoid pulling too tightly. A good seam should stretch naturally with the fabric. This is essential for a professional finish when sewing a knitted sweater together.
Setting in Sleeves
With the shoulders joined, setting in sleeves is the next key step in how to sew a knitted sweater together. This stage shapes the garment and affects how your sweater fits and moves.
How to Sew Knit Sweater Sleeves
1. Position the Sweater Body and Sleeve
Lay the sweater body flat with the right side facing up. Place the sleeve on top, also right side up, so the sleeve cap aligns with the armhole opening. Make sure both pieces are smooth and not twisted.
2. Align the Sleeve Cap with the Shoulder Seam
Locate the center of the sleeve cap and match it with the shoulder seam. This alignment is essential for balanced shaping and helps the sleeve sit correctly when worn.
3. Secure Key Points with Pins or Markers
Pin or clip the sleeve in place, starting at the underarm seams, then the shoulder center, and finally the sides. Distribute the pins evenly to hold the sleeve cap in position and prevent shifting during sewing.
4. Ease the Sleeve Cap Evenly into the Armhole
Gently distribute the extra fabric along the sleeve cap so it fits smoothly into the armhole. Work gradually to avoid puckering and make sure the fabric lies flat and follows the natural curve.
5. Sew the Sleeve Using Mattress Stitch
Using mattress stitch, attach the sleeve by picking up stitches along the armhole edge and the sleeve edge. Work steadily around the curve, keeping even tension to create a clean, flexible, and nearly invisible seam.
This method ensures precise shaping and a professional result when sewing a knitted sweater, especially during the critical sleeve-setting stage.
Key Technique: Easing the Sleeve Cap
Sleeve caps are slightly larger than the armhole by design. Ease about 1–2 inches of fabric into the curve to create a smooth shape.
When done correctly, this step helps create a clean, invisible seam knit sweater finish.
Also Read: How to Add Stitches When Knitting: A Complete Guide
Expert Tips for Better Results
Why This Step Matters
Poor sleeve placement can cause bunching, tightness, or uneven shaping. Taking your time here ensures your sweater looks balanced and fits comfortably, an essential part of mastering how to sew a knitted sweater together.
Sewing Side and Underarm Seams
Once the sleeves are attached, the next step in sewing a knitted sweater together is closing the side and underarm seams. This stage brings the garment together and defines its final shape.
Step-by-Step Instructions
1. Position and Layer the Pieces Correctly
Lay the sweater flat with the front placed over the back, keeping the right sides facing outward. Ensure the edges from the cuff to the hem are straight and untwisted.
2. Align Edges from Cuff to Hem
Match the sleeve edges, underarm points, and side seams. Align the rows so the stitches line up evenly along the length.
3. Secure with Pins or Markers
Place pins or stitch markers at regular intervals, starting at key points such as the cuff, underarm, and hem. This keeps the fabric stable and prevents shifting while you seam knitting pieces together.
4. Begin Sewing with Consistent Technique
Start sewing from the cuff toward the underarm, or from the hem toward the top, depending on your preference. Use mattress stitch, working under the stitch bars on both sides to create a smooth, even join.
5. Seam Continuously Through the Underarm
Continue sewing in one uninterrupted motion through the underarm area, maintaining even tension. Ensure the seam remains flat, flexible, and aligned for a clean, invisible seam knit sweater finish.
This method gives strong, even seams and a professional sweater finish.
Best Stitch: Mattress Stitch
The mattress stitch is ideal for this step because it creates a strong, flexible, and nearly invisible seam knit sweater finish.
Expert Tips for Clean Seams
A steady rhythm helps when you seam knitting pieces together. Small adjustments along the way prevent bigger mistakes later.
Why This Step Matters
Side and underarm seams impact both the look and comfort of your sweater. Clean, even seams ensure the garment hangs correctly and feels comfortable to wear. This is essential to mastering how to sew a knitted sweater together.
Also Read: How to Join in Round in Knitting: Comprehensive Guide
Finishing Techniques (Weaving Ends & Washing)
Once all seams are complete, the final step in sewing a knitted sweater together is finishing. These details ensure your sweater looks polished, holds its shape, and lasts.
Weaving in Ends
Properly securing yarn tails prevents unravelling and keeps your sweater neat.
Moving the yarn around helps avoid lumps and keeps the seam neat and hidden.
Also Read: How Do You Weave in Ends in Knitting? Step-by-Step
Blocking and Washing the Sweater
After seaming, blocking sets the stitches and smooths out seams.
Also Read: How to Block a Knitted Scarf: 5 Easy Steps
Why This Step Matters
Finishing properly is essential when mastering how to sew a knitted sweater together. It gives you a sweater that looks nice, feels good, and lasts a long time.
Common Mistakes and Fixes
Even experienced knitters run into issues when sewing a knitted sweater, so if something feels off, you’re not alone. Most mistakes are easy to fix once you know the cause.
1. Uneven or Wavy Seams
What’s happening: Your seams look rippled or don’t line up neatly.
Why it happens: Skipping blocking or not matching rows properly.
How to fix it: Block your pieces first. Then, line up stitches carefully before sewing. If the seam already looks uneven, gently loosen it and re-block. This often smooths everything out.
2. Visible Seams
What’s happening: You can clearly see where the pieces were joined.
Why it happens: Using the wrong stitch or sewing through the wrong part of the stitches.
How to fix it: Try using mattress stitch. It is the simplest way to make a neat, hidden seam that blends into your knitting.
3. Tight or Puckered Seams
What’s happening: The seam pulls the fabric inward or appears bunched.
Why it happens: Pulling the yarn too tightly while sewing.
How to fix it: Relax your tension. The seam should stretch like your knitting. Pull the yarn gently every few stitches instead of all at once.
Also Read: How to Fix a Dropped Stitch: A Complete Guide for Knitters
4. Misaligned Pieces
What’s happening: The edges don’t match, or one side looks longer than the other.
Why it happens: Not pinning or marking sections before sewing.
How to fix it: Use stitch markers or pins to hold everything in place. This makes it easier to seam knitting pieces together evenly without shifting.
5. Bulky Underarm Seams
What’s happening: The underarm area feels thick or uncomfortable.
Why it happens: Too much yarn buildup or uneven sleeve attachment.
How to fix it: Sew the fabric gently when attaching the sleeves. If the seam feels thick, use a flatter stitch like a simple backstitch in that spot to make it less bulky.
6. Twisted or Incorrectly Joined Pieces
What’s happening: Something feels off, and the sweater doesn’t sit right.
Why it happens: Sewing pieces together with the wrong sides facing or incorrect alignment.
How to fix it: Before you start, double-check that all pieces face the right direction. This simple step prevents a lot of frustration later.
Also Read: How to Cast on Knitting with Two Needles: A Complete Guide
7. Yarn Damage or Felting
What’s happening: Yarn looks fuzzy, stiff, or worn out.
Why it happens: Too much handling or rough finishing.
How to fix it: Be gentle with your yarn, especially during finishing. If you’re unsure, practice on scrap pieces first. It builds confidence quickly.
Pro Tip: If something doesn’t look right, pause and fix it early. Undoing a few stitches now is easier than redoing the whole seam later. With a little practice, how to sew a knitted sweater together will start to feel natural and even enjoyable.
Mattress Stitch vs. Whip Stitch: Which Is Better?
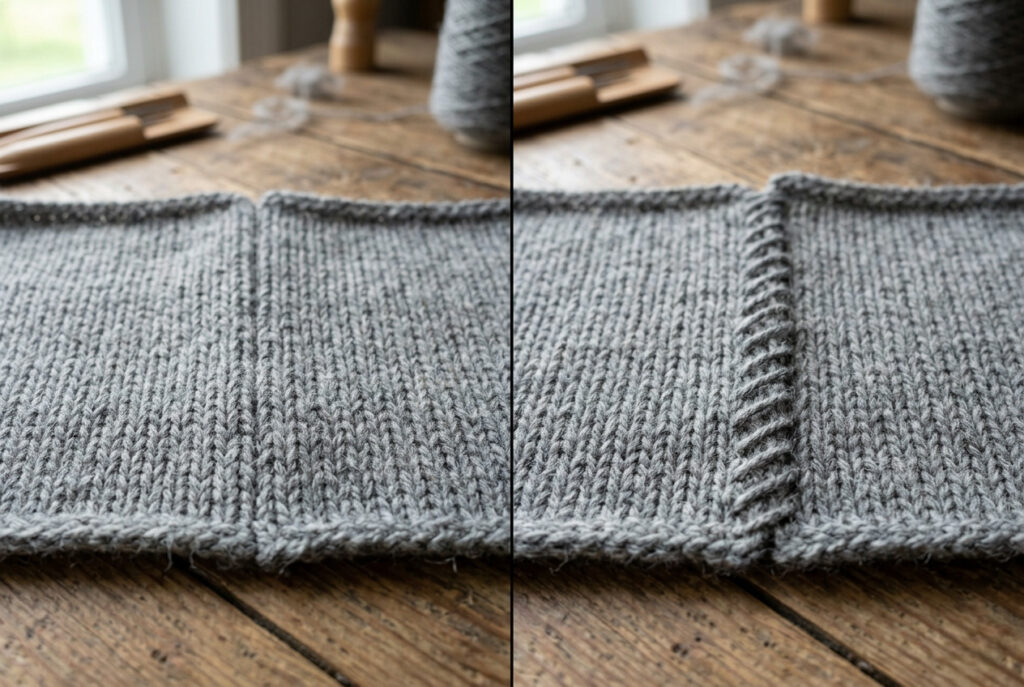
When learning how to sew a knitted sweater together, selecting the right seaming method directly affects the appearance, stretch, and durability of your finished garment. The two most commonly used techniques are mattress stitch and whip stitch, each suited to different purposes.
Mattress Stitch
The mattress stitch knitting sweater technique is widely considered the standard for professional sweater assembly.
This method joins pieces from the front by working under the horizontal bars between stitches, allowing the seam to blend seamlessly into the surrounding fabric.
Whip Stitch
The whip stitch is a simpler and faster method, often used by beginners or for less critical seams.
Whip stitch is typically worked by passing the needle over the edges of both pieces, which makes it less discreet but functional in certain situations.
Key Differences
For most projects involving how to sew a knitted sweater together, the mattress stitch is the preferred choice. It delivers a clean, durable, and professional finish that enhances the garment’s look and fit.
Whip stitch is good for simple seams or quick fixes, but mattress stitch gives the best results for quality sweater assembly.
Also Read: How to Knit SSK Stitch: Easy Guide for Beginners
FAQs: How to Sew a Knitted Sweater Together
Conclusion
Learning how to sew a knitted sweater together is the step that transforms your hard work into a finished, wearable piece. While knitting builds the fabric, it’s the seaming that gives your sweater its structure, fit, and professional appearance.
By following simple steps, shaping your pieces, joining shoulders, adding sleeves, sewing the sides, and finishing with care, you make a sweater that looks neat and feels good to wear. Using stitches like the mattress stitch keeps your seams stretchy and almost hidden, so your sweater moves easily when you wear it.
What matters most is patience and attention to detail. Taking the time to align stitches, maintain even tension, and fix small mistakes early will significantly improve your final result. Even if your first attempt isn’t perfect, each project builds your confidence and skill.
With practice, sewing a knitted sweater together feels natural. Instead of being the hardest step, it becomes one of the most enjoyable parts where all your knitting comes together into something finished, wearable, and special.
Also Read: How to Style a Cable Knit Sweater: Easy Guide 5 Tips