
How to Purl Stitch Knit? Easy Step-by-Step Guide
Learning how to purl stitch Knit is an important step toward becoming a confident knitter. If you already know how to make a basic knit stitch, you have a good starting point. The purl stitch uses a similar technique but you hold the working yarn in front of your needles instead of behind them.
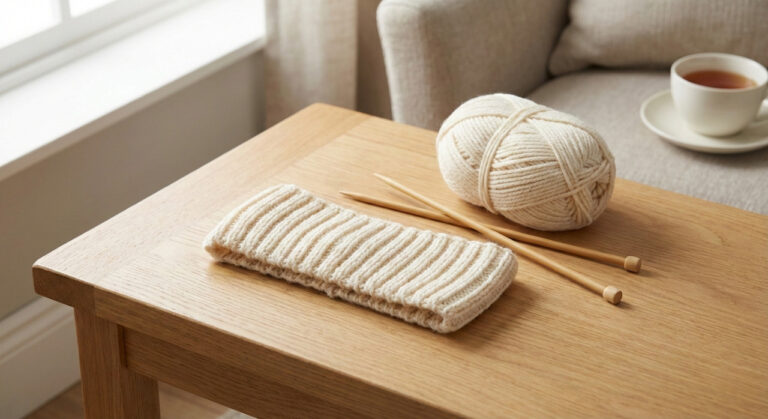
When practicing a new knitting technique, light-colored yarn makes it easier to see each loop and spot mistakes. Purling may feel awkward at first, but a few practice rows help develop a comfortable rhythm.
In this beginner-friendly guide, you will learn how to purl stitch step by step, understand the difference between knit and purl stitches, and correct common mistakes. You will also discover how to use this versatile stitch in familiar knitting patterns such as ribbing, stockinette, and moss stitch.
Also Read: How Do You Make a Slip Knot for Knitting? Easy Guide
Key Takeaways
What Is the Purl Stitch in Knitting?
The purl stitch is one of the two basic knitting stitches. It creates a small horizontal bump on the side of the fabric facing you and forms the reverse side of a knit stitch, which appears as a smooth V. Think of knit and purl stitches as two sides of the same coin.
Both techniques create new loops through existing stitches, but the yarn position and needle movement differ. For a purl stitch, keep the working yarn in front of the needles before inserting the right needle into the existing stitch.
Purling is essential for many familiar knitting patterns, including stockinette stitch, ribbing, moss stitch, and seed stitch. Once the movement feels comfortable, combining knit and purl stitches becomes easier.
Knit Stitch vs. Purl Stitch: What’s the Difference?
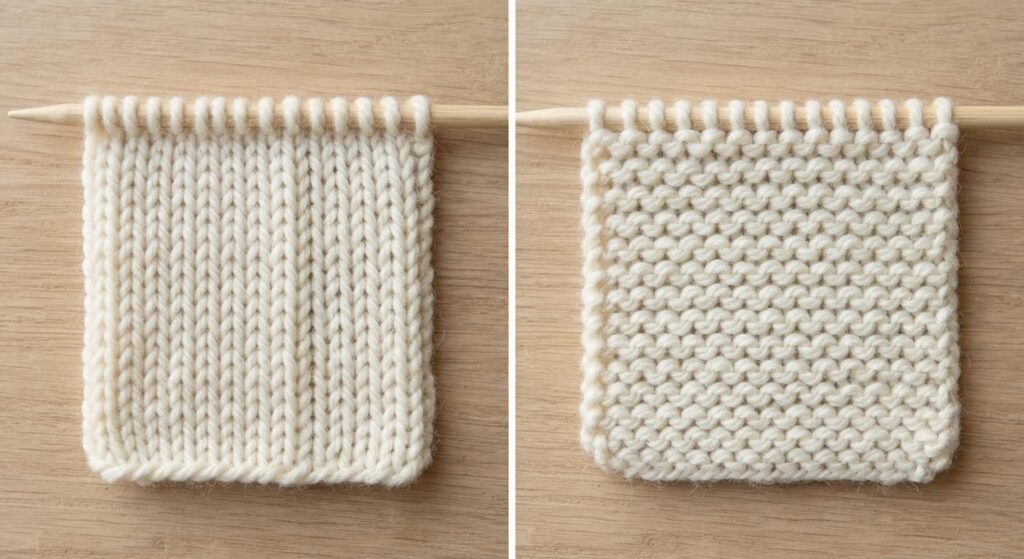
The main difference between knit and purl stitch techniques is the position of the working yarn, the direction of needle insertion, and the texture each stitch creates.
| Feature | Knit Stitch | Purl Stitch |
| Yarn position | Behind the needles | In front of the needles |
| Needle movement | Enters the stitch from front to back | Enters the front of the stitch from right to left |
| Appearance | Smooth V-shaped loops | Small horizontal bumps |
| Common uses | Stockinette fabric and textured patterns | Ribbing, textured patterns, and the reverse side of stockinette |
| Pattern abbreviation | K | P |
A simple way to remember the difference is knit = yarn back; purl = yarn front. When switching stitches, move the working yarn between the needle tips rather than over a needle. This helps prevent accidental yarn-overs and extra stitches.
Both stitches are useful on their own, but combining them creates a much wider range of textures. Understanding their differences also makes knitting patterns easier to read and follow.
Also Read: How to Read Knitting Patterns?
What You Need to Practice the Purl Stitch
You do not need special equipment to learn this stitch. Choose materials that make the loops easy to see and handle.
Avoid dark, fuzzy, or highly textured yarn while practicing. Smooth, light-colored yarn makes it easier to see each loop, recognize stitch structure, and identify mistakes as you work.
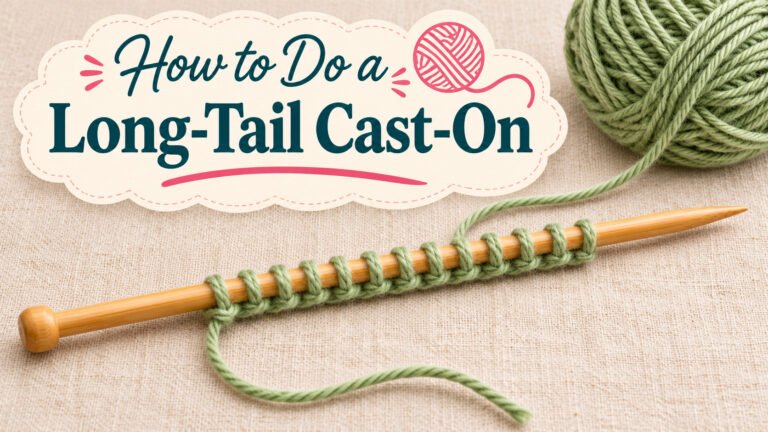
Cast on your stitches before beginning. If casting on is unfamiliar, practice that skill first so you can focus on the purling movement.
Also Read: What Size Needles for Beginner Knitting: 6 Easy Tips
How to Purl Stitch: Step-by-Step Instructions
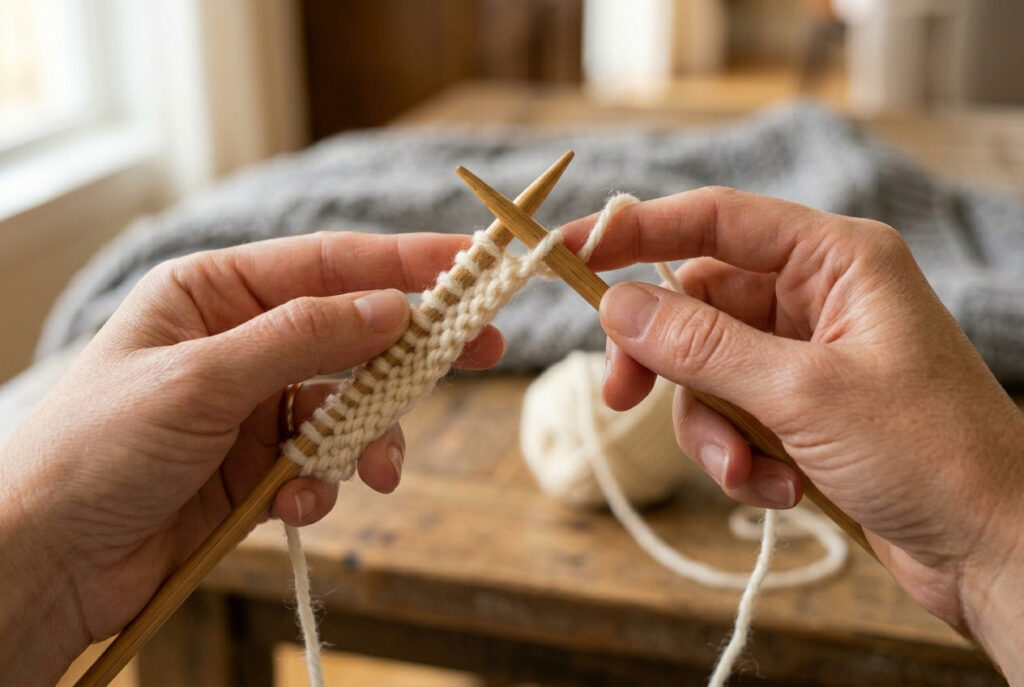
These purl stitch instructions follow the standard Western method for right-handed knitting. Work slowly at first, focusing on yarn position and needle movement. Once comfortable, you can complete a row without stopping after every stitch.
Step 1: Cast On Your Stitches
Cast on 20–30 stitches using your preferred method. Hold the needle with the stitches in your left hand and the empty needle in your right hand.
Keep stitches loose enough to work comfortably. Smooth, light-colored yarn makes each loop easier to see while you practice.
Also Read: How to Cast on Knitting with Two Needles: A Complete Guide
Step 2: Bring the Working Yarn to the Front
Move the working yarn between the needle tips so it rests in front of your work, closest to you.
Unlike a knit stitch, a purl stitch requires the yarn to remain in front while you form the new loop. Moving the yarn over the needle instead of between the needles can create an accidental extra stitch.
Step 3: Insert the Right Needle
Insert the tip of the right needle into the front of the first stitch on the left needle, moving from right to left.
The needle tips should cross, with the right needle passing in front of the left. Check that you have entered the existing loop rather than catching the yarn separately.
Step 4: Wrap the Yarn Around the Right Needle
Keep the working yarn in front and wrap it around the right needle in the usual counterclockwise direction for the standard Western purl stitch.
Make the wrap snug but not tight. Leave enough room for the new loop to pass through the stitch without pulling or stretching the yarn.
Step 5: Pull the New Loop Through
Use the right needle to draw the wrapped yarn through the original stitch.
A new loop should appear on the right needle. If the yarn catches, adjust the needle angle rather than pulling forcefully.
Step 6: Slide the Old Stitch Off
Let the original stitch slide off the left needle once the new loop has passed through.
You have completed one purl stitch. The new loop now rests on the right needle, ready for the next stitch.
Step 7: Repeat Across the Row
Repeat the same movements for every remaining stitch:
- Keep the working yarn in front.
- Insert the right needle from right to left.
- Wrap the yarn around the right needle.
- Pull the new loop through.
- Slide the old stitch off the left needle.
Maintain a comfortable grip and aim for loops of similar size. Count stitches at the end of the row to check you have not accidentally added or dropped any.
Also Read: How to Count Rows in Knitting: A Complete Guide
Step 8: Turn Your Work and Practice Again
At the end of the row, the left needle should be empty and the completed stitches should sit on the right needle.
Switch the needles between your hands so the needle holding the stitches returns to your left hand. Purl another row for practice, or knit one row and purl the next to see how the two stitches create different fabric textures.
Also Read: How to Fix a Dropped Stitch: A Complete Guide for Knitters
How to Purl: English vs. Continental Style
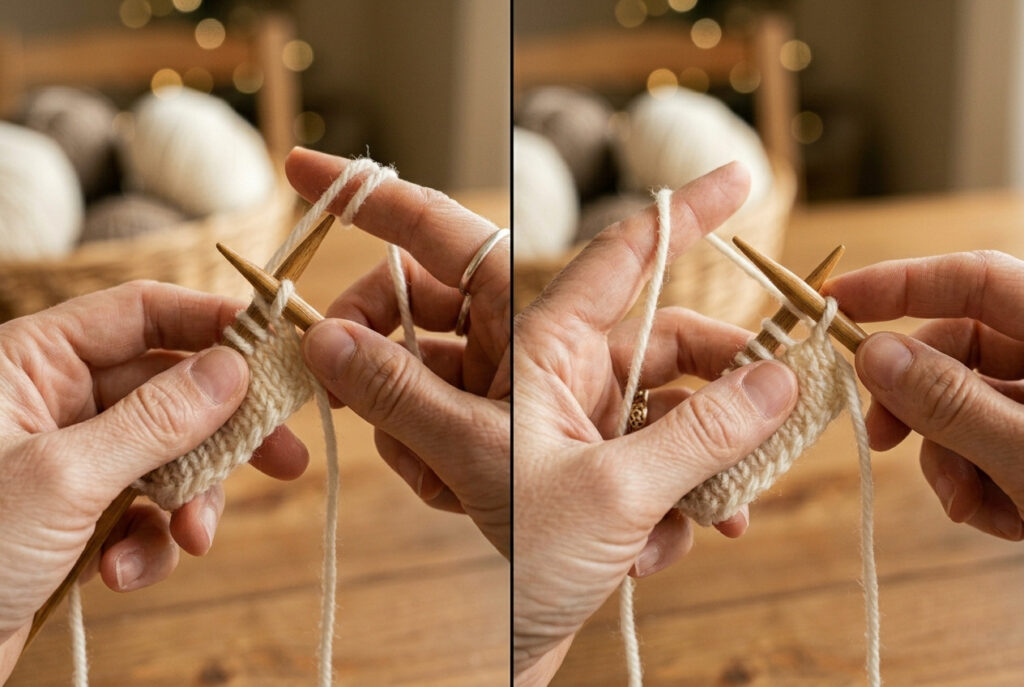
There are two common ways to hold the yarn when purling: English and Continental style. Both create the same purl stitch but differ in how you control and wrap the working yarn. Choose the method that feels comfortable and helps you maintain even tension.
How to Purl English Style
In English-style knitting, you typically hold the working yarn in your right hand. After inserting the right needle into the stitch from right to left, wrap the yarn around the needle with your right hand.
Draw the new loop through the existing stitch, then slide the old stitch off the left needle. Keep the yarn close to the needle tips to minimize hand movement.
This method may suit knitters who prefer controlling the yarn directly with their right hand.
How to Purl Continental Style
In Continental-style knitting, you hold the working yarn in your left hand. Keep the yarn in front of the work, insert the right needle into the stitch, and use its tip to catch the yarn.
Draw the new loop through the existing stitch, then slide the old stitch off the left needle. This technique may feel unfamiliar at first because your left hand controls yarn tension while the right needle catches it.
If your purl stitches are tighter or looser than your knit stitches, adjust how you hold and tension the yarn. Practice both methods with a small swatch to find which feels most natural.
Also Read: Continental vs. English Knitting: Easy Guide
What Does a Purl Stitch Look Like?
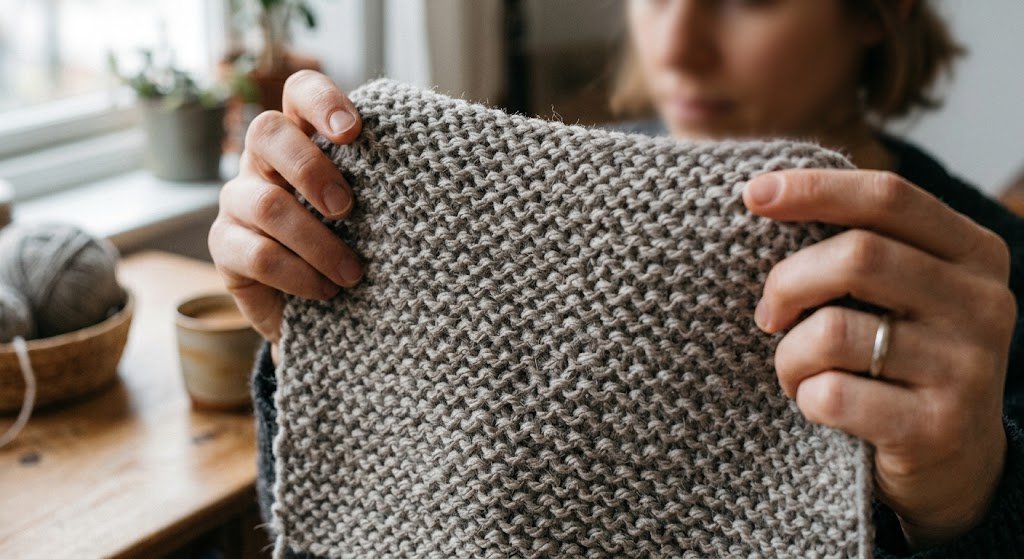
A completed purl stitch forms a small horizontal bump on the side facing you. When you work several purl stitches together, these bumps create a textured surface.
The reverse side of the same fabric displays the familiar V-shaped knit stitches. This difference explains why stockinette stitch has a smooth side and a bumpy side: the knit stitches form the V-shaped side, while the purl stitches form the textured side.
When examining your practice swatch, look for these features:
Common Purl Stitch Mistakes and How to Fix Them
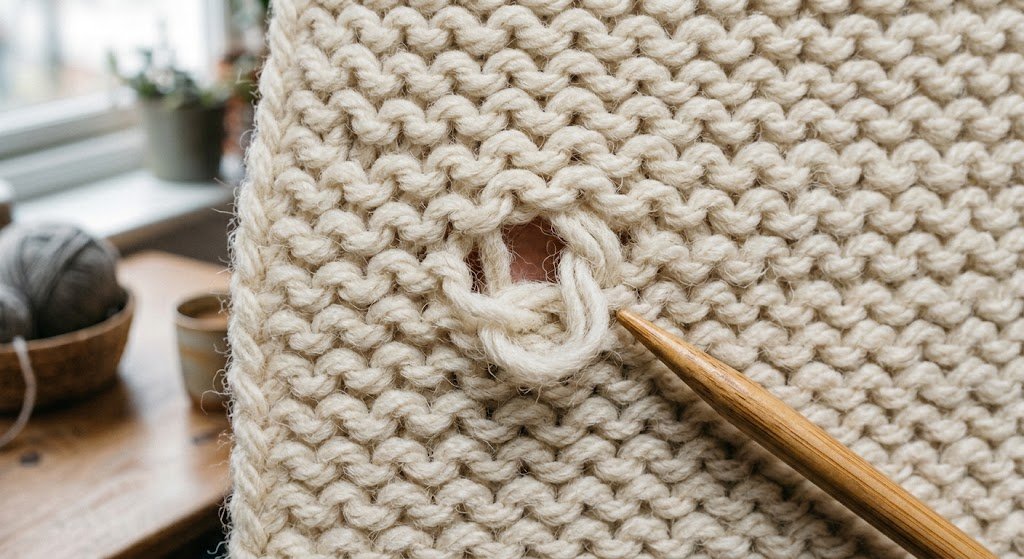
When learning to purl stitch, you may notice uneven loops, unexpected holes, or changes in your stitch count. These problems often come from yarn position, needle movement, or inconsistent tension. Checking your stitches as you work helps you identify and correct mistakes early.
| Common problem | Possible cause | How to fix it |
| Loose or uneven stitches | Inconsistent yarn tension | Hold the yarn comfortably and aim for loops of similar size. |
| Extra stitches appear | Accidental yarn-overs | Move the yarn between the needle tips when switching positions, and count your stitches after each row. |
| Purl stitches look like knit stitches | You may be viewing the reverse side of the fabric | Check for horizontal bumps on the purl side and V-shaped stitches on the knit side. |
| Purl stitches are too tight | Pulling the yarn too firmly | Relax your grip and avoid tightening each loop excessively. |
| Small holes appear | Accidental yarn-overs or loose tension | Check the yarn position before each stitch and maintain consistent tension. |
| Stitches look twisted | The needle enters the stitch incorrectly | Follow the stitch instructions carefully and check that the stitch legs sit correctly on the needle. |
Also Read: How to Fix a Knitting Hole: Easy 5 Techniques and Tips
Why Are My Purl Stitches Loose?
Loose purl stitches often result from inconsistent yarn tension. You might pull one loop tightly and leave the next too relaxed.
Hold the working yarn comfortably and use consistent movement for each stitch. Avoid tugging the yarn after every loop. If your purl rows look looser than your knit rows, practice a small swatch before changing needle size.
Why Does My Purl Stitch Look Like a Knit Stitch?
First, check which side of the fabric you are viewing. A purl stitch forms a V-shaped knit stitch on the reverse side, so this appearance is normal.
If the stitch looks different from the surrounding stitches, check that the working yarn is in front before purling. Insert the right needle through the front of the existing stitch, wrap the yarn once, and draw the new loop through.
How Can I Avoid Adding Extra Stitches?
Count your stitches at the end of each practice row. Pay close attention when moving the working yarn between the front and back of your needles.
Move the yarn between the needle tips, not over the needle. Carrying it over the needle can create an accidental yarn-over, adding a stitch and may leave a small hole in your fabric.
Knitting Patterns You Can Make With Knit and Purl Stitches
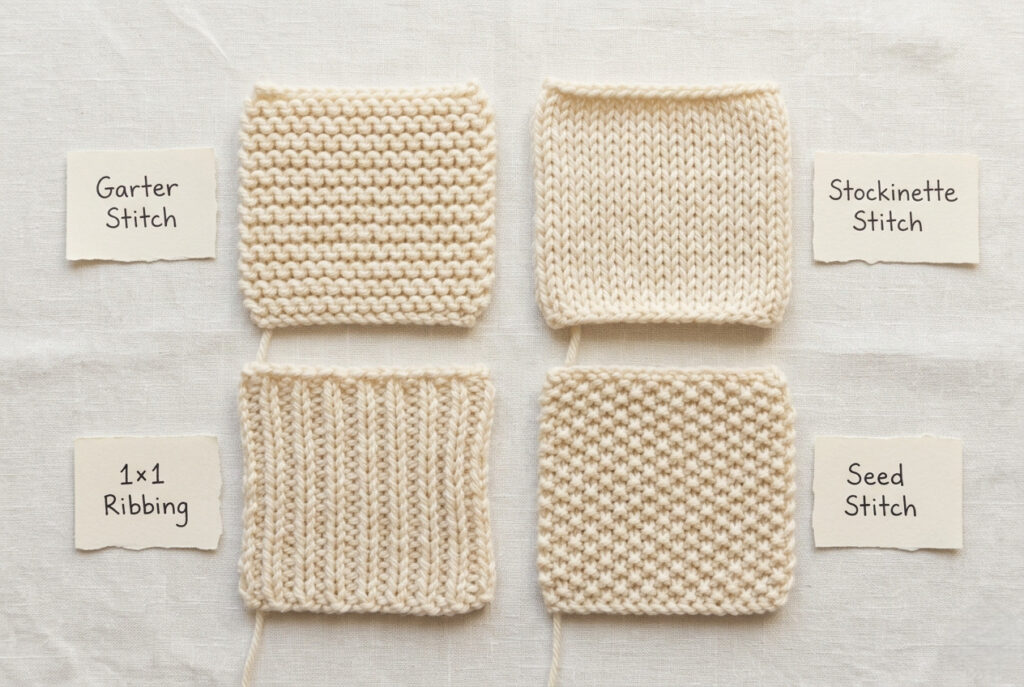
Once you can purl comfortably, combine knit and purl stitches to create various textures. These beginner-friendly patterns provide useful practice and help you understand how stitch combinations affect knitted fabric.
Garter Stitch
Garter stitch creates a reversible fabric with horizontal ridges. When knitting flat, knit every row or purl every row to produce this texture.
Its simple structure makes it useful for scarves, dishcloths, and practice swatches. You do not need to alternate between knit and purl rows to create garter stitch.
Also Read: What is Garter Stitch in Knitting? Easy Knitting Explained
Stockinette Stitch
Stockinette stitch has a smooth side with V-shaped stitches and a bumpy reverse side.
When knitting flat, knit one row and purl the next. Repeat these two rows to build the familiar stockinette texture. The fabric tends to curl at the edges, so consider this when choosing a project.
1×1 Ribbing
Ribbing creates alternating vertical columns that stretch and recover well. It is commonly used for sweater cuffs, hat brims, necklines, and hems.
To make 1×1 ribbing, repeat knit one, purl one across the row. On following rows, follow the pattern instructions to keep the knit and purl columns aligned.
Moss Stitch
Moss stitch creates a textured fabric with small, scattered bumps. In a common version, alternate knit and purl stitches across the row, then work the opposite stitch on each stitch in the next row.
This arrangement prevents the stitches from forming continuous vertical columns. Check your pattern before starting because moss stitch instructions can vary by region.
Also Read: How to Knit a Moss Stitch: Best Expert Guide
Seed Stitch
Seed stitch also creates a bumpy texture, with individual knit and purl stitches alternating across the fabric.
For a common version, work knit one, purl one across the row. On the next row, purl the knit stitches and knit the purl stitches. This keeps matching stitch types from stacking directly above one another.
Seed stitch is useful for textured scarves, borders, and other projects where you want a fabric that looks similar on both sides.
Also Read: Best Knitting Stitch for Scarves: Easy Beginners Guide
Tips for Perfect Tension and Even Stitches
Achieving a smooth, even fabric is the true mark of mastering the purl stitch. If your stitches look uneven at first, don’t worry—this is completely normal when learning purl stitch knitting. With a bit of practice, your tension will become more consistent, and your results will be more professional.
Good tension is what turns basic stitches into polished knitting, especially when working on projects like scarves, blankets, or stockinette patterns.
Here are the best ways to get better results when learning how to purl stitch knit:
Keep Your Hands Relaxed Tension comes from control, not force. Keep your hands, shoulders, and fingers relaxed while practicing the purl stitch. A tight grip leads to uneven stitches and fatigue.
Practice Slow, Consistent Movements Speed is not the goal at the beginning. Focus on repeating each motion evenly when learning how to purl stitch knit. Consistency builds muscle memory and improves stitch uniformity over time.
Maintain the Same Yarn Tension Throughout Keep your yarn tension consistent with every stitch. Think of it as a steady rhythm rather than individual movements. This is essential for achieving clean purl stitch results.
Use the Same Needle Size Stick with one needle size during practice. Switching sizes too early can affect stitch height and disrupt your learning process.
Don’t Pull Stitches Too Tight A common beginner mistake in purl stitch knitting is tightening each loop after forming it. Instead, let stitches sit naturally on the needle without forcing them.
Practice with a Swatch First Before you start a project, make a small practice piece. This helps you feel more confident with the purl stitch and lets you make mistakes without worry.
Keeping your tension the same is what makes your knitting look neat instead of like beginner’s work. Once you get steady with the purl stitch, your knit and purl stitches will fit together smoothly in patterns like stockinette and ribbing.
Also Read: How to Knit a Gauge Swatch: Quick Guide
Conclusion
Learning to purl stitch gives you an essential skill for creating a wide range of knitted fabrics. Once you understand how to position the yarn, insert the needle, and pull a new loop through, you can combine purl stitches with knit stitches to create different textures.
Start with a small practice swatch, count your stitches regularly, and focus on maintaining even tension. Your first rows may look uneven, but practice will help the movements feel more natural.
When you feel comfortable with the basics, try stockinette stitch, ribbing, or seed stitch. These patterns help you build confidence and make it easier to follow knitting instructions in future projects.
Also Read: Best Beginner Knitting Projects for New Knitters
3 Comments