How to Sew a Pillow: Easy Guide for Beginners
If you’ve ever looked at a store-bought cushion and thought I could make that, you’re absolutely right. Learning how to sew a pillow is one of the easiest and most rewarding sewing projects for beginners. It’s a simple way to upgrade your home without spending much.
In this guide, you’ll learn how to sew a pillow from start to finish. This includes choosing the right fabric, cutting accurately, sewing clean seams, and closing your pillow with a neat, professional finish. Whether you’re making a soft throw pillow for your sofa or a decorative accent for your bed, this step-by-step tutorial will help you create something that looks polished, not rushed.
What You Need to Sew a Pillow
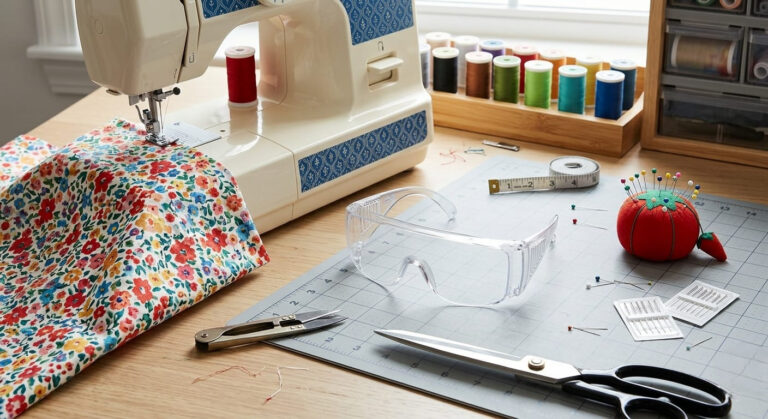
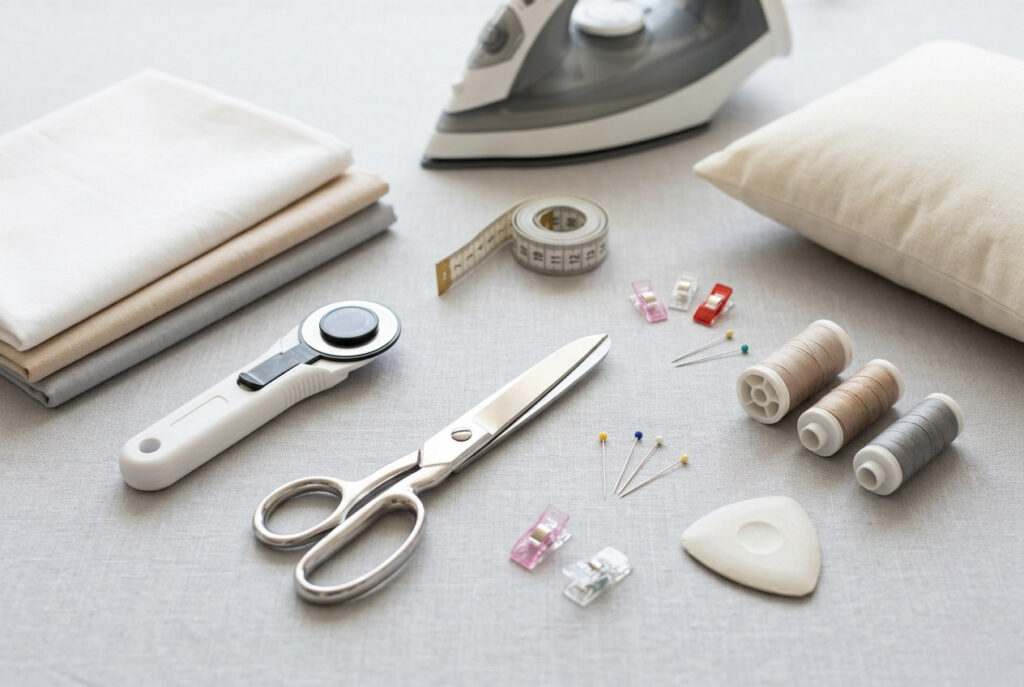
Before you start sewing a pillow, gather everything you need, so you don’t stop halfway through. Having the right tools ready makes the process smoother and helps you get a cleaner, more professional result.
Basic Materials and Tools
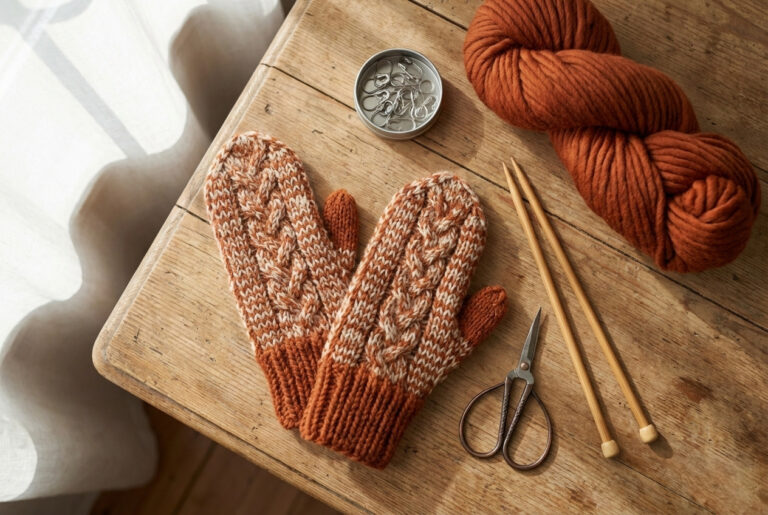
Also Read: Best Knitting Accessories: Top Picks 2026
Choosing Between Pillow Forms and Fiberfill
| Feature | Pillow Form (Insert) | Polyester Fiberfill |
|---|---|---|
| Shape | Structured and polished | Soft and relaxed |
| Best For | Decorative throw pillows | Casual or custom-shaped pillows |
| Firmness Control | Fixed | Fully adjustable |
| Ease of Use | Easy to insert | Requires even distribution |
| Ideal For Beginners | Yes | Yes |
If you’re new to sewing, start with stable cotton or cotton-blend fabric. It’s easier to cut, pin, and sew accurately, which improves your final result.
Choosing the Right Fabric and Pillow Size
One of the easiest ways to make your project look polished is to choose the right fabric and size from the start. When learning how to sew a pillow, these two decisions have a greater impact than most beginners expect.
Common Pillow Sizes for Home Decor
| Size | Best Use |
|---|---|
| 14×14 inches | Children’s rooms or compact spaces |
| 16×16 inches | Ideal for layering or grouping multiple pillows |
| 18×18 inches | Most popular size for standard throw pillows |
| 20×20 inches | Fuller, more decorative, great as a focal point |
Consider where your pillow will be used. Smaller sizes work well in sets, while larger pillows can stand alone on a sofa or bed. For children’s rooms or compact spaces, a 14×14-inch pillow feels more proportionate.
What Fabric to Use for Throw Pillows
Your fabric choice affects both the appearance and ease of sewing the pillow.
| Fabric Type | Characteristics | Best For |
|---|---|---|
| Cotton or cotton blends | Beginner-friendly, easy to cut and sew | First projects, all-purpose use |
| Cotton-linen blends | Slightly textured, more elevated natural look | Decorative or styled pillows |
| Polyester or upholstery fabrics | Durable and stain-resistant | High-use areas, sofas, kids’ rooms |
If this is your first project, start with medium-weight cotton fabric in a simple print or solid color. It stays stable under the needle, shifts less while sewing, and helps you achieve cleaner seams.
Avoid very stretchy or slippery fabrics at the beginning they can make even a simple pillow feel unnecessarily complicated.
Also Read: Best Yarn for Blanket Knitting| Expert Guide 2025
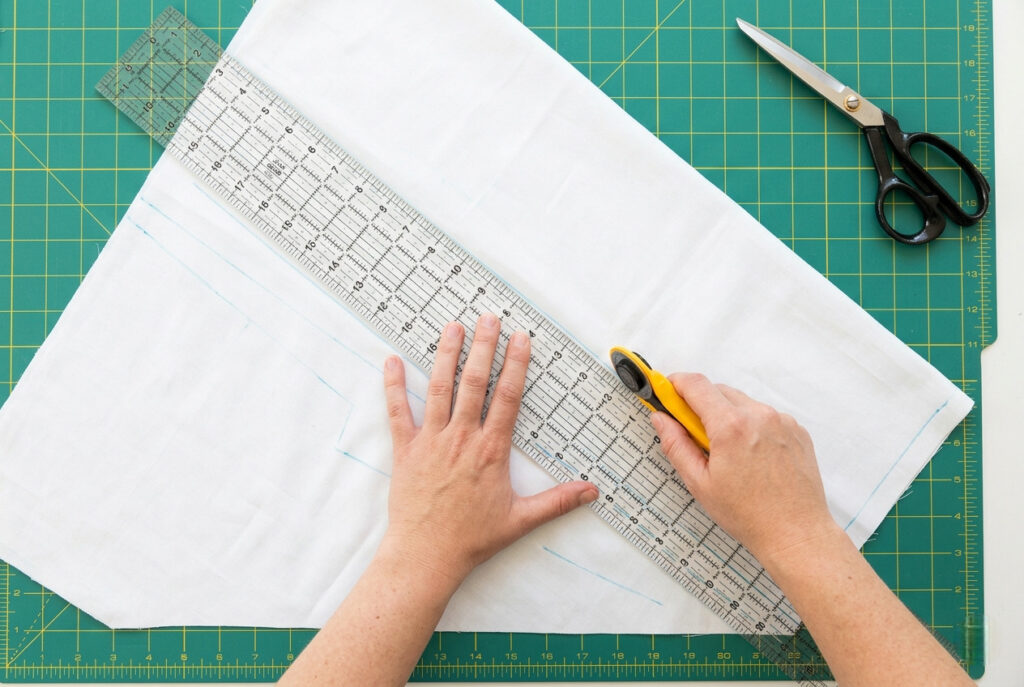
Cutting Your Pillow Fabric Correctly
Cutting fabric may seem like a small step, but it’s where the quality of your pillow really begins. When learning how to sew a pillow, even a few millimeters off can affect how the seams align, how the corners sit, and how professional the final result looks.
Spending a few extra minutes here saves much frustration later.
Start with Fabric Preparation
Before you measure anything, prepare your fabric properly.
Choose and Understand Your Seam Allowance
A consistent seam allowance is key to getting the size right.
Whatever you choose, keep it consistent on all sides. Inconsistent seams often cause pillows to turn out uneven.
Step-by-Step: How to Cut Your Fabric Accurately
Also Read: How to Read Knitting Patterns? Beginners Guide
Example (Clear and Practical)
For an 18×18 inch pillow cover with a ½ inch seam allowance:
Cut two pieces at 19×19 inches.
This ensures that once sewn, your cover fits snugly around the pillow form without looking loose or saggy.
Keep Both Pieces Perfectly Aligned
Before cutting your second piece:
This small step prevents one side from shifting or twisting after sewing, a common problem for beginners.
How to Prevent Fraying on Raw Edges
Raw edges fray quickly, especially on cotton. Finishing them early improves durability.
| Method | Skill Level | Result |
|---|---|---|
| Pinking shears | Beginner | Quick and simple edge finish |
| Zigzag stitch | Beginner | Easy option on most sewing machines |
| Serger / Overlocker | Intermediate | Cleanest and most professional finish |
If you plan to wash your pillow cover often, finishing the edges is worth the effort.
Also Read: How to Finish a Knitting Project: A Complete Guide
Pro Tips for Cleaner, Professional Results
Why This Step Matters More Than You Think
A well-cut pillow:
Uneven cuts cause puckering, twisting, and corners that never look right, no matter how carefully you sew.
If you want your finished pillow to look clean and balanced, treat cutting as part of the craftsmanship, not just preparation. Once you get this step right, everything else, from sewing to stuffing, becomes noticeably easier.
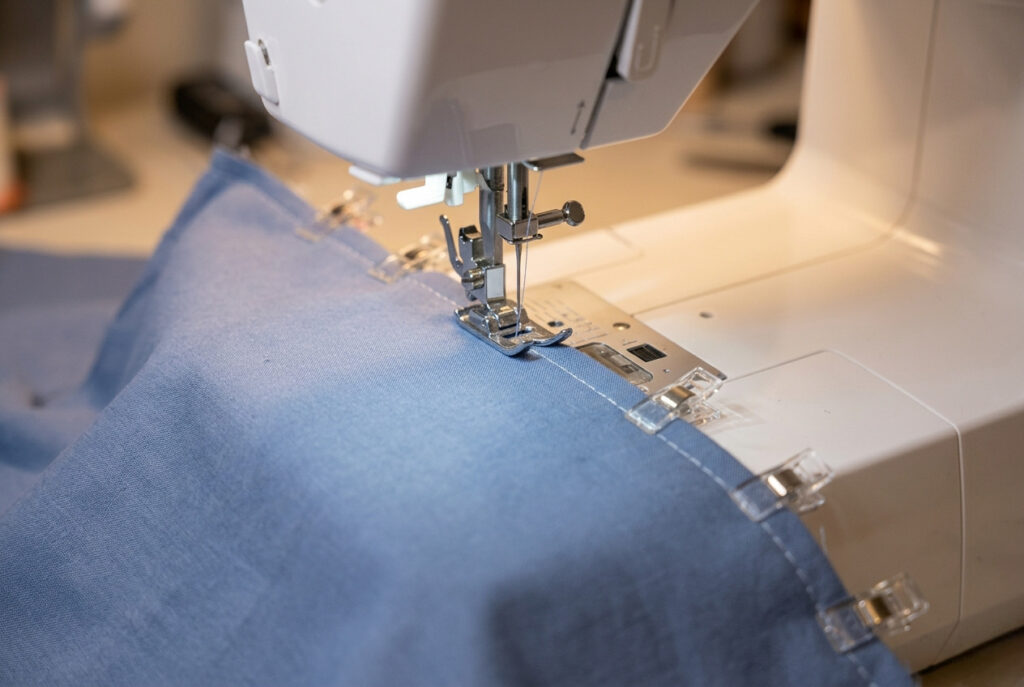
Sewing the Pillow Cover (Right Sides Together)
This is the most important step in learning how to sew a pillow: joining your fabric pieces neatly so the seams are strong and hidden inside.
In sewing terms, you place the right sides together, meaning the outer visible sides of the fabric face inward while you stitch. When you turn the cover right side out later, the seams will be neatly enclosed.
How to Sew a Pillow: Step-by-Step
How to Sew Clean Corners
When you reach each corner:
This helps you maintain sharp, even corners without distortion.
Also Read: How to Count Rows in Knitting: A Complete Guide
Trim Corners for a Better Finish
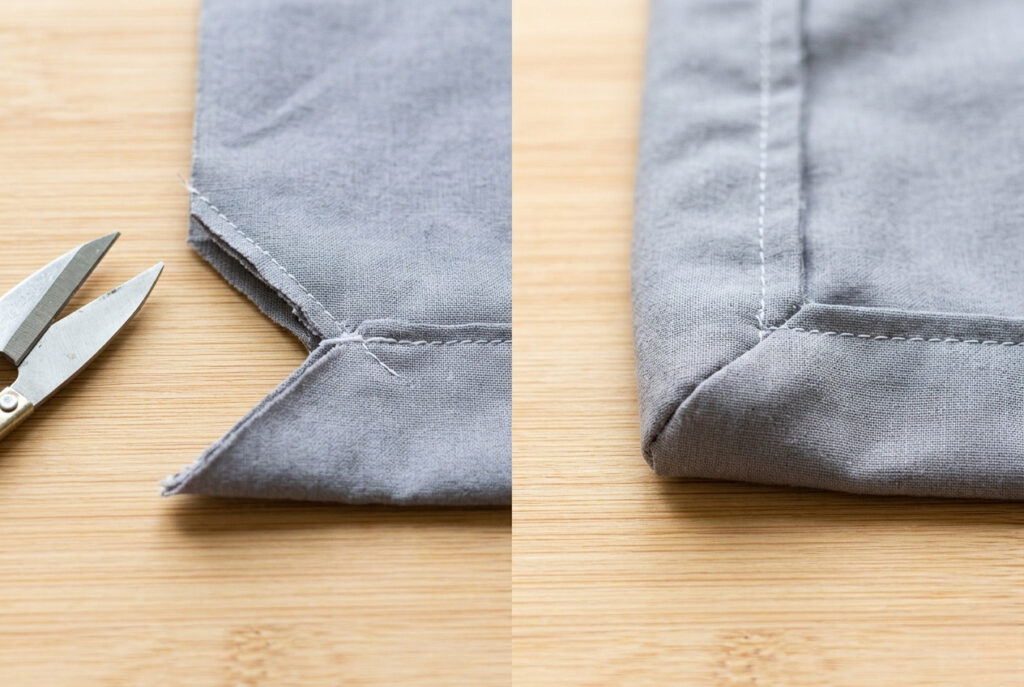
After sewing:
Sewing by Hand (Alternative Method)
If you’re not using a machine:
Hand sewing takes more time, but can still produce a durable and neat pillow cover.
Common Mistakes to Avoid
This step is where your pillow starts to take shape. If your seams are straight and your corners are handled carefully, the rest of the process becomes much easier, and your finished pillow will look noticeably more refined.
Also Read: How to Fix a Dropped Stitch: A Complete Guide for Knitters
Turning and Stuffing the Pillow
Once your seams are sewn, this step brings everything together. When learning how to sew a pillow, turning and stuffing properly gives your project a finished, professional look.
Turning the Pillow Cover
Pressing here makes a noticeable difference in how crisp and structured your pillow looks.
Preparing the Corners for a Clean Finish
If you haven’t already:
Inserting the Pillow Filling
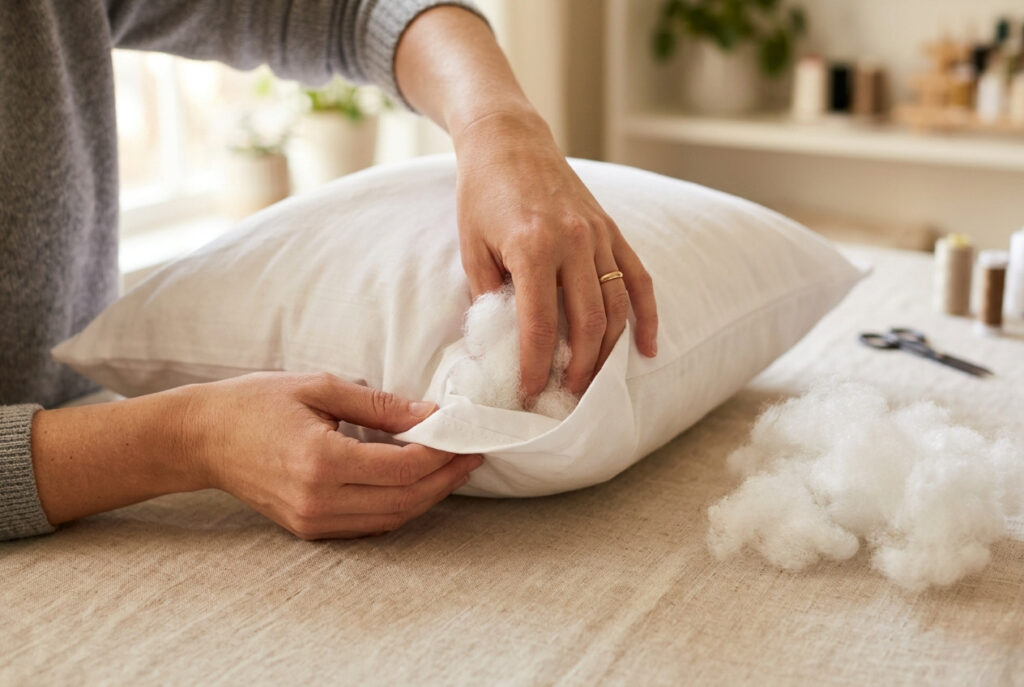
You have two main options:
Pillow Form (Insert)
Polyester Fiberfill
How to Avoid Common Stuffing Problems
Aim for a soft but supportive feel. The pillow should hold its shape without looking tight.
Pro Tip for a Polished Finish
Once filled:
This small adjustment often separates a beginner result from a more refined one.
Turning and stuffing might seem simple, but it greatly impacts the final look. Clean corners, balanced filling, and a well-shaped form can make even a basic pillow look carefully made and visually appealing.
Also Read: Can You Knit Stuffed Animals? Quick Easy Guide
Closing the Pillow Seam Seamlessly
Once your pillow is stuffed and shaped, the final step is closing the opening neatly. This may seem small, but it greatly impacts how professional your finished pillow looks.
There are several ways to close a pillow seam, depending on your style and sewing comfort level.
Option 1: Ladder Stitch (Invisible Hand-Sewn Closure)
If you want the cleanest finish, the ladder stitch is the best method. It creates a nearly invisible seam and is commonly used in decorative pillows and soft furnishings.
How to Hand Sew a Pillow Shut with a Ladder Stitch
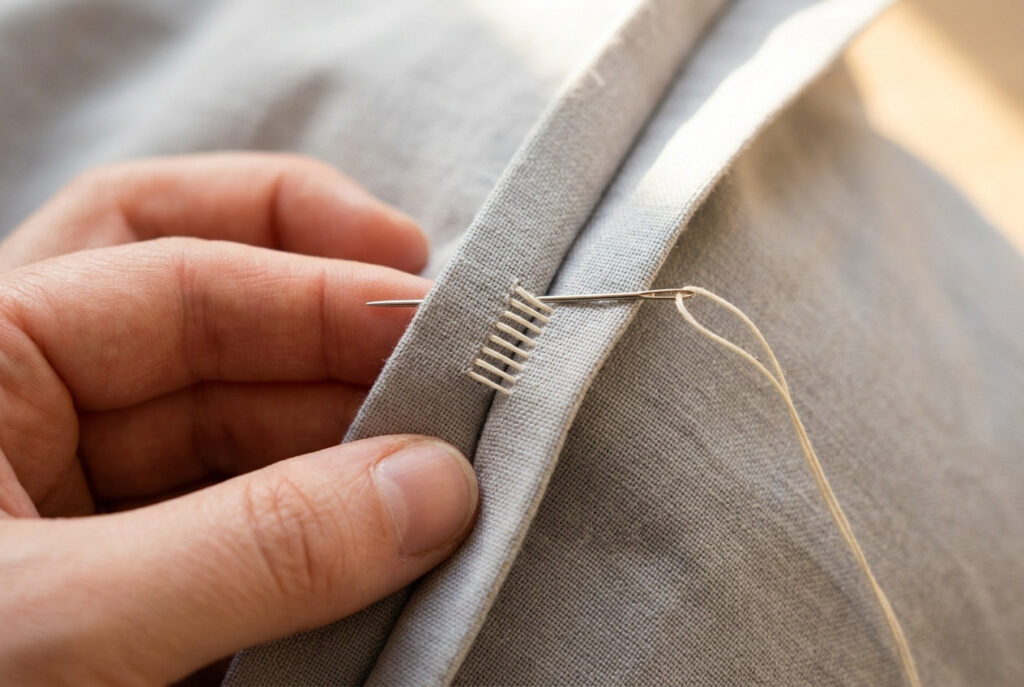
Why This Method Works Well
Also Read: How to Do Mattress Stitch? Easy 7-Step Guide
Option 2: Top-Stitched Machine Closure
If speed matters more than invisibility, a machine topstitch is the simplest option.
How to Do It
This closure is slightly visible but can still look neat and modern, especially on casual or minimalist pillow designs.
Best For
Option 3: Zipper or Envelope Pillow Closure
If you want a removable cover, these are the most practical choices.
How to Sew a Pillow Cover with a Zipper
A zipper is sewn into one edge before assembling the pillow. This creates:
Invisible zippers work especially well for decorative cushions.
Envelope Pillow Cover Style
An envelope closure uses overlapping fabric panels on the back instead of a zipper.
Why beginners love it:
This style is popular for DIY home decor projects because it is simple, functional, and forgiving.
Also Read: How to Do a Whip Stitch? Quick Guide
Which Closure Method Is Best?
| Closure Method | Difficulty | Visibility | Best For |
|---|---|---|---|
| Ladder stitch | Easy–Moderate | Nearly invisible | Decorative pillows |
| Topstitch | Easy | Visible | Quick beginner projects |
| Envelope closure | Easy | Hidden overlap | Washable pillow covers |
| Zipper closure | Moderate | Minimal | Professional removable covers |
Common Mistakes to Avoid
Taking your time in this final step makes the pillow look cleaner and more polished.
A beautifully finished seam is what transforms a simple sewing project into something that looks thoughtfully handmade. Whether you choose a hidden ladder stitch, a quick machine closure, or a removable envelope design, the right finishing method helps your pillow feel durable, comfortable, and professionally made.
Variations: Zipper Pillows, Envelope Covers & Piped Edges
Once you’ve mastered the basic method, you can experiment with different finishes and construction styles. These pillow variations help you create polished, removable, and decorative designs while building on the same foundational sewing skills.
Whether you want a removable cover, cleaner closure, or a more tailored look, these techniques are the natural next step after learning how to sew a pillow.
Zipper Pillow Covers
Adding a zipper creates a removable pillow cover that’s practical, washable, and more professional-looking.
Why Use a Zipper?
How to Sew a Pillow Cover with a Zipper
A zipper is usually sewn into one side seam before assembling the pillow pieces. Using a zipper foot on your sewing machine helps you stitch close to the zipper teeth for a cleaner finish.
Beginner Tip
Invisible zippers create the neatest result, but standard zippers are easier for first-time projects.
Envelope Pillow Covers
An envelope closure is one of the easiest ways to make a removable pillow cover without sewing in a zipper.
How It Works
The back of the pillow is made with two overlapping fabric panels that slide over the pillow form like an envelope flap.
Why Beginners Love Envelope Covers
This method is useful if your measurements aren’t exact, since the overlapping fabric gives you some flexibility.
Best Fabric Choices
Medium-weight cotton and linen blends work well because they hold the overlap neatly without sagging.
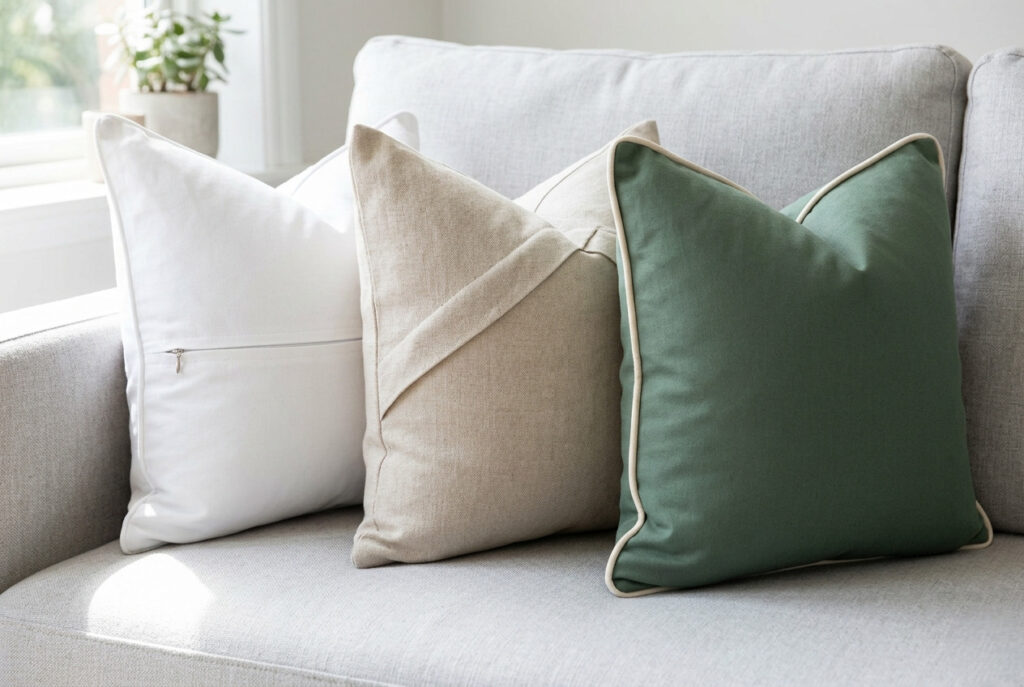
Adding Piping to a Pillow Cover
Piping is a decorative cord sewn into the seam of the pillow. It creates a more structured, high-end appearance and adds definition around the edges.
Why Piping Makes a Difference
You can match the piping to your fabric for a subtle look or use a contrasting color for more visual impact.
Important Sewing Tip
When adding piping:
Which Pillow Variation Is Best?
| Variation | Skill Level | Best For |
|---|---|---|
| Envelope cover | Beginner | Quick removable covers |
| Zipper closure | Intermediate | Professional washable pillows |
| Piped edges | Intermediate | Decorative upscale finishes |
Also Read: Best Knitting Stitch for Scarves: Easy Beginners Guide
Build Your Skills Gradually
The best part about these variations is that they all build on the same basic techniques you use when sewing a throw pillow:
Start with a simple sewn pillow, then gradually experiment with closures and decorative details as your confidence grows.
Once you understand the basics, pillow sewing becomes surprisingly versatile. A simple zipper can make your cover removable, an envelope back can simplify construction, and piping can completely elevate the design. These small upgrades turn a beginner sewing project into something that looks thoughtful, custom-made, and professionally finished.
Also Read: Best Way to Join Yarn in Knitting: Easy 10-Techniques
Common Mistakes to Avoid When Sewing Pillows
Even simple sewing projects can go wrong if small details are overlooked. When learning how to sew a pillow, avoiding a few common mistakes can make the difference between a pillow that looks rushed and one that feels polished and professionally finished.
Most pillow-sewing problems are easy to prevent once you know what to watch for.
1. Inconsistent Seam Allowance
Uneven seam allowance is one of the most common mistakes beginners make.
If your stitching shifts closer or farther from the edge as you sew:
How to Avoid It
Consistent seams create a cleaner and more balanced pillow shape.
2. Skipping the Ironing Step
Pressing fabric may feel unnecessary, but it dramatically improves the final result.
Why Pressing Matters
Pressing seams open or to one side, depending on the fabric, makes even beginner projects look more refined.
3. Choosing Difficult Fabric Too Early
Stretchy, slippery, or thick fabrics can make sewing frustrating for beginners.
Better Beginner-Friendly Options
These materials are easier to cut, pin securely, and sew evenly.
Also Read: What Size Needles for Beginner Knitting: 6 Easy Tips
4. Overstuffing or Understuffing the Pillow
Stuffing affects both comfort and appearance.
Too much filling can:
Too little filling can:
Aim for a pillow that feels full yet soft enough to compress comfortably.
5. Forgetting to Clip the Corners
If you skip trimming the corners before turning the pillow right side out, the corners often look bulky and rounded.
The Fix
Trim a small diagonal piece from each corner—without cutting through the stitching.
This reduces excess fabric and helps create sharper, cleaner points.
6. Not Pre-Washing Fabric
Natural fabrics like cotton and linen can shrink after washing.
If you skip pre-washing fabric:
Washing and ironing fabric before cutting helps prevent distortion after the project is finished.
7. Ignoring Fraying Edges
Some fabrics fray quickly inside the pillow cover, especially after repeated washing.
How to Stop Raw Edges from Fraying
Clean interior finishing helps your pillow last longer and look more professionally made.
Most sewing mistakes aren’t caused by lack of skill but by rushing through small details. Taking extra time to measure carefully, press seams, trim corners, and finish edges properly can completely change how your pillow looks and feels.
With good preparation and attention to detail, you can sew a pillow that doesn’t just look handmade, it looks thoughtfully crafted and beautifully finished.
Also Read: How Do You Weave in Ends in Knitting? Step-by-Step
Caring for Your Handmade Pillows
Once you’ve learned how to sew a pillow, proper care will help preserve its shape, texture, and appearance. Good maintenance keeps handmade pillows looking fresh longer and prevents fading, flattening, or uneven wear.
The care routine depends on the fabric and closure type, but a few simple habits make a big difference.
How to Wash Handmade Pillow Covers
If your pillow has a removable cover, such as a zipper or envelope closure, washing is much easier.
Machine-Washable Pillow Covers
Drying Tips
Caring for Non-Removable Pillows
If your pillow doesn’t have a removable cover:
Keep Pillows Looking Full and Even
Over time, pillow filling naturally shifts and compresses.
To maintain shape:
This helps decorative pillows keep their structure and prevents dents.
Proper Storage Tips
If you switch pillow covers seasonally:
Breathable fabric storage bags work especially well for linen and cotton pillow covers.
Also Read: How to Block a Knitted Scarf: 5 Easy Steps
How to Personalize Pillow Designs
One of the best parts about sewing your own pillows is being able to customize them completely.
Easy ways to personalize handmade pillows:
These small details can transform a basic pillow into a more unique and custom-looking piece.
Also Read: How to Sew a Knitted Sweater Together? Easy Guide
Common Care Mistakes to Avoid
| Mistake | Why It’s a Problem |
|---|---|
| Washing decorative fabrics in hot water | Causes shrinking, fading, and fiber damage |
| Overdrying pillow covers on high heat | Weakens fabric and distorts shape |
| Storing pillows in damp areas | Leads to mildew, odors, and fabric deterioration |
| Ignoring loose seams or worn corners | Small damage worsens quickly over time |
Fixing small issues early helps handmade pillows last longer.
Handmade pillows deserve the same care as any other home decor investment. With proper washing, gentle handling, and occasional reshaping, your pillows can stay comfortable, structured, and visually fresh for years.
And because you made them yourself, they become more than simple decor; they become personal pieces that reflect your style and creativity.
Frequently Asked Questions: How to Sew a Pillow
Conclusion: How to Sew a Pillow
Learning how to sew a pillow is one of the most practical and rewarding beginner sewing projects you can start with. It teaches essential skills like measuring accurately, cutting fabric properly, sewing straight seams, turning corners cleanly, and finishing edges neatly, all while creating something useful for your home.
The beauty of pillow sewing is that it grows with your confidence. You can begin with a simple square pillow cover, then gradually experiment with zipper closures, envelope backs, piping, decorative trims, and custom fabrics as your skills improve.
More importantly, handmade pillows bring personality into a space in a way store-bought decor often can’t. From choosing fabrics that match your style to adding small custom details, every pillow becomes a reflection of your creativity and craftsmanship.
If you focus on careful cutting, balanced stuffing, and clean finishing techniques, even a beginner project can look polished and professional. Once you complete your first pillow, you’ll likely realize how versatile and enjoyable sewing home decor can be.
Start simple, take your time with the details, and enjoy the process. A well-made pillow is more than a sewing project; it’s a handmade piece you’ll use and appreciate every day.
Also Read: How to Knit Cables: Step-by-Step Easy Beginner Guide