Best Way to Join Yarn in Knitting: Easy 10-Techniques
If you’ve ever paused mid-project, wondering about the best way to join yarn in knitting, you’re not alone. Even experienced knitters face the moment when the yarn runs out, and a new skein is ready. The last thing you want is a bulky, visible join disrupting your stitches.
After years of knitting everything from lightweight scarves to structured garments, I’ve learned that how you join yarn can completely change the final result. A clean, well-chosen method means fewer ends to weave in, stronger stitches, and a finish that looks polished instead of patched together.
In this guide, you’ll learn the most reliable, real-world techniques for joining yarn explained clearly and practically. You can use them while knitting, not just read about them.
Also Read: How to Add New Yarn to Knitting? Step-by-Step
Why Joining Yarn Matters in Your Projects
Every knitter eventually reaches the point when yarn runs low mid-project and needs a clean way to continue without disrupting work. Whether knitting a blanket, sweater, or hat, how you join yarn affects the final look and durability of your piece.
A smooth yarn join keeps your stitch tension even and your fabric polished. A poor joining yarn can create weak spots or visible lumps that distract from your hard work.
A poor yarn join can:
A well-executed join will:
Mastering joining yarn may seem like a small detail, but it’s one of the techniques that transforms your knitting from simple, handmade pieces into polished, long-lasting work.
When and Where to Join New Yarn
You’ll typically need to join yarn at several points in a project, and knowing when to do it can make a big difference in how clean your final piece looks.
You’ll need to join yarn when:
Where you join is as important as when you join.
For the cleanest results, try to join yarn:
Yarn weight also matters. Thicker yarns hide joins more easily, while finer yarns need more precise, invisible techniques.
A little planning goes a long way. Choosing the right moment and placement helps your join disappear into the fabric instead of standing out.
Also Read: How to Read Knitting Patterns? Beginners Guide
Top Techniques: The Best Way to Join Yarn in Knitting
Below are the most effective methods, chosen for real-world reliability, ease of use, and how seamlessly they blend into your fabric. I’ve tested these across fibers from soft cotton to durable wool, so you can confidently pick what works best for your project.
1. Magic Knot (Fast and Practical)
Best for: Everyday knitting, acrylics, cotton, and yarn blends
Why it works: Creates a secure join with almost no finishing required
How to do it:
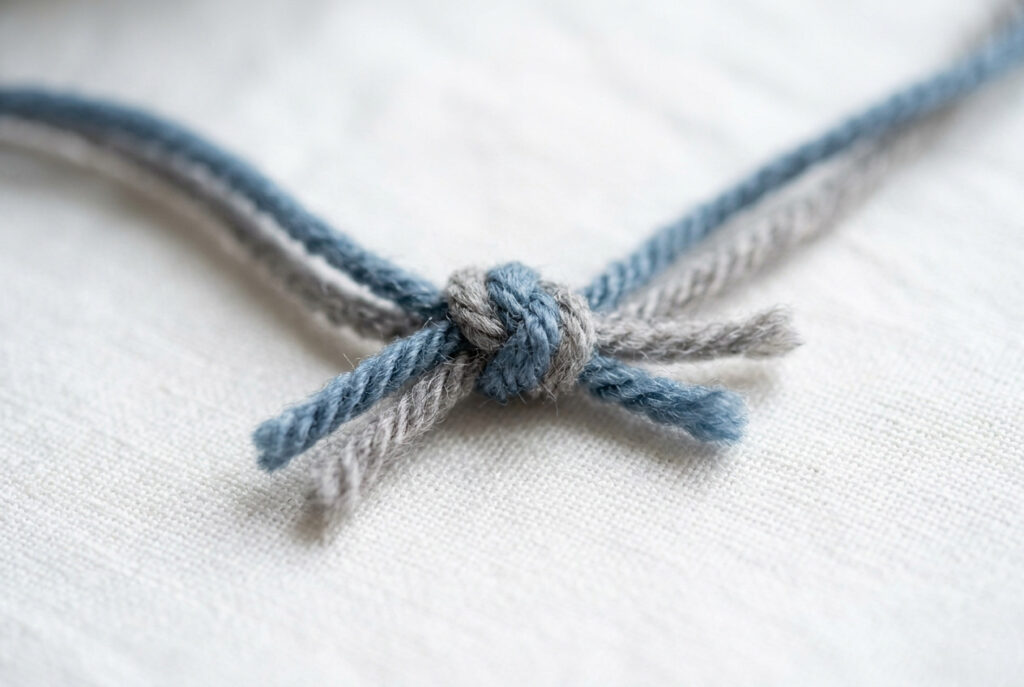
- Lay the old and new yarn parallel to each other.
- Tie an overhand knot with the new yarn around the old strand.
- Repeat with the old yarn around the new strand.
- Pull both standing ends firmly so the knots slide together and lock.
- Trim the tails close to the knot.
Pros:
Cons:
Pro tip: Test this join on a swatch before using it in garments. It holds well for most projects, but very smooth or slippery yarns may need a more secure method.
2. Spit Splice (Felted Join) – Invisible Magic for Natural Fibers
Best for: Wool, alpaca, and other non-superwash animal fibers
Why it works: Fuses fibers to create a completely seamless, invisible join
If you knit often with wool, this becomes a favorite. It joins two yarn ends into one continuous strand without knots, weaving, or bulk.
How to do it:
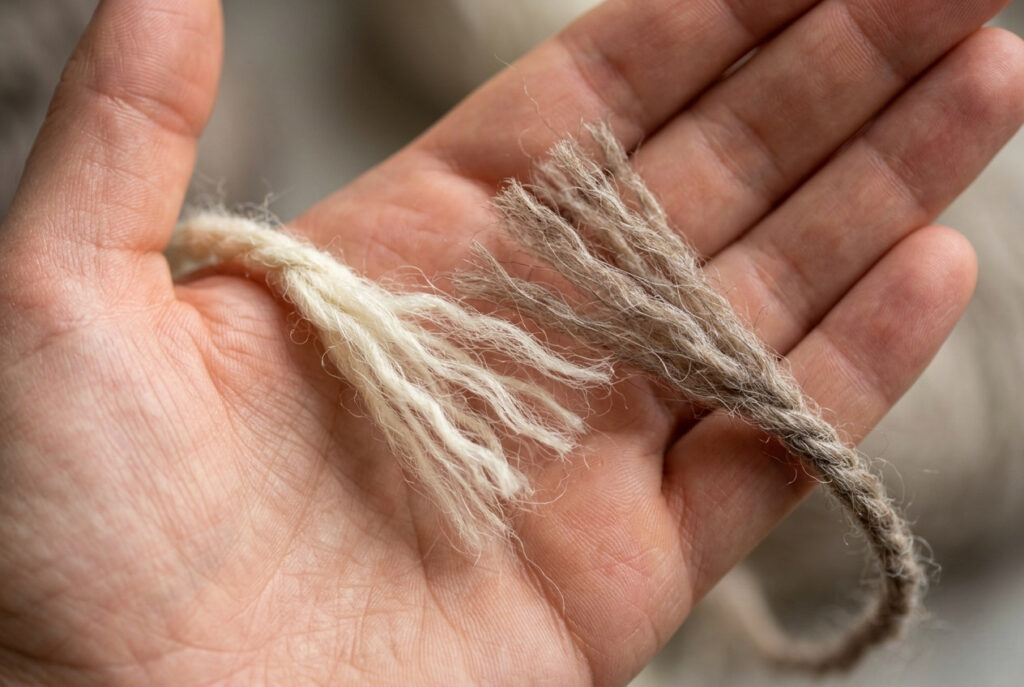
- Gently fray about 1–2 inches at the ends of both yarn strands.
- Overlap the loose fibers.
- Moisten lightly with water
- Rub briskly between your palms until the fibers felt.
- Let it dry briefly before continuing to knit.
Pros:
Cons:
Pro tip: This method works beautifully in sweaters and garments where you want a truly uninterrupted fabric.
Also Read: How Do I Block a Knitted Sweater? Step-by-Step
3. Russian Join (Strong and Subtle)
Best for: Plied yarns, garments, and high-stress areas
Why it works: Weaves yarn into itself to create a durable, hidden join
The Russian join is one of the most reliable techniques when strength matters. It holds up well in hats, socks, and bags that see regular use.
How to do it:
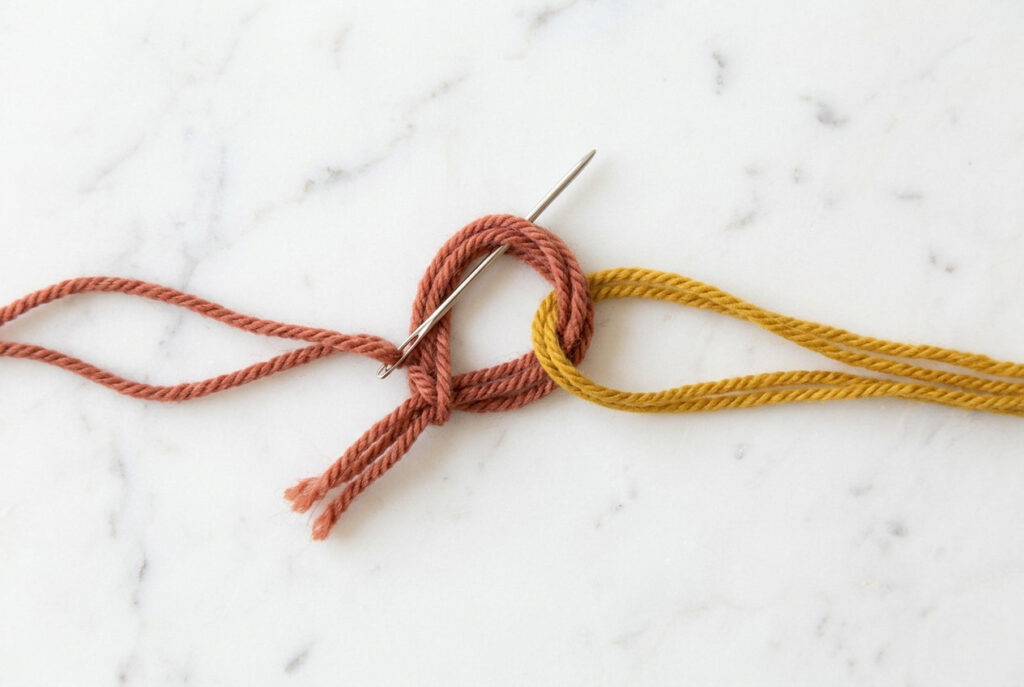
- Thread the yarn tail onto a yarn needle.
- Weave it back into itself for a few inches to create a loop.
- Repeat the same process with the new yarn.
- Pull both strands gently to interlock and secure.
Pros:
Cons:
Pro tip: This is a great choice for worsted and medium-weight yarns where durability is more important than speed.
Also Read: How to Knit a Hat with Straight Needles? Beginner’s Guide
4. Knit Together Method (Beginner-Friendly and Reliable)
Best for: Beginners, quick joins, and simple projects
Why it works: Blends two yarns directly into stitches without knots
If you’re just learning the best way to join yarn in knitting, this is the easiest place to start. It requires no special tools or techniques, just your needles and a steady rhythm.
How to do it:
- Hold the old and new yarn strands together.
- Knit 3 to 5 stitches using both strands at once.
- Drop the old yarn and continue knitting with the new one.
Pros:
Cons:
Pro tip: This method works well for scarves and practice pieces where ease matters more than invisibility.
Also Read: How Long Does It Take to Knit a Scarf? Time Guide
5. Backward Loop Join (Simple Option for Delicate Fabrics)
Best for: Lace knitting and lightweight yarns
Why it works: Maintains even tension without adding bulk
This technique is quick and effective when working with finer yarns, where heavier joins would stand out.
How to do it:
- Create a backward loop with the new yarn on your needle, similar to a backward cast-on.
- Knit into the loop as your next stitch.
- Continue knitting as usual.
Pros:
Cons:
Pro tip: Use this method in low-stress areas or combine it with a later weave-in for added durability.
6. Yarn Over Join (Smooth for Knitting in the Round)
Best for: Circular knitting and seamless garments
Why it works: Locks new yarn into stitches without adding bulk
This method is especially helpful when working in the round, where visible joins can disrupt the flow of your fabric.
How to do it:
- Bring in the new yarn and create a loose yarn over on your needle.
- Knit the next stitch, incorporating the yarn over.
- Continue knitting, allowing the stitch to secure the new yarn.
Pros:
Cons:
Pro tip: Keep your yarn over slightly loose at first, then adjust tension in the next stitches for a smooth finish.
Also Read: How to Connect Circular Knitting: Easy Guide
7. Weft Join (Invisible and Professional Finish)
Best for: Fine fabrics and visible stitch patterns
Why it works: Integrates the new yarn directly into existing stitches
This technique creates one of the cleanest joins possible, especially when appearance matters most.
How to do it:
- Thread the new yarn onto a needle.
- Follow the path of existing stitches using duplicate stitch.
- Pull gently to secure the yarn within the fabric.
Pros:
Cons:
Pro tip: Use this method for garments or gifts where finishing details truly matter.
8. Twist and Knit Join (Quick On-the-Go Method)
Best for: Chunky yarns and quick fixes
Why it works: Temporarily binds yarn strands together while knitting
When you need a fast solution without tools, this method works well.
How to do it:
- Overlap the old and new yarn ends.
- Twist them together firmly.
- Knit a few stitches, holding both strands.
- Continue with the new yarn.
Pros:
Cons:
Pro tip: Reinforce later by weaving in ends if the project will get frequent use.
9. Chain Loop Join (Secure for Colorwork)
Best for: Colorwork techniques like Fair Isle and intarsia
Why it works: Interlocks yarn strands while maintaining structure and tension
When working with multiple colors, you need a join that won’t loosen or distort your pattern. This method secures yarn neatly without disrupting your design.
How to do it:
- Create a small loop with the new yarn.
- Pull the old yarn through the loop, forming a chain-like connection.
- Gently tighten to secure the join.
- Continue knitting, ensuring even tension.
Pros:
Cons:
Pro tip: Practice this method on a swatch before using it in detailed colorwork to prevent uneven joins.
Also Read: How to Change Colors While Knitting? Beginners Tips
10. Simple Overlap Join (Reliable Backup Method)
Best for: Beginners and low-visibility sections
Why it works: Blends yarn by knitting strands together temporarily
This is one of the most dependable fallback techniques. While not the most invisible, it is reliable and works with any yarn type.
How to do it:
- Lay the old and new yarn tails side by side.
- Knit 3 to 5 stitches using both strands together.
- Drop the old yarn and continue with the new.
- Weave in the remaining ends later.
Pros:
Cons:
Pro tip: Use this method in seams or less visible sections to keep your fabric looking clean.
Best Way to Join Yarn in Knitting Based on Yarn Type
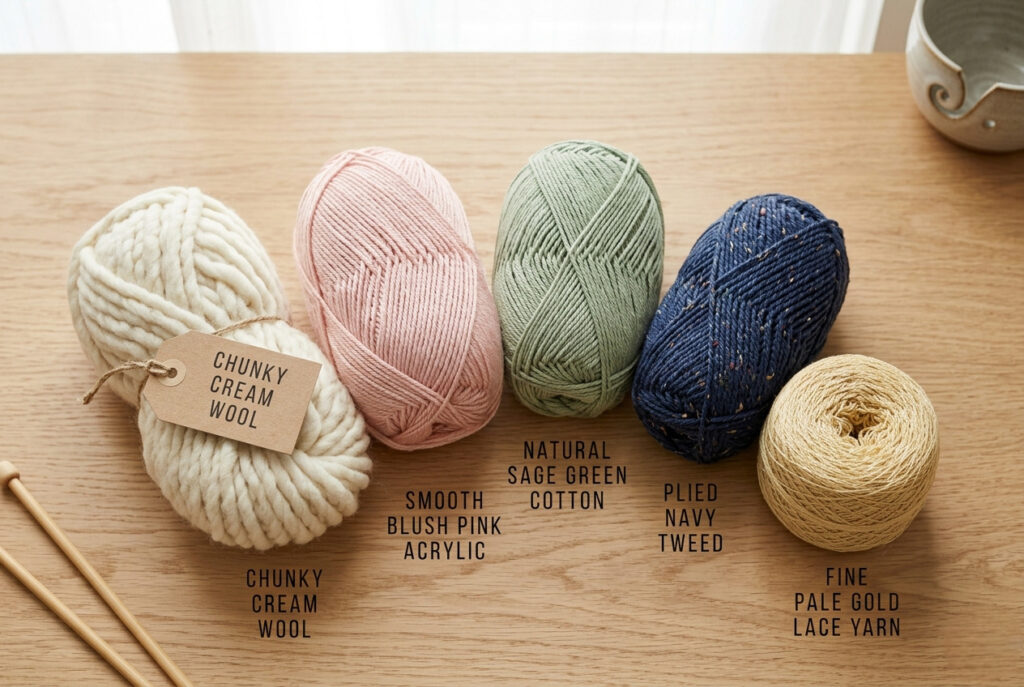
Choosing the best way to join yarn in knitting depends on the fiber you’re working with. Different yarn types behave differently; some felt, some slip, and others need more secure mechanical joins.
Using the right technique for your yarn ensures a cleaner finish, better durability, and fewer issues later.
Wool and Animal Fibers (Alpaca, Sheep Wool)
Wool fibers naturally felt together, making spit splicing one of the most seamless and invisible options.
Acrylic Yarn
Since acrylic doesn’t felt, secure knot-based joins work best to prevent slipping.
Cotton and Plant Fibers
Cotton lacks elasticity, so woven or interlocked joins help maintain strength without bulk.
Plied Yarn
Plied yarns let strands be woven into themselves, creating one of the strongest joins available.
Lace and Fine Yarn
Lightweight yarns need low-bulk joins to maintain a smooth, delicate fabric.
Also Read: Best Yarn for Baby Blanket: Trusted 2026 Picks
Quick Comparison Table
| Yarn Type | Best Method | Why It Works |
|---|---|---|
| Wool / Alpaca | Spit Splice | Fibers felt together naturally |
| Acrylic | Magic Knot | Secure, non-slip join |
| Cotton | Russian Join | Strong without elasticity |
| Plied Yarn | Russian Join | Interlocks strands internally |
| Lace Yarn | Backward Loop | Minimal bulk, smooth finish |
Pro tip: Always test your join on a small swatch first. Even the best method can behave differently depending on yarn tension, gauge, and stitch pattern.
Common Mistakes (And How to Fix Them)
Even experienced knitters encounter issues when joining yarn. The good news is that most problems are easy to fix once you know what to look for.
1. Joining in the Middle of a Visible Section
Fix: Plan your joins near edges or less noticeable areas.
Joining in highly visible sections can leave bumps or uneven stitches that stand out in the finished fabric.
2. Leaving Yarn Ends Too Short
Fix: Always leave at least 4–6 inches of yarn for a secure join.
Short tails can slip out over time, especially after washing or blocking.
3. Using the Wrong Method for the Yarn
Fix: Match your joining technique to the fiber.
For example, wool works best with felted joins. Cotton and acrylic require more secure mechanical methods.
4. Uneven Tension at the Join
Fix: Practice maintaining consistent tension when switching yarns.
Pulling too tight causes puckering, while loose joins create gaps.
5. Trimming Ends Too Early
Fix: Wait until after washing or blocking to trim completely.
This ensures the join has settled and will not loosen unexpectedly.
6. Ignoring Durability in High-Stress Areas
Fix: Use stronger joins, like the Russian join, for garments, socks, and frequently worn items.
A weak join in a high-stress area can unravel over time.
Also Read: How to Fix a Dropped Stitch: A Complete Guide for Knitters
How to Fix a Failed Yarn Join
If a join comes undone or looks uneven:
It is better to fix it early than deal with long-term issues later.
Also Read: How to Finish a Knitting Project: A Complete Guide
Best Tips for Seamless Yarn Joins
Also Read: Can I Knit Two Strands at a Time? Easy 4-Step Guide
FAQ About Best Way to Join Yarn in Knitting
Final Thoughts: Best Way to Join Yarn in Knitting
Finding the best way to join yarn in knitting is not about memorizing one perfect technique. It is about understanding which method works best for your yarn type, project, and knitting style.
From my experience, having a small set of reliable methods makes a big difference in creating smooth, professional-looking results:
Once you become comfortable switching between these techniques, yarn changes no longer feel like interruptions. They become a natural part of your knitting flow.
The real goal is consistency, confidence, and clean finishing when joining yarn, because even small details like yarn joins can elevate your entire project.
Also Read: How to Knit a Scarf With a Loom: 5 Easy Steps Guide