How to Sew a Curtain? Easy Steps for Perfect Results
The first curtain you sew may not be perfect, and that is normal. Uneven hems, crooked seams, or confusing measurements are part of the learning process. With each project, your skills improve, and creating custom curtains becomes easier.
Learning how to sew a curtain is a practical sewing skill because it allows you to make window treatments that fit your space, style, and budget. Unlike ready-made panels with limited sizes and colors, handmade curtains can be tailored to any window and finished exactly as you want.
The process uses simple techniques like accurate measuring, careful cutting, pressing, and straight stitching. This makes it ideal for beginners. This guide walks you through every step. From choosing fabric and calculating measurements to sewing neat hems and creating rod pocket, tab top, and pleater tape headers, you can confidently sew curtains that look beautifully finished.
Materials and Tools You’ll Need
Gathering your materials before you begin makes the sewing process more efficient and prevents interruptions when you start cutting fabric. Most curtain projects require only basic sewing supplies, making this an approachable project for beginners.
Essential Materials
- Curtain fabric
- Matching sewing thread
- Pleater tape (if making pleated curtains)
- Curtain hooks (for pleater tape)
Also Read: What Is a Basting Stitch in Sewing? Easy Guide
Basic Sewing Tools
Also Read: Do You Need Safety Goggles When Sewing?
Optional Materials and Tools
Depending on your curtain style, you may need:
Choosing the right fabric is just as important as accurate measuring. The material you select affects how your curtains drape, filter light, provide privacy, and hold up over time. Before buying fabric, consider where the curtains will hang, how much sunlight the room receives, and whether you want a light, airy look or a fuller, more structured finish.
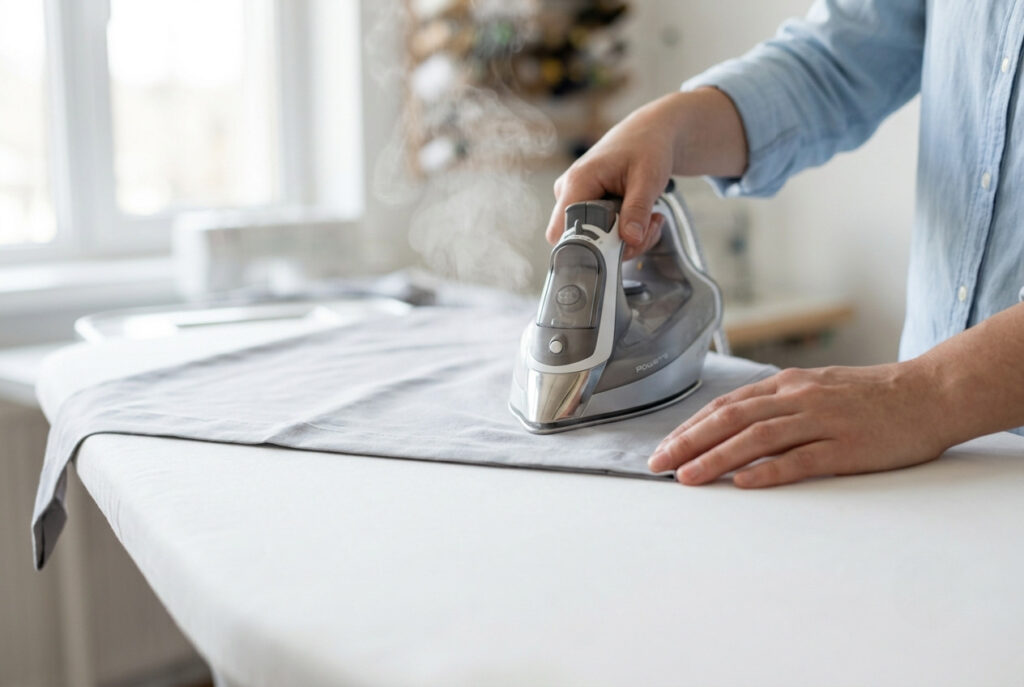
Tip: Press every fold before stitching and every seam after sewing. Careful pressing keeps fabric flat, improves accuracy, and gives finished curtains a crisp, professional look.
How to Choose Fabric and Lining
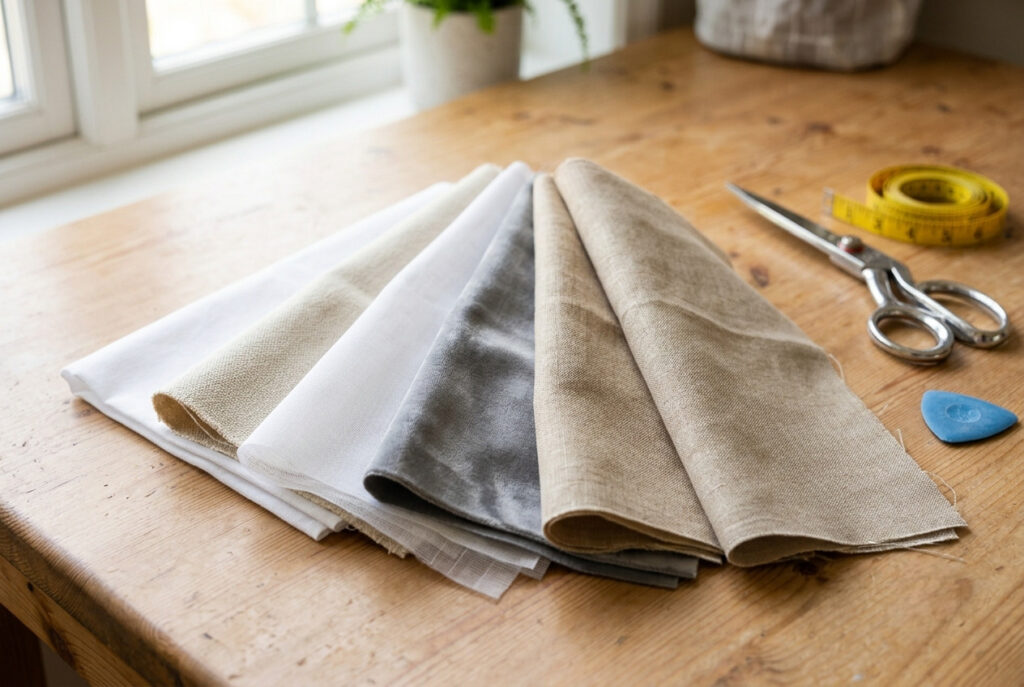
Best Fabric for Curtains
Medium-weight woven fabrics are easiest to sew and suit most homes, but the best choice depends on your room and style.
| Fabric | Best For | Sewing Difficulty |
|---|---|---|
| Cotton | Everyday living spaces | Easy |
| Cotton-Linen Blend | Casual and modern décor | Easy |
| Linen | Elegant, relaxed interiors | Moderate |
| Canvas | Structured curtain panels | Easy |
| Duck Cloth | Heavy-duty curtains | Moderate |
| Velvet | Luxury and formal rooms | Intermediate |
| Polyester | Budget-friendly, low-maintenance curtains | Easy |
Lightweight Fabrics
Sheer polyester, voile, and lightweight cotton allow plenty of natural light while creating a soft, airy appearance. These fabrics work well in kitchens, breakfast nooks, and living areas where privacy is less of a concern.
Medium-Weight Fabrics
Cotton, linen blends, canvas, and duck cloth are excellent for most curtain projects. They drape well, offer better privacy than lightweight fabrics, and are easy to handle on a sewing machine, making them perfect for beginners.
Heavyweight Fabrics
Velvet and other heavyweight fabrics create elegant, full curtains that block light and improve insulation. They are great for bedrooms, media rooms, and formal living spaces, but may require a heavier sewing needle and slower stitching for best results.
Should You Add a Lining?
Lining isn’t essential for every curtain, but it improves appearance and performance. It helps curtains hang smoothly, protects the fabric from fading, increases privacy, and adds insulation against heat and cold.
If you want maximum light control, blackout lining is an excellent choice for bedrooms and nurseries, while a standard cotton or polyester lining adds structure without excessive weight.
Tip: If you’re making your first pair of curtains, choose a medium-weight cotton or cotton-linen blend. These fabrics are stable, easy to press, and forgiving to sew, making it easier to achieve clean, professional-looking results.
Also Read: How to Sew a Pillow: Easy Guide for Beginners
Curtain Math: Measure and Calculate Fabric
Accurate measurements are the foundation of well-made curtains. Even a small error can make panels too short, narrow, or uneven once hanging. Before cutting fabric, measure carefully and decide how full you want your curtains to look. A few extra minutes of planning can save fabric and adjustments later.
Step 1: Measure the Finished Curtain Length
Start by installing the curtain rod or deciding exactly where it will be mounted. Measure from the top of the rod or curtain rings to the point where you want the curtain to end.
The most common curtain lengths are:
| Curtain Style | Finished Position |
|---|---|
| Sill Length | Ends at the windowsill |
| Apron Length | Falls 4–6 inches below the sill |
| Floor Length | Ends about ½ inch above the floor |
| Break Length | Lightly touches the floor |
| Puddle Length | Extends several inches onto the floor |
For most living spaces, floor-length curtains offer a clean, timeless look that works with a wide range of decorating styles.
Step 2: Measure the Curtain Rod Width
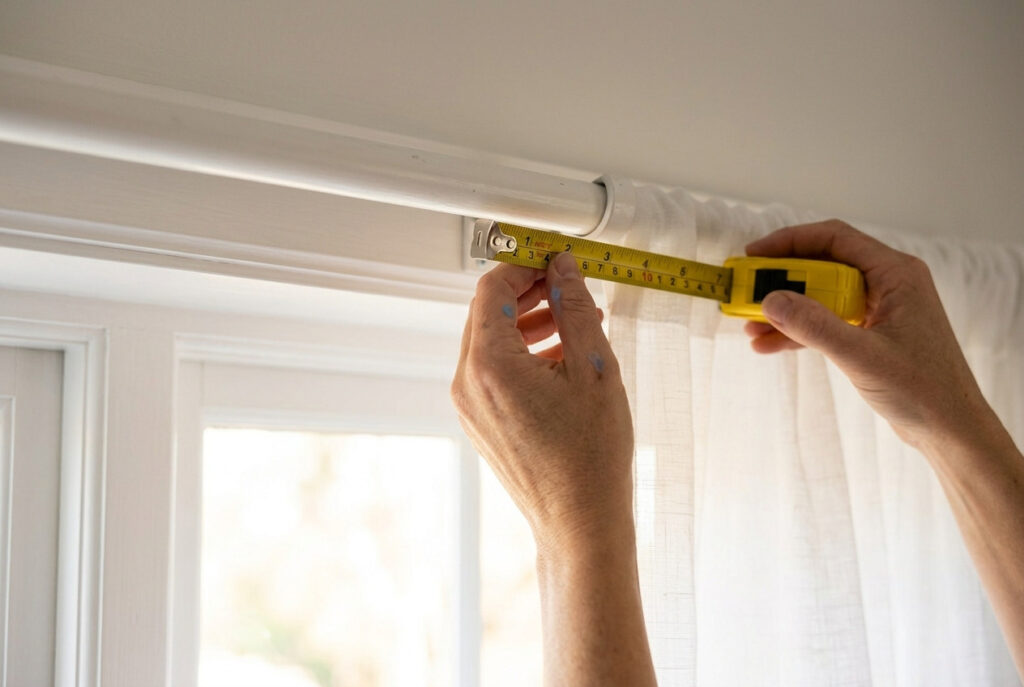
Measure the full width of the curtain rod, not the window frame. If the rod isn’t installed yet, extend it 6–10 inches (15–25 cm) beyond each side of the window when possible. This allows the curtains to stack neatly when open and makes the window appear larger.
For example:
Step 3: Measure the Rod Diameter
If you’re making rod pocket curtains, measure the curtain rod diameter. The rod pocket should be slightly larger than the rod so the curtain slides easily without bunching or sticking.
Step 4: Choose the Right Fullness
Fullness is the amount of fabric used compared to the width of the curtain rod. More fullness creates deeper folds and a fuller appearance.
| Look | Fabric Multiplier |
|---|---|
| Light gathers | 1.5× rod width |
| Standard fullness | 2× rod width |
| Rich, full folds | 2.5× rod width |
| Formal or designer look | 3× rod width |
For example, if your curtain rod measures 60 inches wide:
If sewing two curtain panels, divide the total fabric width equally before adding side hems to each panel.
Step 5: Calculate the Fabric Length
Cut fabric longer than the finished curtain length to allow for hems and headers.
Use this simple formula:
For example:
If you prewashed fabric, you might not need extra length for shrinkage.
Curtain Fabric Calculator
Use this quick reference to estimate fabric width for common window sizes.
| Curtain Rod Width | 1.5× Fullness | 2× Fullness | 2.5× Fullness |
|---|---|---|---|
| 36 inches | 54 inches | 72 inches | 90 inches |
| 48 inches | 72 inches | 96 inches | 120 inches |
| 60 inches | 90 inches | 120 inches | 150 inches |
| 72 inches | 108 inches | 144 inches | 180 inches |
| 84 inches | 126 inches | 168 inches | 210 inches |
These figures estimate the total fabric width before adding seam allowances or accounting for pattern matching.
Consider Pattern Matching
If using striped, checked, floral, or other large prints, buy extra fabric so the design aligns across both curtain panels. Pattern matching creates a balanced, professional look and is important for full-length curtains.
As a general guide:
Buying extra fabric is worthwhile, especially with directional prints.
Before You Cut
Before the first cut, confirm your measurements carefully.
Keep your measurements in a notebook or worksheet when sewing curtains for multiple windows. A simple record makes it easier to cut matching panels and stay organized throughout the project.
Cutting and Preparing the Fabric
Once you’ve measured and calculated your fabric requirements, it’s time to prepare the sewing material. Although it’s tempting to start cutting right away, careful preparation prevents shrinking, uneven panels, and distorted seams. Spending extra time at this stage makes the sewing process smoother and improves the finished result.
Prewash and Press the Fabric
If your fabric is washable, clean it before cutting. Natural fibers such as cotton and linen often shrink during their first wash, and prewashing helps ensure your finished curtains remain the correct length.
Wash and dry the fabric according to the manufacturer’s care instructions, then press it with a steam iron to remove wrinkles and fold lines. Flat fabric is easier to measure accurately than fabric with creases.
If you’re using velvet, blackout fabric, or another specialty material, check the care label first. Some fabrics are designed to be dry-cleaned rather than machine-washed.
Square the Fabric
Fabric doesn’t always come off the bolt perfectly straight. Before measuring, lay it on a flat surface and check that the grain is aligned.
Trim any uneven ends or distorted edges to create a square starting point. This simple step helps the curtain panels hang evenly once they’re finished.
Remove the Selvage
The selvage is the tightly woven edge along both sides of the fabric. Because it can shrink differently from the main fabric, leaving it attached may cause the finished curtain to pull over time.
Trim away the selvage before marking your cutting lines for smoother, more even panels.
Mark the Cutting Lines
Using a measuring tape, quilting ruler, and tailor’s chalk or washable fabric marker, mark the cut length, width, side hems, top allowance, and bottom hem.
Check every measurement before cutting. Measuring twice is easier than correcting a panel cut too short.
Cut the Curtain Panels
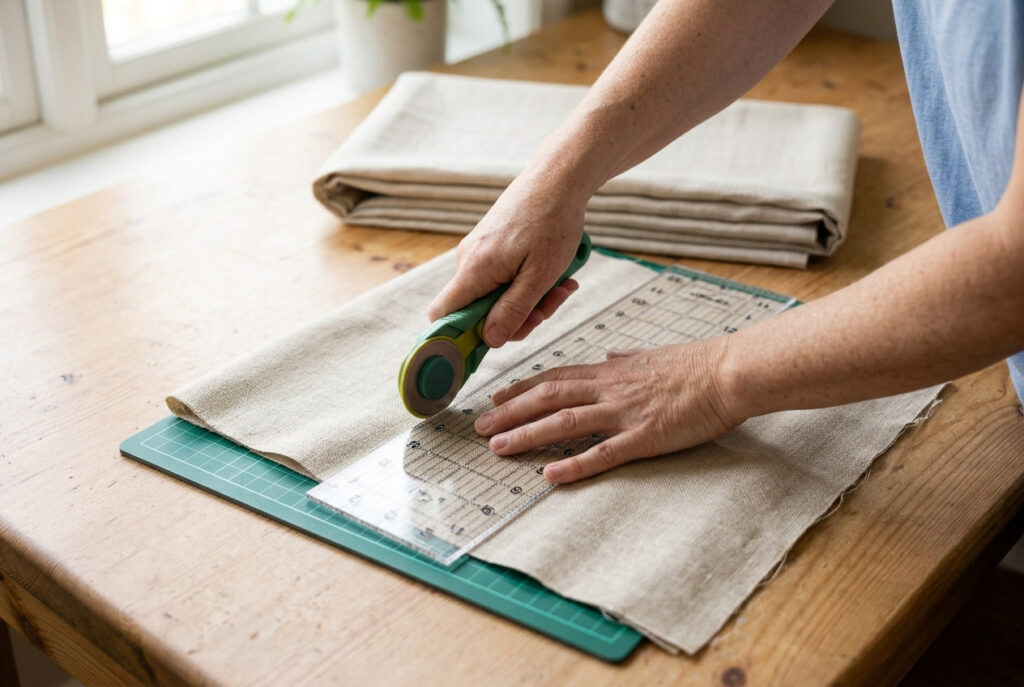
Support the fabric on a table or clean floor to keep it from shifting while you work. Use sharp fabric scissors or a rotary cutter to make long, smooth cuts along the marked lines.
If you’re working with lightweight cotton or other stable fabrics, you can fold the fabric and cut both panels at once to ensure they match. For thick, bulky, or slippery fabrics, it’s more accurate to cut one panel first and use it as a template for the second.
When both panels are cut, place them together and compare their length and width. Making small adjustments now is easier than correcting uneven hems after sewing.
Quick Checklist Before Sewing
Before moving to the sewing machine, make sure you have completed these steps:
Careful fabric preparation is one of the simplest ways to achieve straight seams, even hems, and curtains that hang beautifully once installed.
Sewing the Sides and Bottom Hem
The side and bottom hems form the foundation of a well-made curtain. Straight, even hems give the panels a polished appearance, help them hang smoothly, and prevent raw edges from fraying. Pressing each fold before stitching and working methodically makes sewing easier and improves the finished result.
Step 1: Fold and Press the Side Hems
Lay the curtain panel with the wrong side facing up on a large, flat surface.
For each long side:
Secure the folded hem with sewing clips or straight pins every few inches to keep the fabric from shifting while sewing.
This double-fold method creates a clean, durable finish without the need for a serger.
Also Read: How to Sew a Seam by Hand? Easy 5-Step Guide
Step 2: Stitch the Side Hems
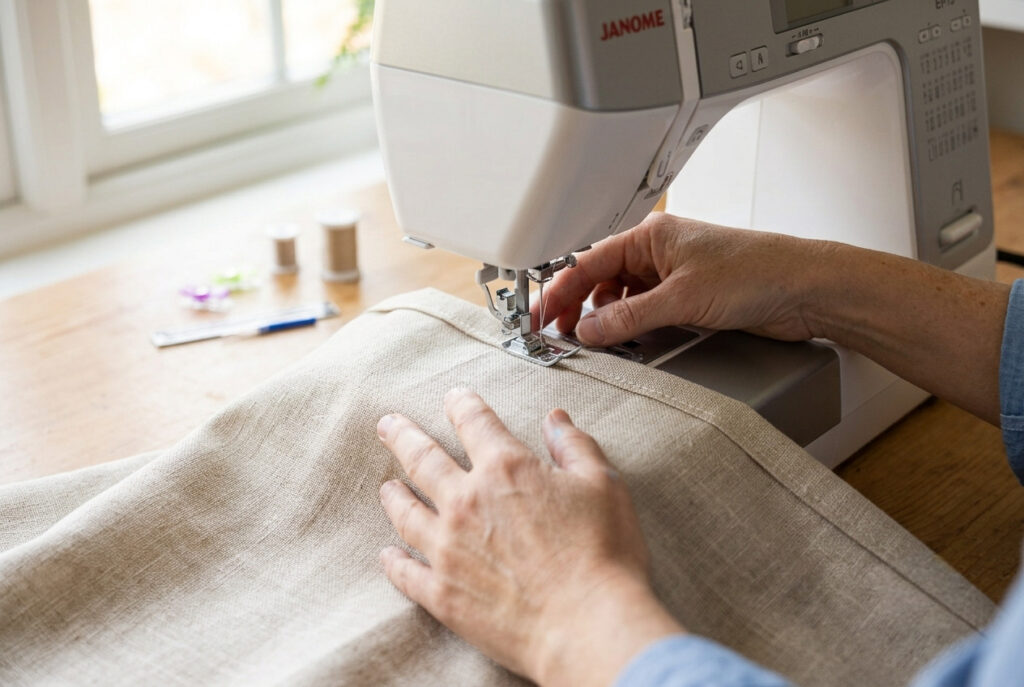
Using a straight stitch, sew close to the inner folded edge of the hem. A stitch length of 2.5–3 mm provides a neat, secure seam for most curtain fabrics.
As you sew:
Repeat the process for the opposite side, then press both finished hems flat.
Tip: Test your stitch on a fabric scrap before sewing the curtain panel. This allows you to check the stitch length and thread tension without risking visible stitching on the finished fabric.
Step 3: Create the Bottom Hem
A generous bottom hem adds weight, helping the curtain drape naturally and hang evenly.
For standard curtain panels:
For lightweight fabrics like sheers, a narrower hem of 1–2 inches may work better. Heavier fabrics often need less depth because the material already provides enough weight.
Step 4: Sew the Bottom Hem
Stitch close to the upper folded edge using a straight stitch. Support the weight of the curtain panel on your sewing table or another flat surface as you work. Allowing a large panel to hang off the machine can pull the fabric, making it more difficult to sew a straight, even hem.
Once the stitching is complete, press the entire bottom hem with steam to set the seam and create a crisp finish.
Should You Add Curtain Weights?
Curtain weights are optional, but they can improve the way lightweight fabrics hang. They are particularly useful for:
Place a small weight inside each bottom corner before closing the final hem. This helps the curtain hang straighter and reduces movement from drafts.
Also Read: How to Sew a Rip? Easy 6- Step Guide
Check the Finished Panel
Before sewing the curtain header, inspect the panel carefully. Check that:
Fixing small issues at this stage is easier than after finishing the top.
Helpful Sewing Tips
A few simple habits can improve the quality of your finished curtains:
Taking extra time with these finishing details helps create curtains that hang evenly and have a clean, professional appearance. Once the side and bottom hems are complete, you’re ready to sew the top header and give your curtains their final style.
Top Finishes: Rod Pocket, Tab Top, Pleater Tape
The top finish determines both the style and the hanging method. Choose the one that matches your room and your sewing comfort level.
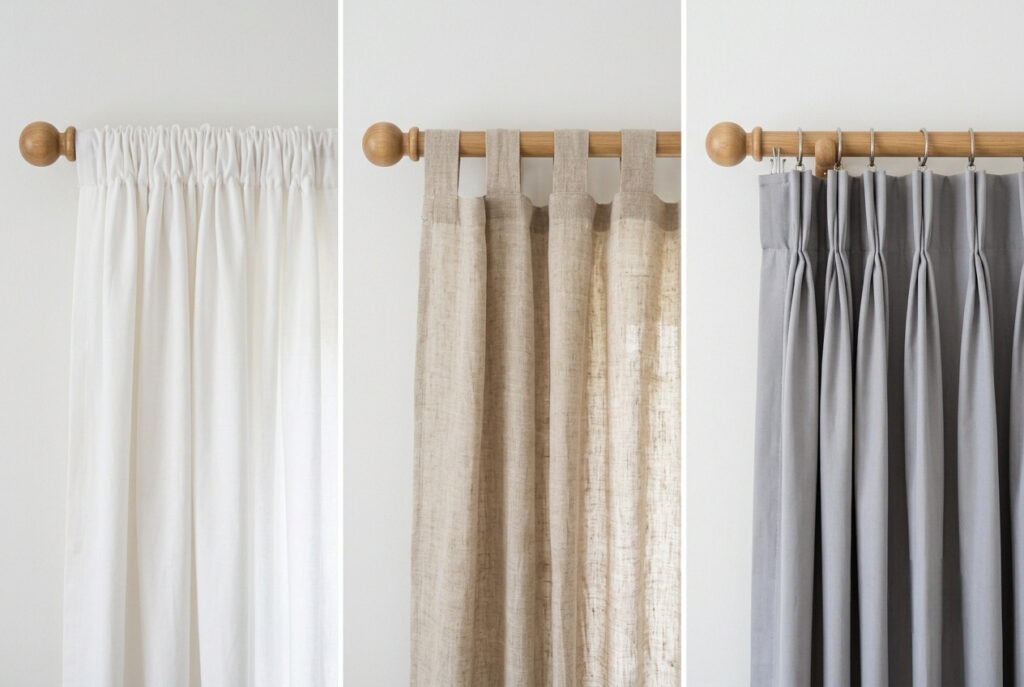
Rod Pocket Curtain
A rod pocket is one of the easiest styles for beginners. Create a channel at the top by folding the fabric down to fit the rod, then stitch close to the folded edge.
This style looks soft and simple and works well for casual rooms or lightweight curtains. Remember the pocket uses some length, so measure carefully before cutting.
Tab Top Curtains
Tab tops are decorative and easy to personalize. Sew fabric loops or tabs along the upper edge, leaving space for the curtain rod to slide through.
This style gives a relaxed, handcrafted look. It also works well with cotton, linen, and home décor fabrics that hold shape nicely.
Pleater Tape Curtains
Pleater tape creates a more formal finish. Sew the tape across the top edge, then pull the cords inside the tape to create even gathers.
This option is ideal if you want a polished draped look. It takes a little more time than a rod pocket, but the result often looks more custom and refined.
Attaching Pleater Tape and Hooks
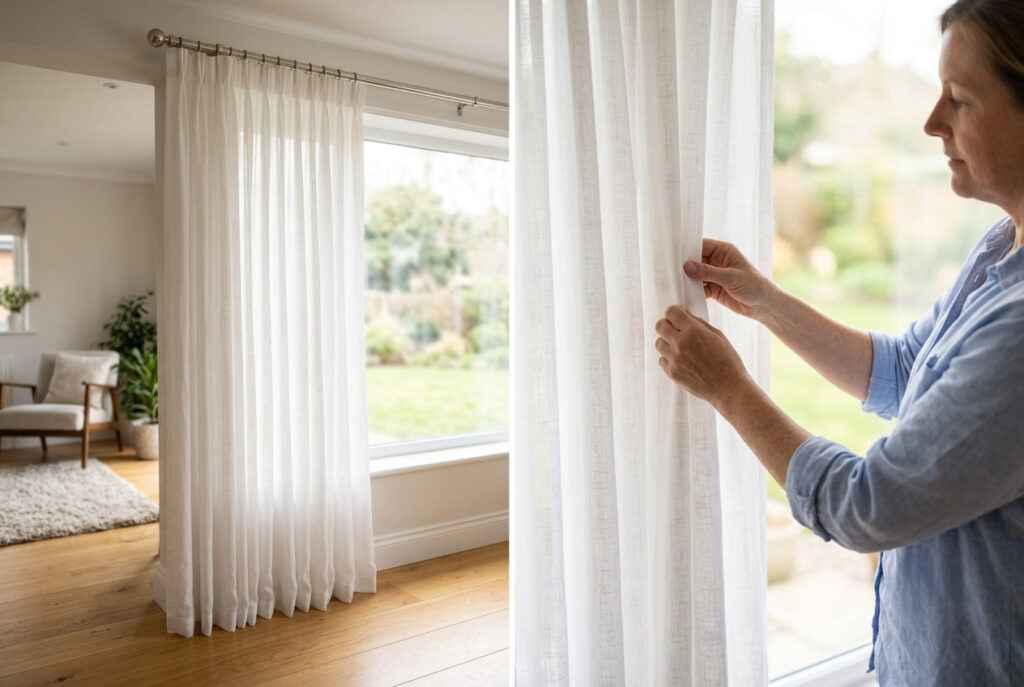
If you choose pleater tape, pin it evenly across the top of the curtain first. Make sure the tape sits straight because any tilt will show once the gathers are drawn.
Stitch along the top and bottom edges of the tape, leaving the cord ends free. After sewing, pull the cords gently to create the desired fullness, then tie them off securely.
Insert hooks where needed, depending on your curtain hardware. This system gives you more control over the spacing and creates a neat, professional drape.
Also Read: How to Do a Whip Stitch? Quick Guide
Hanging, Finishing Touches, and Troubleshooting
The final steps are as important as the sewing. Hanging the curtains correctly, making small adjustments, and giving them a final press can significantly improve their appearance. Even carefully sewn panels may settle slightly after installation, so taking extra time now helps achieve a polished, custom-made finish.
Hang the Curtains and Let Them Settle
Install the curtain panels using your chosen header style, whether that’s a rod pocket, tab top, pleater tape, or curtain rings.
Before making any final adjustments:
For floor-length curtains, allow the fabric to hang for 24 to 48 hours before making permanent hem adjustments. Natural fibers such as cotton and linen may relax slightly under their own weight.
Check the Length and Fullness
Stand back and view the curtains from different angles. Check that:
If one panel appears longer, mark the adjustment while it’s hanging rather than measuring on a table. This gives a more accurate finished length.
Add Curtain Weights (Optional)
Curtain weights aren’t essential, but can improve how lightweight fabrics drape. They’re particularly useful for:
Place a small weight inside each bottom corner before closing the hem. The weights remain hidden while helping the curtain hang straighter and reducing movement near open windows or doors.
Steam and Final Press
After hanging the curtains, use a garment steamer or a steam iron to remove any remaining fold lines.
For delicate fabrics, hold the steamer slightly away and test on a hidden area first. A final press gives the curtains crisp hems and smooth, professional-looking folds.
Common Curtain Sewing Problems and Solutions
| Problem | Possible Cause | Solution |
|---|---|---|
| Uneven curtain length | Incorrect measuring or fabric stretching | Measure from the curtain rod, mark the hem, and trim if necessary. |
| Puckered seams | Thread tension is too tight, or the needle is incorrect | Test the stitch on a fabric scrap and adjust the machine settings. |
| Wavy side hems | Fabric stretched while sewing | Press the fabric well and allow the feed dogs to move it naturally. |
| Rod pocket too tight | Pocket allowance too small | Increase the pocket depth before closing the seam. |
| Curtains don’t gather evenly | Fullness distributed unevenly | Rearrange the gathers by hand after hanging. |
| Bulky corners | Excess fabric inside the folds | Trim seam allowances before turning and press thoroughly. |
Most small imperfections become less noticeable once the curtains are hanging, so don’t worry if every stitch isn’t perfect. Each project builds confidence and improves your sewing skills.
Also Read: How to Do Mattress Stitch? Easy 7-Step Guide
Fabric-Specific Sewing Tips
Different fabrics respond differently under the sewing machine. Making small adjustments for each material can improve both the sewing experience and the finished appearance.
Cotton
Cotton is one of the easiest fabrics to sew because it’s stable, presses well, and holds its shape. Prewash before cutting to allow for shrinkage.
Linen
Linen creates a relaxed, elegant look but wrinkles more easily than cotton. Press often during sewing and allow the curtains time to relax after hanging.
Velvet
Velvet requires patience because the pile can cause layers to shift. For the best results:
Sheer Fabrics
Voile and other lightweight sheers are delicate and benefit from:
Blackout Fabric
Blackout lining is thicker than standard fabric and may require a stronger sewing needle and a slightly longer stitch length. Testing fabric on a scrap before sewing the full panel helps produce smoother seams.
Quick Variations and Time-Saving Tips
Lined vs. Unlined Curtains
| Feature | Lined Curtains | Unlined Curtains |
|---|---|---|
| Privacy | Excellent | Moderate |
| Light Control | Better | Allows more natural light |
| Insulation | Better | Limited |
| Sewing Time | Longer | Shorter |
| Best For | Bedrooms and living rooms | Kitchens, sunrooms, and casual spaces |
Use Curtain Rings with Clips
Curtain rings with clips provide a simple alternative to sewn headers. Space the clips evenly across the top edge and hang them directly on the rod. They’re especially useful for linen and casual curtain styles.
Try a No-Sew Alternative
If you don’t have a sewing machine, iron-on hem tape can finish side and bottom edges. While stitched hems are generally more durable, fusible tape works well for lightweight or temporary curtains.
Before cutting fabric for multiple windows, complete one curtain panel from start to finish. This allows you to check the measurements, hem depth, and header style before making the remaining panels.
Also Read: How to Sew a Pocket Square? Two Easy Methods
Keep a Sewing Record
Record details such as window measurements, finished length, fabric type, needle size, stitch length, and thread color. These notes make it much easier to sew matching curtains in the future.
Final Curtain Sewing Checklist
Before considering your project complete, confirm that you have:
FAQs about Curtain Sewing
Conclusion: How to Sew a Curtain
Learning how to sew a curtain is a practical skill that allows you to create window treatments tailored to your home, style, and budget. The project requires careful measuring and patience, but the sewing techniques are straightforward and suitable for beginners with basic sewing experience.
By choosing the right fabric, calculating accurate measurements, preparing the material, and sewing neat hems and headers, you can create curtains that look polished and hang beautifully. Whether you prefer a simple rod pocket, classic tab top, or pleated finish, the same careful approach will help you achieve professional-looking results.
Don’t worry if your first project isn’t perfect. Every curtain you sew builds confidence, improves accuracy, and strengthens your sewing skills. As you gain experience, you’ll find it easier to experiment with different fabrics, lengths, and header styles to suit each room in your home.
With the step-by-step techniques covered in this guide, you’re ready to sew custom curtains that fit your windows perfectly and add a personal touch to your living space. Take your time, measure carefully, and enjoy the satisfaction of creating something both beautiful and functional.