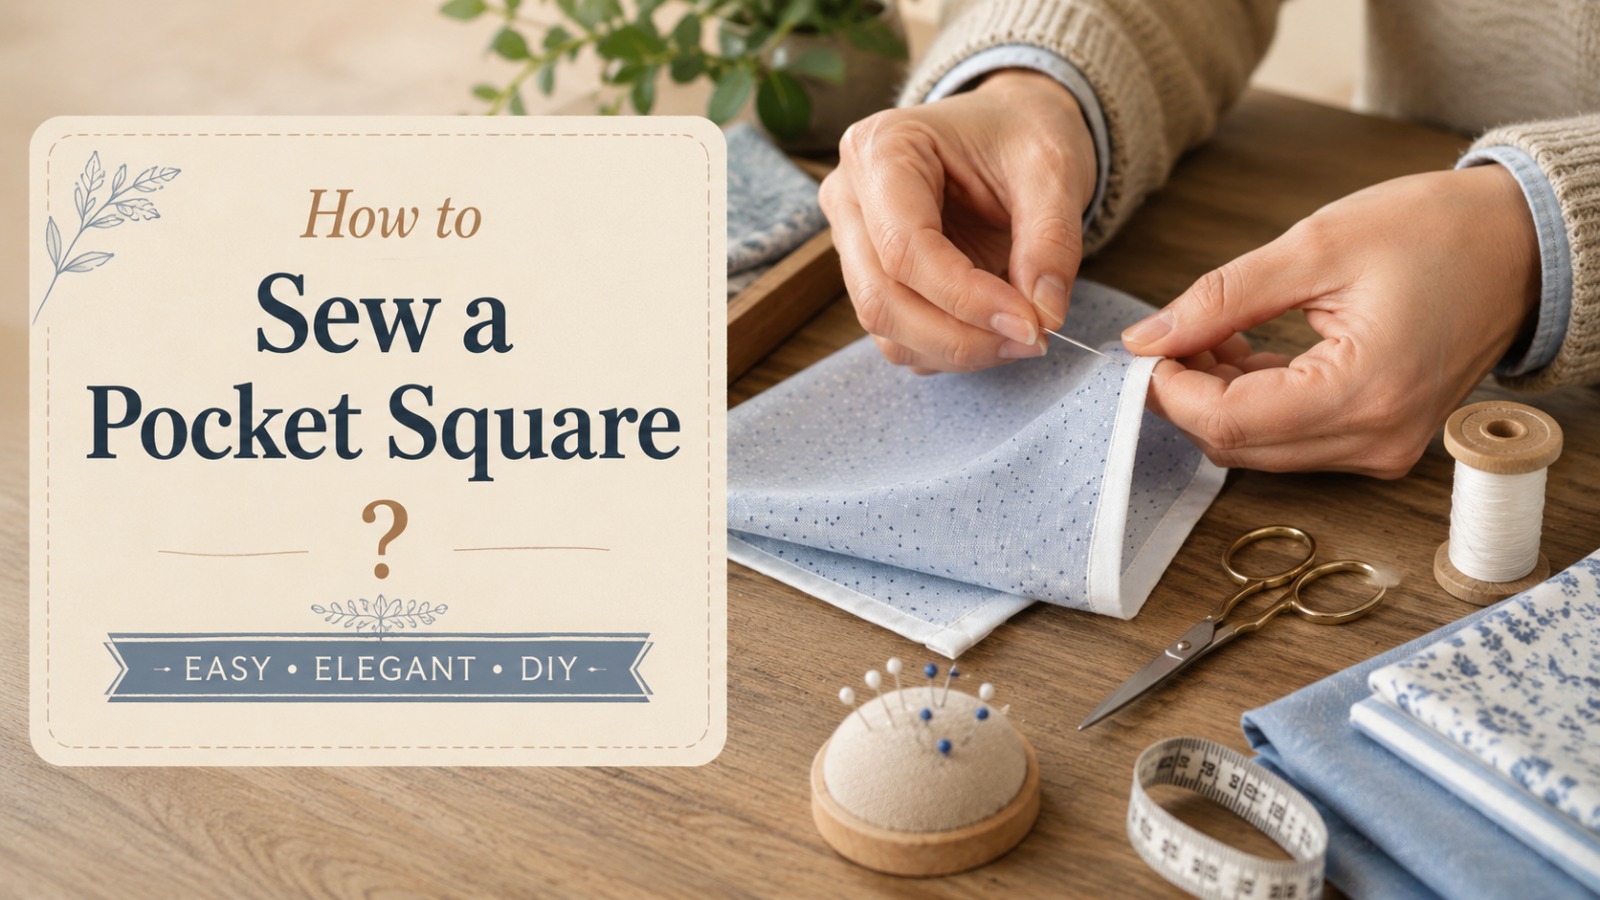
How to Sew a Pocket Square? Two Easy Methods
Learning how to sew a pocket square is easier than you might think. In 15–30 minutes, you can create a custom pocket square using a sewing machine for cotton or linen, or a traditional hand-rolled hem for silk. This step-by-step guide explains the best fabrics, standard measurements, cutting methods, hemming techniques, and finishing details to help you achieve a neat, professional-looking result.
Why Make Your Own Pocket Square?
A handmade pocket square is a simple way to add a personal touch to formal and casual outfits. By making your own, you can choose the exact fabric, color, pattern, and finish to match your style while creating an accessory that fits your jacket pocket perfectly.
Unlike many sewing projects, a pocket square requires only a small piece of fabric, making it a great way to use leftover linen, cotton, or silk from previous projects. It is also practical for beginners because it helps you practice accurate cutting, pressing, and hemming without advanced sewing techniques.
Whether you’re sewing one for yourself, creating a thoughtful handmade gift, or making several for special occasions, this project offers plenty of opportunities for customization. With careful measuring and neat finishing, you can create a pocket square that looks polished, holds its shape, and lasts through years of regular wear.
Also Read : How to Sew a Seam by Hand? Easy 5-Step Guide
Also Read : How to Sew a Rip? Easy 6- Step Guide
What You’ll Need
Before you begin, gather your materials and tools. Being prepared will make the sewing process smoother and help you achieve accurate, professional-looking results.
Fabric
Choose a lightweight fabric that suits the style of pocket square you want to make.
Sewing Supplies
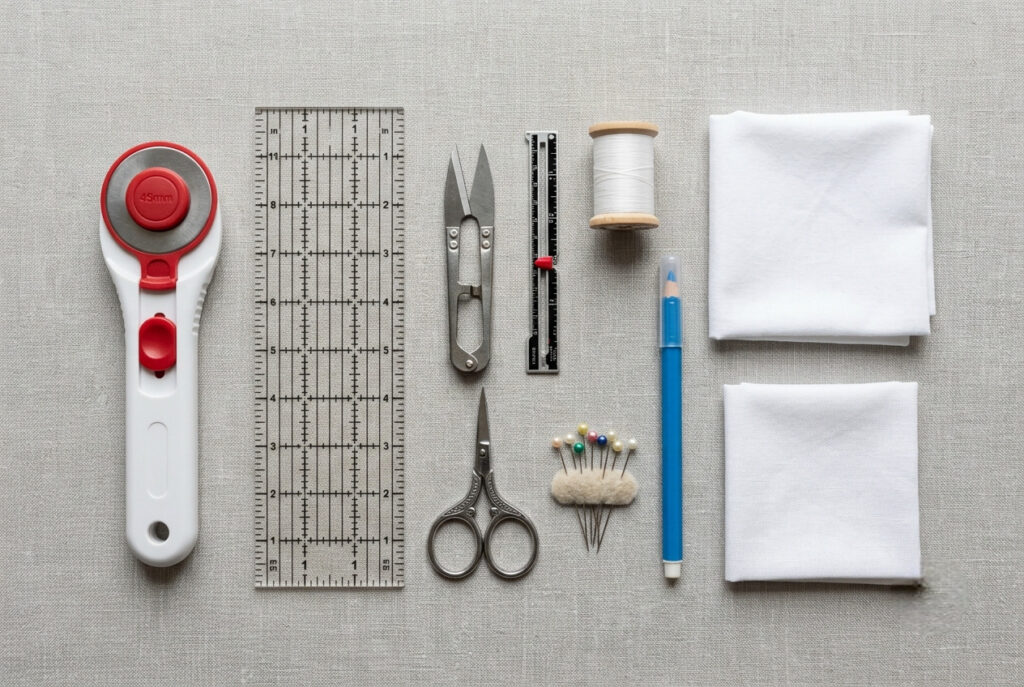
Optional Tools
These tools are not essential, but can make the project easier:
Keeping these supplies within reach lets you focus on accurate cutting, even hems, and clean finishing throughout the project.
Also Read: Best Sewing Scissors: Top Picks 2026
Best Fabrics & Finished Sizes
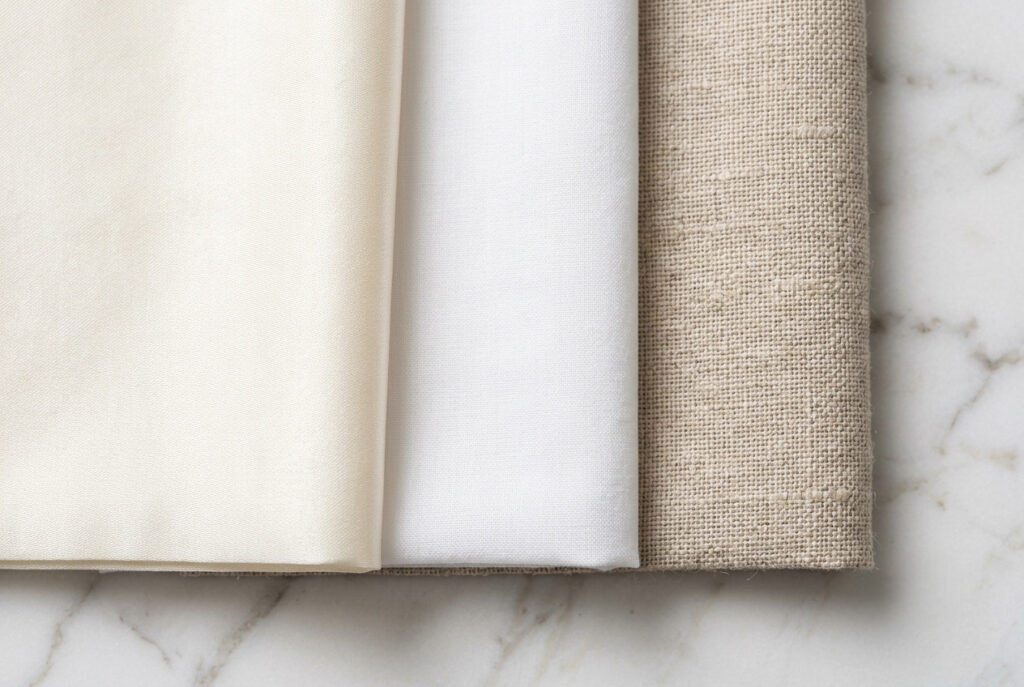
Choosing the right fabric is one of the most important steps when sewing a pocket square. Each fabric has its own texture, drape, and pressing qualities that influence both the finished accessory’s appearance and the hemming method you’ll use.
Linen
Linen is a timeless choice that creates crisp, structured folds and holds its shape all day. It presses well, making it ideal for classic white pocket squares, business attire, weddings, and formal occasions. A narrow machine-sewn hem provides a clean, durable finish that complements linen’s natural texture.
Cotton
Cotton is one of the easiest fabrics to sew, making it an excellent choice for beginners. It feeds smoothly through a sewing machine, presses neatly, and comes in a wide range of colors and prints. A machine-sewn narrow hem creates a polished finish suitable for everyday wear and casual jackets.
Silk
Silk offers a soft drape and subtle sheen, making it popular for formal wear. Because it is lightweight and frays more easily than cotton or linen, a traditional hand-rolled hem creates the most refined finish. When pressing silk, use a press cloth and low heat to protect the delicate fibers.
Cotton Lawn
Cotton lawn is finer and lighter than standard quilting cotton, producing a smooth, elegant pocket square without bulk. Its weave is especially suitable for narrow hems and detailed prints.
Lightweight Wool
Lightweight wool adds texture and depth, making it a great option for autumn and winter wardrobes. Despite its slightly heavier feel, it folds neatly and pairs well with tweed jackets and seasonal tailoring.
Also Read: How to Sew a Pillow: Easy Guide for Beginners
Choosing the Right Finished Size
Pocket squares come in several standard sizes. The ideal dimensions depend on your fabric choice, jacket pocket depth, and preferred folding style.
| Finished Size | Recommended Use |
|---|---|
| 10 × 10 in (25 × 25 cm) | Slim jacket pockets and minimalist folds |
| 12 × 12 in (30 × 30 cm) | Compact everyday pocket squares |
| 13 × 13 in (33 × 33 cm) | A versatile size for most jackets and folds |
| 14 × 14 in (36 × 36 cm) | Classic everyday size with fuller folds |
| 16–17 × 16–17 in (41–43 × 41–43 cm) | Silk pocket squares and puff folds |
If you’re making your first pocket square, a finished size of 13–14 inches (33–36 cm) is a practical start. It fits comfortably in most jacket pockets and works well with classic folds without bulk. Larger sizes, such as 16–17 inches (41–43 cm), suit silk pocket squares and fuller display folds like the puff fold.
Understanding Seam Allowances
Add your hem allowance before cutting the fabric.
Planning the seam allowance helps ensure your finished pocket square matches the intended size after hemming.
Practice your hemming technique on a scrap of similar fabric before sewing the final piece. This allows you to adjust stitch length, pressing technique, and corner finishing while reducing the risk of mistakes on premium fabrics such as silk or fine linen.
Also Read: What Is a Basting Stitch in Sewing? Easy Guide
Cutting the Fabric
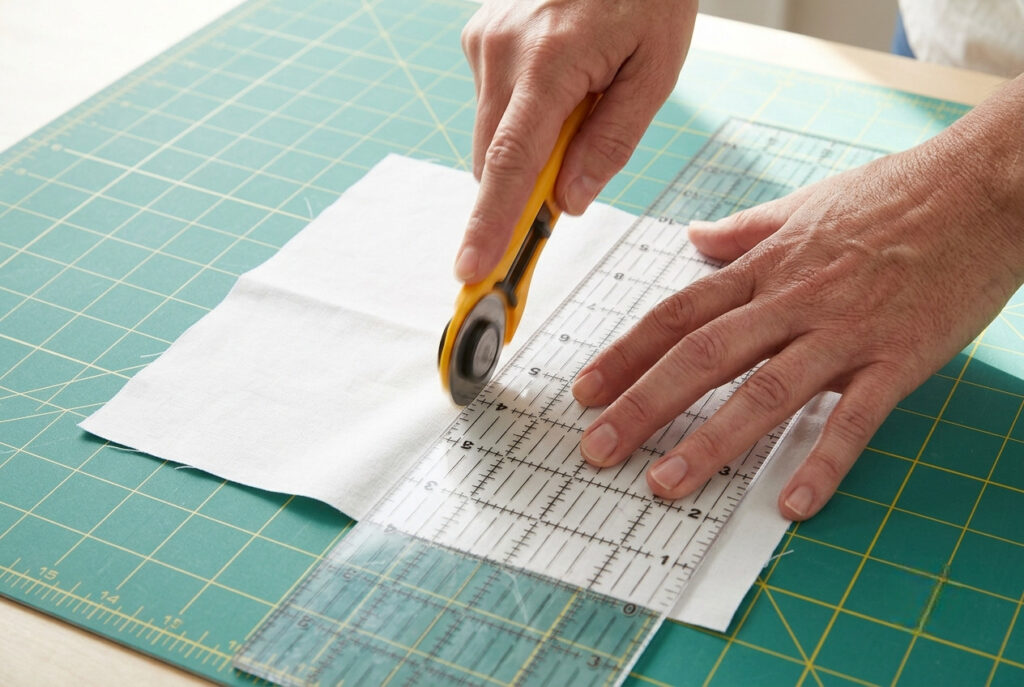
Accurate cutting is the foundation of a well-made pocket square. Minor variations become noticeable after hems are sewn, so measure carefully and create perfectly square edges.
Before cutting, pre-wash cotton and linen per the manufacturer’s instructions to remove shrinkage. Silk usually does not require pre-washing, but should be lightly pressed with a press cloth to remove wrinkles before measuring.
Lay the fabric flat on a cutting mat without stretching it. Align the grain with the fabric selvage and smooth ripples. Using an acrylic quilting ruler and rotary cutter produces the straightest, most accurate edges, though sharp fabric scissors also work well.
If you’re using patterned fabric, consider how the design will appear after the pocket square is folded. Position stripes, checks, or larger motifs so the most attractive part remains visible when worn.
Recommended Cutting Sizes
Use the following guide when cutting your fabric. The extra measurement accounts for the hem allowance.
| Finished Size | Cotton & Linen Cut Size | Silk Cut Size |
|---|---|---|
| 10 × 10 in (25 × 25 cm) | 11 × 11 in | 10½ × 10½ in |
| 12 × 12 in (30 × 30 cm) | 13 × 13 in | 12½ × 12½ in |
| 13 × 13 in (33 × 33 cm) | 14 × 14 in | 13½ × 13½ in |
| 14 × 14 in (36 × 36 cm) | 15 × 15 in | 14½ × 14½ in |
| 16 × 16 in (41 × 41 cm) | 17 × 17 in | 16½ × 16½ in |
| 17 × 17 in (43 × 43 cm) | 18 × 18 in | 17½ × 17½ in |
After cutting, inspect all four edges and trim loose threads or uneven corners before beginning the hemming process.
A rotary cutter and quilting ruler are especially useful when cutting multiple pocket squares from a single piece of fabric. They help maintain consistent measurements and produce cleaner, straighter edges than repeated scissor cuts.
Method A – Machine Narrow Hem
A machine-sewn narrow hem is the quickest and most reliable way to finish a pocket square made from cotton, linen, or other stable woven fabrics. It creates a clean, durable edge that holds its shape, making it ideal for everyday use. This method is beginner-friendly and requires only basic sewing skills and standard machine settings.
Prepare the Edges
Begin by inspecting the cut fabric. Trim loose threads and check that all four sides are perfectly square. Accurate edges make it easier to sew an even hem and produce a balanced finished pocket square.
If you’re working with loosely woven linen or another fabric that frays easily, sew a short line of zigzag stitching or use an overcast stitch close to the raw edge before folding. This helps reduce fraying while you handle the fabric.
Next, create a narrow double-fold hem.
Press after each fold to set the hem before stitching. Well-pressed edges are easier to sew accurately and help create a smooth, even finish.
Recommended Machine Settings
Before sewing, test stitch length and thread tension on a scrap of the same fabric. Small adjustments help prevent puckering and ensure consistent stitches.
| Setting | Recommendation | Why It Helps |
|---|---|---|
| Stitch Type | Straight stitch | Produces a clean, classic hem |
| Stitch Length | 2.2–2.4 mm | Creates neat, balanced stitches |
| Needle | Universal 70/10 or 80/12 | Suitable for lightweight woven fabrics |
| Thread | Fine polyester or cotton | Provides smooth, durable seams |
| Presser Foot | Standard or rolled hem foot | Helps maintain an even hem |
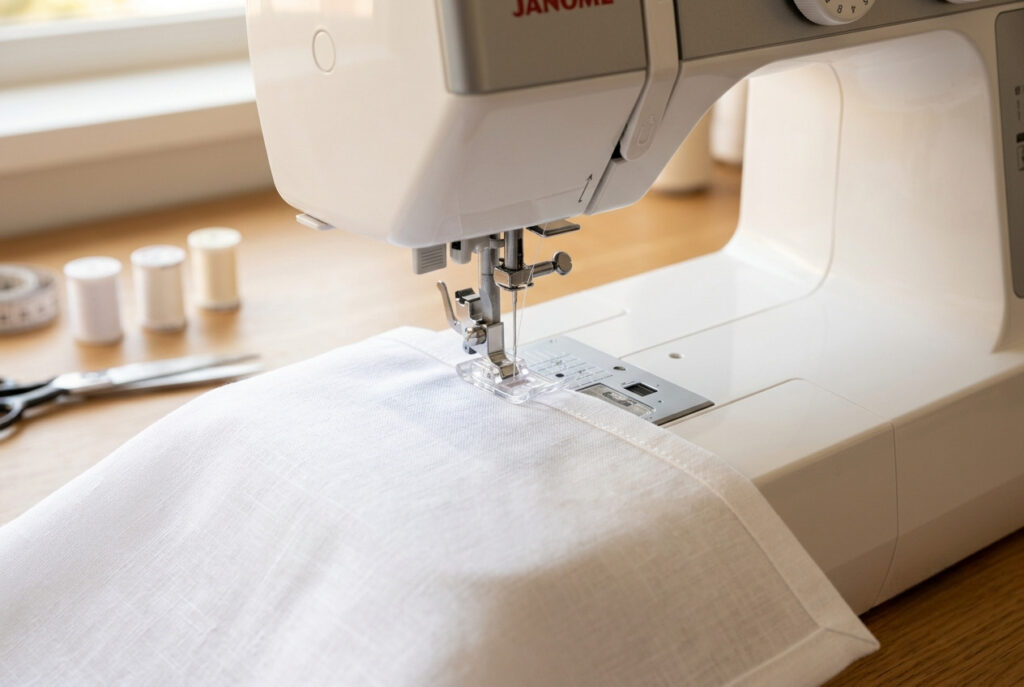
Machine Stitching Steps
Thread the sewing machine with a thread that closely matches your fabric. Position the folded edge under the presser foot and begin sewing about 1 inch (2.5 cm) before the first corner.
Keep the stitching approximately ⅛ inch (3 mm) from the inner folded edge, allowing the machine to feed the fabric naturally rather than pulling it through.
When you reach a corner:
- Stop with the needle in the fabric.
- Raise the presser foot.
- Pivot the fabric 90 degrees.
- Lower the presser foot.
- Continue sewing along the next edge.
Backstitch briefly at the beginning and end of the seam, or leave long thread tails and tuck them inside the folded hem for a clean finish.
Trimming Corners & Final Pressing
Pocket squares are not turned inside out, but trimming a small triangle of excess fabric from each folded corner before the final fold reduces bulk and creates flatter, sharper corners.
Once all four sides have been sewn:
- Remove any pins or clips.
- Trim the thread tails.
- Press the pocket square from the wrong side.
- Turn the pocket square over and give it a final press.
Use steam for cotton and linen to create crisp edges. For delicate fabrics, place a press cloth between the iron and fabric to protect the surface.
If you’re making several pocket squares, a rolled hem presser foot can speed up the sewing process while producing consistently narrow, even hems.
Also Read: How to Do a Whip Stitch? Quick Guide
Also Read: How to Do Mattress Stitch? Easy 7-Step Guide
Method B – Hand-Narrow Hem
A hand-rolled hem is the traditional finish for silk pocket squares. It creates a soft, rounded edge with nearly invisible stitches, giving the accessory a refined appearance that’s difficult to achieve with a sewing machine.
Although this method takes more time, it offers excellent control and suits silk, silk blends, fine cotton lawn, and other lightweight fabrics.
Folding & Pressing Technique
Begin by pressing the fabric to remove wrinkles. For silk, use a press cloth and low iron temperature to avoid damaging fibers.
Work on one side at a time rather than folding all four edges at once.
Fold the raw edge toward the wrong side about 1⁄16–⅛ inch (1.5–3 mm). Using your thumb and forefinger, gently roll the folded edge over itself to enclose the raw edge.
Roll only 2–3 inches (5–8 cm) at a time. Working in short sections makes it easier to maintain an even, narrow roll and produce more consistent stitching.
Lightly finger-press or pin each section before sewing.
Slip Stitch / Hand-Rolled Hem Steps
Thread a fine hand-sewing needle with a single strand of matching silk or polyester thread. A length of about 18–20 inches (45–50 cm) helps reduce tangles.
- Begin at one corner and hide the knot inside the rolled edge.
- Take a tiny catching stitch through only a few fabric threads, then pass the needle through the rolled hem.
- Continue with evenly spaced stitches, keeping them small and consistent to remain almost invisible from the front.
- Maintain gentle thread tension throughout. Pulling too tightly can cause the edge to pucker.
- As you reach each corner, carefully roll both adjoining edges together and secure with two or three small stitches to maintain a smooth, even shape.
- Finish by securing the thread with a few small backstitches hidden inside the rolled hem before trimming the thread.
Pressing the Finished Pocket Square
After completing the hand sewing, lightly press the pocket square from the wrong side.
Avoid flattening the rolled edge completely because its slightly rounded profile is part of the traditional appearance of a hand-finished pocket square.
For silk and other delicate fabrics:
Practice the hand-rolled hem on a small fabric scrap before sewing your finished pocket square. A few minutes of practice helps develop an even rolling technique and produce more consistent stitches on your final project.
Optional Finishes & Creative Variations
Once you’ve mastered the basic pocket square, you can personalize it with finishing details that reflect your style and improve the overall appearance. These optional techniques add character without making the design decorative.
Topstitched Edge
A narrow topstitched edge creates a clean, contemporary finish that works well with cotton and linen fabrics. Stitch about ⅛ inch (3 mm) from the finished edge using matching thread for a subtle look or contrasting color for added visual interest.
Mitered Corners
Mitered corners produce a flat, tailored finish by reducing bulk where the hems meet. Instead of overlapping folded edges, trim and fold each corner diagonally before hemming. This technique requires more precision but creates sharp corners, especially attractive on linen and other lightweight woven fabrics.
Embroidered Initials & Decorative Details
Personalizing a pocket square with embroidered initials adds a thoughtful finishing touch, making it an excellent choice for weddings, anniversaries, graduations, or other special occasions. Position the monogram near one corner so it remains visible when the pocket square is folded.
You can add a small appliqué, delicate hand embroidery, or subtle beadwork near one edge. Keep embellishments minimal so they don’t interfere with folding or create bulk inside the jacket pocket.
Also Read: How to Knit a Tie: Easy Step-by-Step Guide
Decorative Edge Stitching
Many sewing machines include decorative stitch options that can add subtle detail to a pocket square. Feather stitches, scallop stitches, blanket stitches, or simple heirloom patterns work well on cotton fabrics. Choose understated designs that complement the fabric rather than overpower it.
Making Multiple Pocket Squares
If you’re sewing several pocket squares, prepare all the fabric pieces before you begin stitching. Sewing them one after another using a chain-sewing technique helps maintain consistent stitch settings and reduces overall sewing time. Once all the hems are complete, trim the connecting threads and press each pocket square individually for a neat, uniform finish.
Professional Finishing Tips
Small details often make the biggest difference in appearance.
Taking a few extra minutes to focus on finishing details helps create a pocket square with clean edges, balanced proportions, and a polished appearance.
Also Read: How to Finish a Knitting Project: A Complete Guide
Also Read: How Do You Weave in Ends in Knitting? Step-by-Step
Care, Pressing & Packaging
Proper care preserves the shape, color, and finish of a handmade pocket square. The best cleaning method depends on the fabric, so always check the manufacturer’s care instructions before washing, especially with fabric blends or specialty finishes.
Washing
Cotton Machine wash on a gentle cycle using cold or lukewarm water with a mild detergent. Avoid bleach unless the fabric care instructions recommend it.
Linen Linen can usually be machine-washed on a gentle cycle. Remove it while slightly damp to make pressing easier and restore its naturally crisp appearance.
Silk Silk should be hand-washed in cool water with detergent for delicate fabrics or professionally dry cleaned. Avoid wringing or twisting the fabric as this can damage fibers and distort a hand-rolled hem.
Pressing is essential to achieving a professional-looking pocket square. It sets stitches, smooths hems, and helps the finished accessory hold crisp folds when worn.
For the best results:
Also Read: How to Block a Knitted Blanket: Easy 3 Methods
Also Read: How Do I Block a Knitted Sweater? Step-by-Step
Storage
Store pocket squares flat in a drawer or fabric organizer to prevent creases. If you have several, separate silk from rough-textured fabrics to reduce snags. For travel, fold each pocket square neatly and place it in a protective pouch or garment organizer to maintain its shape.
Packaging & Gift Ideas
A handmade pocket square makes a thoughtful gift for weddings, birthdays, Father’s Day, graduations, and other special occasions.
For an attractive presentation:
Thoughtful packaging not only protects the finished pocket square but also highlights the care and craftsmanship that went into making it.
Also Read: How to Knit Mittens: The Easy Complete Guide
Also Read: How to Knit a Headband: Easy Beginner Guide
Troubleshooting Common Problems
Even with careful preparation, small sewing issues can occur. Most are easy to fix with a few simple adjustments. Use the following solutions to improve your results and achieve a professionally finished pocket square.
My Pocket Square Isn’t Perfectly Square
An uneven pocket square is usually caused by inaccurate measuring or fabric shifting during cutting.
Solution: Before cutting, square the fabric by aligning the grain with the selvage edge. Use an acrylic quilting ruler and rotary cutter when possible. Double-check your measurements before the first cut.
The Hem Looks Wavy or Puckered
Wavy hems often occur when lightweight fabric stretches during sewing or when the stitch length isn’t suitable for the material.
Solution:
Reduce the stitch length slightly to 2.0–2.2 mm for lightweight fabrics and sew at a steady pace without pulling the fabric. Let the sewing machine feed the fabric naturally. Always test your stitch settings on a scrap of the same material before sewing the finished pocket square.
If you’re working with very lightweight or slippery fabrics, a lightweight tear-away or wash-away stabilizer can provide extra support while sewing and help prevent distortion.
Corners Feel Too Thick
Bulky corners are typically caused by overlapping seam allowances inside the folded hem.
Solution:
Before making the final fold, trim a small triangle of excess fabric from each corner. Reducing the bulk allows the corners to lie flatter, creating sharper, cleaner points.
Also Read: How to Fix a Dropped Stitch: A Complete Guide for Knitters
Also Read: How to Fix a Knitting Hole: Easy 5 Techniques and Tips
Silk Keeps Slipping While Sewing
Silk is smooth and lightweight, making it more difficult to guide evenly through a sewing machine.
Solution:
Use fine silk pins or fabric clips, a sharp Microtex needle, and sew slowly. A walking foot or lightweight stabilizer can improve fabric control and help produce straighter, more even stitching.
Visible Hand Stitches
Large or uneven stitches can distract from the finished appearance of a hand-rolled hem.
Solution:
Take small, evenly spaced stitches and angle the needle slightly to catch only a few threads inside the folded edge. This technique keeps stitches almost invisible from the right side while securely holding the rolled hem in place.
Professional Tips for Sewing a Pocket Square
Experienced sewists rely on careful preparation and consistent techniques to achieve high-quality finishes.
Time-Saving Tip
If you’re making several pocket squares, cut all the fabric squares first. Press every hem in batches and stitch each piece one after another using a chain-sewing method. Doing the same step across multiple pocket squares improves consistency, reduces sewing time, and creates a more uniform finished collection.
Frequently Asked Questions
Final Thoughts on How to Sew a Pocket Square?
Learning how to sew a pocket square is a practical sewing skill that combines precision, creativity, and attention to detail. With a small amount of fabric and a few essential tools, you can create a custom accessory that complements both casual and formal wardrobes.
Whether you prefer the speed of a machine-sewn narrow hem for cotton and linen or the refined look of a traditional hand-rolled hem for silk, the techniques in this guide provide a reliable foundation. They help you achieve clean edges, balanced proportions, and a professional look finish.
As your confidence grows, experiment with different fabrics, sizes, decorative stitching, monograms, and mitered corners to create pocket squares that reflect your style or make thoughtful handmade gifts.
With careful measuring, accurate pressing, and consistent stitching, each project becomes an opportunity to refine your sewing skills while creating an accessory that is functional and timeless.
Also Read: Best Beginner Knitting Projects for New Knitters
Also Read: Do You Need Safety Goggles When Sewing?