How to Sew on a Patch? Easy Step-by-Step Guide
A sew-on patch is a simple and reliable way to repair worn clothing, reinforce weak areas, or personalize jackets, jeans, backpacks, hats, and uniforms. Learning how to sew on a patch extends the life of everyday items while adding a custom touch.
Over the years, I’ve sewn patches onto denim jackets, school uniforms, canvas bags, backpacks, and everyday clothing. Careful preparation makes a noticeable difference. Spending a few extra minutes cleaning the fabric, positioning the patch accurately, and choosing the right stitch usually results in a neater finish that stays secure through regular wear and washing.
Whether you’re repairing a favorite pair of jeans or attaching an embroidered badge to a jacket, the process is straightforward once you understand the basics. This guide covers the tools you’ll need, how to position a patch correctly, hand- and machine-sewing methods, the best stitches for different fabrics, common mistakes to avoid, and practical tips to help every patch last longer.
Key Takeaways
What You Need to Sew on a Patch
Gathering the right supplies before you begin makes the process easier and helps you achieve a cleaner finish. Using the correct needle, thread, and tools also improves durability, especially when sewing patches onto thicker fabrics like denim or canvas.
Essential Supplies
Prepare the following items before starting:
From experience, keeping several thread colors nearby is always helpful. Matching thread creates a subtle finish, while a contrasting color can turn the stitching into a decorative detail.
Also Read: Best Sewing Scissors: Top Picks 2026
Choosing the Right Needle
Using the correct needle makes sewing easier and helps prevent skipped stitches or fabric damage.
If you’re unsure which needle to use, test it on a scrap piece of the same fabric before sewing the patch onto the garment.
Choosing the Best Thread
Thread quality plays an important role in keeping a patch securely attached.
For most projects, I recommend:
Avoid using old or brittle thread because it can weaken over time and break while sewing.
Also Read: 10 Best Thread for Sewing: Ultimate Guide 2026
Types of Patches You Can Sew On
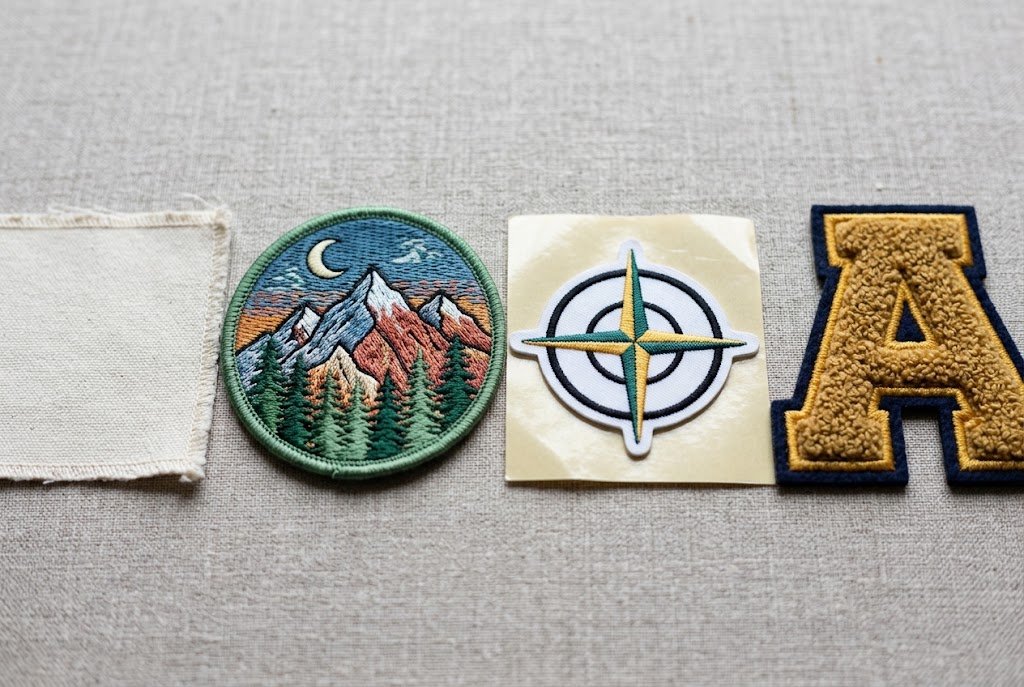
Different patches require slightly different sewing methods. Understanding each type helps you choose the most suitable approach.
Sew-On Patches
Sew-on patches are designed to be stitched around the edges. They provide one of the most durable attachments and work well on jackets, jeans, uniforms, backpacks, hats, and workwear.
Embroidered Patches
Embroidered patches feature dense stitched designs with finished borders that make them easy to sew by hand or with a sewing machine. They’re commonly used for club logos, scout badges, sports teams, military-style emblems, and decorative clothing.
Also Read: Can You Embroider With a Sewing Machine? Easy Guide
Iron-On Patches
Iron-on patches include a heat-activated adhesive that helps hold the patch in place. While the adhesive provides a good starting bond, I recommend sewing around the edges afterward. Stitched edges hold up much better through repeated washing and everyday wear.
Decorative Fashion Patches
Decorative patches come in many styles, including floral designs, letters, chenille patches, vintage motifs, sequins, and embroidered artwork. They’re a simple way to personalize jackets, hoodies, tote bags, and other accessories.
Repair Patches
Repair patches strengthen worn or damaged fabric while helping prevent small tears from becoming larger. For the best support, choose a patch that extends beyond the damaged area by at least ½ inch on every side.
Fabric Considerations
The fabric affects both the needle and thread you’ll need.
When working with an unfamiliar fabric, test your needle and stitch on a fabric scrap first.
Best Places to Sew a Patch
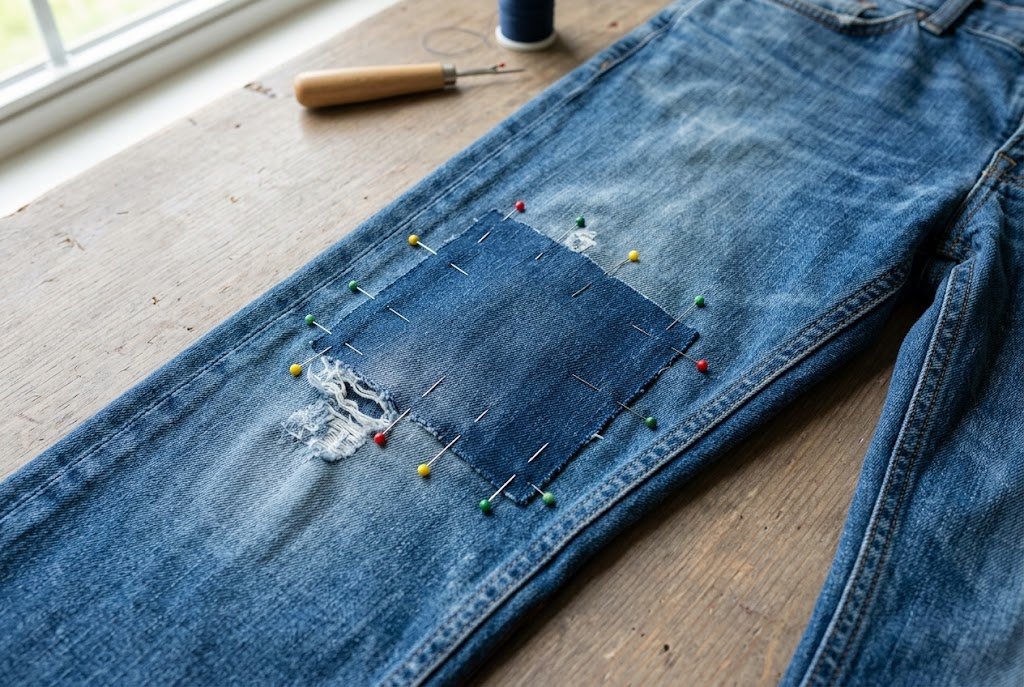
Choosing the right location affects both the appearance and the durability of the finished project. Before sewing, lay the garment flat or try it on to confirm the placement looks balanced.
Jeans
Jeans are one of the most common items for patch repairs.
Popular placement areas include:
For repairs, extend the patch beyond the damaged area to distribute stress more evenly. Avoid placing decorative patches directly over bulky seams or high-stress belt-line areas unless they’re reinforced.
Jackets
Jackets provide plenty of space for both repairs and decorative patches.
Common placement options include:
Large statement patches often suit the center back, while smaller embroidered patches fit neatly on the chest or sleeves.
Backpacks and Bags
Backpacks receive frequent movement, so secure stitching is especially important.
Flat panels usually provide the easiest sewing surface. Reinforce the edges carefully and avoid stitching across zippers, heavy seams, or padded sections whenever possible.
Shirts and Hoodies
Smaller patches work well on lightweight clothing.
Popular locations include:
Support the fabric during sewing to help prevent stretching or puckering.
Hats
Because hats have curved surfaces, they require more preparation. Pinning or hand-basting the patch before stitching helps keep it aligned throughout the sewing process.
Uniforms and Scout Badges
Uniform patches often have official placement requirements. Before sewing, check the organization’s guidelines and measure the position carefully so every badge sits straight and evenly spaced.
How to Position the Patch Before Sewing
Taking a few minutes to position the patch carefully makes the sewing process easier and helps create a cleaner, more balanced finish. In my experience, accurate placement is just as important as choosing the right stitch because even neat stitching can look uneven if the patch isn’t aligned properly.
Wash and Press the Garment
Start with a clean garment whenever possible. Washing removes dirt and allows the fabric to shrink before the patch is attached. After washing, press the fabric with an iron to remove wrinkles and create a smooth sewing surface.
Trim Loose Threads
Before positioning the patch, inspect the garment and patch. Trim loose threads, frayed edges, or excess backing so the patch sits flat against the fabric.
Test the Placement
Place the patch where you want it before securing it.
For the best results:
This check often makes it easier to notice small adjustments before sewing.
Mark the Position
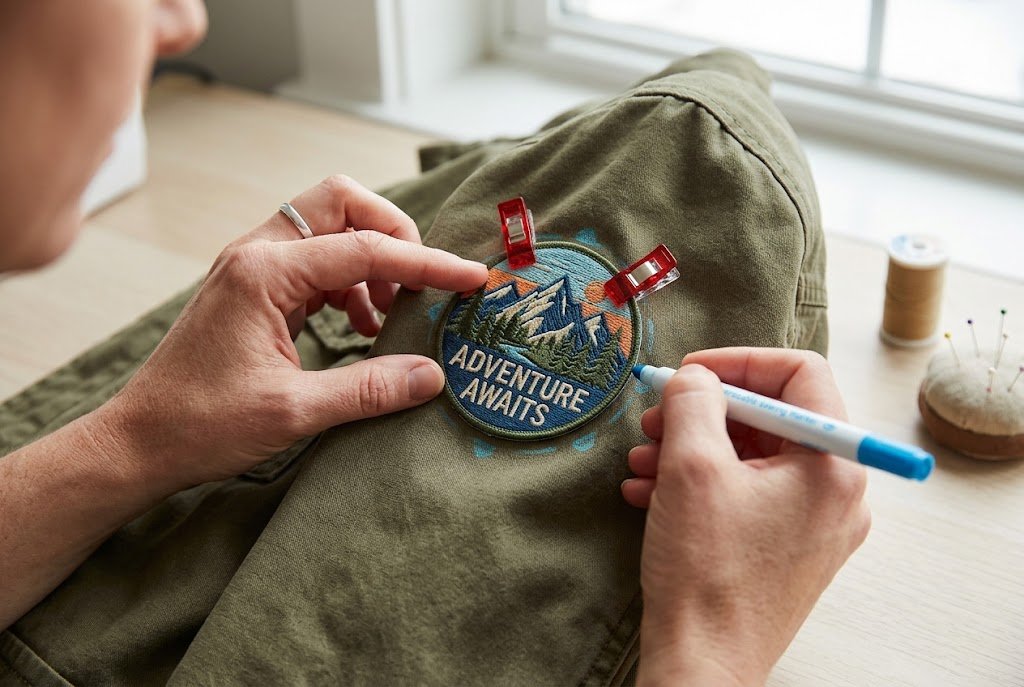
Once satisfied with the placement, lightly outline the patch using tailor’s chalk or a washable fabric marker. The guide marks help keep the patch centered if it shifts while pinning.
Secure the Patch
Hold the patch firmly in place before stitching using one of the following:
Fabric clips often work better on thick materials like denim or canvas, while basting stitches provide extra stability on slippery fabrics.
Check the Alignment One Last Time
Before making the first stitch, look at the garment from several angles to confirm the patch is straight and evenly positioned. Small adjustments now are easier than removing stitches after the patch has been sewn in place.
How to Sew on a Patch by Hand
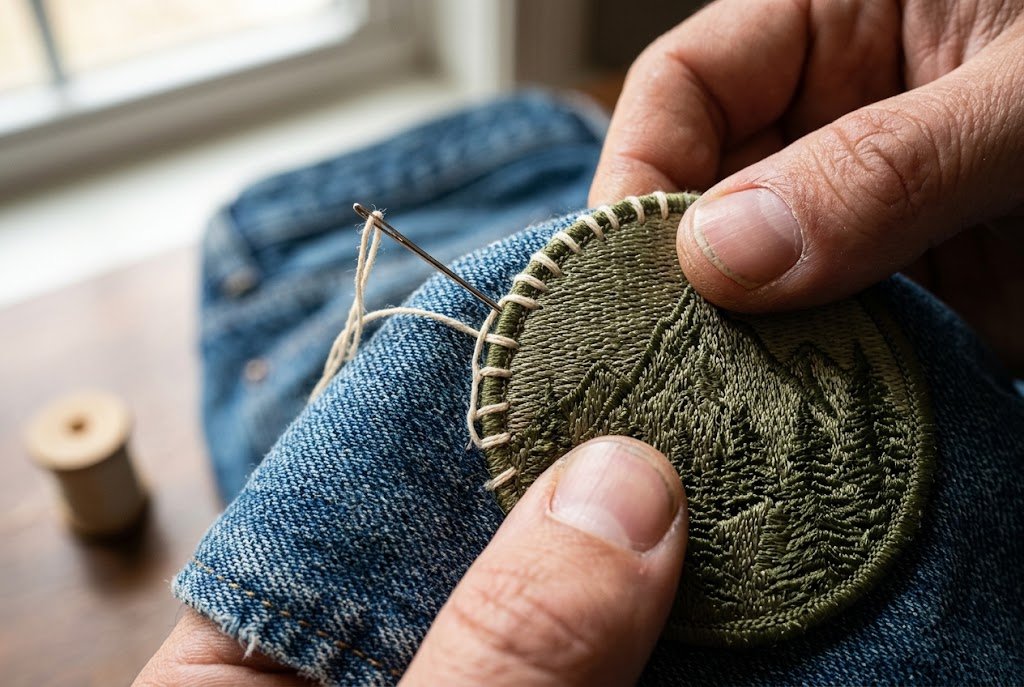
Hand sewing is a reliable way to attach patches, especially on thick fabrics, curved surfaces, or hard-to-reach areas where a sewing machine can’t reach. I often use this method for scout badges, denim repairs, backpacks, and decorative patches because it offers excellent control and helps keep the patch aligned.
If you’re new to sewing, work slowly and focus on keeping stitches even. Patience usually produces a stronger and neater result.
Also Read: How to Sew a Seam by Hand? Easy 5-Step Guide
Step 1: Thread the Needle
Choose a hand-sewing needle that matches the fabric thickness and a quality thread that either blends with the patch border or provides a decorative contrast.
To prepare the thread:
For heavy fabrics such as denim or canvas, I often use doubled polyester thread because it provides extra strength without adding too much bulk.
Step 2: Secure the Patch
Place the patch in its marked position and hold it securely before stitching.
You can use:
When working on slippery fabrics or children’s clothing, I usually baste the patch first. This keeps everything in place and reduces the chance of the patch shifting while sewing.
To begin stitching, bring the needle up from the inside of the garment so the knot remains hidden. Make a small anchoring stitch near the edge of the patch to secure the starting point.
Also Read: What Is a Basting Stitch in Sewing? Easy Guide
Step 3: Stitch Around the Edge
Work around the patch using small, evenly spaced stitches. Consistent stitching creates a cleaner appearance and helps distribute tension evenly around the patch.
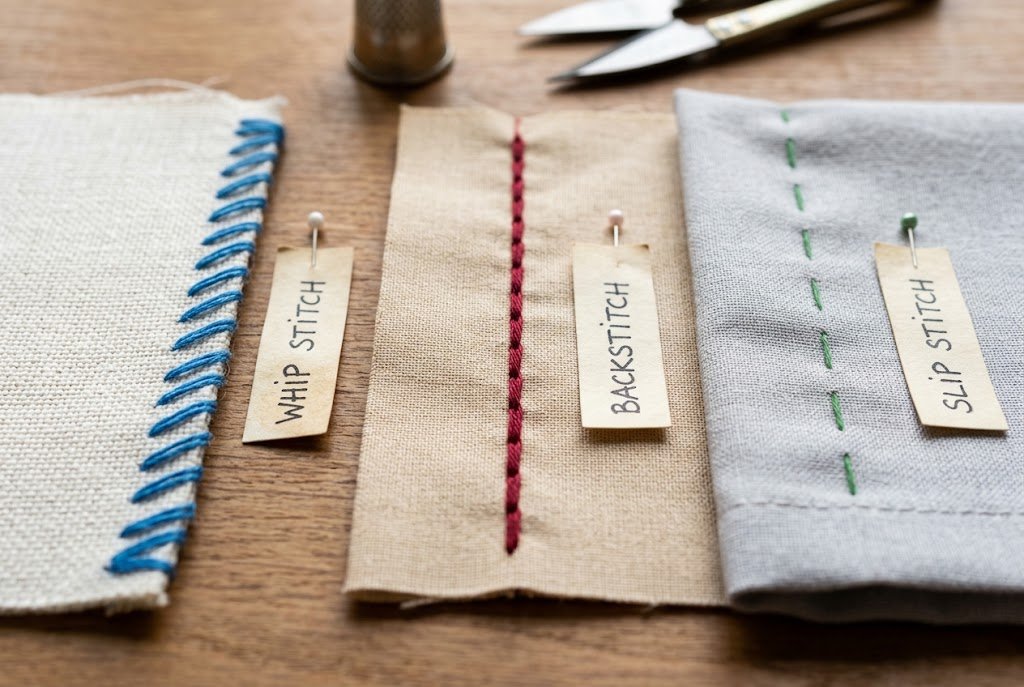
Several hand stitches work well for attaching patches.
Whip Stitch
A whip stitch wraps around the edge of the patch, making it quick and easy for beginners. It creates a visible border and works well on casual clothing, frayed-edge patches, and repair projects.
Also Read: How to Do a Whip Stitch? Quick Guide
Backstitch
A backstitch is one of the strongest hand stitches because it closely resembles a machine stitch. It’s an excellent choice for workwear, uniforms, backpacks, and patches that get frequent wear. Keep each stitch about 1 to 2 millimeters apart for a secure finish.
Slip Stitch
A slip stitch, sometimes called a ladder stitch, hides most of the thread beneath the patch edge. This method works well when you want the stitching to be less noticeable, especially on decorative or embroidered patches.
Whichever stitch you choose, avoid pulling the thread too tight. Tight stitches can cause lightweight fabrics to pucker around the patch.
Step 4: Reinforce the Corners and Stress Points
Corners, pocket edges, knees, elbows, and other high-wear areas get more strain during everyday use. Before moving to the next side of the patch, add two or three extra stitches in these spots to help prevent the edges from lifting later.
For round or oval patches, reinforce the area where you begin and finish stitching, as these points often experience the greatest tension.
Step 5: Knot, Finish, and Press
After sewing around the entire patch:
Finally, inspect the patch to ensure every edge lies flat. If the fabric allows, press the garment gently from the back with a warm iron. Place a pressing cloth over delicate embroidered patches to protect the stitching from direct heat.
Also Read: 10 Best Iron for Sewing: Top-Rated Picks 2026
How to Sew on a Patch with a Sewing Machine
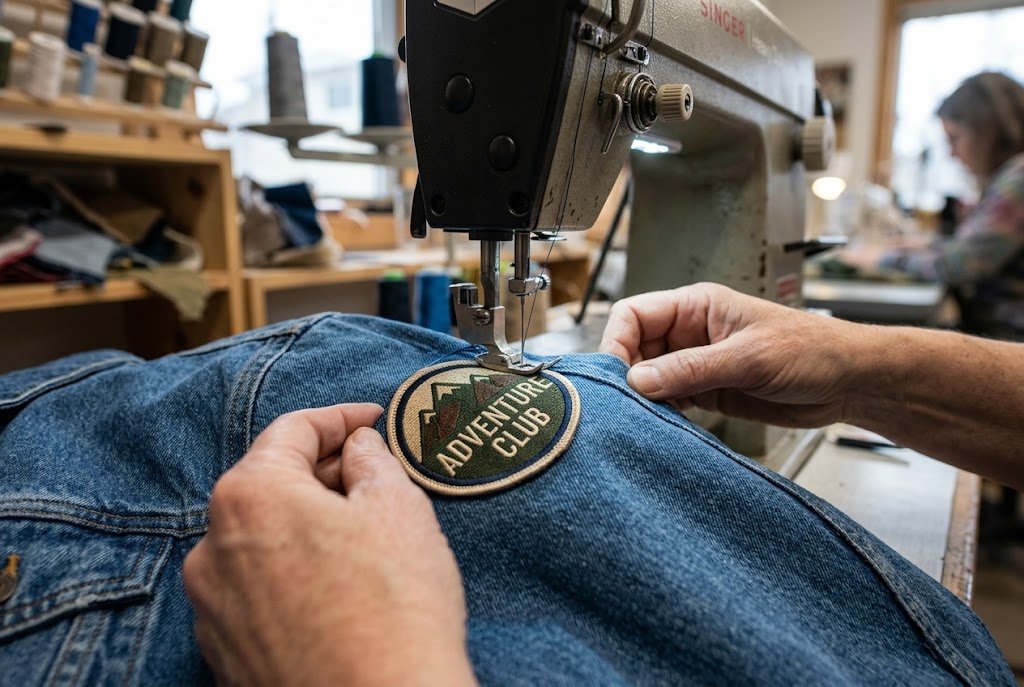
Using a sewing machine is a practical choice when attaching larger patches or sewing on heavy fabrics such as denim, canvas, and workwear. It creates consistent stitches, saves time on larger projects, and provides a durable finish for garments that are washed and worn regularly.
I usually choose this method for jackets, jeans, backpacks, and tote bags because it produces strong, even stitching while keeping the patch securely attached.
Step 1: Prepare the Sewing Machine
Set up the machine before placing the garment under the presser foot. Using the correct needle, thread, and stitch settings smooths the sewing process and helps prevent skipped stitches.
For most projects, I recommend:
Before sewing the actual garment, test the stitch on a scrap piece of the same fabric. This quick step allows you to check stitch quality and adjust the thread tension as needed.
Also Read: How to Load Bobbin in Sewing Machine? Easy Steps
Step 2: Position and Secure the Patch
Place the patch in the marked position and secure it before sewing. A patch that shifts during stitching can leave uneven edges that are difficult to correct.
You can hold the patch in place with:
For thick embroidered patches or multiple fabric layers, raise the presser foot carefully before positioning the fabric. If your machine has a walking foot, use it to feed bulky layers evenly.
Lower the presser foot before taking the first stitch and check that the patch remains flat against the fabric.
Step 3: Stitch Around the Edge
Begin sewing near the bottom or least noticeable edge of the patch. Sew slowly and keep the stitching close to the border without sewing over the embroidered design.
When sewing around corners or curves:
For decorative patches with unfinished or raw edges, a zigzag stitch or narrow satin stitch can help secure the edge and reduce fraying. For patches with finished embroidered borders, a straight stitch placed close to the edge usually provides a clean, durable finish.
Avoid pulling the fabric while sewing. Let the machine’s feed dogs move the garment naturally to keep stitches even.
Step 4: Lock the Stitches
When you reach the starting point, sew two or three backstitches to lock the seam. If your machine has a reverse function, a few short reverse stitches also work.
After backstitching:
Locking the stitches helps prevent the thread from loosening after repeated wear and washing.
Tips to Prevent Puckering
Light puckering usually results from excessive thread tension, stretching the fabric while sewing, or using the wrong needle.
To reduce puckering:
With careful preparation and slow, steady stitching, a sewing machine produces a neat, durable finish that works well for everyday clothing, uniforms, bags, and heavy-duty repairs.
Best Stitches for Sewing a Patch
Choosing the right stitch is just as important as selecting the right patch. The stitch you use affects how securely the patch stays attached, how the finished project looks, and how well it stands up to everyday wear. Over the years, I’ve found that matching the stitch to both the fabric and the patch type produces the most reliable results.
Whip Stitch
A whip stitch is one of the easiest hand stitches to learn and is a popular choice for beginners. The thread wraps around the edge of the patch, creating a visible border that holds the patch firmly against the fabric.
Best for:
Advantages:
Backstitch
When durability is the priority, I usually choose a backstitch. Each stitch overlaps the previous one, creating a strong seam that closely resembles machine stitching.
Best for:
Advantages:
It takes a little longer to sew than a whip stitch, but the added strength makes it worthwhile for clothing that sees regular use.
Slip Stitch
A slip stitch, sometimes called a ladder stitch, hides most of the thread beneath the edge of the patch. It’s a good choice when you want the stitching to remain as discreet as possible.
Best for:
Advantages:
Keep the stitches small and evenly spaced to maintain both strength and a smooth finish.
Straight Stitch
A straight stitch is the standard machine stitch for attaching patches with finished embroidered borders. When sewing by machine, stitch close to the edge while maintaining an even distance around the entire patch.
Best for:
Thread matching the patch border helps the stitching blend into the finished design.
Zigzag or Satin Stitch
A narrow zigzag or satin stitch wraps slightly over the edge of the patch, helping secure raw or woven edges while reducing fraying. It also creates a decorative border that works well on children’s clothing and fashion projects.
Best for:
Advantages:
Which Stitch Should You Choose?
The best stitch depends on the type of patch and how the garment will be used.
| Patch Type | Recommended Stitch | Why It Works |
| Embroidered patch | Whip stitch | Secure border with a decorative finish |
| Repair patch | Backstitch | Excellent strength for everyday wear |
| Decorative patch | Slip stitch or whip stitch | Neat appearance with reliable attachment |
| Iron-on patch | Straight stitch or whip stitch | Reinforces the adhesive backing |
| Scout badge | Whip stitch | Traditional and durable finish |
| Backpack patch | Backstitch or straight stitch | Withstands frequent movement and heavier use |
No matter which stitch you choose, consistent stitch length is more important than speed. Small, evenly spaced stitches distribute tension evenly and usually produce a cleaner, longer-lasting result.
How to Make a Patch Last Longer
Attaching a patch correctly is only the first step. Simple habits help keep it securely attached through regular wear and washing. I’ve found that spending extra time reinforcing a patch during installation often prevents repairs later.
Sew Around the Entire Edge
Avoid securing the patch in just a few places. Stitching around the entire edge keeps edges flat and reduces the chance of corners lifting over time.
Use Strong Thread
Thread quality plays an important role in durability.
For most projects, I recommend:
Quality thread helps stitches resist wear and repeated laundering.
Reinforce High-Wear Areas
Certain parts of a garment experience more movement than others. Add a few extra stitches around:
These small reinforcements help prevent the patch from loosening during everyday use.
Add Extra Support for Heavy Fabrics
For larger patches on denim, canvas, or workwear, add lightweight fusible interfacing behind the damaged area before sewing. It provides extra support and helps distribute stress across the surrounding fabric.
On heavy garments, an additional row of topstitching around the patch can also improve long-term durability.
Wash and Dry Carefully
Proper care helps protect both the patch and the stitching.
For the best results:
Sew Around Iron-On Patches
Iron-on adhesive holds a patch in place during installation, but it isn’t always enough for clothing with regular wear. Sewing around the edge adds mechanical support, keeping the patch securely attached long after the adhesive weakens.
With the right stitch, quality thread, and proper care, a well-sewn patch can remain securely attached for years while continuing to protect or personalize the garment.
Common Mistakes to Avoid
Even experienced sewists make small mistakes from time to time. Most patch-sewing problems are easy to prevent with careful preparation and the right materials.
Sewing Too Close to the Edge
Stitching on the edge of the patch may not leave enough fabric to hold stitches securely. Leave about 1 to 2 millimeters of the patch border outside the stitching line to provide better support and prevent edges from lifting.
Using the Wrong Thread
Thread should match the fabric and the garment’s expected wear.
For the best results:
Not Securing the Patch Before Sewing
A patch can shift while stitching if not held firmly in place.
Before sewing, secure it using one of the following:
Securing the patch usually results in straighter, more even stitching.
Pulling the Thread Too Tight
Pulling the thread too tight often causes fabric puckering and patch distortion.
Pull each stitch gently until it lies flat against the fabric without gathering the material.
Choosing the Wrong Needle
Using the correct needle makes sewing smoother and helps reduce skipped stitches.
As a general guide:
Skipping Corner Reinforcement
Corners and curved edges receive more stress than flat sections. Adding two or three extra stitches here helps keep the patch securely attached through repeated wear and washing.
Troubleshooting Patch Sewing Problems
Even with careful preparation, small issues can appear while sewing. Most have simple solutions.
Fabric Is Puckering
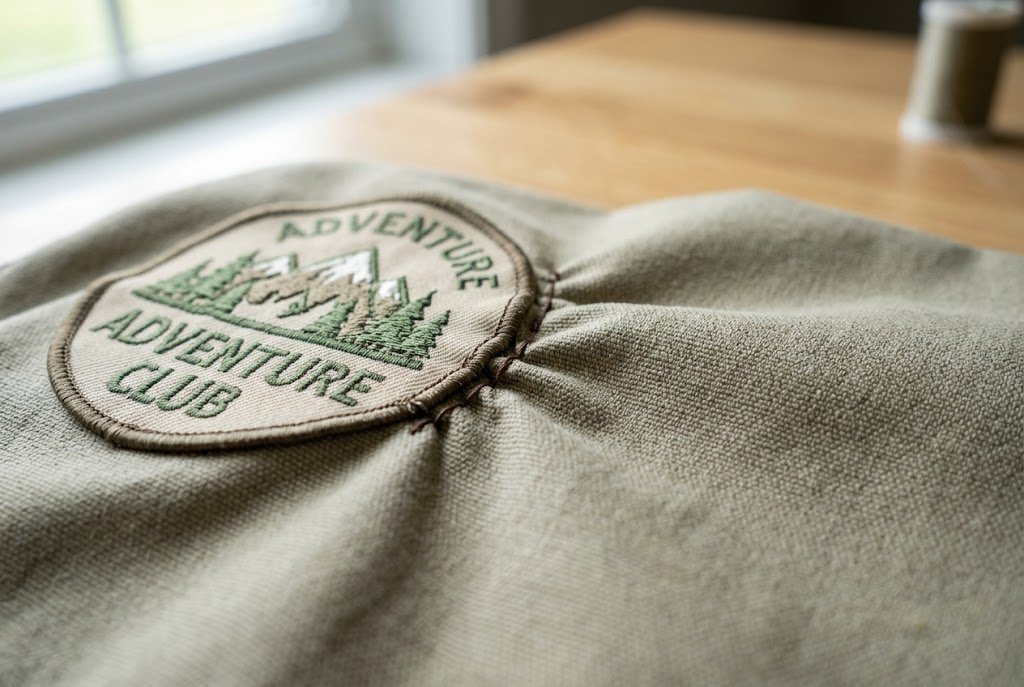
Puckering usually occurs when the thread tension is too tight or the fabric is pulled while sewing.
Try these adjustments:
Stitches Look Uneven
Uneven stitches often happen when sewing too quickly.
For a cleaner result:
Thick Seams Won’t Feed Smoothly
Bulky seams can make the fabric difficult to move under the presser foot.
If this happens:
Also Read: Why Does My Sewing Machine Keep Jamming? Easy Fixes
Corners Keep Lifting
If the corners begin lifting after sewing, reinforce them with several additional stitches. A small diagonal stitch across each corner can provide extra support on frequently used garments.
Thread Keeps Tangling
Thread tangles often result from using thread that’s too long or allowing it to twist repeatedly.
Cut shorter lengths of thread, allow the needle to hang occasionally so the thread can untwist naturally, and replace damaged thread if necessary.
How to Remove or Replace a Sewn Patch
A patch may eventually need replacing because of wear, damage, or a change in style. Removing it carefully helps protect the garment and prepares the fabric for a replacement.
Step 1: Remove the Stitches
Turn the garment inside out when possible. Using a seam ripper, cut one stitch at a time instead of pulling the thread. Working slowly helps prevent accidental damage to the surrounding fabric.
Step 2: Lift Away the Patch
Once all the stitches have been removed, gently lift the patch from the fabric.
If removing an iron-on patch, warming it slightly with an iron may soften the adhesive and make removal easier. Remaining adhesive can usually be removed with gentle scraping or a fabric-safe adhesive remover suitable for the garment.
Step 3: Clean and Press the Fabric
Remove any remaining threads or adhesive residue, then press the fabric flat with an iron. This restores the surface before attaching a replacement patch.
Step 4: Attach the New Patch
Position the replacement patch carefully. If the original area is worn or weakened, consider moving the new patch slightly so it rests on stronger fabric before stitching it securely in place.
Should You Sew an Iron-On Patch?
Yes. Iron-on adhesive provides a convenient way to hold a patch in position during installation, but it isn’t designed to replace stitching on garments that receive frequent wear or repeated washing.
For the most durable result, press the patch onto the garment according to the manufacturer’s instructions, then sew around the entire edge. The adhesive helps keep the patch aligned, while the stitches provide long-term strength and help prevent the edges from lifting.
Caring for Patched Clothing
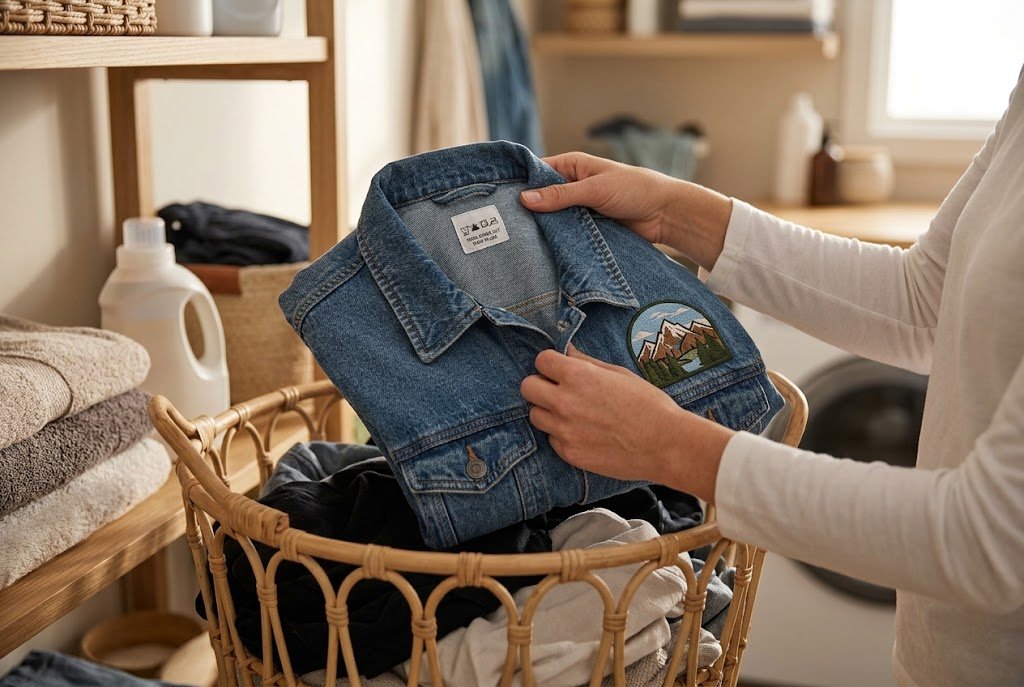
Proper care helps preserve both the patch and the stitching.
For longer-lasting results:
With careful sewing and routine care, a well-attached patch can remain secure and continue protecting or decorating a garment for many years.
Final Thoughts
Learning how to sew on a patch is a practical sewing skill that can extend the life of clothing while adding a personal touch to everyday items. Whether you’re repairing worn jeans, customizing a jacket, attaching a scout badge, or decorating a backpack, careful preparation and steady stitching create lasting results.
From my sewing projects, I’ve found success comes down to a few simple habits. Clean and press the garment first, position the patch carefully, choose the right needle and thread, and reinforce the edges before finishing. These steps help prevent lifting, puckering, and uneven stitching after repeated wear and washing.
If you’re new to patch sewing, start with a simple hand-sewn project on woven cotton to build confidence. As your skills grow, try sewing patches by machine on larger garments and heavier fabrics. With a little practice, you’ll be able to repair, reinforce, and personalize clothing with clean, durable stitching that looks neat and withstands everyday use.