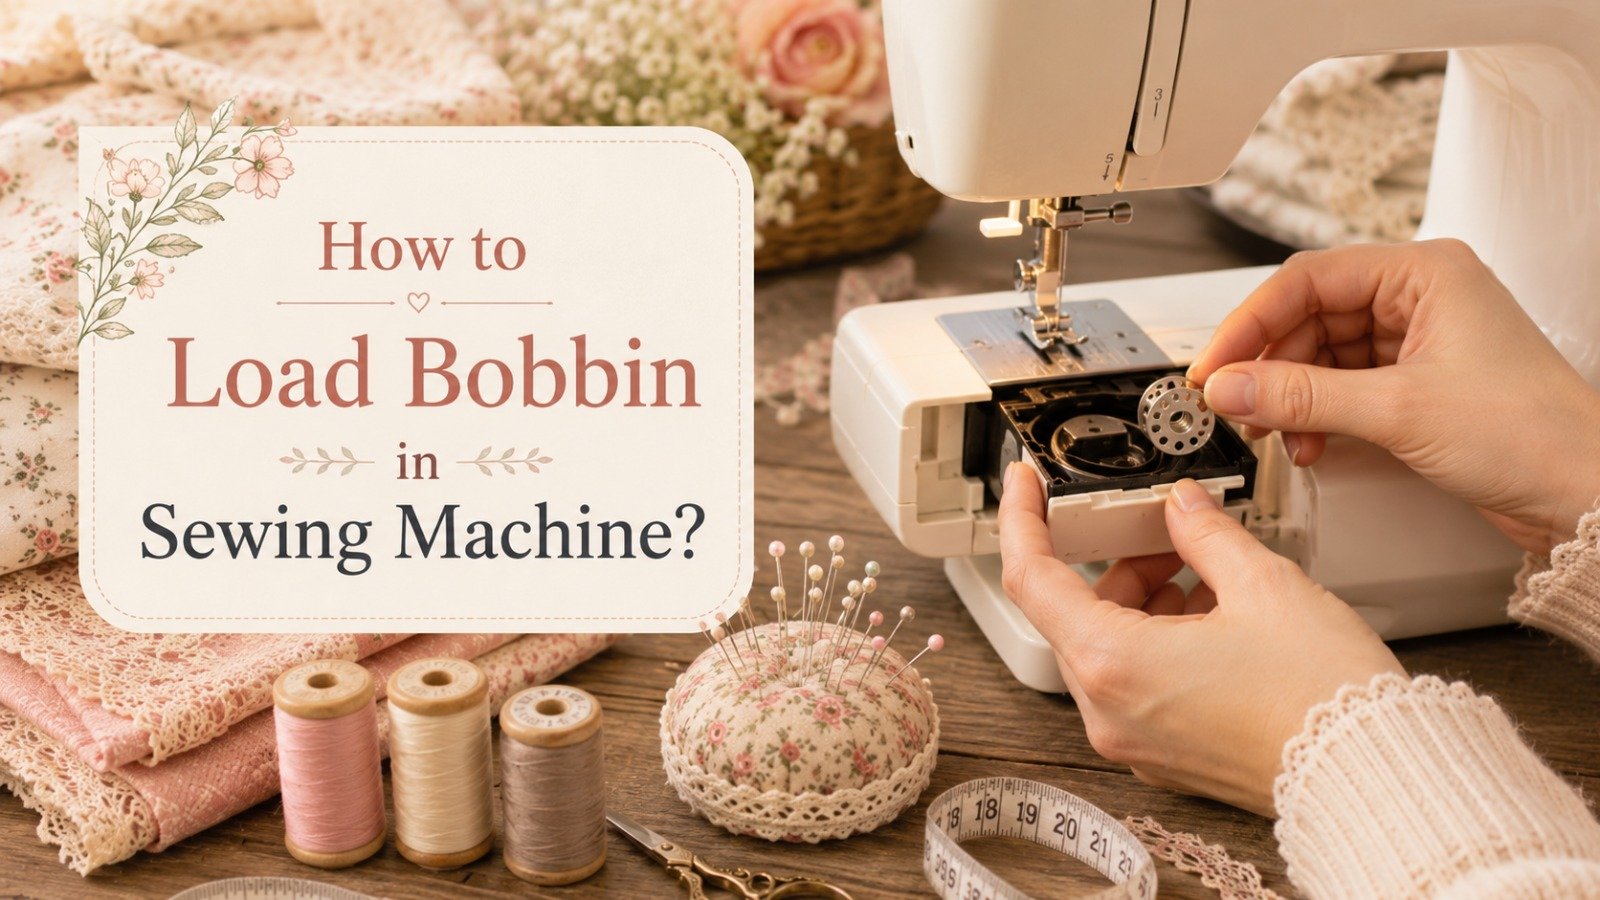
How to Load Bobbin in Sewing Machine? Easy Steps
A sewing machine produces neat, even stitches only when the upper thread and the bobbin thread work together correctly. Many beginners adjust the thread tension when the real issue is a bobbin loaded the wrong way. Even a small setup mistake can lead to skipped stitches, tangled thread, or loose loops under the fabric.
Learning how to load bobbin in sewing machine is one of the first skills every sewer should master. Although the bobbin may seem confusing at first, the process becomes easy with practice. A properly loaded bobbin helps the machine sew smoothly and produce cleaner, more consistent stitches.
This step-by-step guide explains how to load bobbin, insert bobbin sewing machine correctly, wind it evenly, bring up the bobbin thread, and avoid common mistakes that cause most sewing problems.
Key Takeaways
Understanding the Bobbin Before Loading It
A bobbin is a small spool that holds the lower thread inside a sewing machine. During stitching, the upper thread interlocks with the bobbin thread to form each stitch. Without a properly loaded bobbin, the machine cannot produce consistent, balanced stitches.
Although the bobbin looks simple, it has a direct impact on stitch quality. Even a well-made sewing machine can produce skipped stitches, loose loops, or thread tangles if the bobbin is wound unevenly or inserted incorrectly.
Taking a few extra moments to check the bobbin before sewing makes loading the bobbin in sewing machine much easier and helps prevent problems that take much more time to fix later.
Also Read: Can You Embroider With a Sewing Machine? Easy Guide
Why Correct Bobbin Loading Matters
Knowing how to load bobbin in sewing machine correctly helps the machine operate smoothly and produce balanced stitches.
A properly installed bobbin helps:
Many common stitching problems can be solved simply by checking that the bobbin is wound and inserted correctly.
How to Load Bobbin in Sewing Machine
Loading the bobbin correctly is essential before starting any sewing project. A properly installed bobbin allows the upper and lower threads to work together, creating smooth, balanced stitches. Although sewing machines differ by brand and model, the basic process is the same. Start by preparing the machine, winding the bobbin evenly, identifying the bobbin system, inserting the bobbin correctly, bringing up the bobbin thread, and testing the machine before sewing.
Before You Begin
Taking a few minutes to prepare the sewing machine helps prevent common stitching problems later.
Before loading the bobbin:
These preparation steps help the bobbin feed smoothly and reduce thread jams.
Also Read: Best Sewing Scissors: Top Picks 2026
Wind the Bobbin
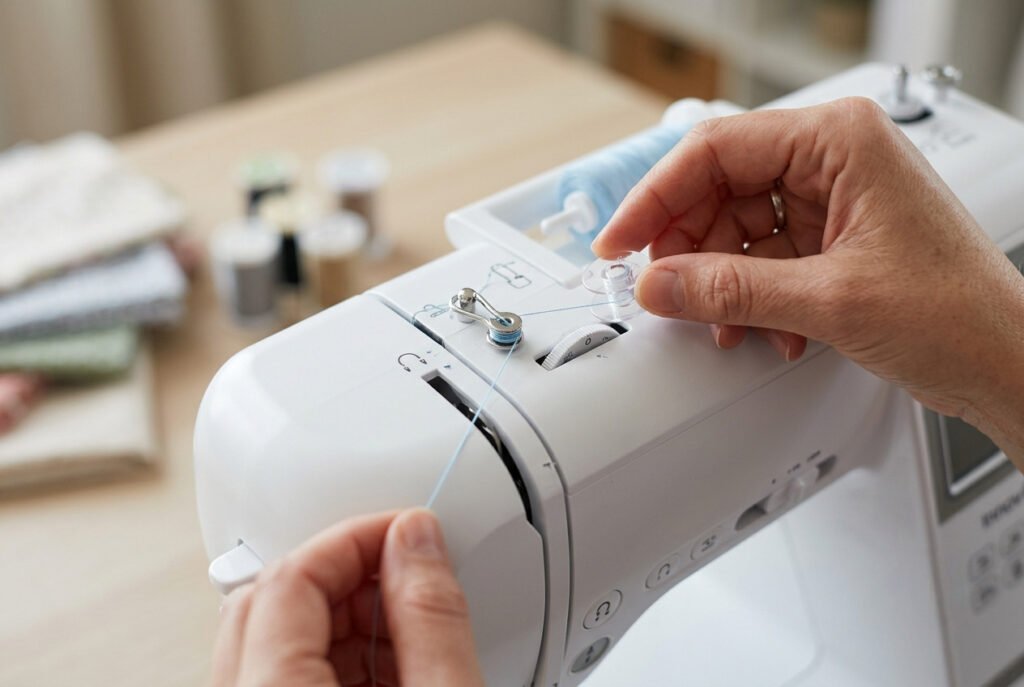
A properly wound bobbin provides steady thread tension and supports consistent stitch quality throughout the sewing process.
Follow these steps:
An evenly wound bobbin helps maintain balanced stitches and minimizes thread tension problems.
Also Read: How to Sew a Pocket Square? Two Easy Methods
Identify Your Sewing Machine’s Bobbin System
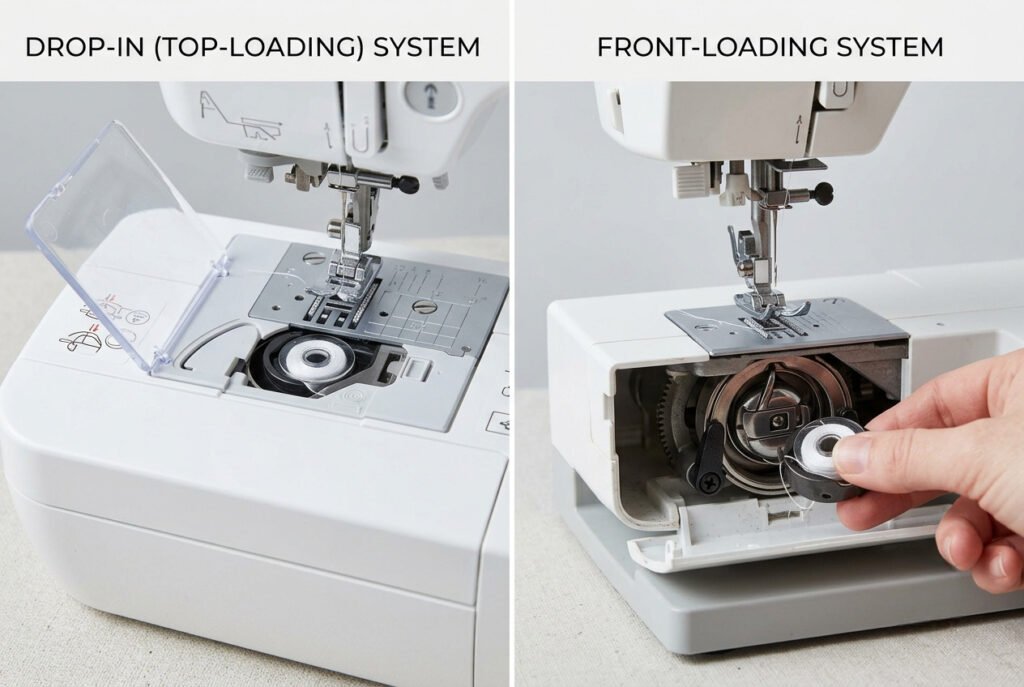
Most household sewing machines use one of two bobbin systems.
A drop-in (top-loading) bobbin sits beneath a clear cover on the sewing bed. Many modern machines use this design because it keeps the remaining thread visible and makes bobbin changes quick and convenient.
A front-loading bobbin fits inside a removable metal bobbin case behind the machine’s front access panel. Although it requires a few additional steps, it provides reliable performance and is common on many traditional sewing machines.
Identifying the bobbin system before loading the machine helps ensure the thread follows the correct path.
Load a Drop-In (Top-Loading) Bobbin
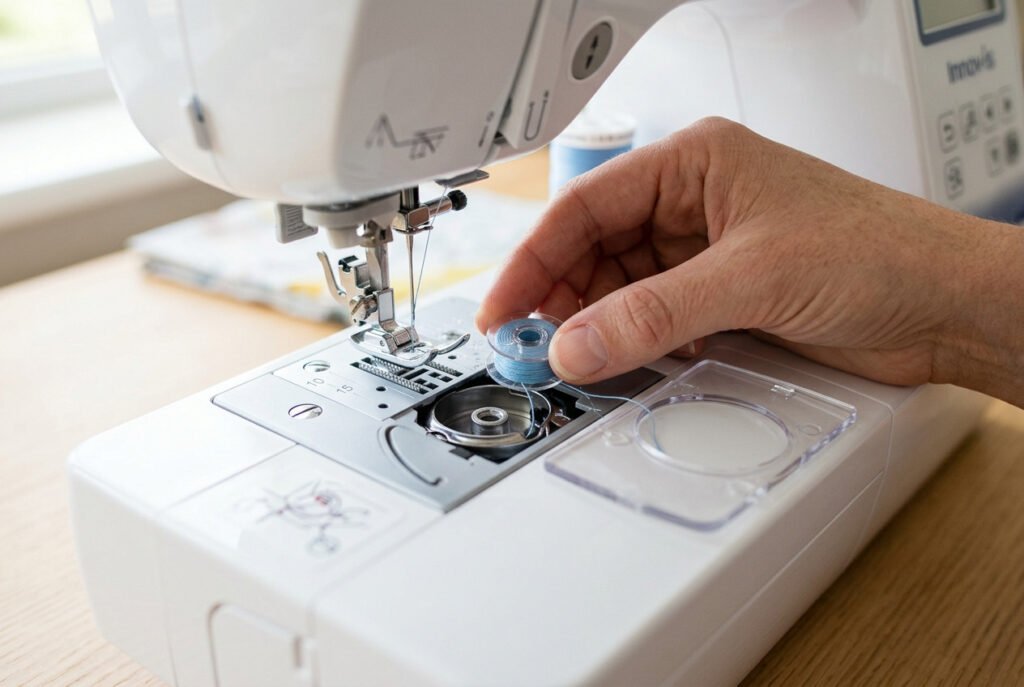
Open the clear bobbin cover and place the wound bobbin into the compartment.
Many drop-in sewing machines require the thread to unwind counterclockwise, but the correct direction depends on the machine model. Always follow the threading diagram printed on the machine or the owner’s instruction manual.
Guide the thread through the marked slot and beneath the tension guide. Pull the thread gently to confirm it feeds smoothly, then replace the bobbin cover.
If the thread catches or feels tight, remove the bobbin and rethread it before continuing.
Load a Front-Loading Bobbin Case
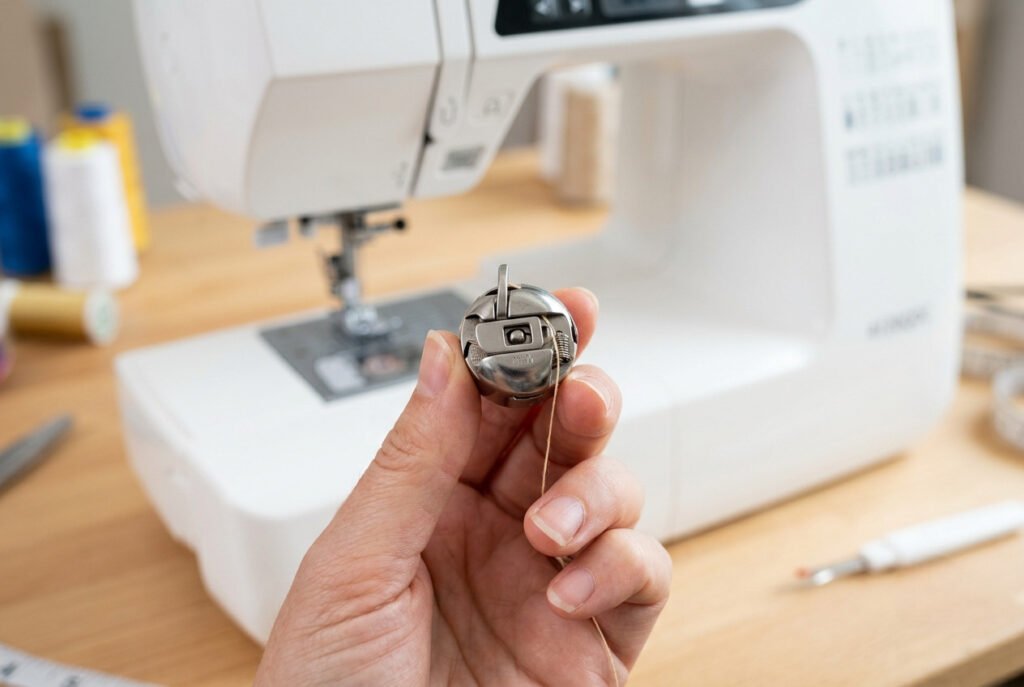
Open the front access panel and remove the bobbin case by holding its latch. Insert the wound bobbin into the case with the thread facing the direction recommended for the machine. Pull the thread through the slot and beneath the tension spring until it moves with light resistance.
Hold the latch and return the bobbin case to the machine. Press it gently into place until it locks securely. Turn the handwheel once to confirm that the bobbin case remains seated correctly.
Bring Up the Bobbin Thread
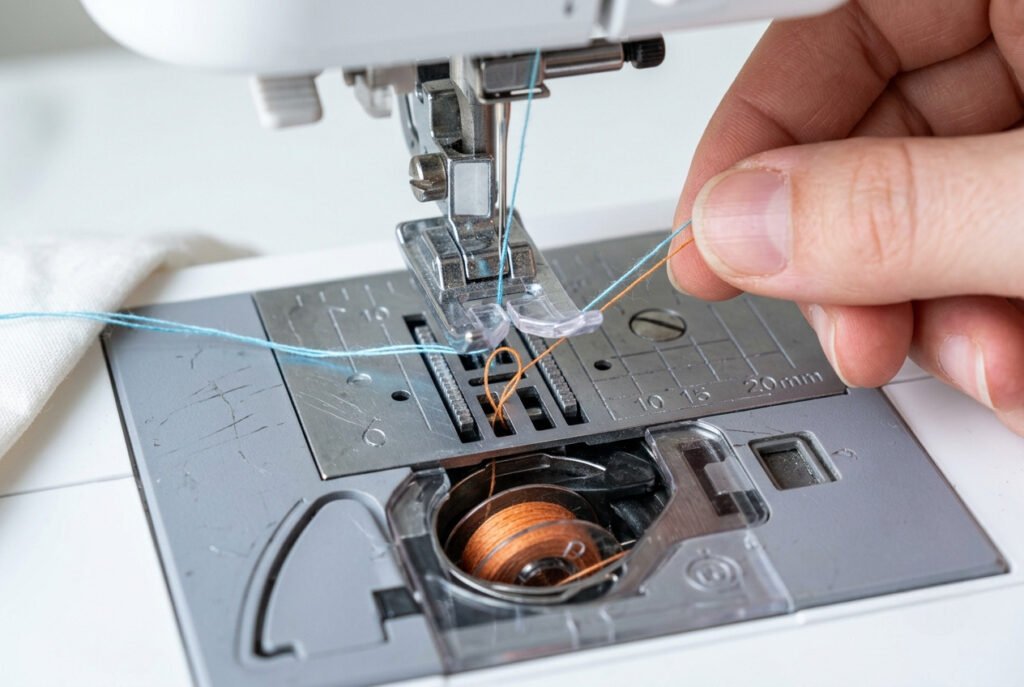
Before sewing the first stitch, bring the bobbin thread to the top of the needle plate.
Hold the upper thread lightly with one hand. Turn the handwheel toward the front of the machine until the needle moves down and returns to its highest position. As the needle rises, it catches the bobbin thread and forms a small loop above the needle plate.
Pull the upper thread until the bobbin thread appears. Draw both thread tails beneath the presser foot and toward the back of the machine, leaving about 4 to 6 inches free.
Completing this step helps prevent thread tangles and creates a clean start to every seam.
Test the Machine
Before starting the actual project, sew a few test stitches on a scrap piece of fabric that matches the weight and type of your project fabric.
Examine both sides of the fabric. The upper and lower threads should interlock neatly between the fabric layers without loose loops, puckering, or skipped stitches.
If the stitches appear uneven, recheck the upper threading, bobbin placement, and thread path before adjusting the thread tension. Testing the machine first helps identify small setup issues before they affect the finished project.
Also Read: What Is a Basting Stitch in Sewing? Easy Guide
How to Load Bobbin in Singer Sewing Machine
Singer sewing machines include both drop-in (top-loading) and front-loading bobbin systems, depending on the model. Although the design may vary, the loading process follows the same basic steps. Start by winding the bobbin evenly, insert it according to the machine’s threading guide, and test the stitches before beginning a project.
Wind the Bobbin Evenly
Place the thread spool on the spool pin and follow the bobbin winding path shown on the machine.
Wind the thread at a steady speed until it fills the bobbin evenly from side to side. Avoid overfilling the bobbin, as excess thread can affect stitch quality and thread tension.
Insert the Bobbin
For drop-in Singer models, place the bobbin into the compartment and follow the printed threading diagram. Many models require the thread to unwind in a specific direction, so use the markings on the machine rather than guessing.
For front-loading Singer machines, place the bobbin inside the removable bobbin case, guide the thread through the slot and beneath the tension spring, then reinstall the case securely.
Guide the Thread Correctly
Pull the thread through each guide exactly as shown on the machine. Skipping a guide or placing the thread outside the tension path can lead to loose stitches, thread nests, or uneven tension.
Test Before Sewing
Bring the bobbin thread to the top of the needle plate and sew several test stitches on a scrap piece of fabric.
Check both sides of the fabric to make sure the stitches are balanced. If the stitching appears uneven, recheck the bobbin placement and thread path before adjusting the machine settings.
Common Bobbin Loading Mistakes
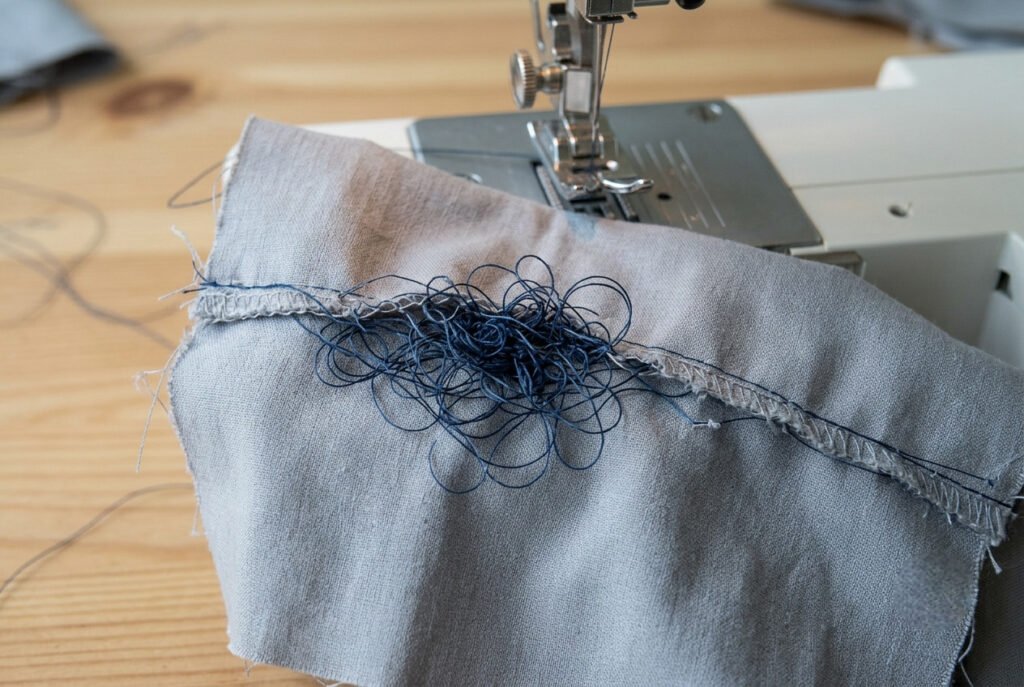
Even experienced sewists occasionally make a simple mistake when loading a bobbin. Fortunately, most bobbin-related problems are easy to identify and correct before they affect an entire project.
Using the Wrong Bobbin
Not all bobbins are the same. Even small differences in height, width, or material can affect how the thread feeds through the machine.
Always use the bobbin size and type recommended by the sewing machine manufacturer. A mismatched bobbin can cause uneven stitches, thread jams, or excessive wear on the bobbin case.
Overfilling the Bobbin
Fill the bobbin evenly without extending beyond its edges. Overfilling stops the bobbin from rotating freely and creates uneven thread tension.
Stop winding when the thread reaches the bobbin’s outer rim.
Uneven Thread Winding
A thread that is wound loosely or unevenly can snag while sewing.
Wind the bobbin steadily so the thread forms smooth, even layers across its surface.
Incorrect Thread Direction
Thread direction is important for proper bobbin installation. Many drop-in machines require the thread to unwind in a specific direction, while front-loading machines follow the threading path on the bobbin case.
Follow the threading diagram on the machine or the owner’s manual instead of guessing.
Skipping the Thread Guides
The thread must pass through every guide and tension point before sewing.
Missing a single guide can cause loose stitches, thread nests, or inconsistent tension.
Troubleshooting Common Bobbin Problems
Even after learning to load bobbin in sewing machine, occasional stitching problems can still occur. Most can be solved with a few simple checks before adjusting the machine.
Thread Bunches Under the Fabric
Large loops underneath the fabric usually indicate that the upper thread was not threaded correctly, rather than a problem with the bobbin.
Remove the upper thread, raise the presser foot, and rethread the machine. Check that the bobbin is seated properly before testing another seam.
Skipped Stitches
Skipped stitches often result from one of these common causes:
Replacing the needle is often the quickest solution.
Bobbin Thread Keeps Breaking
If the bobbin thread breaks repeatedly, inspect the machine closely.
Possible causes include:
Correcting the underlying cause usually restores smooth stitching.
Bobbin Does Not Turn Smoothly
A bobbin that hesitates or sticks while sewing often means there is an obstruction.
Check for:
Cleaning the bobbin compartment usually resolves the problem.
Bobbin Care and Maintenance
Regular maintenance keeps the sewing machine running smoothly and helps produce consistent stitches.
Clean the Bobbin Area
Lint, dust, and loose thread collect beneath the needle plate over time.
After finishing a project, remove the bobbin and clean the compartment with a small lint brush. Avoid blowing into the machine since moisture can push debris deeper inside.
Inspect Bobbins Regularly
Replace any bobbin that has cracks, rough edges, or signs of warping.
A damaged bobbin can wobble during sewing and affect stitch quality.
Store Bobbins Properly
Keep wound bobbins in a storage case or organizer to prevent the thread from unraveling.
Organizing bobbins by thread color makes future projects easier to prepare.
Choose Quality Thread
Good-quality thread produces less lint and feeds more consistently through the machine.
Inexpensive thread may seem like a bargain, but it creates more lint and increases thread breaks.
Also Read: 10 Best Thread for Sewing: Ultimate Guide 2026
Expert Tips for Better Stitching
Small adjustments can improve stitch quality and machine performance noticeably.
These simple habits improve stitch consistency and reduce interruptions during sewing.
Safety Tips While Loading a Bobbin
Safe machine handling protects the sewing machine and the user.
Developing safe habits prevents damage and makes sewing more enjoyable.
Also Read: Do You Need Safety Goggles When Sewing?
Signs the Bobbin Is Loaded Correctly
After inserting the bobbin, a quick inspection confirms everything is ready for sewing.
A correctly loaded bobbin should provide:
If any signs are missing, check bobbin placement and threading before continuing.
Quick Bobbin Checklist Before Every Project
Use this checklist before each project.
Spending a minute on this checklist helps prevent many sewing problems that interrupt projects and reduce stitch quality.
Conclusion
Spending a few extra minutes learning how to load bobbin in sewing machine is a fundamental skill that makes every sewing project easier. The process may seem unfamiliar at first but quickly becomes part of a regular sewing routine with practice.
A properly wound and inserted bobbin helps the machine produce balanced stitches, reduces thread tangles, and minimizes sewing problems. Taking a moment to check the thread path, bring up the bobbin thread, and test stitches before sewing can save time and improve results.
Whether working on clothing, home décor, quilting, or simple repairs, a correctly loaded bobbin provides the foundation for smooth, consistent stitching. Mastering this basic technique builds confidence and helps every project get off to a successful start.
Also Read: How to Sew a Curtain? Easy Steps for Perfect Results
Also Read: How to Sew a Pillow: Easy Guide for Beginners
Also Read: How to Sew a Rip? Easy 6- Step Guide