How to Sew a Hood? Step-by-Step Guide 2026
Adding a hood to a jacket, hoodie, or sweatshirt can improve both appearance and function. A well-made hood provides extra warmth, blocks wind, and gives handmade clothing a clean, professional finish. The process is simpler than it seems when broken into clear steps.
For anyone learning how to sew a hood, success starts with choosing the right style, taking accurate measurements, and using a pattern that fits the garment. Careful preparation makes sewing easier and helps create a hood that fits comfortably and hangs naturally.
This guide explains the complete process from start to finish. It covers selecting materials, using or creating a hood sewing pattern, taking essential measurements, cutting fabric correctly, sewing the hood, adding an optional lining, and attaching it neatly to a hoodie, jacket, or sweatshirt. It also offers practical solutions for common fitting problems to help beginners and experienced sewists achieve a polished result with confidence.
Key Takeaways
What You’ll Need
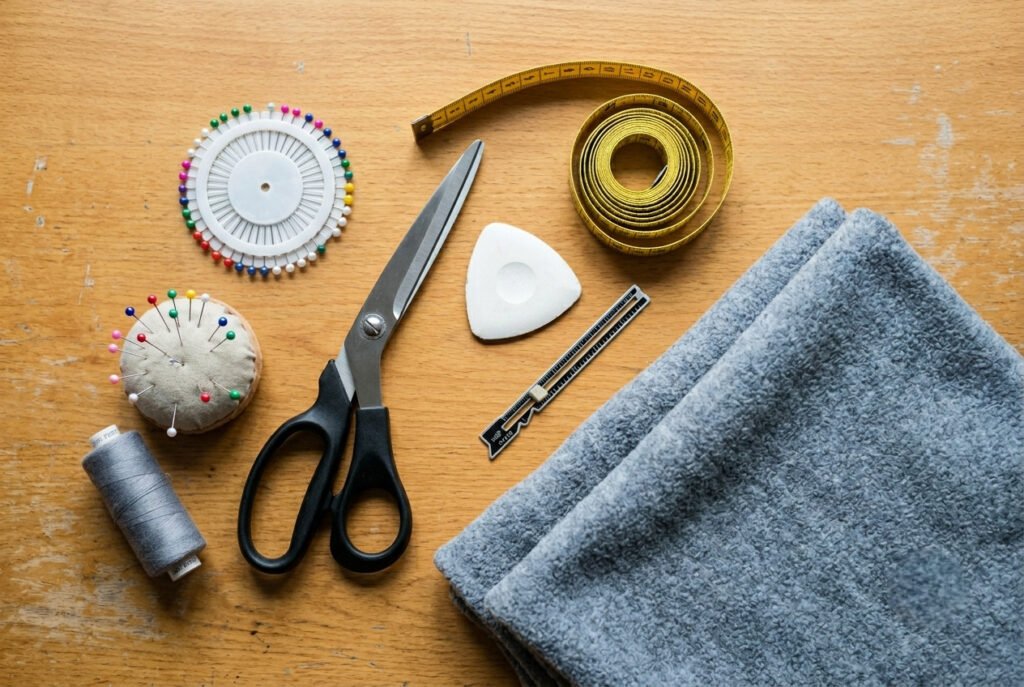
Before starting, gather all the materials and tools. A well-organized workspace makes sewing more enjoyable and reduces mistakes at each step.
Materials
Also Read: 10 Best Thread for Sewing: Ultimate Guide 2026
Sewing Tools
Also Read: Best Sewing Scissors: Top Picks 2026
Pattern Supplies
If you’re creating your own draft hood pattern instead of using a commercial hood sewing pattern, you will also need:
Choosing the Right Fabric
The fabric you choose affects how the hood looks and feels. French terry, sweatshirt fleece, and cotton jersey work well for hoodies because they offer softness and flexibility. Woven cotton, denim, canvas, and softshell fabrics provide more structure for jackets and coats. For extra warmth, add a lining made from fleece, flannel, or sherpa.
A Quick Tip Before You Start
Keep an iron nearby and press each seam as you sew. Pressing improves the hood’s shape, reduces bulk, and gives the finished project a cleaner, more professional appearance.
Choose the Right Hood Style
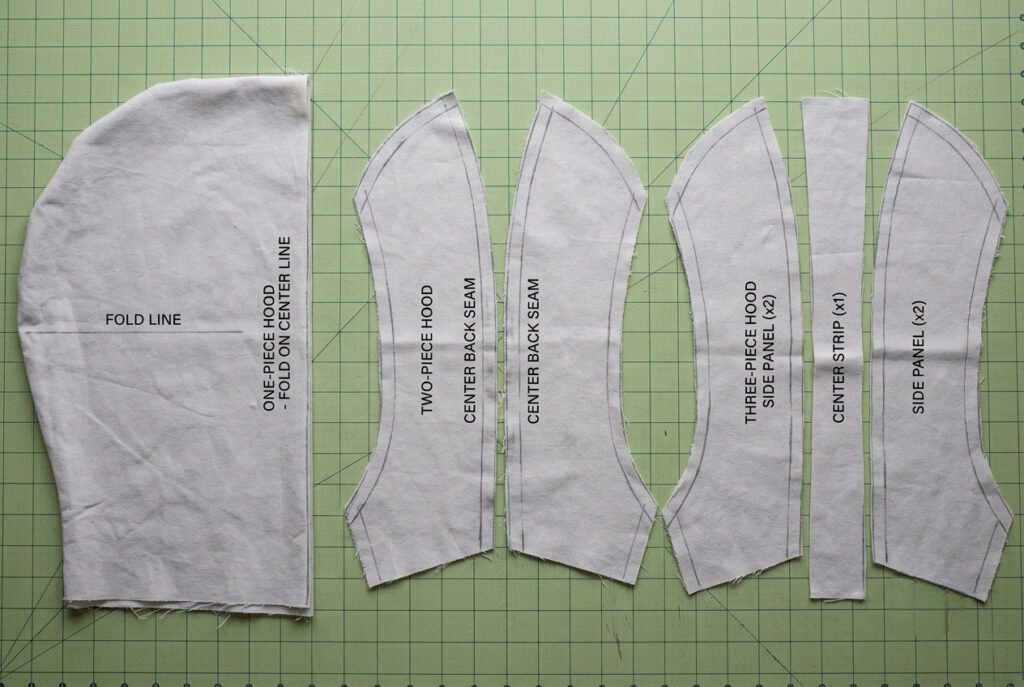
Not every hood is built the same. The best choice depends on the type of garment, fabric, and the fit you want to achieve. Some styles are quick and beginner-friendly, while others create a more tailored shape with additional structure. Understanding the differences before cutting fabric helps you select the right design and avoid adjustments later.
One-Piece Hood Pattern
A one-piece hood pattern uses a single folded fabric piece to create the hood. It is one of the simplest options and a great start for beginners because it requires fewer seams and less assembly.
Pros
Cons
This style works well for casual hoodies, children’s clothing, lightweight jackets, and simple projects.
Two-Piece Hood
The two-piece hood joins two mirrored side panels along the center back seam. It offers a smoother shape than a one-piece design and remains straightforward to sew.
Pros
Cons
This is a common hood style for sweatshirts, zip-up hoodies, and everyday jackets because it balances appearance and simplicity.
Three-Piece Hood
A 3-piece hood typically features two side panels and a center strip running over the top of the head. This extra panel creates a more sculpted shape and improves fit.
Pros
Cons
Outdoor jackets, winter coats, and premium hoodies often use this construction because it produces smooth curves with less bulk.
Lined Hood
A lined hood sewing method uses outer fabric and a separate lining, which are sewn together for a clean finish inside and out.
Pros
Cons
A lined hood is an excellent choice for hoodies, jackets, coats, and children’s clothing where comfort and durability matter.
Unlined Hood
An unlined hood uses a single layer of fabric, making it lighter and quicker to construct.
Pros
Cons
An unlined hood suits lightweight sweatshirts, athletic wear, and warm-weather garments where a simple finish is enough.
How to Draft or Choose a Hood Pattern
The hood pattern plays a major role in how the finished hood looks and fits. Careful sewing cannot fix a pattern that is too small, too deep, or poorly shaped. Spending extra time on this step helps create a hood that feels comfortable and sits naturally on the garment.
There are two ways to get started:
A ready-made pattern is often the easiest choice for beginners because the sizing and shaping are already tested. Drafting your own pattern offers more flexibility and allows you to adjust the fit for different garments, head sizes, or preferences.
Using a Commercial Hood Sewing Pattern
Commercial patterns save time and provide consistent results. They are especially useful when making your first hood or following a complete garment pattern.
Look for a pattern that includes:
Choose a pattern designed for the fabric you plan to use. A pattern made for knit fabrics may not fit correctly when sewn with woven fabric because the stretch differs.
Draft Your Own Hood Pattern
Creating your own pattern gives you complete control over the shape and fit. Once perfected, it can be reused for future projects with only minor adjustments.
A custom pattern can be tailored for:
Because the pattern is based on the garment’s neckline, it often produces a more accurate fit than a standard commercial design.
Measurements to Take
Accurate hood draft measurements are the foundation of a well-fitting hood. Measure carefully before transferring to pattern paper.
Neckline Measurement
Measure the actual neckline of the garment where the hood will be attached.
Do not measure around the neck. The hood must match the garment opening, not the wearer’s neck circumference.
Head Circumference
Wrap a measuring tape around the fullest part of the head.
The tape should pass:
Keep the tape snug without tightening.
Hood Height
Measure from the base of the neck, over the top of the head, to the point where you want the front opening to sit.
This measurement determines the overall depth of the hood.
Face Opening
Measure around the front of the face where the hood opening will rest.
An accurate measurement prevents the hood from feeling tight or falling into the eyes.
Desired Ease
Decide how much extra room the hood needs.
Add slightly more ease for:
For fitted hoodies or athletic garments, use less ease to achieve a closer fit.
Basic Hood Drafting Method
After taking your measurements, sketch the hood on pattern paper.
A simple hood pattern typically includes:
Draw smooth, continuous curves instead of sharp angles. Gentle curves help the hood sit naturally and make sewing easier, especially for beginners.
Before cutting fabric, check that the pattern’s grainline runs parallel to the fabric’s selvage. Correct grainline placement helps the finished hood hang evenly and maintain its shape.
If possible, cut the pattern from inexpensive muslin or scrap fabric and sew a quick test version. Testing the fit before cutting final fabric makes adjusting height, depth, or face opening easier and avoids wasting material.
Printable Hood Pattern
Once you’re happy with the fit, create a master paper pattern for future projects. A reusable pattern saves time and provides consistent results each time you sew a hood.
Label the pattern with useful details such as:
Store the finished pattern flat in a labeled envelope or folder to keep it in good condition. Building a small collection of well-tested hood patterns makes sewing future hoodies, jackets, coats, and children’s garments faster and more enjoyable.
Cutting Fabric and Preparing Pieces
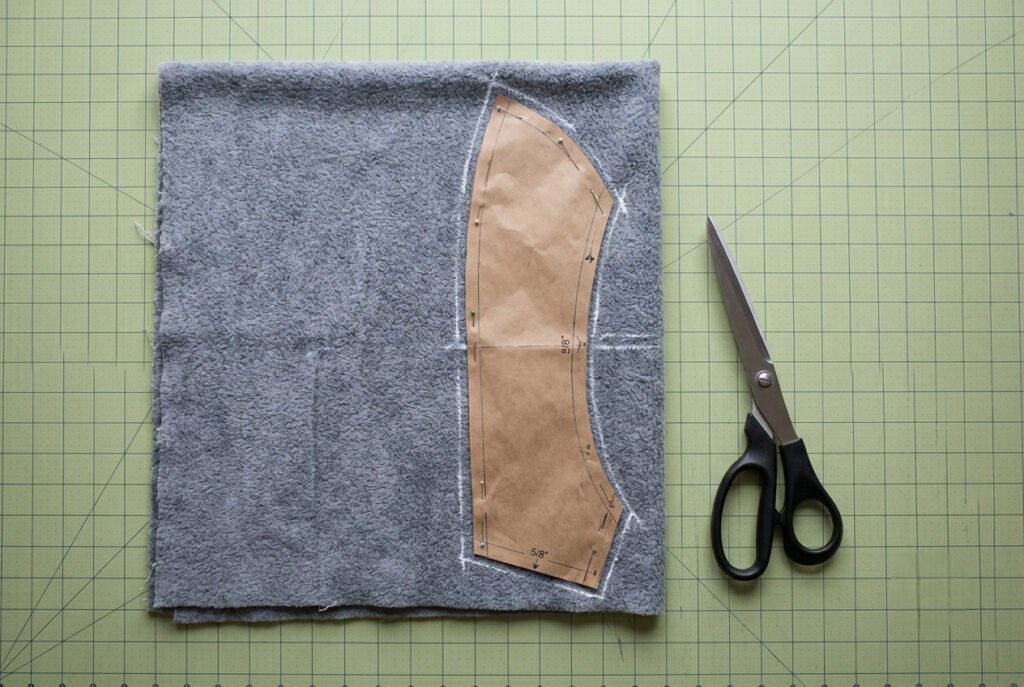
Preparing the fabric before sewing helps everything come together smoothly. Accurate cutting, proper grainline placement, and careful marking reduce fitting problems and make the hood easier to assemble.
Prewash and Press Your Fabric
Prepare the fabric the same way you plan to care for the finished garment.
Wash and dry it before cutting to remove fabric finishes and reduce the risk of shrinkage after sewing. Once the fabric is dry, press it flat to remove wrinkles that could affect cutting accuracy.
Find the Grainline
Every pattern includes a grainline marking. Position this line parallel to the fabric’s selvage before pinning or cutting.
Keeping the pattern on the grain helps the hood:
Ignoring the grainline can cause the hood to twist or drape unevenly after it is sewn.
Cut Mirrored Pieces
Most hood styles require two mirrored fabric pieces.
Fold the fabric with the right sides together before placing the pattern. This helps ensure both sides are identical.
For a two-piece hood, cut:
For a three-piece hood, cut:
Transfer all pattern markings using tailor’s chalk or a washable fabric marker.
Before removing the pattern pieces, check that both layers of fabric remain smooth and aligned. This simple step helps ensure the left and right hood pieces match perfectly.
Also Read: What Is a Basting Stitch in Sewing? Easy Guide
Apply Interfacing
Lightweight fusible interfacing isn’t necessary for every project but provides extra support where the fabric experiences more stress.
Consider applying interfacing to:
Fuse the interfacing before sewing seams for the best results.
Mark Important Match Points
Marking key reference points speeds assembly and improves accuracy.
Transfer the following markings to your fabric:
These guides help align the hood correctly when attaching it to the garment.
Finish Raw Edges (Optional)
If you’re sewing with woven fabric and leaving the hood unlined, finishing the raw edges now can improve durability and reduce fraying.
Common finishing methods include:
Most knit fabrics don’t require edge finishing because they naturally resist fraying.
Final Preparation Check
Before moving to the sewing machine, organize all the cut pieces and review your markings. A quick inspection now can prevent mistakes later and make the sewing process much more enjoyable.
Press the cut pieces one final time before sewing. Smooth, flat fabric is easier to handle, produces straighter seams, and helps create a hood with a clean professional finish.
Sewing the Hood Step by Step
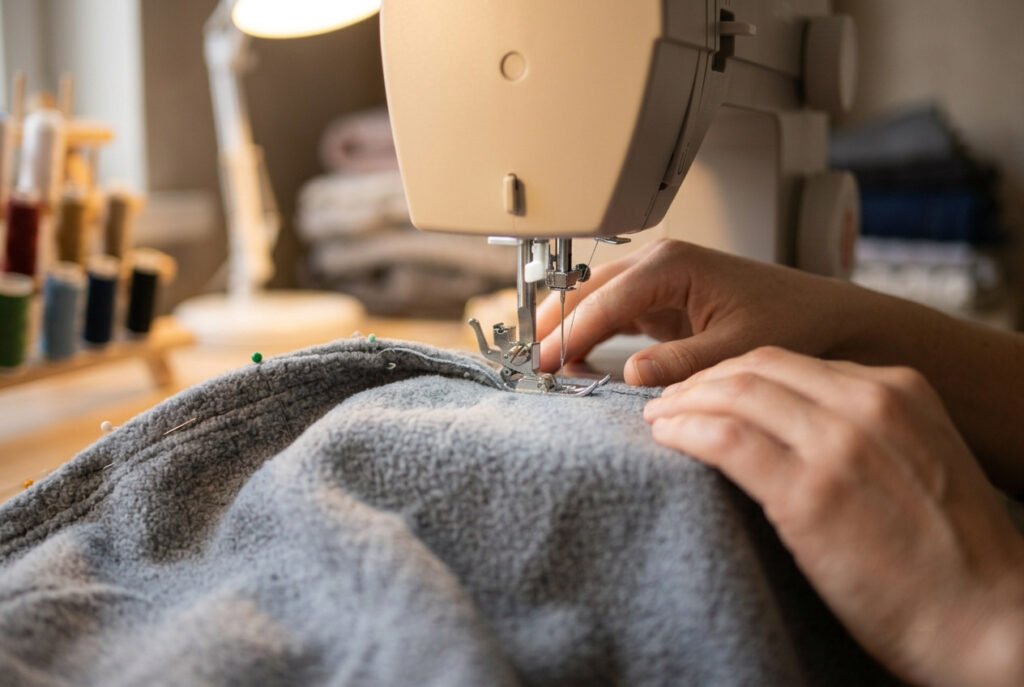
With the fabric cut and prepared, it’s time to assemble the hood. If you’ve measured carefully and followed the pattern, this part is straightforward. Work slowly, keep an even seam allowance, and press each seam before the next step. Consistent pressing helps the hood hold its shape and gives the finished project a cleaner, more professional appearance.
Step 1: Sew the Main Hood Pieces
Also Read: How to Load Bobbin in Sewing Machine? Easy Steps
Step 2: Sew the Lining
If you’re making a lined hood, repeat the same process with the lining pieces.
Keep the lining separate from the outer hood for now.
After sewing, press the seam flat. For thicker fabrics, trim the seam allowance to reduce bulk and create a smoother finish.
Step 3: Sew a Three-Piece Hood (If Using One)
If you’re following a 3-piece hood tutorial, begin by attaching the center strip to one side panel.
Press each seam after sewing. The center panel creates a rounded shape that fits the head more naturally and gives the hood a tailored appearance.
Also Read: How to Sew a Seam by Hand? Easy 5-Step Guide
Step 4: Join the Outer Hood and Lining
Place the outer hood inside the lining with the right sides facing each other.
Carefully match the:
Pin or clip the layers together, then sew around the face opening, leaving the neckline open.
Turn the hood right side out through the neckline opening. Shape the curves gently with your fingers or a point turner, then press the edge flat to create a crisp finish.
Step 5: Press Every Seam
Pressing is one of the simplest ways to improve the quality of a sewing project.
Pressing after each seam helps:
Avoid dragging the iron across the fabric. Lift and press to prevent stretching, especially with knit fabrics.
Step 6: Trim Bulk Around Curves
Curved seams naturally create extra fabric that can make the hood feel bulky.
Trim the seam allowance where needed, then clip small notches into inside curves without cutting the stitching.
These small adjustments allow the fabric to spread evenly when turned right side out, helping the hood maintain a smooth, natural shape.
Step 7: Topstitch (Optional)
Topstitch around the face opening approximately ⅛ to ¼ inch from the edge.
Topstitching offers several benefits:
Use a slightly longer stitch length for an even, professional-looking result.
Final Check Before Attaching the Hood
Before attaching the hood to the garment, inspect your work carefully.
Make sure:
Taking a few extra minutes to check your work now can prevent fitting problems and make attaching the hood easier in the next step.
Sewing a Lined Hood
A lined hood creates a clean interior finish by hiding most of the raw edges. Although it adds a few extra steps, many sewists prefer this method because it improves both comfort and durability while giving the garment a polished appearance.
Sew the Lining
Assemble the lining the same way you sewed the outer hood.
You should now have two completed hood sections: the outer hood and the lining.
Join the Hood and Lining
Place the outer hood and lining right sides together.
Carefully match the:
Pin or clip the layers together, then sew slowly around the face opening. Leave the neckline open because this edge will be attached to the garment later.
Turn the Hood
Pull the hood through the neckline opening so the right sides face outward.
Use a point turner or another blunt tool to gently shape the front corners and curved edges without stretching or damaging the fabric.
Understitch (Optional)
For an even cleaner finish, understitch the lining close to the seam allowance before completing the hood.
This simple technique helps keep the lining from rolling toward the front edge, allowing the face opening to lie flatter and giving the hood a sharper, more professional appearance.
Press the Hood
Press the face opening carefully to set the seam.
A crisp, well-pressed edge helps the hood sit comfortably around the face and gives the finished garment a refined look. Taking a few extra minutes to press now makes a noticeable difference in the final result.
Topstitching and Creating a Cord Casing (Optional)
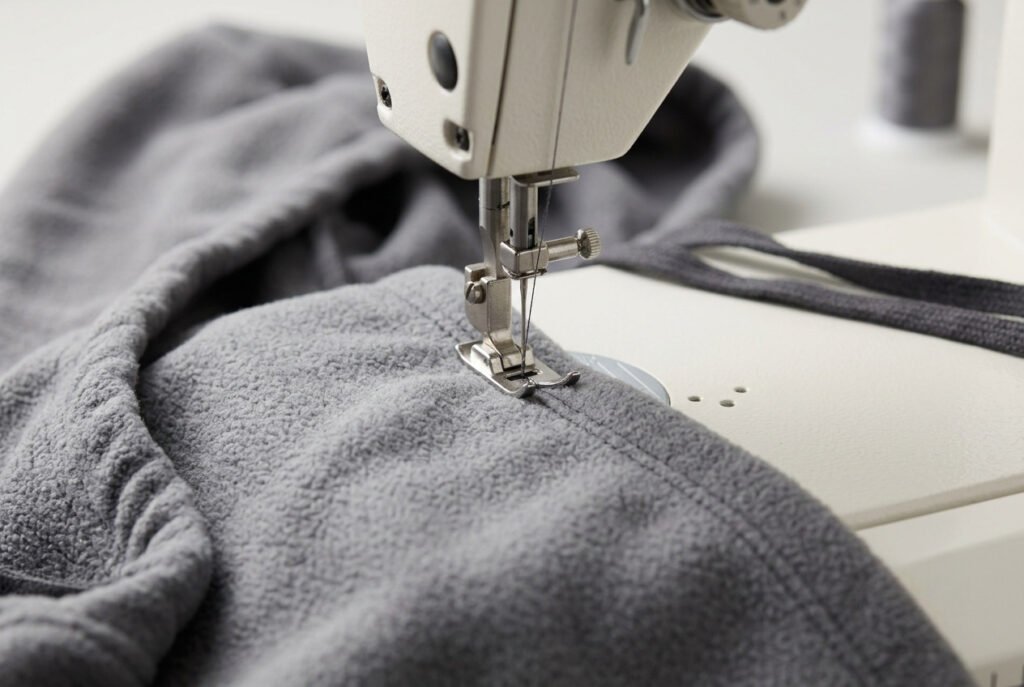
Many hoodies include topstitching and a drawstring for both function and style. These finishing details help the hood keep its shape while adding a classic ready-to-wear appearance.
Add Topstitching
Topstitch approximately ⅛ to ¼ inch from the front edge.
Topstitching helps:
For even results, use a slightly longer stitch length and sew at a steady pace.
Sew a Cord Casing
If you’re adding a drawstring, sew the casing before attaching the hood to the garment.
Fold the edge according to your pattern instructions and stitch evenly around the opening, leaving enough space for the cord to move freely.
Install Eyelets or Grommets
Eyelets or grommets reinforce the openings where the drawstring exits.
Before installing them:
Reinforcement helps prevent the fabric from stretching or tearing with repeated use.
Also Read: How to Sew a Curtain? Easy Steps for Perfect Results
Also Read: Do You Need Safety Goggles When Sewing?
Insert the Drawstring
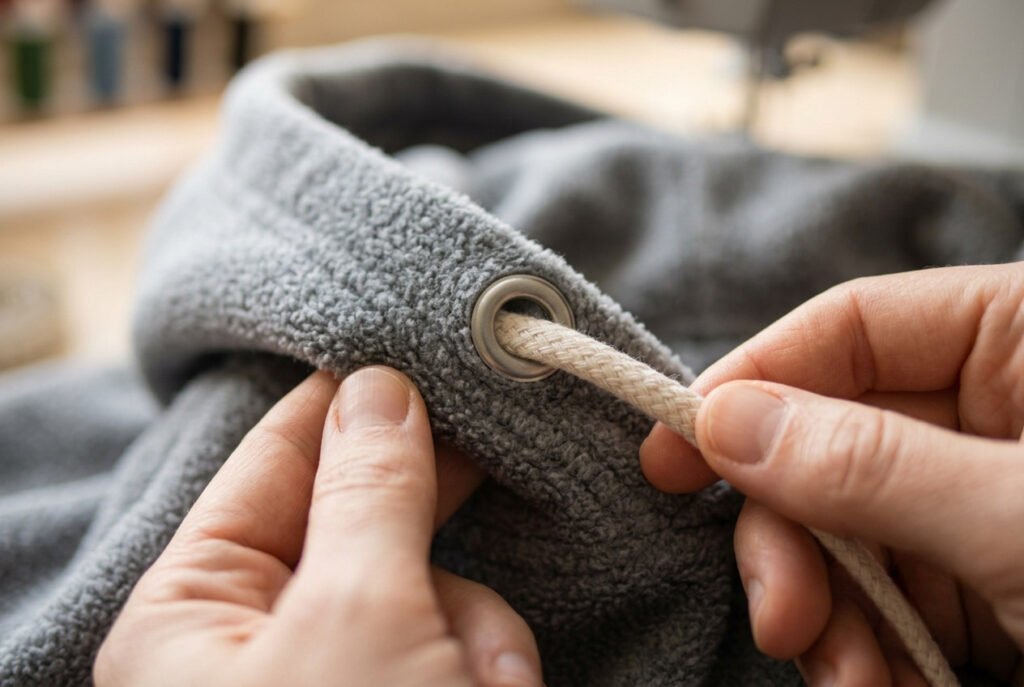
Attach a safety pin or bodkin to one end of the drawstring and guide it through the casing.
Adjust the cord until both ends are even, then secure them with:
These small finishing touches improve both the appearance and functionality of the hood.
Final Check Before Attaching the Hood
Before sewing the hood to the garment, inspect it carefully.
Check that:
If possible, place the hood on a dress form or test it on the wearer before attaching it permanently. A quick fitting check makes it easier to spot and correct minor adjustments, ensuring the hood is balanced, comfortable, and ready for final assembly.
Attaching the Hood to the Garment
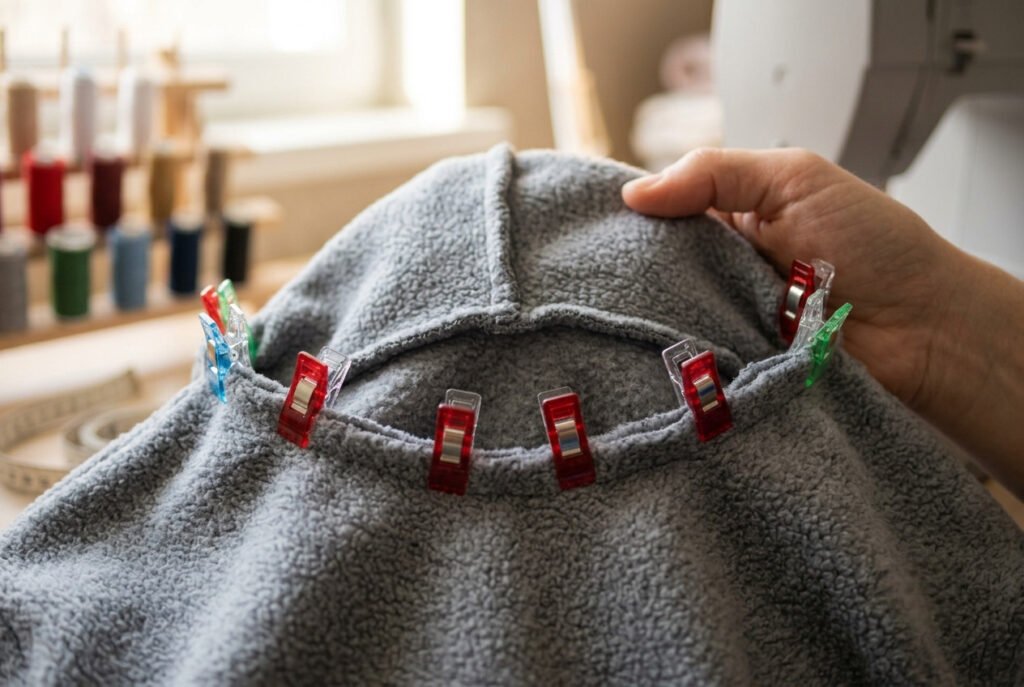
The final assembly is when the hood and garment become one finished piece. Even a neatly sewn hood can look uneven if not attached correctly. Taking a few extra minutes to align the neckline carefully helps the hood sit comfortably and gives the garment a balanced, professional appearance.
Whether you’re learning to attach hood to jacket, sew a hood onto a sweatshirt, or make a hood for hoodie projects, the process is nearly the same.
Step 1: Find the Center Back
Locate the center back of both the hood and the garment neckline.
Most commercial patterns include a notch here. If yours doesn’t, fold both pieces in half and mark the center with tailor’s chalk or a washable fabric marker.
Matching these center points first prevents the hood from twisting after it is sewn.
Step 2: Match the Shoulder Points
After securing the center back, align the shoulder seams on the garment with the matching points on the hood.
Continue pinning or clipping toward the front neckline.
If the hood has slight extra fullness, ease it evenly between the shoulder seams rather than gathering it in one spot.
Step 3: Pin or Clip the Entire Neckline
Pin or clip around the neckline a few inches at a time.
Before sewing, check that:
Fabric clips often hold thick sweatshirt fleece more securely than straight pins.
Step 4: Check the Fit Before Sewing
Before stitching the final seam, place the hood on the garment and confirm both front edges are even.
A quick fitting check catches small alignment issues before they become permanent. Adjusting now is easier than removing stitches later.
Step 5: Sew the Neckline
Sew around the neckline using the seam allowance recommended by your pattern.
Maintain a steady speed, especially when sewing curved sections, and backstitch at the beginning and end to secure the seam.
After stitching, inspect the neckline before trimming any excess fabric.
Step 6: Finish the Raw Edge
Finish the neckline seam to improve both durability and comfort.
Suitable methods include:
A neatly finished neckline withstands repeated washing and gives the inside of the garment a cleaner appearance.
Step 7: Press the Neckline
Press the seam allowance toward the garment body.
Use steam carefully, especially with knit fabrics, and avoid stretching the neckline while pressing.
A well-pressed seam helps the hood stand naturally and creates a smoother transition between the hood and the garment.
Optional: Topstitch the Neckline
Many ready-to-wear hoodies include a row of topstitching around the neckline.
This extra stitching helps:
Use a slightly longer stitch length and sew slowly to create an even, decorative finish.
Before considering the project complete, inspect the hood from both the front and back.
Make sure:
A careful final inspection takes only a few minutes and ensures the finished hood looks comfortable, balanced, and professionally sewn.
Common Hood Fit Problems and Fixes
Even with careful measuring and sewing, the first fitting may reveal some issues. Fortunately, most hood fit problems can be corrected with small pattern adjustments rather than starting over.
Also Read: How to Sew a Rip? Easy 6- Step Guide
Face Opening Is Too Small
A hood that feels tight around the face can limit movement and make the garment uncomfortable to wear.
How to fix it:
Always test the adjustment on muslin or scrap fabric before cutting your final fabric.
Hood Is Too Large
An oversized hood may slide over your eyes or bunch around the neckline.
How to fix it:
Make small adjustments first. A ¼-inch change can noticeably improve the fit.
Gaping at the Neckline
If the hood stands away from the back of the neck, the neckline curve is often too long or doesn’t match the garment correctly.
How to fix it:
Checking the fit at this stage can prevent larger adjustments later.
Excess Bulk at the Crown
Heavy fabrics or thick seam allowances can create unwanted fullness at the top of the hood.
How to fix it:
Consider using a three-piece hood for improved shaping when working with bulky fabrics.
Hood Pulls Back While Wearing
If the hood constantly slips backward, it usually doesn’t have enough depth or height.
How to fix it:
Making a paper test pattern before cutting fabric confirms the fit and avoids wasting materials.
Finishing Options and Styling Ideas
Once the hood is attached, you can personalize it with decorative details or practical features. These finishing touches improve both the appearance and everyday functionality of the garment.
Add a Drawstring
A drawstring is one of the most popular ways to finish a hood because it allows the opening to be adjusted for comfort.
Popular options include:
Finish the ends with knots, cord locks, decorative beads, or metal tips for a polished look.
Decorative Topstitching
Topstitching does more than enhance appearance—it also helps the hood keep its shape.
Consider using:
Consistent stitching gives handmade garments a professional finish.
Add Piping
Piping creates a crisp outline around the hood and adds subtle visual interest.
It works especially well for:
Insert the piping between the outer hood and lining before sewing the face opening.
Use Rib Knit Trim
Instead of folding the front edge, finish it with rib knit for a comfortable and flexible opening.
Benefits include:
This technique works particularly well on sweatshirts and athletic hoodies.
Create a Detachable Hood
A removable hood adds flexibility, allowing one garment to suit different weather conditions and styles.
Common attachment methods include:
Detachable hoods are especially popular on coats, outdoor jackets, and children’s outerwear.
Add Decorative Details
Personal touches make each project unique.
Ideas include:
Choose details that complement the garment while matching its intended use and style.
Also Read: Can You Embroider With a Sewing Machine? Easy Guide
Final Tip
Before calling the project complete, try the garment on or place it on a dress form. Check that the hood sits comfortably, the opening frames the face evenly, and all decorative details are securely attached. A final fitting often reveals small improvements that elevate a handmade hood from good to exceptional.
Printable Pattern and Downloadable Checklist
A printable hood pattern and a simple checklist can make every sewing project more organized. They reduce the chance of missing important steps and make it easier to recreate a successful hood in the future.
If you’re using a commercial hood sewing pattern or printable PDF, print it at 100% scale and check the test square before cutting. Confirming the print size ensures the finished hood matches the intended measurements.
Hood Pattern Sheet
Create a master pattern that includes:
Store the pattern flat in a large envelope or document sleeve to keep it clean and crease-free.
Sewing Checklist
Print this checklist and keep it near your sewing machine during work.
Before Cutting
Before Sewing
Before Attaching the Hood
Keep Notes for Future Projects
After completing the hood, write notes on your pattern about the fabric used, any fitting adjustments, and the stitch settings that worked best. These details make future projects faster and help produce more consistent results.
Why Use a Sewing Checklist?
A simple checklist helps keep the project organized from start to finish. Whether you’re sewing your first hoodie or refining a custom jacket, following a consistent workflow reduces mistakes, saves time, and makes every hood easier to reproduce with confidence.
Conclusion
Learning how to sew a hood? is a valuable skill that opens the door to many sewing projects. Whether you’re making a cozy hoodie, refreshing a favorite jacket, or creating custom outerwear, a well-constructed hood adds both style and function.
Start with accurate measurements and choose a hood style that suits your project. Take your time through each stage. Careful cutting, regular pressing, and thoughtful finishing details all contribute to a hood that fits comfortably and looks professional.
As your confidence grows, experiment with different fabrics, linings, and hood styles to expand your skills. Each project refines techniques like accurate cutting, careful pressing, and precise construction. This makes future hoods easier to sew and more polished.