How to Sew Binding on a Quilt? Step-by-Step Guide
Quilt binding gives a quilt a clean edge, protects the raw fabric, and adds a polished finish that helps the project last longer. If learning how to sew binding on a quilt has felt confusing, this guide explains every step in clear, practical language that is easy to follow.
It covers how to cut binding strips, join them with smooth diagonal seams, sew the binding to the quilt front, and finish the back by hand or machine. It also explains how to miter quilt corners, avoid common mistakes, and achieve neat, even edges without bulk.
Designed for beginners, home sewists, and quilting enthusiasts, this quilt binding tutorial focuses on simple techniques that produce professional-looking results. Whether finishing a baby quilt, throw, wall hanging, or bed quilt, the same methods apply and become easier with each project.
Key Takeaways
What Quilt Binding Is
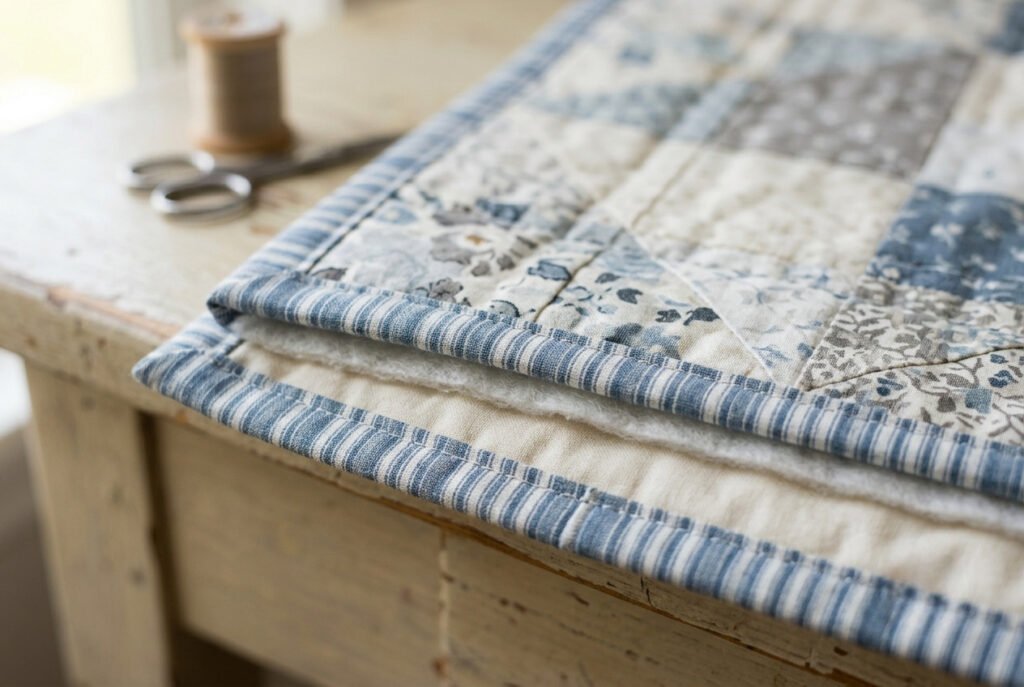
Quilt binding is the fabric strip sewn around the outer edge of a finished quilt. It encloses the raw edges where the quilt top, batting, and backing meet, keeping all three layers securely together. Without binding, the edges are more likely to fray, separate, and wear down with regular use.
Beyond protecting the quilt, binding creates a clean, finished border that enhances the overall design. It can blend with the quilt for a subtle look or provide contrast to frame the pattern and add visual interest.
When learning to sew binding on a quilt, understanding its purpose makes every step easier. A properly attached binding strengthens the quilt edges, secures the corners, and helps the quilt withstand years of washing and everyday use.
Why Most Quilters Choose Double-Fold Binding
Most quilters recommend double fold quilt binding because it wraps the quilt edge with two layers of fabric instead of one. The extra layer increases durability and helps the binding resist fraying, making it an excellent choice for quilts that will be used regularly.
Double-fold binding also:
Single-fold binding works well for decorative wall hangings, but double-fold binding is generally better for quilts washed and handled frequently.
Straight-Grain vs. Bias Binding
Before cutting binding strips, decide if straight-grain or bias binding best suits the project.
Straight-grain binding is cut parallel to the fabric selvage. It is easy to prepare, uses less fabric, and works well for quilts with straight edges.
Bias binding is cut at a 45-degree angle to the fabric grain. The added flexibility allows it to wrap smoothly around curved or scalloped edges, although it requires more fabric and preparation.
Choosing the Right Binding Fabric
Quilting cotton is the most common choice for binding because it is durable, easy to sew, and available in many colors and prints. A matching binding creates a subtle frame, while contrasting fabric can highlight the quilt design. The best choice depends on the overall style of the finished quilt.
Materials and Tools
Gathering the right supplies before starting makes quilt binding easier and prevents mistakes. Most tools are standard quilting essentials, so no specialized equipment is needed.
Essential Materials
Also Read: 10 Best Thread for Sewing: Ultimate Guide 2026
Essential Tools
Also Read: How to Load Bobbin in Sewing Machine? Easy Steps
Also Read: Best Sewing Scissors: Top Picks 2026
Helpful Accessories
These tools are not required but can improve accuracy and make the process more comfortable.
Walking Foot
A walking foot feeds the quilt layers evenly through the sewing machine, reducing shifting and puckering. It is especially useful for thicker quilts and larger projects.
Quarter-Inch Foot
A quarter-inch foot helps maintain a consistent seam allowance and creates an even binding width around the quilt.
Optional Tools
Before You Start
Trim the batting and backing to be even with the quilt top before attaching the binding. Smooth, square edges make binding easier to sew and produce a cleaner finish. Keeping every tool within reach helps the project move smoothly from start to finish.
How to Cut Binding Strips
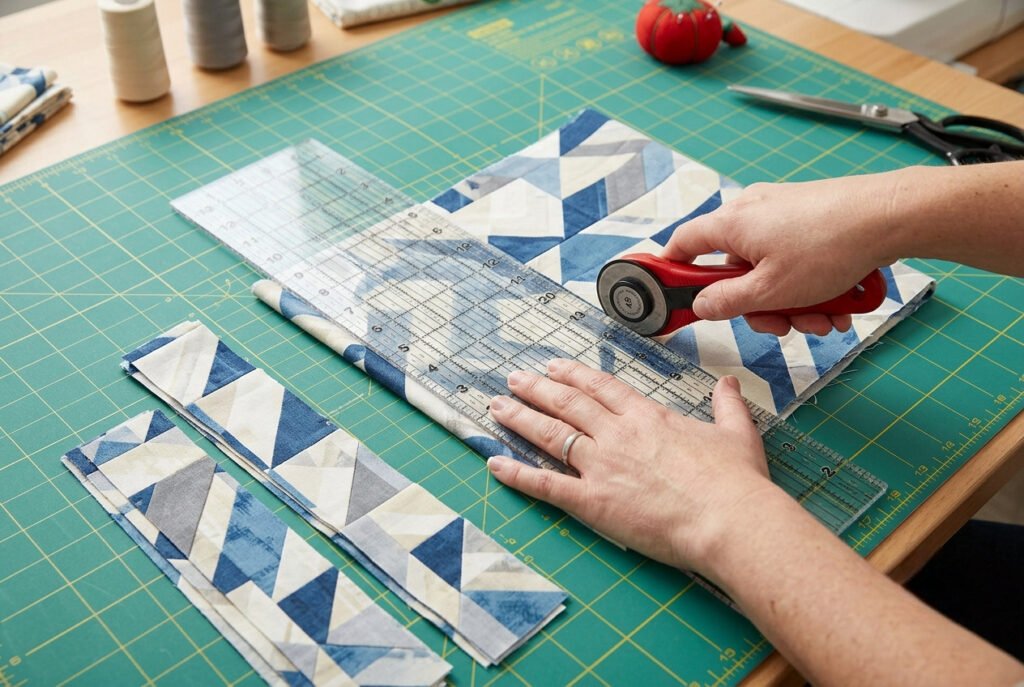
Cutting accurate binding strips is the foundation of a neat, even quilt binding. Small differences in strip width can make the binding look uneven, so careful measuring and cutting are worth the extra time.
Before cutting the fabric, measure all four sides of the finished quilt and add 10–15 inches to the total perimeter. This extra length provides enough binding to join the ends comfortably after sewing it around the quilt.
For most quilts, 2½-inch-wide strips are the standard choice for double fold quilt binding. This width wraps neatly around the quilt edge and covers both the front and back.
Cut Across the Width of the Fabric
Most quilters cut binding across the width of fabric (WOF) because it produces long strips that are easy to join.
Follow these steps:
Keeping the quilting ruler firmly in place helps produce consistent strip widths.
Also Read: Do You Need Safety Goggles When Sewing?
Choosing the Right Strip Width
Although 2½-inch strips work well for most quilts, the ideal width depends on the batting and the finished look.
| Quilt Type | Strip Width |
|---|---|
| Thin wall hanging | 2¼ inches |
| Standard cotton quilt | 2½ inches |
| Thick batting quilt | 2½–2¾ inches |
| Baby quilt | 2½ inches |
If uncertain, 2½ inches is the most versatile option for beginners.
Press the Strips Before Joining
After cutting, press each strip flat before sewing them together. Smooth strips are easier to align and help create accurate diagonal seams and a more even binding. Avoid stretching the fabric while pressing because this can cause wavy quilt edges later.
Tips for Accurate Cutting
Careful preparation at this stage makes the remaining binding steps easier and helps produce a cleaner, longer-lasting finish.
How to Join Quilt Binding Strips
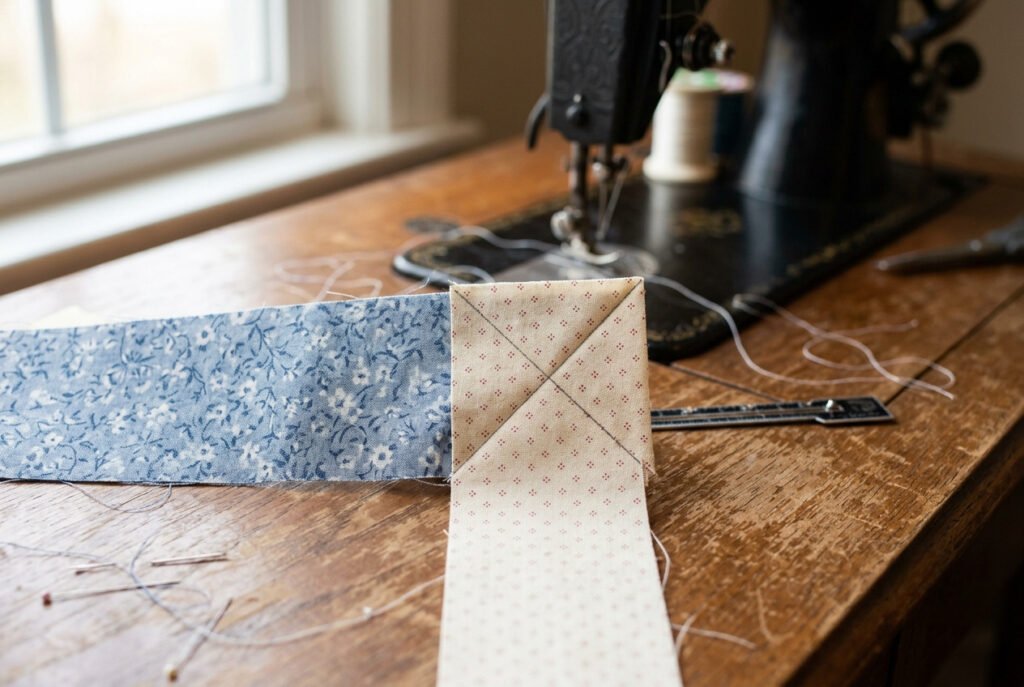
Most quilts require several binding strips joined together to create one continuous length. Although sewing the strip ends together with a straight seam is quicker, a diagonal seam produces a flatter, smoother binding that wraps around the quilt edge more evenly.
If learning to join quilt binding strips feels intimidating, this simple method makes the process easier and creates a cleaner finish.
Why Use a Diagonal Seam?
Joining strips diagonally spreads the seam allowance over a larger area instead of stacking fabric in one place.
This method:
Step 1: Arrange the Strips
Step 2: Mark and Sew the Seam
Step 3: Press the Seam Open
Press the seam open rather than to one side.
An open seam distributes the fabric more evenly, reducing bulk and helping the finished binding lie flatter against the quilt.
Repeat the process until the binding is slightly longer than the quilt perimeter. Leaving an extra 10–15 inches provides enough length to join the ends comfortably after sewing the binding around the quilt.
Fold the Binding
Once all the strips have been joined, fold the entire binding strip in half lengthwise with the wrong sides together.
Press the folded edge along the full length. This creates the classic double fold quilt binding, ready to attach to the quilt.
Before Moving On
Before sewing the binding to the quilt, check that:
A few minutes spent checking the binding now can prevent problems later and make the next step easier.
How to Sew Binding to the Quilt Front
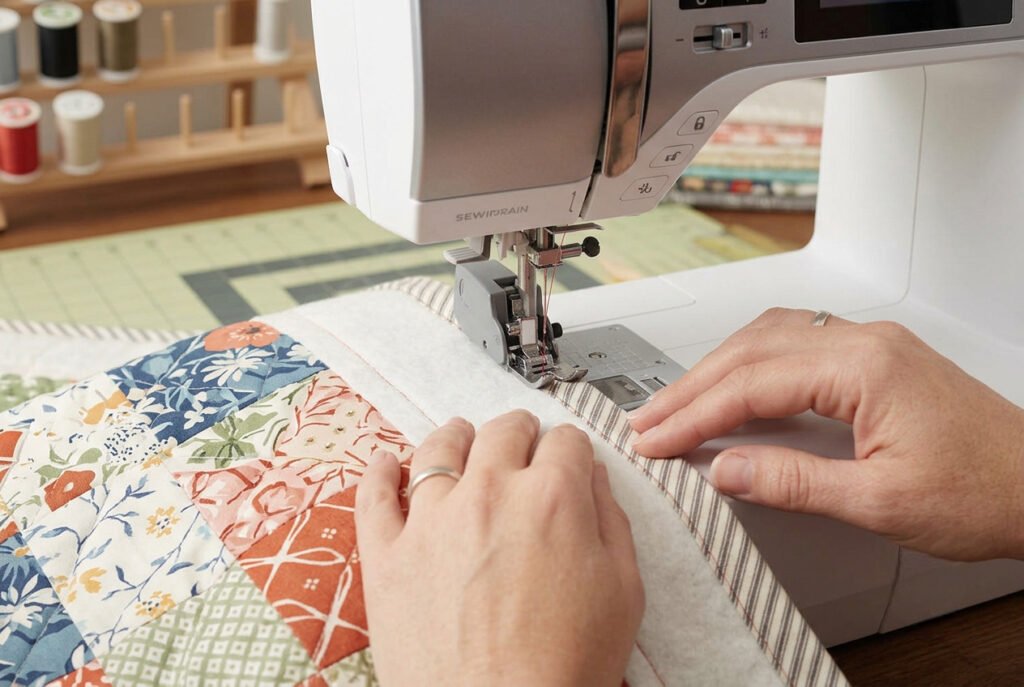
With the binding prepared, it’s time to attach it to the front of the quilt. This step creates the foundation for a neat, durable finish, so taking time to sew accurately will make the remaining stages much easier.
Step 1: Prepare the Quilt
Before attaching the binding, inspect the quilt edges carefully.
Trim away any excess batting or backing so all three layers are even. Clean, square edges allow the binding to wrap smoothly around the quilt without adding unnecessary bulk.
Step 2: Leave a Starting Tail
Begin sewing along the middle of one side rather than at a corner.
Leave an 8–10-inch tail of binding unstitched at the start. This length will be used later to join the binding ends.
Also Read: What Is a Basting Stitch in Sewing? Easy Guide
Step 3: Align the Binding
Place the raw edges of the folded binding against the raw edge of the quilt with the folded edge facing the center.
Secure the binding with binding clips or pins every few inches to keep it from shifting while sewing.
Step 4: Sew with a Quarter-Inch Seam
Using a ¼-inch seam allowance, stitch the binding to the quilt.
A walking foot helps feed the quilt layers evenly and reduces shifting, especially on larger or thicker quilts.
Instead of watching the needle, follow the seam guide on the sewing machine to maintain a consistent seam allowance.
Step 5: Stop Before the Corner
As you approach each corner, stop sewing ¼ inch before the edge of the quilt.
Backstitch once or twice to secure the stitches, then remove the quilt from the machine.
Stopping at the correct point provides enough space to fold the binding neatly and create a crisp mitered corner in the next step.
How to Miter Quilt Corners
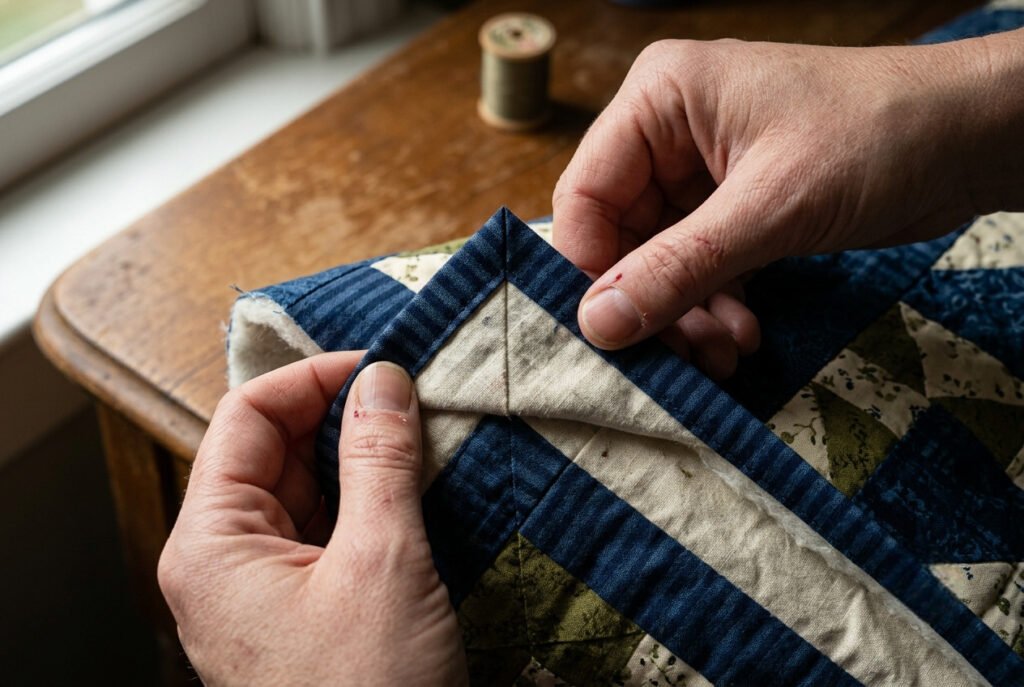
Neatly folded corners give a quilt a clean, professional finish. They may seem challenging at first, but learning to miter quilt corners becomes easier once you understand the folding sequence. With practice, this technique creates crisp, durable corners that enhance your quilt’s overall appearance.
Step 1: Stop Before the Corner
Sew until you are exactly ¼ inch from the edge of the quilt.
Backstitch once or twice, then remove the quilt from the sewing machine.
Stopping at the correct point provides enough space to form a crisp miter.
Step 2: Fold the Binding Up
Lift the binding straight up to form a 45-degree angle from the corner.
The folded edge should align neatly with the quilt edge.
Smooth the fabric before making the next fold.
Step 3: Fold the Binding Down
Fold the binding back down along the next side of the quilt.
Align the folded edge with the new quilt edge, keeping the raw edges even.
The diagonal fold underneath will become the miter when the binding is wrapped to the back.
Secure the fold with a binding clip or pin if needed.
Step 4: Continue Sewing
Return the quilt to the sewing machine and begin stitching at the top edge of the next side using the same ¼-inch seam allowance.
Repeat this process at each corner until the binding has been attached around the entire quilt.
Check the Corners
Before finishing the back of the quilt, inspect each corner.
A well-formed miter should:
If a corner looks uneven, adjusting it now is easier than after the binding is permanently stitched.
Tips for Crisp Mitered Corners
Taking a little extra time at each corner helps create clean, balanced edges that enhance the finished quilt.
How to Finish Quilt Binding by Hand
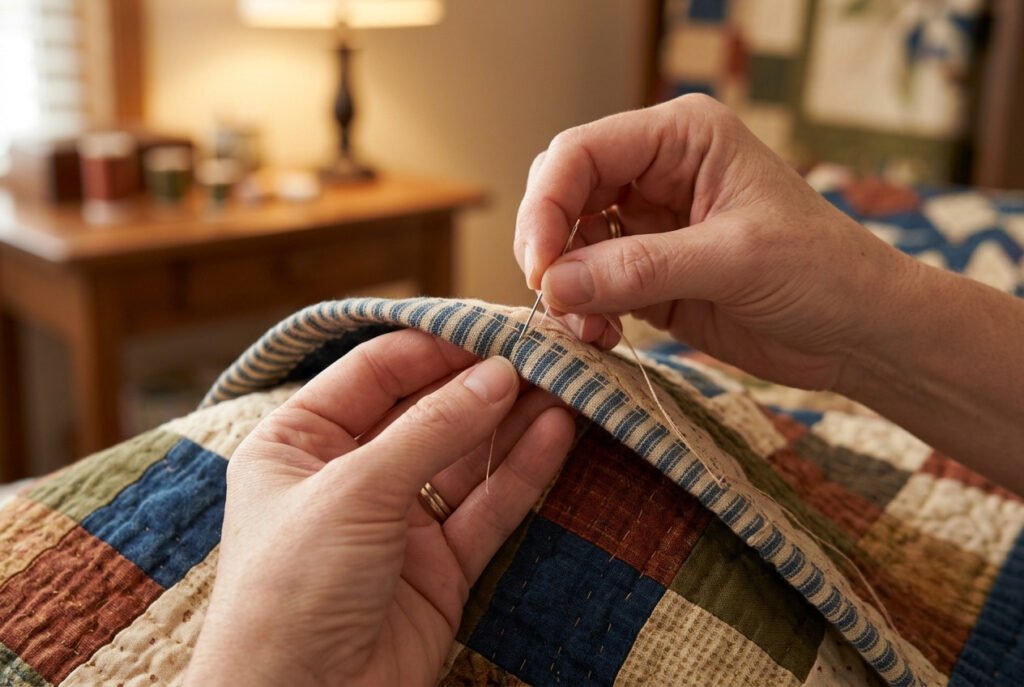
Many quilters prefer hand sew quilt binding because it creates nearly invisible stitches on the back of the quilt. Although hand finishing takes longer than machine stitching, it offers excellent control and produces a clean, traditional finish that is well suited to heirloom quilts and keepsake projects.
Wrap the Binding Around the Edge
After sewing the binding to the front, fold it over the raw edge toward the back of the quilt.
The folded edge should completely cover the stitching line. Secure the binding with binding clips or pins, working on one side at a time to keep it from shifting.
Thread the Needle
Choose a hand-sewing needle and thread that closely matches the binding fabric.
Cut a thread length of about 18–24 inches to reduce tangling while sewing. Tie a small knot and hide it beneath the folded binding so it remains invisible.
Use a Blind Stitch
A blind stitch, also called a ladder stitch, keeps the stitches nearly invisible.
Avoid pulling the thread too tightly because it can cause the quilt edge to pucker.
Finish the Corners
Fold each corner into a neat miter before stitching it down.
Take one or two extra stitches inside the corner to secure the folds and help them keep their shape through regular use and washing.
Benefits of Hand Finishing
Hand finishing offers several advantages:
Finishing the binding by hand helps create a durable edge with a clean, refined appearance.
Also Read: How to Sew a Seam by Hand? Easy 5-Step Guide
Also Read: How to Do a Whip Stitch? Quick Guide
How to Finish Quilt Binding by Machine
Machine finishing is a practical choice when speed and durability are priorities. It works especially well for everyday quilts, children’s quilts, and projects that will be washed frequently.
If the goal is to sew binding on a quilt by machine, careful positioning and consistent stitching help produce a neat, secure finish.
Fold the Binding to the Back
After attaching the binding to the front of the quilt, wrap it around the raw edge toward the back.
The folded edge should extend slightly beyond the original stitching line to allow the machine stitches to catch it evenly.
Secure the binding with binding clips every few inches to prevent shifting while sewing.
Stitch from the Front
Many quilters prefer to sew from the front of the quilt.
As the needle follows the seam where the binding meets the quilt top or stitches close to the folded edge, it catches the binding on the back at the same time.
A walking foot can help feed the quilt evenly, especially when working with thicker quilts.
Topstitch Close to the Edge
Another common method is to topstitch about 1⁄16 to ⅛ inch from the inside edge of the binding.
This creates a neat, visible line of stitching while securing the binding firmly around the quilt.
Keep the stitching distance consistent for a balanced, professional-looking finish.
Sew the Corners Carefully
Slow down as you approach each corner.
Pause with the needle in the fabric, pivot the quilt, and continue stitching along the next side.
Check the back occasionally to make sure the stitches are catching the folded binding evenly.
Tips for a Neat Machine Finish
Taking a few extra moments to check the stitching throughout the process helps create a strong, even binding that withstands regular use.
Also Read: How to Do Mattress Stitch? Easy 7-Step Guide
Common Quilt Binding Mistakes
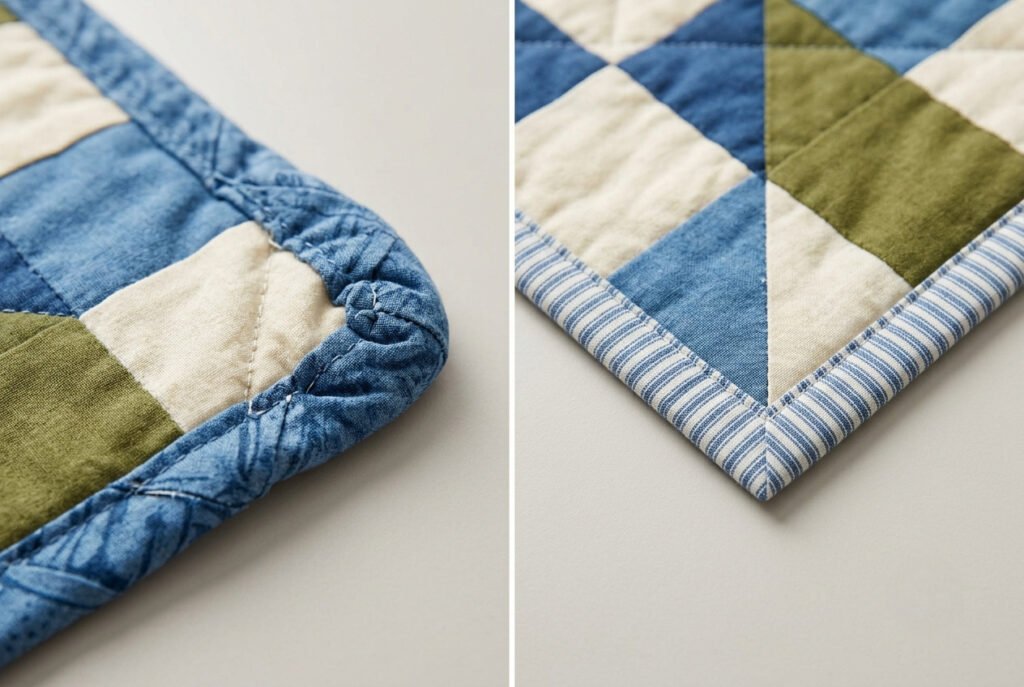
Even experienced quilters make mistakes from time to time. Fortunately, most binding problems are easy to fix once you understand what causes them.
Wavy Quilt Edges
Cause: Pulling the binding while sewing or stretching the fabric during pressing.
Solution: Let the sewing machine feed the quilt naturally. Press gently without stretching the binding.
Bulky Corners
Cause: Stopping too late before the corner or making uneven folds.
Solution: Stop stitching ¼ inch before each corner and follow the same folding sequence every time.
Uneven Binding Width
Cause: An inconsistent seam allowance.
Solution: Use a quarter-inch foot if available or follow the presser foot edge to maintain an even seam.
Visible Gaps on the Back
Cause: The folded binding did not completely cover the original stitching line.
Solution: Fold the binding slightly farther over the edge before stitching.
Twisted Binding
Cause: The binding was not checked after joining the strips.
Solution: Lay the entire binding flat before attaching it to the quilt and correct any twists before sewing.
Bulky Seam Joins
Cause: Joining binding strips with straight seams instead of diagonal seams.
Solution: Join the strips diagonally and press every seam open to reduce bulk.
Inaccurate Strip Cutting
Cause: Binding strips were cut at different widths.
Solution: Measure carefully and use a sharp rotary cutter and quilting ruler to produce consistent strips.
Tips for Better Results
These simple habits help improve the finished binding:
Small improvements with each project build confidence and lead to cleaner, more consistent quilt binding.
Conclusion
Learning how to sew binding on quilt projects is one of the most valuable quilting skills for beginners. A neatly attached binding protects the quilt edges, strengthens the entire project, and gives every quilt a polished finish.
Cutting accurate binding strips, joining them with a diagonal seam, creating crisp mitered corners, and choosing between hand or machine finishing all contribute to a durable, professional-looking result.
Like any quilting technique, binding becomes easier with practice. Start with a small project, sew carefully, and focus on accuracy over speed. With each finished quilt, confidence grows, techniques improve, and creating smooth, long-lasting bindings becomes natural.