How to Knit Ribbing? Easy 1×1 and 2×2 Guide
Ribbing is a useful knitting technique because it gives handmade projects a stretchy, flexible finish. It commonly appears on sweater cuffs, hat brims, sock tops, and necklines, helping knitted edges fit comfortably.
Learning how to knit ribbing starts with two basic stitches: knit and purl. By alternating them in a repeating pattern, you create neat vertical columns that stretch when pulled and return to their original shape when released.
In this beginner-friendly tutorial, I will explain how to knit 1×1 and 2×2 ribbing, work ribbing in the round, and bind off without making the edge tight. You will also find practical tips for correcting common mistakes and keeping the ribbing neat and consistent.
Key Takeaways
What Is Ribbing in Knitting?
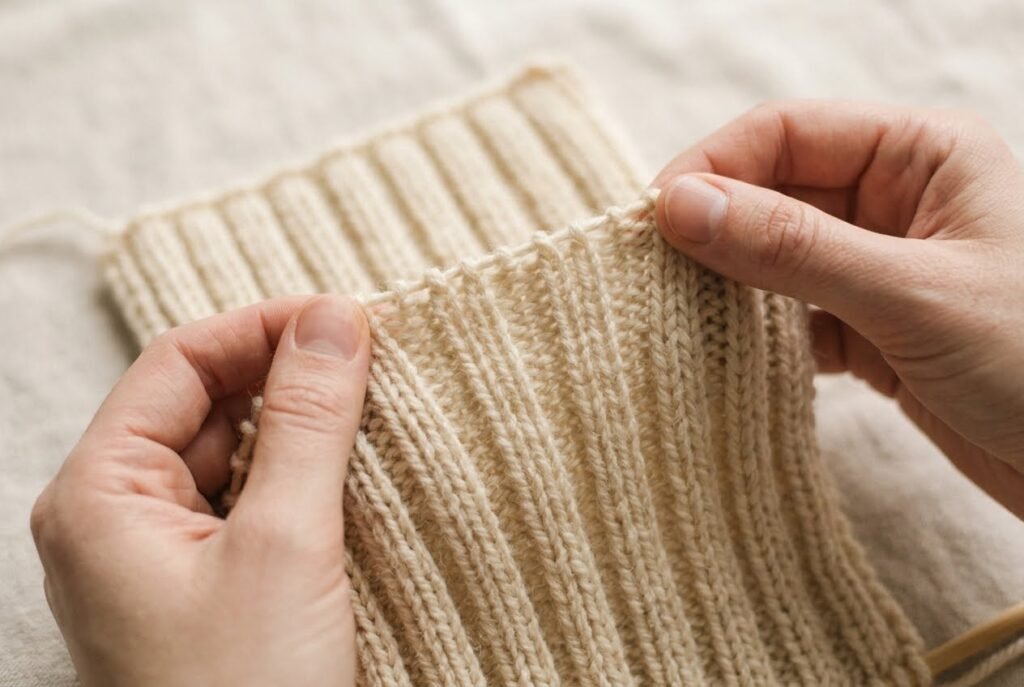
Ribbing is a knitted stitch pattern alternating knit and purl stitches to create raised vertical columns. These columns allow the fabric to stretch horizontally and return to its original shape, making ribbing useful for garment edges that need a comfortable, flexible fit.
Why Is Ribbing Stretchy?
Knit stitches create smooth V-shaped columns, while purl stitches form raised bumps between them. Alternating these stitches creates folds that open when the fabric stretches and close when released.
Basic ribbing looks similar on both sides, making it practical for cuffs, hat brims, collars, and other edges where either side may be visible.
Where Can You Use Rib Stitch Knitting?
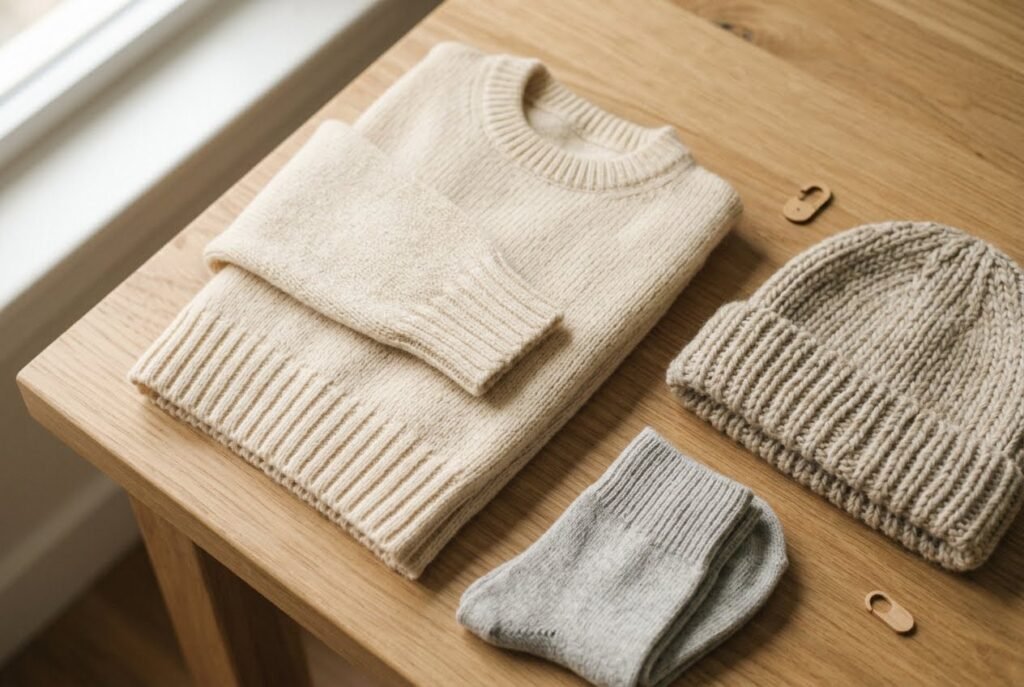
Ribbing works well for many knitting projects, including:
Ribbing differs from stockinette stitch, which has smooth V shapes on the front and horizontal bumps on the back. Stockinette fabric often curls at the edges, while ribbing lies flatter because of its alternating stitch structure.
Also Read: What is Garter Stitch in Knitting? Easy Knitting Explained
The two most common beginner patterns are 1×1 ribbing and 2×2 ribbing. A 1×1 rib alternates one knit stitch with one purl stitch, creating narrow columns that provide a snug fit. A 2×2 rib alternates two knit stitches with two purl stitches, producing wider, more noticeable columns.
Also Read: How to Knit Mittens: The Easy Complete Guide
Both patterns are useful for garment edges. Stretch and final appearance depend on the yarn, needle size, and knitting tension.
What You Need to Knit Ribbing
You do not need special tools to learn rib stitch knitting. A few basic supplies and a practice swatch are enough to get started.
Gather the following materials:
Also Read: Best Knitting Accessories: Top Picks 2026
For your first practice piece, choose a smooth wool, acrylic, or cotton-blend yarn in a pale or medium shade. Avoid dark, fuzzy, or textured yarn because it can hide the difference between knit and purl stitches.
Cast on 20 to 24 stitches to practice the basic ribbing pattern. A small swatch provides enough fabric to recognize stitch columns and develop consistent tension. This prepares you before starting a larger project.
Check the yarn label for the recommended needle size. For a firmer ribbed edge, some knitting patterns recommend smaller needles than those used for the main fabric. Follow pattern instructions when available. Practice with a swatch to see how the fabric behaves.
Also Read: What Size Needles for Beginner Knitting: 6 Easy Tips
How to Knit 1×1 Ribbing: Knit 1, Purl 1
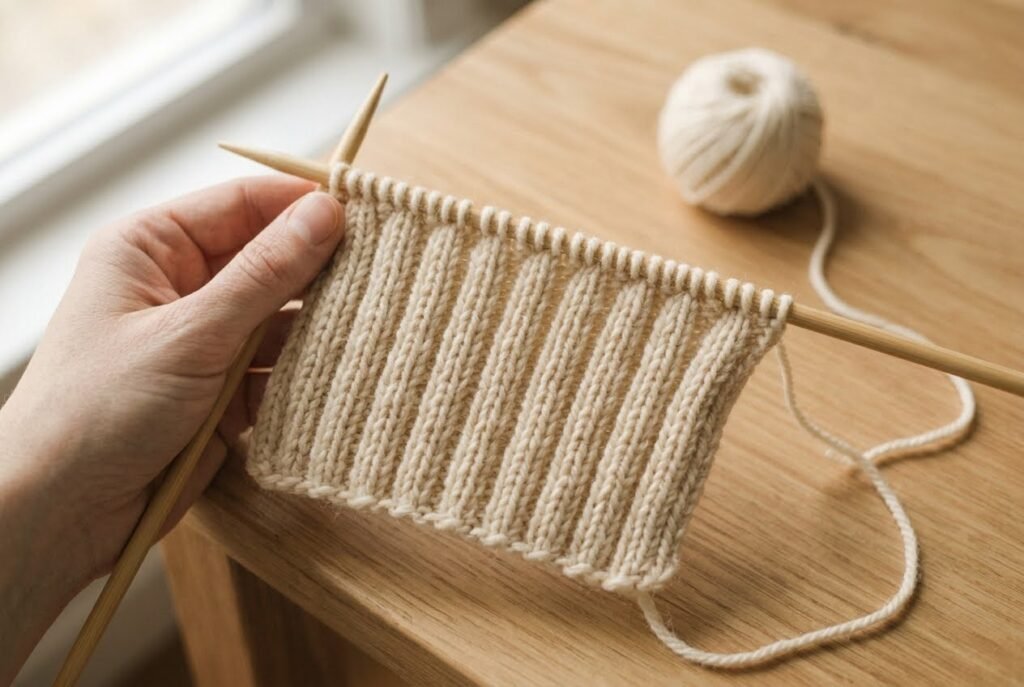
The 1×1 rib stitch is a classic knitting pattern alternating one knit stitch with one purl stitch. This creates narrow vertical columns that let the fabric stretch and recover its shape. People commonly use it for sweater cuffs, sock tops, neckbands, sleeve edges, and fitted hems.
Learning to knit 1×1 ribbing starts with understanding the knit-and-purl sequence, controlling yarn placement, and maintaining even tension. Once familiar with these basics, the pattern is easy to repeat across multiple rows.
Cast-On Count for 1×1 Ribbing
When knitting 1×1 ribbing flat, an even number of stitches usually works best because each complete repeat contains two stitches: one knit and one purl.
For example:
Cast-on requirements vary with the pattern. Some designs include edge stitches or specify an odd number of stitches to achieve a particular finish, so follow the pattern instructions when available.
For circular knitting, an even number of stitches also suits a standard 1×1 rib repeat. Join the round carefully, making sure the cast-on edge is not twisted.
Step-by-Step: How to Knit 1×1 Ribbing
Step 1: Cast on the stitches.
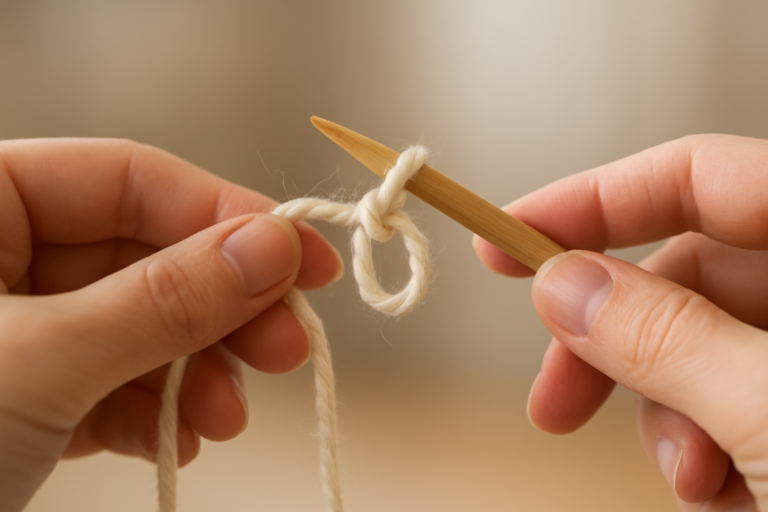
Cast on 20 stitches using a method that provides comfortable stretch. A standard long-tail cast-on works well for many projects. A stretchier cast-on may be better for snug sock cuffs or fitted neckbands.
Avoid casting on too tightly. The lower edge should stretch without restricting the finished garment.
Also Read: How to Do a Long Tail Cast On Knitting? Easy Guide
Step 2: Knit the first stitch.
Hold the working yarn behind the knitting. Insert the right needle into the first stitch on the left needle, wrap the yarn around the right needle, and draw a new loop through. Slip the old stitch off the left needle.
The new loop forms a knit stitch, which appears as a small V on the fabric.
Step 3: Bring the yarn to the front.
Move the working yarn between the two needle tips from back to front. The yarn must sit in front of the work before making the next purl stitch.
Keep this movement controlled. Carrying the yarn over the needle instead of between them can cause an accidental yarn over, adding an extra stitch to the row.
Step 4: Purl the next stitch.
With the yarn in front, insert the right needle into the next stitch using the purling motion. Wrap the yarn around the needle and draw a new loop through. Slip the old stitch off the left needle.
The resulting purl stitch forms a small horizontal bump on the fabric.
Also Read: How to Purl Stitch Knit? Easy Step-by-Step Guide
Step 5: Move the yarn to the back.
After completing the purl stitch, move the working yarn between the needle tips toward the back. The yarn is now correctly positioned for the next knit stitch.
Moving the yarn at the right time keeps the stitch count consistent and the ribbing pattern neat.
Step 6: Repeat K1, P1 across the row.
Continue alternating one knit stitch and one purl stitch until all stitches on the left needle are worked.
In knitting patterns, K1, P1 means knit one stitch, then purl one stitch. Repeating this sequence creates the alternating columns characteristic of 1×1 ribbing.
Also Read: How to Read Knitting Patterns?
Step 7: Turn the work and continue.
Turn the knitting and begin the next row. When knitting 1×1 ribbing flat, work the stitches as they appear: knit the knit stitches and purl the purl stitches.
This distinction is important. Repeating K1, P1 on every flat row can interrupt the rib columns because the reverse side shows stitches differently.
Look at each stitch before working it. A V-shaped stitch is usually a knit stitch, while a raised horizontal bump is a purl stitch. Following the existing columns helps maintain the rib pattern across the fabric.
Continue until the ribbing reaches the required length.
How to Maintain Even 1×1 Ribbing
Consistent tension affects the appearance and performance of ribbed fabric. Knit columns should remain consistent; the fabric should stretch without feeling tight.
Keep these practical points in mind:
Also Read: How to Count Rows in Knitting: A Complete Guide
If the ribbing feels stiff, try a slightly larger needle for a practice swatch and compare results. The right needle size depends on the yarn, pattern, and desired fabric.
How to Recognize the 1×1 Rib Stitch
After knitting several rows, the fabric should show alternating narrow columns. Knit stitches form raised vertical ridges, while purl stitches create recessed lines between them.
The texture differs from stockinette stitch, which has a smooth V-shaped surface on the right side and horizontal bumps on the reverse. Ribbing combines both stitch types to produce a more flexible structure.
If the columns appear irregular, inspect the previous row. Accidentally knitting a purl stitch or purling a knit stitch interrupts the vertical pattern. Correcting the mistake early helps preserve a consistent finish.
A useful habit is to pause at the beginning of each row and identify the first few stitches before knitting. As stitch recognition improves, following the rib pattern becomes more intuitive.
For garments that need a snug but flexible edge, such as socks, sweaters, and hats, a small ribbing swatch can also help assess the fabric’s stretch and recovery before beginning the main project.
How to Knit 2×2 Ribbing: Knit 2, Purl 2
Difficulty: Beginner | Best for: Sweater hems, sleeve cuffs, and hat brims
The 2×2 rib stitch is a knitting pattern alternating two knit stitches with two purl stitches. Written as K2, P2, it creates wider vertical columns than 1×1 ribbing, giving the fabric distinct texture and stretch.
This pattern is commonly used for sweater hems, sleeve cuffs, hat brims, and other flexible edges. The technique is simple once you’re comfortable with knit and purl movements. Consistent yarn placement and stitch recognition help produce an even finish.
Cast-On Count for 2×2 Ribbing
For standard 2×2 ribbing, cast on a multiple of four stitches when no additional edge stitches are required. Each complete repeat contains two knit stitches and two purl stitches.
Suitable counts for a practice swatch include:
For a first practice swatch, 24 stitches provide six complete repeats. Choose a smooth, light-colored yarn so the individual stitches are easier to recognize.
The cast-on edge should remain flexible. If too tight, the bottom of the ribbing may not stretch as much as the fabric. A stretchy cast-on helps when knitting fitted cuffs or hat brims.
Step-by-Step: How to Knit 2×2 Ribbing
Step 1: Cast on the stitches.
Cast on 24 stitches using a suitable cast-on method. Hold the needle comfortably and avoid pulling each new loop too tightly.
Check that the stitches move along the needle without resistance. Even spacing makes the first row easier and helps maintain consistent tension.
Step 2: Knit the first stitch.
Hold the working yarn behind the needles. Insert the right needle into the first stitch on the left needle, wrap the yarn around the right needle, and draw a new loop through.
Slip the old stitch off the left needle. The new loop forms a knit stitch, which appears as a small V on the right side of the fabric.
Step 3: Knit the second stitch.
Keep the yarn at the back and knit the next stitch in the same way. The first two stitches now form the knit section of the repeat.
Avoid pulling the working yarn too tight after the second stitch. Consistent tension helps knit columns maintain a similar width.
Step 4: Bring the working yarn to the front.
Move the yarn between the two needle tips from back to front. Position it in front of the work before starting the purl section.
Always move the yarn between the needles, not over a needle. Moving it over the needle can create an accidental yarn over and add an extra stitch.
Step 5: Purl the first stitch.
With the yarn in front, insert the right needle into the next stitch using the purling motion. Wrap the yarn around the needle and draw a new loop through.
Slip the old stitch off the left needle. The resulting purl stitch has a raised horizontal bump on the fabric.
Step 6: Purl the second stitch.
Keep the yarn in front and purl the next stitch. After both purl stitches, the first full K2, P2 repeat is finished.
The two knit stitches form a raised column, while the two purl stitches create a recessed column beside it.
Step 7: Move the yarn to the back.
After the second purl stitch, move the working yarn between the needle tips toward the back. The yarn is now positioned for the next knit section.
Make this transition smoothly without pulling the yarn across the fabric or wrapping it around a needle.
Step 8: Repeat K2, P2 across the row.
Knit the next two stitches, bring the yarn forward, and purl the next two stitches. Continue alternating until all stitches on the left needle are worked.
With 24 stitches and no additional edge stitches, the row has six complete K2, P2 repeats. If the pattern specifies edge stitches, follow its instructions rather than forcing the final group to match.
Step 9: Turn the work and continue in pattern.
Turn the knitting to begin the next row. Look at the stitches before working them, rather than automatically repeating K2, P2.
When knitting 2×2 ribbing flat, knit the knit stitches and purl the purl stitches as they appear. On the reverse side, visible stitch shapes help identify which stitch to work next.
A knit stitch generally looks like a V, while a purl stitch has a raised horizontal bump. Following these shapes keeps the rib columns aligned across successive rows.
Step 10: Check the ribbing as it grows.
After several rows, examine the fabric. The knit stitches should form continuous raised columns, with recessed purl columns between them.
Check the stitch count if an unexpected gap or extra loop appears. An accidental yarn over or dropped stitch can interrupt the pattern, so correcting it early is easier than fixing several rows later.
Continue until the ribbing reaches the length required by the knitting pattern.
How to Keep 2×2 Ribbing Neat
Consistent tension and correct stitch placement directly affect the finished fabric. Use these checks while knitting:
If the ribbing feels stiff, try a slightly larger needle for a separate swatch and compare the results. Needle size, yarn thickness, fiber content, and individual tension all influence the finished fabric.
1×1 vs. 2×2 vs. 3×3 Ribbing
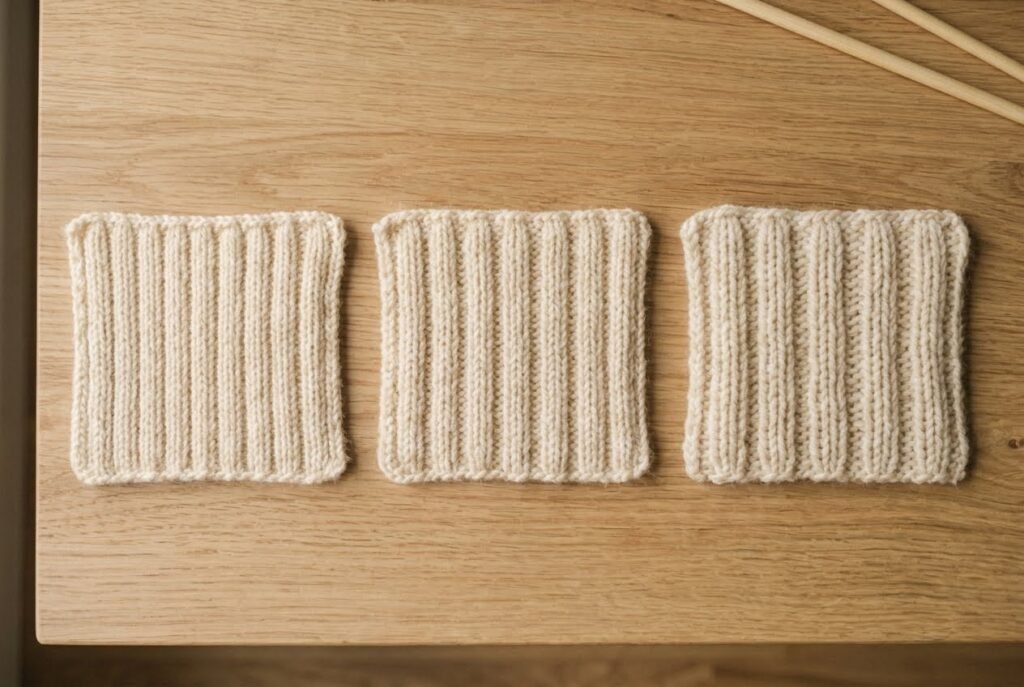
| Rib pattern | Stitch repeat | Common uses |
|---|---|---|
| 1×1 rib | K1, P1 | Sock cuffs, necklines, and fine edges |
| 2×2 rib | K2, P2 | Sweater hems, sleeve cuffs, and hat brims |
| 3×3 rib | K3, P3 | Wider ribbed borders and decorative edges |
The main difference is the width of each knit and purl group. A 1×1 rib creates narrow columns, while 2×2 and 3×3 ribbing produce wider bands.
The best choice depends on the garment design, the amount of stretch needed, and the desired appearance. Knitting a small sample before beginning the main project helps determine whether the selected rib pattern and needle size are suitable.
How to Knit Ribbing in the Round
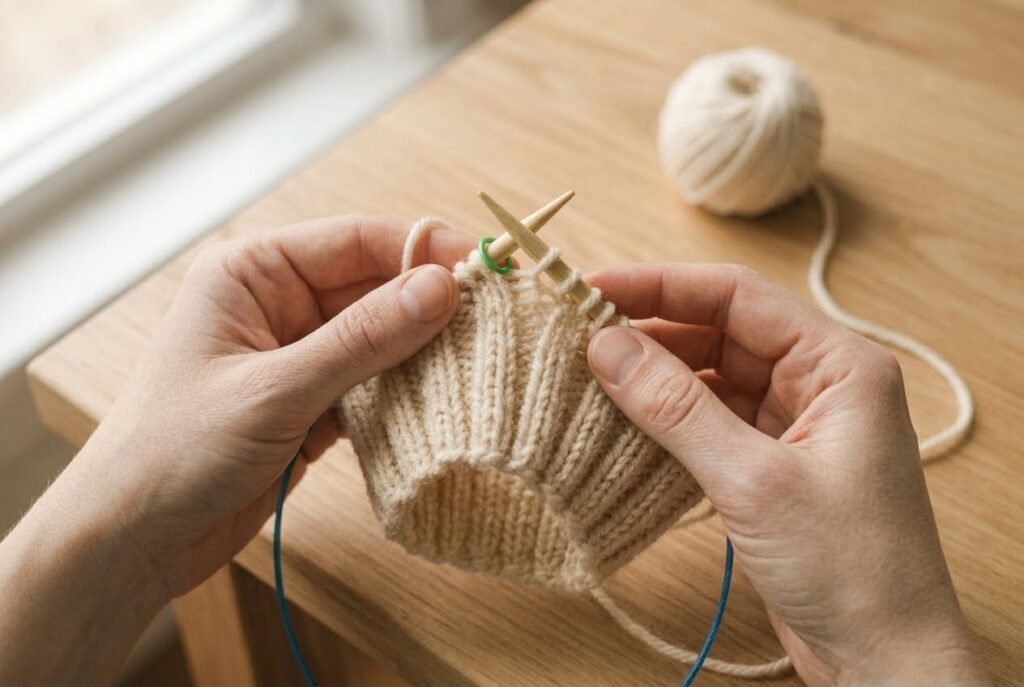
Knitting ribbing in the round is useful for hats, socks, cowls, sweater cuffs, and seamless garments. Flat knitting and circular knitting let the fabric grow continuously around a tube without turning at the end of each row.
The technique uses the same knit and purl stitches as flat ribbing, but the stitch sequence is repeated around each round. For 1×1 ribbing, alternate one knit stitch with one purl stitch. For 2×2 ribbing, work two knit stitches followed by two purl stitches.
The most important parts of circular ribbing are joining the cast-on stitches without twisting them, maintaining the correct yarn position, and following the established stitch pattern.
What You Need for Circular Ribbing
Before beginning, prepare the following supplies:
Choose needles that match the yarn and pattern recommendations. The needle length should suit the project’s circumference. Short circular needles work well for many hat brims. Double-pointed needles or the magic loop method help with smaller circumferences.
Also Read: How to Measure Circular Knitting Needles? Easy Guide
How to Knit 1×1 Ribbing in the Round
The 1×1 rib stitch alternates one knit stitch with one purl stitch. It creates narrow vertical columns and a flexible fabric suitable for sock cuffs, hat brims, and fitted garment edges.
Step 1: Cast on the correct number of stitches.
Cast on a multiple of two stitches for standard 1×1 ribbing. The stitch count should suit the pattern and the finished project’s circumference.
For example, 80 stitches provide 40 repeats of K1, P1 around the round. The number depends on the yarn, needle size, gauge, and desired fit.
Step 2: Arrange the stitches along the needles.
If using circular needles, spread the cast-on stitches evenly along the cable and needle tips. Make sure the cast-on edge consistently faces inward, rather than twisting around the cable.
A twisted cast-on edge can create a permanent twist in the finished tube. Checking alignment before joining prevents this problem.
Step 3: Join the work in the round.
Bring the first and last cast-on stitches together using the chosen joining method. Position the working yarn so the first stitch can be worked normally.
Place a stitch marker before the first stitch to identify the beginning of the round. A marker is particularly helpful when knitting long sections of ribbing.
Also Read: How to Connect Circular Knitting: Easy Guide
Step 4: Knit the first stitch.
Keep the working yarn at the back and knit the first stitch as usual. The resulting V-shaped stitch begins the knit column.
Step 5: Purl the next stitch.
Bring the yarn between the needle tips to the front. Purl the next stitch, then move the yarn to the back before knitting again.
Moving the yarn between the needles prevents accidental yarn overs and unwanted increases.
Step 6: Repeat K1, P1 around the round.
Continue alternating one knit stitch and one purl stitch until you return to the stitch marker. Check that the last stitch of the round completes the intended repeat.
Step 7: Continue working each round in pattern.
When you reach the marker, transfer it to the right needle and begin the next round. Continue knitting the knit stitches and purling the purl stitches as they appear.
Because circular knitting does not require turning the work, repeat the same K1, P1 sequence every round. Continue until the ribbing reaches the length specified in the pattern.
How to Knit 2×2 Ribbing in the Round
The 2×2 rib stitch alternates two knit stitches with two purl stitches. It creates wider columns than 1×1 ribbing and is commonly used for sweater cuffs, hat brims, and garment hems.
Step 1: Cast on a multiple of four stitches.
Choose a stitch count that matches the required circumference and pattern. For example, 80 stitches provide 20 complete K2, P2 repeats.
Step 2: Arrange the stitches and check the edge.
Arrange the stitches evenly on the circular needles, confirm the cast-on edge is not twisted, and join the work into a circle. Place a marker at the beginning of the round.
Step 3: Knit two stitches.
Keep the yarn at the back and knit the first two stitches. These stitches form the raised knit column.
Step 4: Purl two stitches.
Move the working yarn to the front between the needle tips. Purl the next two stitches, keeping the yarn in front until both stitches are complete.
Step 5: Repeat K2, P2 around the round.
Move the yarn to the back and knit the next two stitches. Continue alternating two knit stitches and two purl stitches until you reach the marker.
Step 6: Work subsequent rounds in pattern.
Slip the marker from one needle to the other and continue knitting knit stitches and purling purl stitches. Check the columns regularly to ensure the pattern remains consistent.
If the project requires more length, continue until the ribbing reaches the desired measurement.
Tips for Neat Circular Ribbing
- Check for twists before joining. The cast-on edge should follow the same direction around the needles.
- Use a stitch marker. It identifies the beginning of each round and helps maintain an accurate stitch count.
- Keep yarn movements controlled. Move the yarn between the needle tips when switching between knit and purl stitches.
- Check the rib columns regularly. Each knit column should remain aligned with the knit stitches in the rounds below.
- Test the fit. Ribbing should stretch comfortably without feeling excessively tight. A gauge swatch can help determine whether the stitch count and needle size are appropriate.
If the circular needles are too long for the project circumference, consider shorter circular needles, double-pointed needles, or a method like magic loop. The best option depends on project size and personal preference.
Also Read: How to Knit a Gauge Swatch: Quick Guide
Common Problems When Knitting Ribbing in the Round
How to Read Ribbing Stitches
Learning to read knitting stitches makes ribbing easier to maintain and helps identify mistakes before they affect multiple rows. Instead of memorizing every stitch in the pattern, look at the fabric to determine the next stitch.
In ribbing, knit and purl stitches form alternating vertical columns. Recognizing these columns helps maintain the pattern in both 1×1 ribbing and 2×2 ribbing.
How to Recognize Knit and Purl Stitches
The difference becomes easier to recognize after knitting a few rows. Check the stitch below the needle to see how the column continues.
How to Read 1×1 and 2×2 Ribbing
In 1×1 ribbing, the fabric alternates between one knit stitch and one purl stitch. On the right side, you see a narrow V-shaped column followed by a column of purl bumps.
In 2×2 ribbing, the pattern has two knit stitches followed by two purl stitches. The wider groups make the columns easier to distinguish once the fabric develops.
Use this guide when checking your work:
These visual cues help maintain the established rib pattern without repeatedly consulting the written instructions.
Reading Stitches When Knitting Flat
When knitting ribbing back and forth, stitches look different after turning the work. A knit stitch from the reverse side looks like a purl bump, while a purl stitch looks like a knit V.
For this reason, do not automatically repeat K1, P1 or K2, P2 on every flat row. Instead, look at the stitches facing you and work each stitch as it appears.
Following the visible stitches helps keep the knit and purl columns aligned across successive rows.
Reading Stitches When Knitting in the Round
Circular knitting does not require turning the work after each round. The right side of the fabric generally remains facing you, so the knit and purl columns stay visible as you continue.
For 1×1 ribbing, alternate K1, P1 around each round. For 2×2 ribbing, alternate K2, P2. Follow the established columns and use a stitch marker to identify the beginning of each round.
How to Check Ribbing for Mistakes
Inspect the fabric every few stitches or at the end of a repeat. If a column suddenly changes direction or the texture differs from the rows below, check if a knit stitch was purled or a purl stitch was knitted by mistake.
If you lose your place, examine the stitch immediately below the next stitch on the needle. The fabric often shows which stitch belongs in that position.
Correcting a misplaced stitch early is usually easier than repairing several rows later. With practice, reading the knit and purl columns becomes a natural part of knitting ribbing.
How to Bind Off Ribbing
Binding off finishes your knitting by securing the final stitches. When finishing ribbing, aim to create a neat edge that holds its shape without restricting stretch. A standard bind-off can make cuffs and hems tight if you pull the yarn too firmly.
Standard Bind-Off in Pattern
Binding off in pattern means knitting the knit stitches and purling the purl stitches as you work the finishing row. This helps the edge follow the existing ribbing pattern.
- Work the first two stitches according to the established rib pattern.
- Insert the left needle into the first stitch on the right needle.
- Lift the first stitch over the second stitch and off the needle.
- Work the next stitch in pattern.
- Lift the previous stitch over the newest stitch and off the needle.
- Repeat these steps across the row or round, following the knit and purl sequence.
- When one stitch remains, cut the yarn, leaving a tail, and pull it through the final loop.
- Weave in the loose end with a tapestry needle without pulling the finished edge tight.
For 1×1 ribbing, continue alternating knit and purl stitches. For 2×2 ribbing, follow the groups of two knit stitches and two purl stitches. Keep your tension relaxed as you bind off to prevent the edge from becoming too firm.
Also Read: How to Bind Off Knitting: Easy Ultimate Guide
How to Keep a Ribbed Edge Stretchy
A standard bind-off may not provide enough flexibility for ribbing that needs to stretch over a hand, heel, or head. For sock cuffs, hat brims, and fitted sweater edges, consider a stretchy bind-off designed for ribbing.
Test the finishing method on a small swatch when possible. The completed edge should stretch comfortably and return to shape without feeling rigid or flaring excessively. If your pattern specifies a particular bind-off, follow those instructions to achieve the intended fit.
Common Ribbing Mistakes and How to Fix Them
Even experienced knitters sometimes make mistakes when working ribbing. Uneven tension, misplaced stitches, or incorrect yarn positioning affect the appearance and stretch of the fabric. Recognizing these problems early makes them easier to correct before they spread across rows.
Why Is My Ribbing Loose?
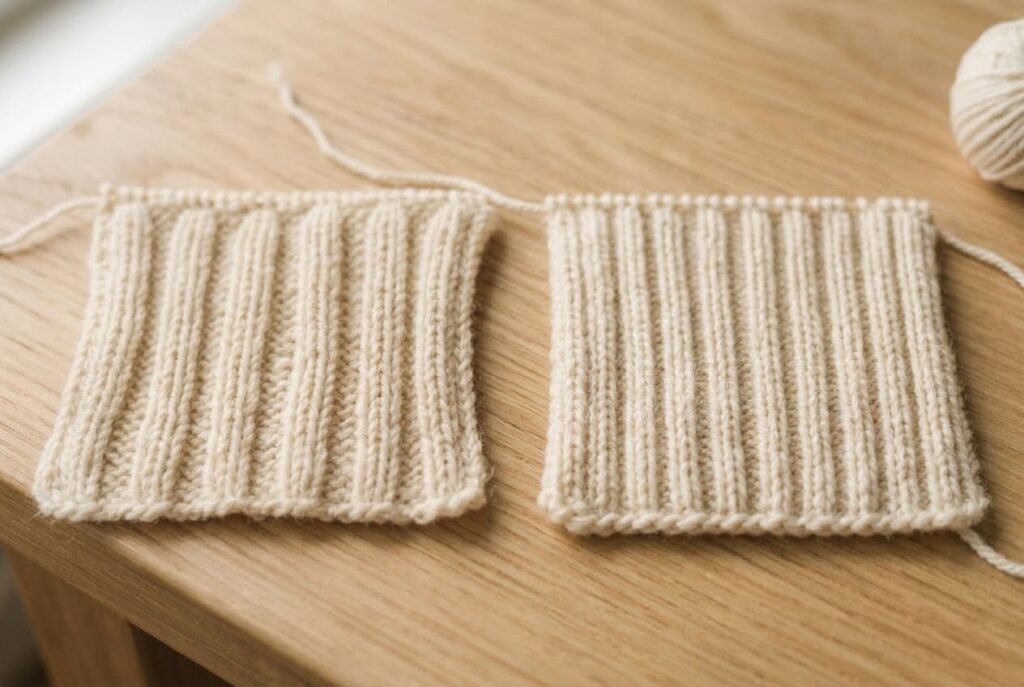
Loose ribbing often results from inconsistent tension, especially when switching between knit and purl stitches. You may notice gaps between stitches or less defined knit columns.
How to fix it:
If the fabric remains too loose, try a smaller needle and compare the results.
Changing needle size affects both the appearance and stretch of ribbing, so test the fabric before choosing a size for your project.
Why Are My Rib Columns Broken?
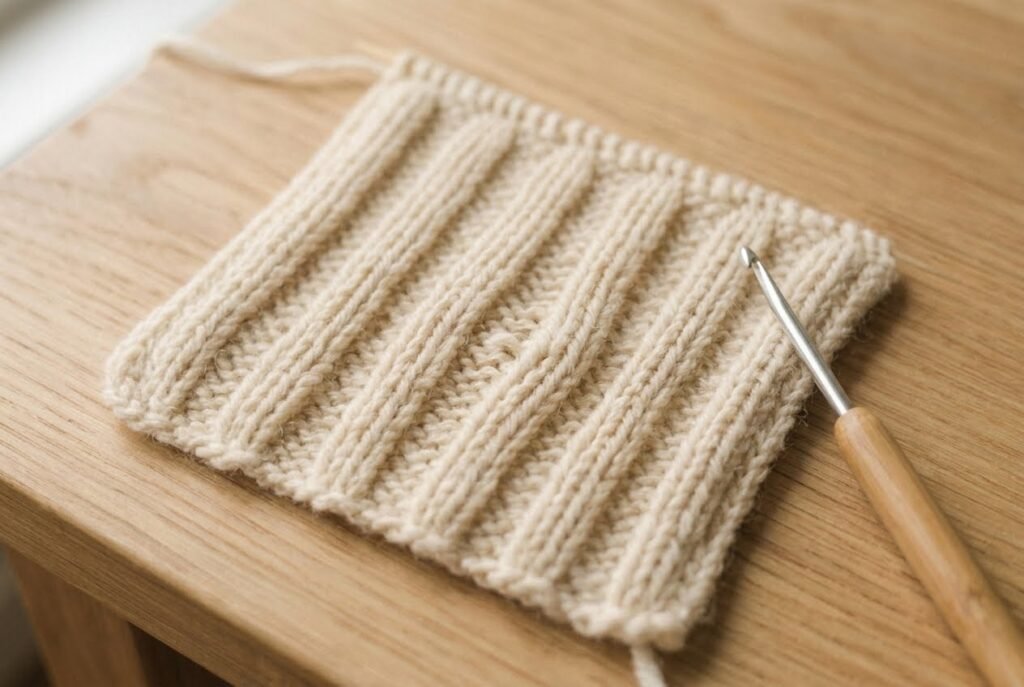
Broken rib columns usually occur when a knit stitch is worked as a purl stitch or a purl stitch as a knit stitch. This mistake interrupts the vertical lines that give ribbing its characteristic texture.
How to fix it:
Check the stitches before continuing. Knit stitches look like V shapes, while purl stitches appear as raised horizontal bumps. Use these visual cues to maintain the established pattern.
If you spot a mistake several rows later, carefully unravel the affected stitches and rework them. Use a crochet hook to repair a misplaced stitch without undoing the entire section.
Why Do I Have Extra or Missing Stitches?
An accidental yarn-over adds a stitch, while a dropped or skipped stitch reduces your stitch count. These errors make the ribbing wider or narrower than intended.
How to fix it:
If your stitch count changes unexpectedly, find the cause before continuing. Early correction preserves the ribbing pattern.
Also Read: How to Fix a Dropped Stitch: A Complete Guide for Knitters
Why Is My Cast-On Edge Too Tight?
A tight cast-on edge can prevent socks, hats, and cuffs from stretching comfortably, even if the ribbing has enough elasticity.
How to fix it:
Use a relaxed cast-on method and avoid pulling each loop tightly against the needle. For projects needing extra stretch, choose a cast-on technique made for elastic edges.
Before knitting several rows, gently stretch the cast-on edge to check if it opens enough for the intended fit.
Why Does My Ribbing Look Uneven?
Uneven ribbing can result from changing tension, misplaced stitches, or differences in how you work knit and purl stitches. Beginners often notice this problem when switching between the two movements.
How to fix it:
Maintain steady yarn movement and check that your stitch count stays consistent. Compare knit and purl columns as you work to spot any pattern changes.
Ribbing may look uneven right after knitting. Depending on the yarn and fiber, gentle blocking can help the fabric relax and improve its appearance. Blocking will not fix incorrectly worked stitches.
Why Is My Yarn in the Wrong Position?
In ribbing, the yarn must move between the needle tips when switching between knit and purl stitches. Leaving it in the wrong position causes accidental yarn overs, loose loops, or uneven tension.
How to fix it:
Paying attention to yarn placement helps prevent accidental increases and keeps the ribbing pattern consistent.
How to Correct Ribbing Mistakes
When something looks wrong, stop and check the fabric before continuing.
With practice, reading the fabric becomes easier and you can catch many mistakes before they affect several rows.
Ribbing Variations to Try
Once you are comfortable with basic rib stitch knitting, try other ribbing patterns to create different textures. Each variation has its own appearance and construction method.
Start with 1×1 and 2×2 ribbing before moving on to more advanced techniques. Practicing the basic patterns first will make it easier to understand the stitch instructions for each variation.
Also Read: Best Knitting Stitch for Scarves: Easy Beginners Guide
Conclusion
Learning how to knit ribbing gives you a useful technique for hats, socks, sweaters, and many other knitting projects. Start with 1×1 ribbing to practice alternating knit and purl stitches, then try 2×2 ribbing once the movements feel comfortable.
Keep the yarn in the correct position, check the stitch columns as you work, and maintain consistent tension. With practice, you can create neat, stretchy edges that improve the fit and finish of your handmade projects.