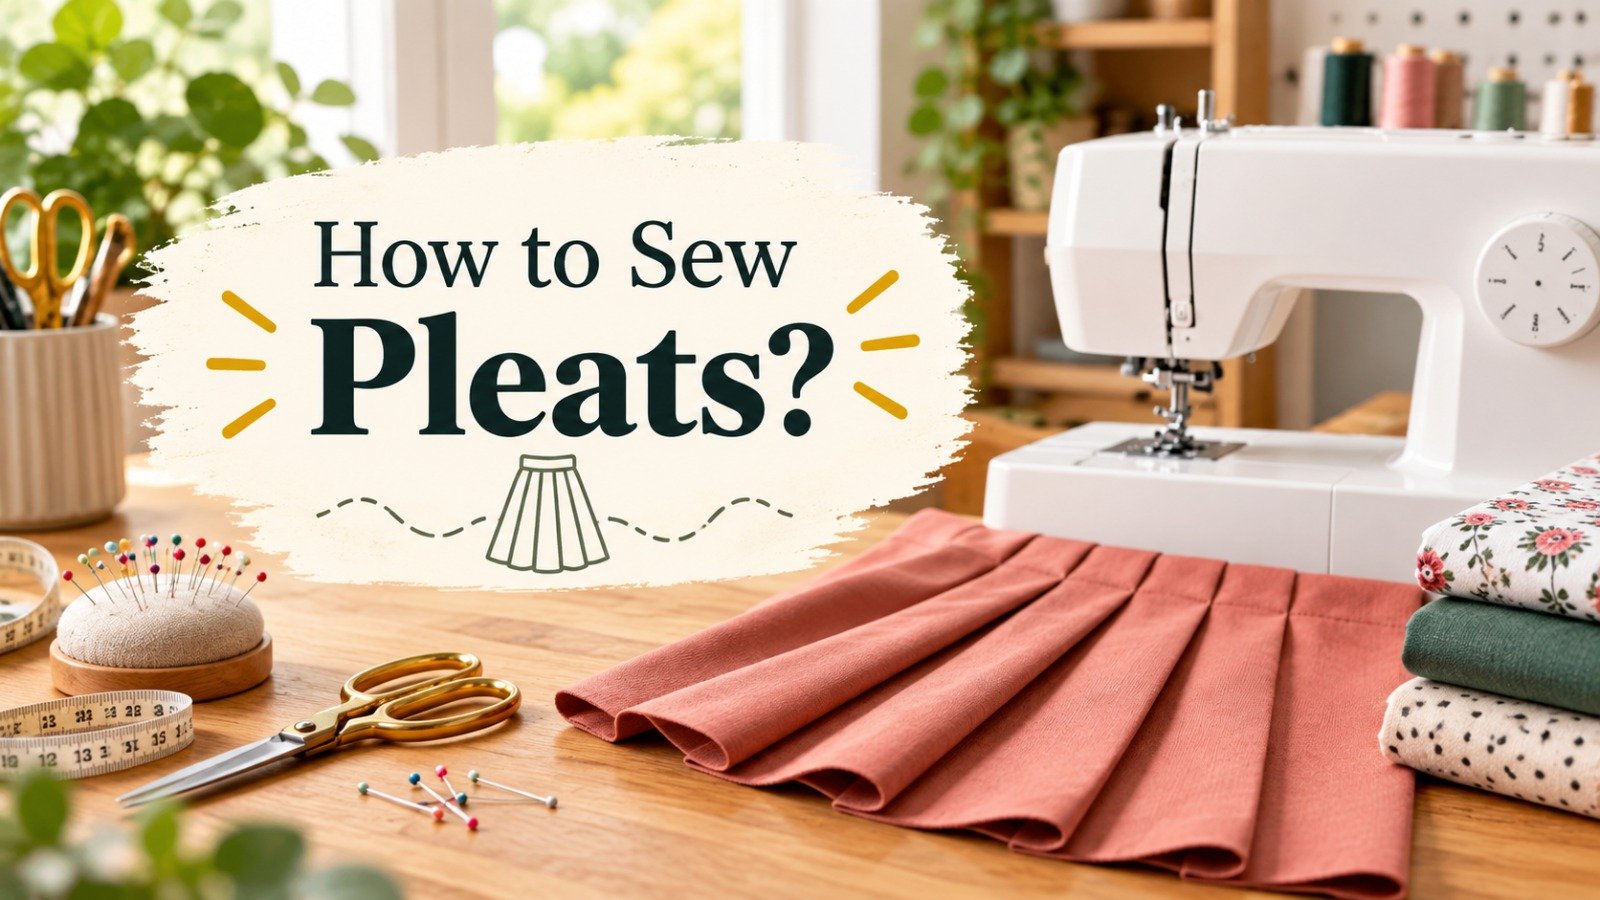
How to Sew Pleats? Easy Beginner Guide
If you have admired the neat folds on a skirt, trousers, or curtain and wondered how to sew pleats, the technique is easier than it seems. The key is measuring the fabric, marking, and keeping pleats neat.
This guide explains how to make pleats in fabric from the first measurement to the final stitching. You will learn how to work with knife, box, inverted, and accordion pleats, along with practical methods for pressing and securing them.
Whether you are making a pleated skirt or adding a few folds to a garment, the same basic principles apply. Careful marking and consistent pressing give finished pleats a cleaner, more even appearance.
Key Takeaways
What Are Pleats and Why Use Them?
A pleat is a fold of fabric that you create and secure to control fullness. Instead of gathering fabric into small ripples, you fold specific sections into a planned shape.
Pleats can be narrow or wide, shallow or deep. You can also space them closely together or farther apart. This flexibility makes them useful for both clothing and home sewing.
You will often see pleats on:
Pleats can change how fabric moves. A pleated skirt may look structured when standing but open naturally as you walk.
Before sewing a full garment, I recommend practicing on a scrap of the same fabric. This lets you check fold direction, pleat depth, and iron temperature before working on the finished piece.
Also Read: How to Sew Drapes and Curtains: Easy Guide
Types of Pleats
Different pleats create various shapes, fullness, and movement. Some are simple enough for a first sewing project, while others require more careful marking and construction.
Before choosing a style, consider the fabric, the fullness you want, and how the finished garment should move. A narrow knife pleat can create a very different result from a wide box pleat, even with the same fabric.
Knife Pleats
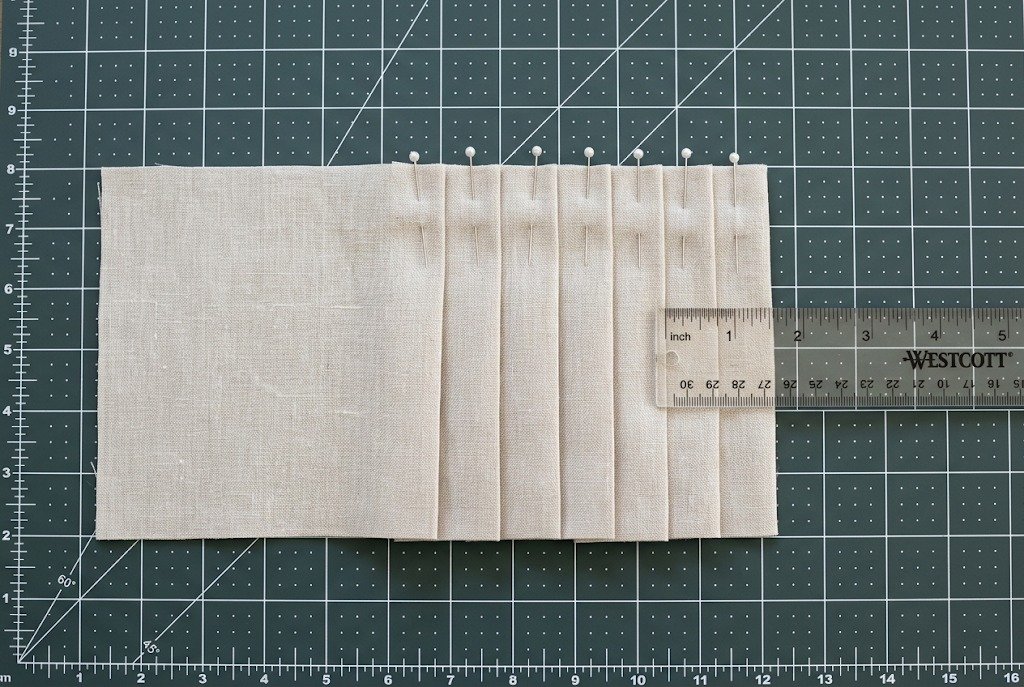
Knife pleats are a series of folds that all face the same direction. Each pleat has a fold line and a placement line, which determines how much fabric disappears into the fold.
From the front, the pleats create parallel lines with a clean and orderly appearance. They can be narrow for a traditional school skirt or wider for a more relaxed garment.
Knife pleats work well on skirts, dresses, uniforms, trousers, and some home décor projects. Lightweight to medium-weight woven fabrics are generally easier to handle because they fold neatly without creating excessive bulk.
For sewing pleats for beginners, knife pleats are a useful starting point. Once the first fold is measured and pressed correctly, the arrangement repeats across the fabric.
Box Pleats
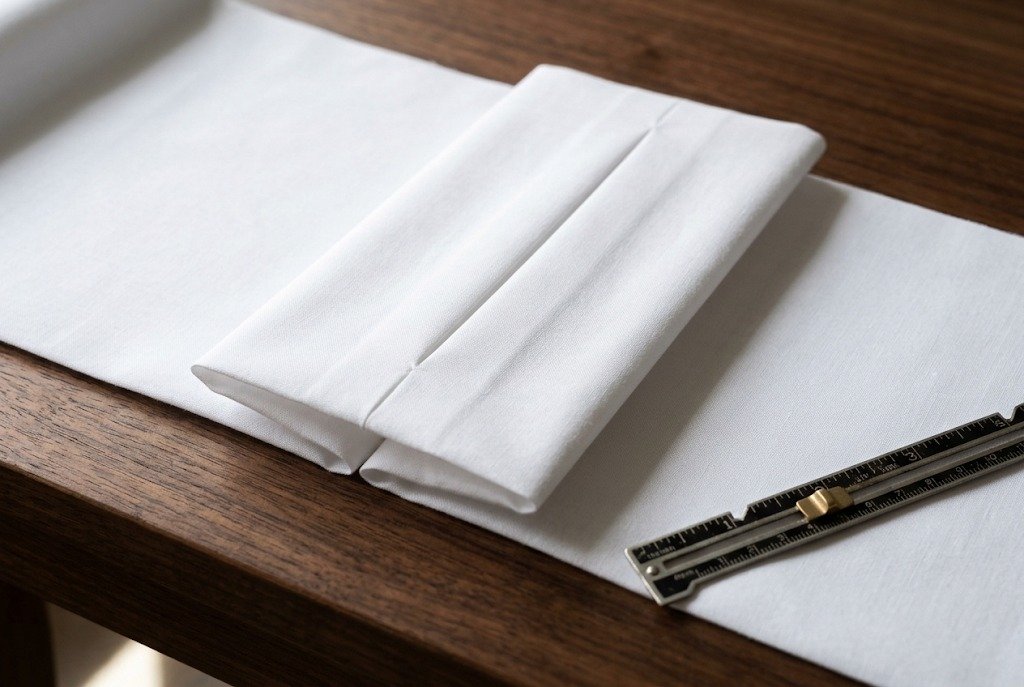
Box pleats use two folds that turn away from each other and meet around a center area. This creates a raised section on the front with additional fabric hidden behind it.
The center section’s width can vary. A narrow box pleat gives a controlled appearance, while a wider one creates more fullness and movement.
Box pleats work particularly well on skirts, dresses, trousers, curtains, and decorative fabric panels. They can also create a strong vertical design line when used down the center of a garment.
When sewing box pleats, accurate center marking is important. If the two sides do not match, the pleat looks tilted rather than symmetrical.
Inverted Pleats
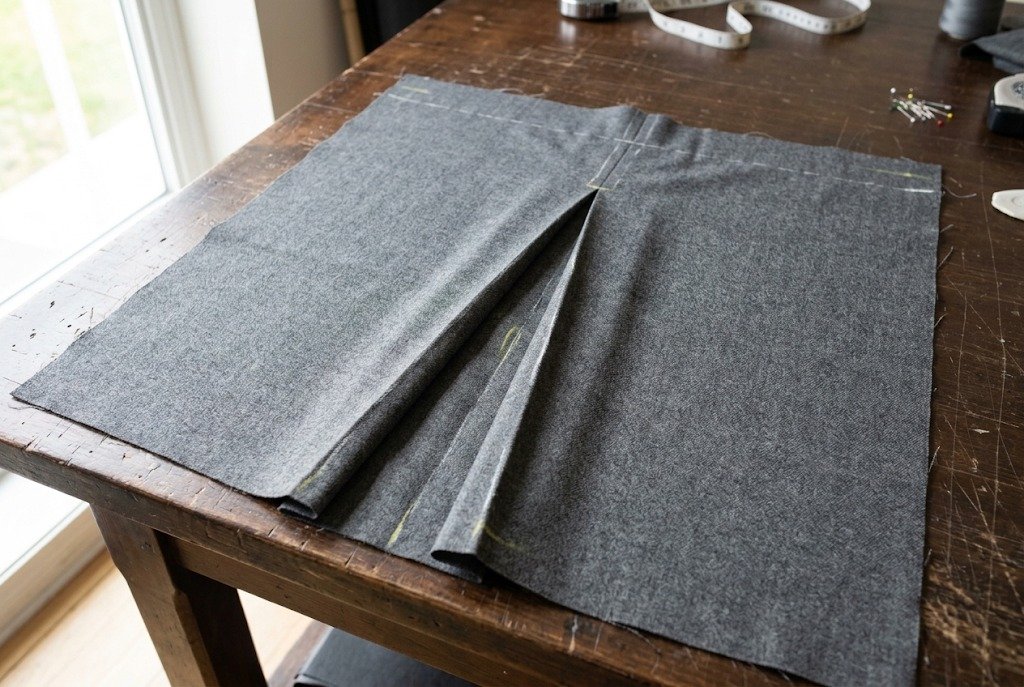
An inverted pleat is closely related to a box pleat, but the folds turn inward. Instead of producing a raised box on the outside, the visible fabric forms a recessed fold.
This style works well when a garment needs extra fullness while maintaining a smooth outer appearance. You may find inverted pleats on skirts, dresses, coats, tunics, and shirt details.
The center line is particularly important when marking an inverted pleat. Mark it clearly before folding so both sides meet at the correct position.
An inverted pleat can also be left partly open below a secured section. That approach allows the fabric to move more freely while keeping the upper part controlled.
Accordion Pleats
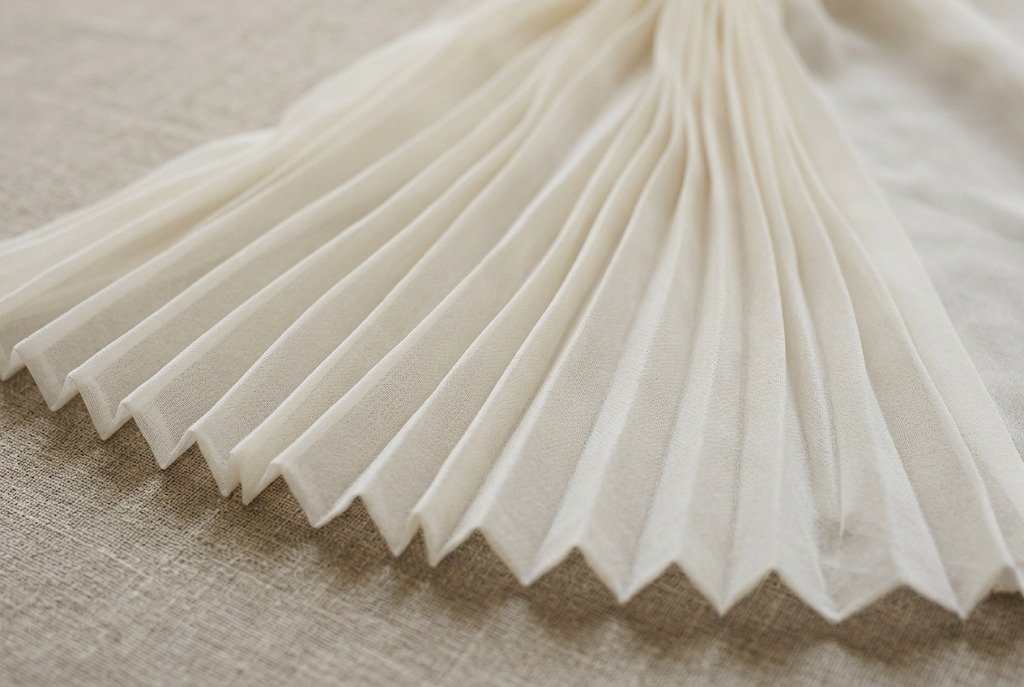
Accordion pleats contain many narrow folds that alternate from one direction to the other. When opened slightly, the fabric resembles the folds of an accordion.
These pleats create more surface texture than wider knife or box pleats. They also allow the fabric to expand and contract as the garment moves.
Fine or lightweight fabrics suit this style because narrow folds become bulky in heavier materials. Commercially pleated fabrics are common, but creating repeated narrow folds by hand requires patience and accurate measuring.
When making accordion pleats at home, mark spacing carefully. Even a small difference between folds becomes noticeable when many narrow pleats appear together.
Cartridge Pleats
Cartridge pleats are different from ordinary pressed pleats. Instead of forming flat folds, they create rounded loops or tube-like sections of fabric.
They hold a large amount of fabric in a relatively narrow attachment area. This makes them useful when a historical or costume garment needs substantial fullness without spreading the attachment point across the same width.
Cartridge pleats often appear in historical clothing and costume construction. They usually require careful hand stitching and controlled gathering, so they are not the easiest option for a first project.
Because the construction differs from simple pressed pleats, practice on a small fabric sample before working on the finished garment. A sample lets you check spacing, fullness, and attachment method without wasting main fabric.
Which Pleat Should a Beginner Try First?
For a first project, knife pleats are usually the simplest place to begin. The folds all follow the same direction, so the marking and pressing pattern stays consistent.
Box and inverted pleats are useful next because they introduce different folding directions while still using straightforward construction. Accordion pleats require more patience since the folds are narrower and more numerous.
Cartridge pleats are better saved for a later project when basic pleating and hand-sewing techniques feel comfortable.
Tools and Materials You’ll Need
You do not need a large collection of equipment to learn how to make pleats in fabric. A basic sewing setup is enough for most pleating projects.
Gather:
A clear ruler helps keep pleats evenly spaced. A seam gauge helps you check fold depth and seam allowances.
Also Read: Best Sewing Scissors: Top Picks 2026
Also Read: 10 Best Iron for Sewing: Top-Rated Picks 2026
Also Read: Best Mechanical Sewing Machine: Our Top Pick 2026
Choosing the Best Fabric for Pleats
The best fabric for pleats depends on the pleat style and the finished look. For a first project, choose a stable woven fabric with enough body to hold a fold without being difficult to handle.
Good options include:
Slippery fabrics can move while you mark and fold them. Thick fabrics create bulk where pleats meet. Stretch fabrics may behave differently because they can relax after pressing.
Before cutting the full project, make a small pleat sample from the same fabric. Press it at the recommended temperature, then check how well the fold holds.
Test the iron temperature on a scrap first. A pressing cloth provides extra protection with delicate or heat-sensitive fabrics.
How to Mark Pleats on Fabric
Good marking is the foundation of neat, evenly spaced pleats. Before folding the fabric, decide how wide each pleat should be, how deep the folds will go, and where each pleat will sit.
The amount of fabric needed depends on the pleat style and depth. A deeper pleat uses more fabric because more material is hidden inside the fold.
Step 1: Decide the Pleat Width and Depth
First, decide how wide each finished pleat should look. Then choose the depth of the fold.
For example, you might want a knife pleat that looks 1 inch wide with a 1-inch depth. The visible width and folded depth are separate, so keep both measurements in mind when calculating the fabric.
For a simple knife pleat, the fabric consumed by one pleat can be calculated as:
Finished pleat width + 2 × pleat depth
So, a 1-inch visible pleat with a 1-inch depth uses about 3 inches of fabric.
Multiply the fabric used per pleat by the number of pleats. Then add any flat sections between or beside the pleats.
Step 2: Calculate the Required Fabric Width
Calculate the total width before cutting to prevent the finished panel from becoming narrower than expected after folding the pleats.
The basic idea is:
Required fabric width = finished width + fabric consumed by the pleats
The exact calculation varies with pleat style. Box and inverted pleats distribute fullness differently from knife pleats, so follow the sewing pattern measurements when available.
If you are sewing pleats without a pattern, make a small sample first. Measure the sample before calculating the full fabric requirement.
Step 3: Mark the Fold and Placement Lines
Place the fabric flat with the correct side facing the appropriate direction for marking. Use a ruler and a fabric-safe marking tool to keep the lines straight.
For each pleat, mark:
Keep measurements consistent across the panel. For directional pleats, small arrows can show which way each fold should turn.
Use light marks that suit the fabric and can be removed or hidden during sewing.
Step 4: Add Notches for Alignment
Mark small notches at the top edge of each pleat. If the project has matching points at the lower edge, mark those as well.
These reference marks are useful when attaching a waistband, yoke, facing, or other garment section. They also help keep pleats in their correct positions after folding.
When working from a pattern, transfer the pattern’s pleat markings carefully instead of creating a new measurement system.
Can You Sew Pleats Without Marking?
You can sew simple pleats without marking every fold, but marking is safer for beginners. Without reference points, pleat widths can gradually change across the fabric.
Experienced sewists may use fabric stripes, checks, measurements, or temporary guides to control spacing. For a first project, a ruler and washable marking tool make the process easier.
Can a Fork Help With Small Pleats?
A dinner fork can serve as a quick spacing guide for narrow pleats on small informal projects. The tines provide repeated spacing without a separate pleating tool.
This method works best when exact pattern measurements are not critical. For a fitted skirt, waistband, or pattern-based garment, use measured markings instead of relying on a fork.
How to Sew Knife Pleats
Knife pleats are a practical style to learn because every fold turns in the same direction. Once the first pleat is measured and positioned, the remaining folds follow the same arrangement.
The quality of the finished pleats depends more on accurate preparation than stitching speed. Mark the fabric carefully, press each fold consistently, and secure the top edge before attaching it to the garment.
Step 1: Prepare and Pre-Wash the Fabric
Pre-wash and dry the fabric according to its care instructions before cutting. This reduces the chance of shrinkage altering the finished size after the garment is completed.
Press the fabric flat after washing. Wrinkles interfere with measuring and make straight marking lines harder to achieve.
Check the fabric grain before cutting. Pleats should run in the garment’s intended direction, so keeping the fabric aligned with the grain helps maintain a consistent appearance.
If the fabric is new to you, make a small pleat sample before cutting the full project. Test how easily it folds, how well it holds a crease, and which iron temperature works safely.
Step 2: Mark the Pleat Positions
Lay the fabric on a large, flat surface. Transfer the fold and placement lines using a fabric-safe chalk or washable marking tool.
Use the measurements you calculated earlier instead of estimating each fold by eye.
For every pleat, identify the:
If the pleated section will attach to a waistband or yoke, mark matching points along the top edge.
Before folding, measure several pleats across the panel. Correcting a marking mistake is much easier while the fabric is still flat.
Step 3: Fold Each Pleat in the Same Direction
Start at one end of the fabric. Bring the marked fold line to its corresponding placement line.
Keep the fold facing the same direction as the previous pleat. Continue across the fabric without changing the sequence.
Do not pull or stretch the fabric while folding. Stretching changes the distance between markings and makes the pleats uneven.
For a long panel, work in manageable sections. This provides better control and prevents folded areas from becoming distorted.
Step 4: Press Each Fold
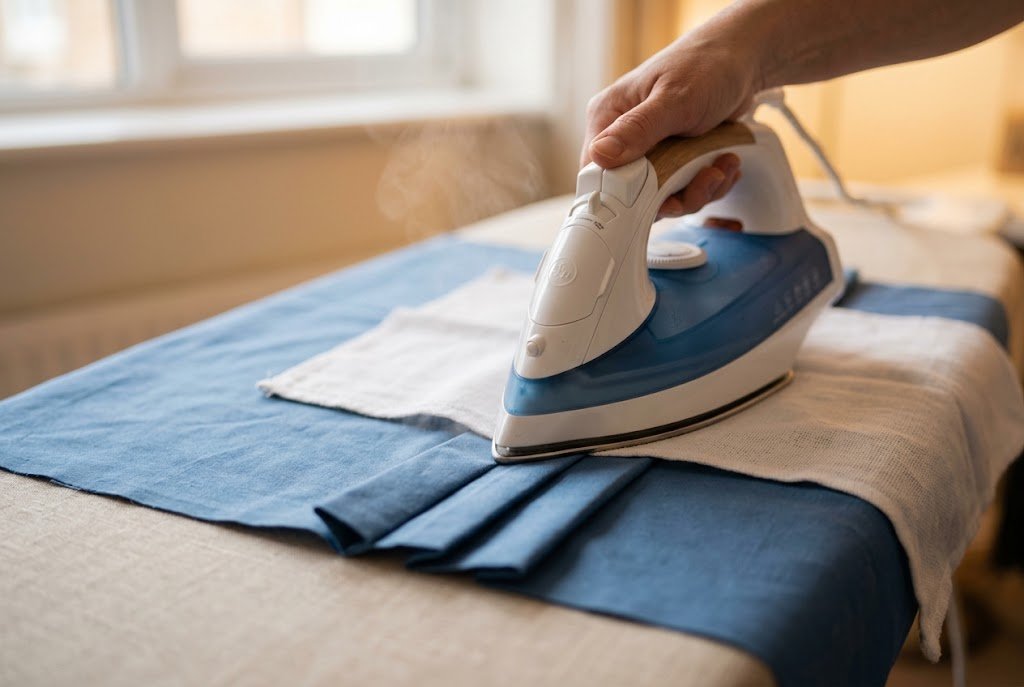
Press each pleat after folding it. Use an iron temperature appropriate for the fabric.
For delicate or heat-sensitive fabrics, place a pressing cloth between the iron and fabric. Test the iron on a scrap before pressing the finished piece.
Press straight down and lift the iron rather than dragging it across several folds. Moving the iron sideways can shift the pleat positions.
Work from one end of the panel to the other. Check that the fold edges remain parallel as you continue.
At this stage, do not worry about making the pleats permanent. Pressing establishes clear folds to make the next sewing steps easier.
Step 5: Pin the Pleats
Once the folds have been pressed, place pins near the top edge to hold them in position.
Insert pins vertically through the folded layers when possible. This keeps folds secure while making the fabric easier to guide under the presser foot.
For delicate fabrics, use fine pins that are suitable for the material. Clips can be useful with thicker fabrics or when pin marks are a concern.
Before sewing, inspect the entire row. Check that every pleat:
Fix any uneven fold before continuing. After attaching the waistband or facing, correcting the problem becomes much harder.
Step 6: Baste Across the Top
Basting is helpful when working with several pleats. Sew a temporary line across the top edge within the seam allowance.
You can hand-baste with a needle and thread or use a longer machine stitch.
Keep the basting line straight and avoid catching fabric outside the pleated section. Temporary stitches should hold folds together without becoming part of the finished seam.
Basting also lets you check the finished width. Measure the pleated section after basting and compare it with the required garment measurement.
Also Read: What Is a Basting Stitch in Sewing? Easy Guide
Step 7: Attach the Pleated Section
Align the pleated section with the waistband, yoke, facing, or other adjoining piece.
Match the center points and any transferred notches first. Then check the remaining pleats along the edge.
Sew using the seam allowance required by the pattern. Support the fabric as it moves through the machine.
Do not pull the pleated fabric toward or away from the presser foot. Let the feed dogs move the layers steadily.
If pleats become compressed near the seam, stop and realign the layers before continuing. Extra care here prevents uneven fullness at the finished seam.
Step 8: Remove Temporary Stitches and Press Again
Once the permanent seam is secure, remove visible basting stitches that are no longer needed.
Give the pleated section a final press. Follow the fabric’s care instructions and use a pressing cloth if appropriate.
Press each fold in its original direction. Avoid flattening nearby pleats while working on one fold.
Allow the fabric to cool before moving or hanging the garment. Cooling helps the pressed folds settle into their intended shape.
A Useful Check Before Finishing
Hold the garment or fabric panel at its intended hanging position and look across the pleats.
The folds should appear evenly spaced, face consistently in one direction, and meet the waistband or joining seam cleanly.
If one pleat looks noticeably wider, correct it before finishing the hem or adding details. Small adjustments are easier at this stage than after you fully assemble the garment.
How to Sew Box Pleats: Standard and Inverted
Box pleats use two folds that turn in opposite directions, creating a structured section of fabric around a center line. They can add fullness while keeping the outside of a garment relatively neat.
The basic process is similar to sewing knife pleats: measure the fabric, mark the fold positions, press the folds, and secure them before attaching the pleated section. The main difference is the direction of the folds.
Standard Box Pleats
For a standard box pleat, the folds turn away from the center, leaving a raised section on the right side of the fabric.
- Mark the center line of the pleat.
- Mark the two fold lines at equal distances from the center.
- Bring each fold toward the center as measured.
- Press both folds carefully so they meet evenly.
- Pin or baste the pleat across the top.
The center section should stay straight and symmetrical. If the sides differ in width, the box will look uneven after pressing.
Inverted Box Pleats
An inverted pleat uses the opposite folding arrangement. The fullness is directed toward the inside, so the outer surface has a more recessed appearance.
Mark the center and outer fold lines. Fold both sides inward and check the fabric’s right side before pressing.
This style is especially useful when you want extra fullness without a raised box shape on the outside of the garment.
Pressing and Basting Box Pleats
Press each fold after arranging the pleat. Use an iron temperature suitable for the fabric and a pressing cloth when needed.
Place pins near the top edge to hold folds. For long pleated sections, temporary basting offers more control than pins alone.
A short vertical basting line helps maintain the center shape during construction. Keep this stitching within areas that will be covered or removed later.
Before attaching the pleated section, check that all box pleats have the same width and face the intended direction. It is easier to correct this before sewing the waistband, yoke, or other joining piece.
Attaching Box Pleats to a Garment
Align the pleated section with the adjoining garment piece, matching center points and pattern notches first. Then check the remaining pleats along the seam.
Sew with the seam allowance required by your pattern. Guide the fabric gently through the machine rather than pulling the pleated layers.
After sewing, press the pleats again in their original direction. Lift and reposition the iron instead of dragging it across several folds, which can shift the carefully aligned pleats.
For thicker fabrics, check the seam allowance where several folded layers meet. Trimming or grading excess layers may reduce bulk and help the finished seam lie flatter.
How to Press and Set Pleats So They Stay Crisp
Pressing does more than make pleats look neat. It helps establish the folds and keeps them aligned while you sew.
Use an iron temperature suitable for the fabric and a stable ironing surface. Before pressing the finished garment, test the iron on a scrap of the same fabric to see how it reacts to heat and steam.
Use Steam and a Pressing Cloth
If the fabric can safely handle steam, a small amount can help establish a sharper crease. For delicate, dark, or heat-sensitive fabrics, place a clean pressing cloth between the iron and the fabric.
Position each fold where you want it before pressing. Press straight down and lift the iron instead of dragging it back and forth. This reduces the chance of shifting the fold or stretching the fabric.
For shiny or delicate fabrics, pressing from the wrong side can provide additional protection. Always follow the fabric’s care instructions when choosing the iron temperature and steam setting.
Baste the Pleats During Construction
Temporary basting helps keep pleats in position while attaching waistbands, yokes, facings, or other garment sections.
A line of basting across the top edge usually suffices for simple pleats. Long or deep pleats may need extra temporary stitching to prevent folds from spreading or twisting.
For example, you can use:
Keep temporary stitches in place; remove them after sewing permanent seams.
Also Read: How to Sew a Seam by Hand? Easy 5-Step Guide
How to Press Pleats Crisp
For how to press pleats crisp, consistency matters more than pressing with excessive heat.
Follow this routine:
- Align the fold carefully.
- Press the fold without dragging the iron.
- Check that the edge remains straight.
- Move to the next section.
- Allow the fabric to cool before moving it.
The cooling stage is easy to overlook but allows the fabric to settle into the pressed shape.
Give the Pleats a Final Press
After the permanent seams are sewn, inspect the pleats before finishing the garment. Remove any temporary basting stitches you no longer need, then press each fold again.
Work from the wrong side when appropriate and use a pressing cloth if the fabric requires extra protection. For curved areas or shaped garments, a tailor’s ham can help support the fabric while you press.
Don’t assume every fabric will hold a sharp crease permanently. Fiber content, fabric construction, heat, moisture, and laundering can all affect how well pleats retain their shape.
For washable garments, follow the care instructions and expect some fabrics to need light pressing again after laundering. A well-pressed pleat should look even and controlled without making the fabric appear overly flattened.
How to Hem Pleated Fabric Without Losing Shape
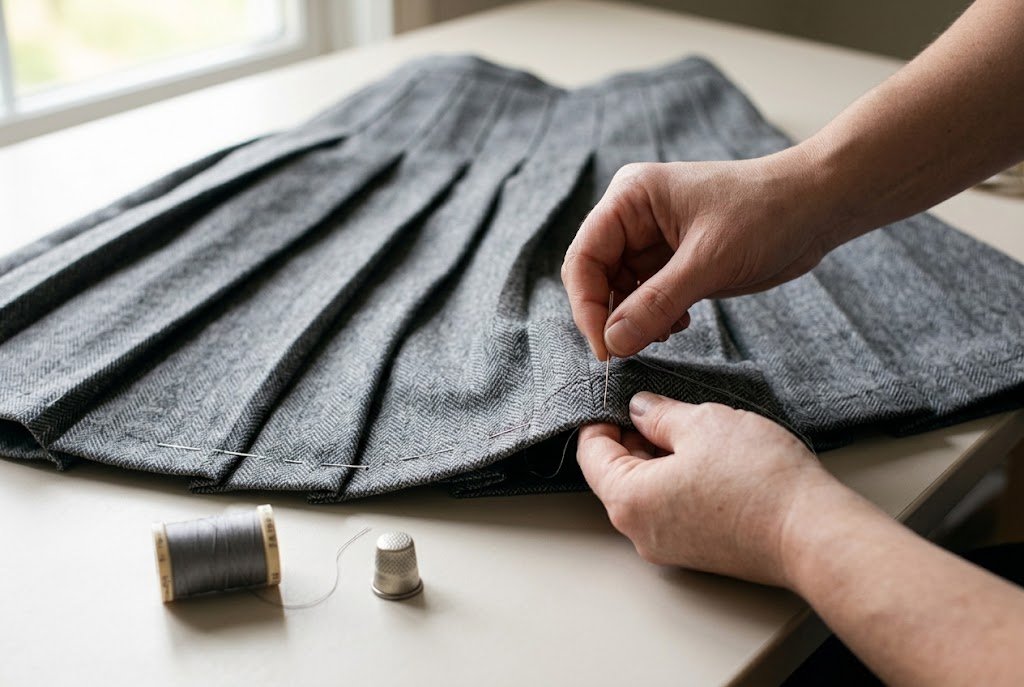
Hemming pleated fabric requires more care than hemming flat fabric. The goal is to finish the lower edge without flattening or shifting the folds.
Before marking the hem, make sure the pleats are still aligned and facing in their intended direction. If the folds tend to open, temporary basting can hold them in place while you work.
Keep the Pleats Aligned at the Hem
Start by marking the hem while the pleats are arranged naturally. Avoid stretching the fabric when measuring because it can change the folds’ position.
For pleats extending to the bottom edge, hand-baste the folds just above the hemline. This gives more control when trimming, folding, and stitching the hem.
A basting line can also prevent narrow pleats from spreading while handling the garment.
Choose a Suitable Hem Finish
The best hem method depends on the fabric, garment, and amount of fullness.
For a machine-stitched hem, use the seam allowance specified by the pattern and sew steadily. Support the fabric so the pleats do not pull or shift as they pass through the machine.
A hand-stitched hem provides better control on lightweight or delicate fabrics. A blind hem stitch works when you want less noticeable stitching on the outside.
Before sewing the finished garment, test the hem method on a fabric sample with the same pleat depth. This shows whether the stitching affects the folds.
Press the Hem Without Flattening the Pleats
Press the hem carefully instead of pressing the entire lower section flat. Work from the appropriate fabric side and use a pressing cloth when needed.
Keep the iron on the hem allowance instead of dragging it across the pleats. Lift and reposition the iron as you move around the garment.
After pressing, check that the pleats keep their original spacing and direction. If a fold has shifted, correct it before finishing the hem.
Sewing Pleats Without a Pattern
You can make simple pleated projects without a commercial pattern. This works well for rectangular skirts, curtains, decorative panels, and other projects with straightforward shapes.
First, determine the finished width you need. Then calculate how much fabric the number and depth of pleats will consume.
Mark the entire panel before folding so the pleats stay evenly spaced. For a skirt, also account for the waistband, seam allowances, ease, and hem.
A fabric rectangle can suffice for some simple pleated skirt designs, but the finished fit depends on waist measurement, fabric characteristics, and construction method.
Also Read: How to Read a Sewing Pattern? Easy Step-by-Step Guide
Fork Pleats Hack
A dinner fork can serve as a quick spacing guide for very small pleats. Fold the fabric around the fork tines consistently, then press or secure each fold before moving to the next section.
This method is useful for small decorative projects or narrow fabric strips. It is less practical for a full garment because maintaining identical spacing over a long piece takes a lot of time.
For a fitted or pattern-based garment, measured markings are more reliable than a fork. Use the fork method as a shortcut, not a replacement for accurate measurements.
Common Mistakes and How to Fix Them
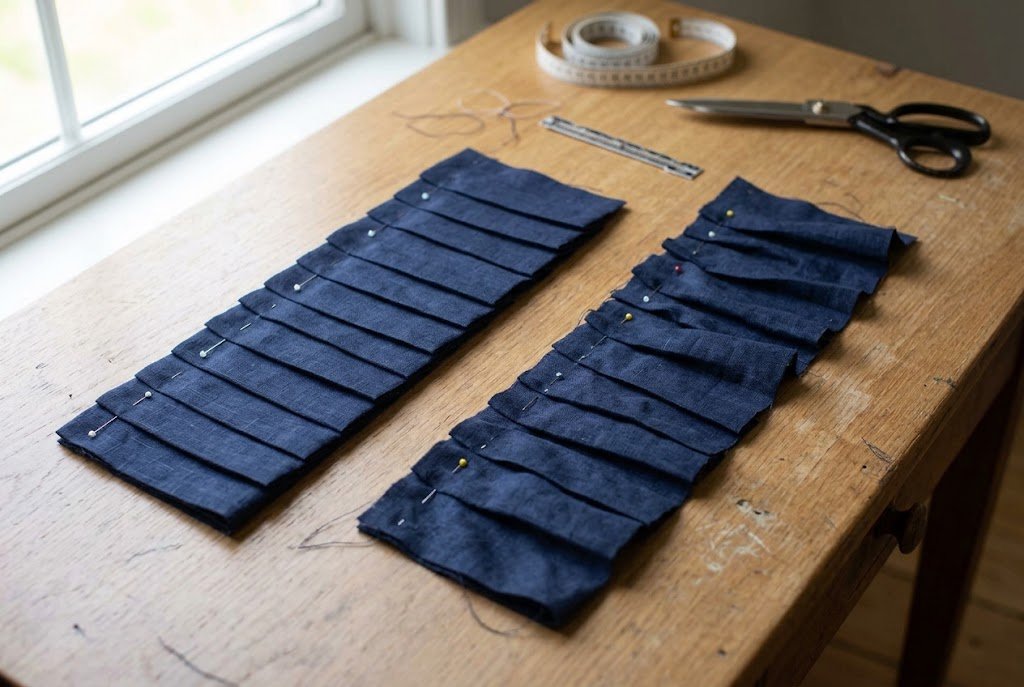
Pleats can look uneven or lose their shape when the fabric is marked, folded, pressed, or stitched inconsistently. Most problems are easier to fix before the pleats are permanently attached.
Uneven Pleats
Uneven pleats usually begin with inconsistent measurements or folding.
Measure each section carefully before folding and compare neighboring pleats as you work. If you notice a difference before permanent stitching, unfold the affected section and correct the markings instead of adjusting the fold by eye.
A clear ruler, seam gauge, and fabric-safe marking tool make repeated measurements easier.
Pleats Pointing in Different Directions
This problem usually occurs when the fold direction was not clearly marked.
Before folding, use small arrows or temporary marks to show which way each pleat should turn. Check the first few folds before continuing across the piece.
For knife pleats, all folds should follow the same direction. Box and inverted pleats require more attention because the folds turn toward or away from a center point.
Pleats Unfolding After Washing
Some fabrics do not retain a sharp pressed crease after laundering. This depends on the fiber content, fabric construction, and finishing process.
Test a pleat on a fabric scrap before starting the project. Wash and dry the sample according to the care method, then check how well the fold remains.
If the fabric needs pressing after washing, reshape the pleats during ironing and follow the manufacturer’s care instructions.
Too Much Bulk at the Seam
Several folded layers can create considerable bulk around a waistband, side seam, or other joining point.
Where the pattern allows, grade bulky seam allowances so the layers don’t end in the same place. Press the seam carefully and avoid removing fabric from the structural part of the pleat unless the pattern calls for it.
If the fabric is particularly thick, consider whether a shallower pleat or lighter-weight material would produce a cleaner result.
Pleats Shifting While Sewing
Pleats can move when the fabric is fed through the sewing machine, especially when several folded layers are joined.
Baste across the top edge before sewing the permanent seam. Keep the fabric supported and guide it gently as it approaches the presser foot.
Do not pull the fabric through the machine. Let the feed dogs move the layers at a steady pace.
Also Read: Why Does My Sewing Machine Keep Jamming? Easy Fixes
Pleats vs Gathers vs Darts: When to Use Each
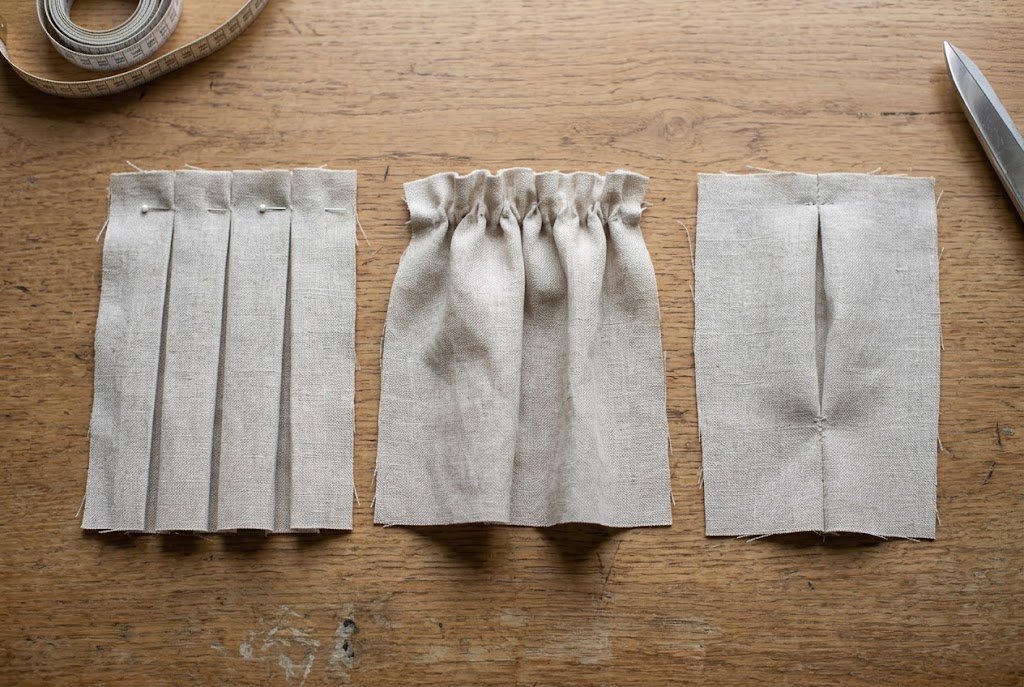
Pleats, gathers, and darts all control fabric, but they create different types of shape and fullness.
| Technique | Appearance | Main Purpose |
|---|---|---|
| Pleats | Planned, visible folds | Controlled fullness and structure |
| Gathers | Small, soft ripples | Fuller, softer volume |
| Darts | Tapered shaping | Fitting fabric around the body |
Choose pleats when you want controlled fullness with visible folds. They work well on skirts, trousers, dresses, curtains, and other projects where the folds are part of the design.
Choose gathers when you want a softer transition between a wider piece of fabric and a narrower one. Gathers are common on sleeves, skirts, ruffles, and other designs where a relaxed effect is desired.
Darts work differently because they remove fabric through a tapered fold. They are mainly used to shape garments around areas such as the bust, waist, and hips without adding the visible fullness created by pleats or gathers.
Understanding these differences makes it easier to choose the right technique for the shape and appearance you want.
Also read: How to Do Darts in Sewing the Easy Way
Conclusion: How to Sew Pleats?
Learning how to sew pleats becomes easier when you understand the process of marking, folding, pressing, securing, and stitching. The sewing machine handles only part of the work. Accurate measurements and careful preparation strongly affect the finished result.
For your first project, try simple knife pleats on stable woven fabric. Once the folds feel familiar, experiment with box, inverted, or accordion pleats. A small practice sample helps you understand the fabric’s behavior before starting a complete garment.
With consistent marking and pressing, you can use pleats to add structure and controlled fullness to skirts, dresses, curtains, and other sewing projects.