How to Read a Sewing Pattern? Easy Step-by-Step Guide
Reading a sewing pattern can feel confusing at first. The envelope shows several views, the instructions have unfamiliar terms, and the pattern pieces are covered with lines and symbols. Once each part has a clear purpose, the process becomes easier.
Learning to read a sewing pattern is not about memorizing every symbol. It is about knowing where to find the information needed at each stage. The envelope covers sizing and fabric, the pattern pieces show construction details, and the instructions explain the sewing order.
One lesson from working with patterns is simple: do not rush to cut. Check the selected view, compare body measurements with the size chart, identify the required pieces, and review the layout first. A few extra minutes can save fabric and prevent mistakes.
This guide explains how to read a sewing pattern step by step, including sizing, symbols, fabric requirements, cutting layouts, and sewing instructions. By the end, the pattern will feel like a clear roadmap rather than a page of confusing markings.
Key Takeaways
What a Sewing Pattern Is
A sewing pattern is a template that helps you cut fabric into the shapes needed to make a garment or sewing project. Commercial patterns usually include an envelope, printed pattern pieces, and written instructions.
Each pattern piece has a specific purpose. A simple blouse, for example, may include a front, back, sleeve, collar, and facing. The pattern also shows how many of each piece to cut and how they should be positioned.
Think of the pattern as a roadmap for the project. You do not need to memorize every marking before starting. The key is to understand what the envelope, pattern pieces, symbols, and instructions tell you at each stage.
Pattern Pieces and Views
Many patterns offer several versions of the same design, known as views. Each view may have different sleeves, necklines, lengths, or other design details.
For example, one pattern might include:
The front of the envelope usually shows these options. Check the view carefully before cutting because each version may require different pattern pieces.
A letter beside the garment illustration usually identifies each view. Mark the chosen view on the instruction sheet before beginning so the correct pieces stay easy to identify.
How to Read the Pattern Envelope
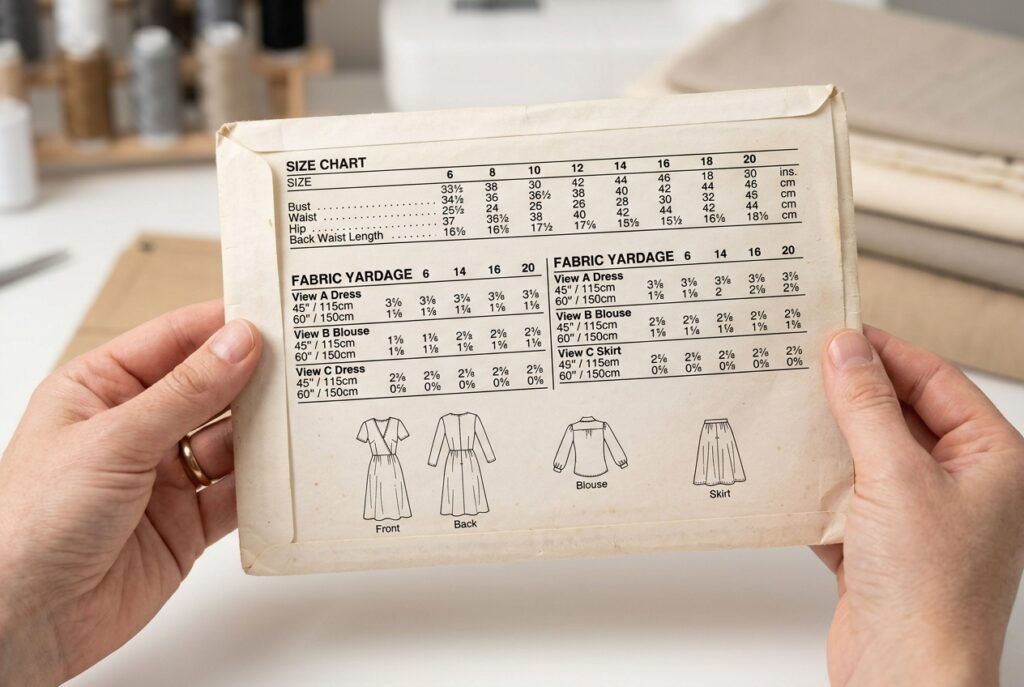
The pattern envelope is the first place to look as it provides an overview of the project. Before opening the pattern sheets, study both sides carefully to understand the available views, sizing, fabric, and other requirements.
How to Read the Pattern Envelope Front and Back
The front usually shows the finished garment or project and may include several views or style variations. Check the letters or numbers beside each view to decide which version you plan to make.
The back usually provides practical details such as:
Check these details before buying fabric or cutting the pattern. Different sizes, views, or fabric widths can change the amount of fabric required.
Check the Recommended Fabrics
Pattern envelopes often suggest fabrics based on the design’s weight, drape, stretch, or structure. Common recommendations include cotton, linen, rayon, challis, flannel, denim, knits, and wool blends.
Do not choose fabric based only on appearance. Fabric that behaves differently from the recommended type can affect the fit, drape, and construction of the finished garment.
For a first project, staying close to the suggested fabric type usually makes the pattern easier to handle and the final result more predictable.
How to Choose Sewing Pattern Size
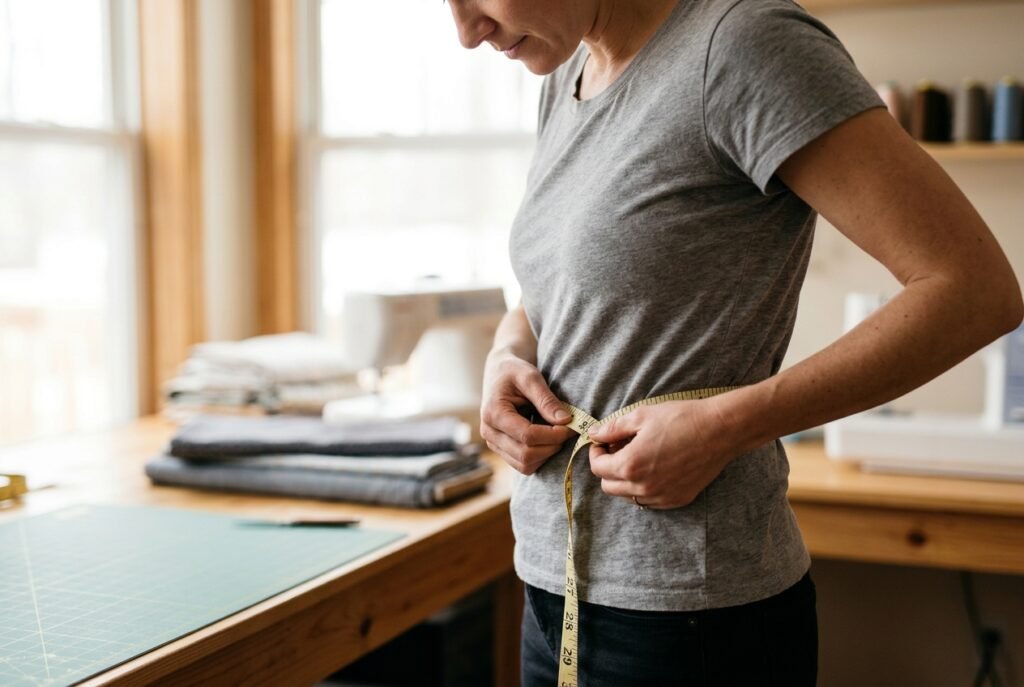
Choosing a pattern size starts with measurements, not the size usually bought in a store. Commercial pattern sizing and ready-to-wear sizing do not always match, so use the chart provided with the pattern.
Use Your Body Measurements
Take accurate measurements before selecting a size. Depending on the garment, the pattern may require:
Compare your measurements with the sewing pattern size chart. Keep the tape comfortably against the body without pulling it tight.
Check Finished Measurements
Some patterns also provide finished garment measurements. These show the approximate dimensions of the completed garment at key points.
The difference between body and finished measurements shows the amount of ease in the design. For example, if a pattern recommends a 38-inch bust and the finished bust measures 42 inches, the garment has about 4 inches of extra room there.
Use these measurements to understand the intended fit before cutting.
What If You Fall Between Sizes?
Do not worry if your measurements do not match one size exactly. It is common to need different sizes for different body areas.
For example, a garment may need a smaller size at the bust and a larger size at the hip. When the pattern has nested cutting lines, you can often blend the transition gradually between sizes.
For fitted garments, pay particular attention to the finished measurements and any fitting guidance included with the pattern.
Understanding Sewing Pattern Symbols
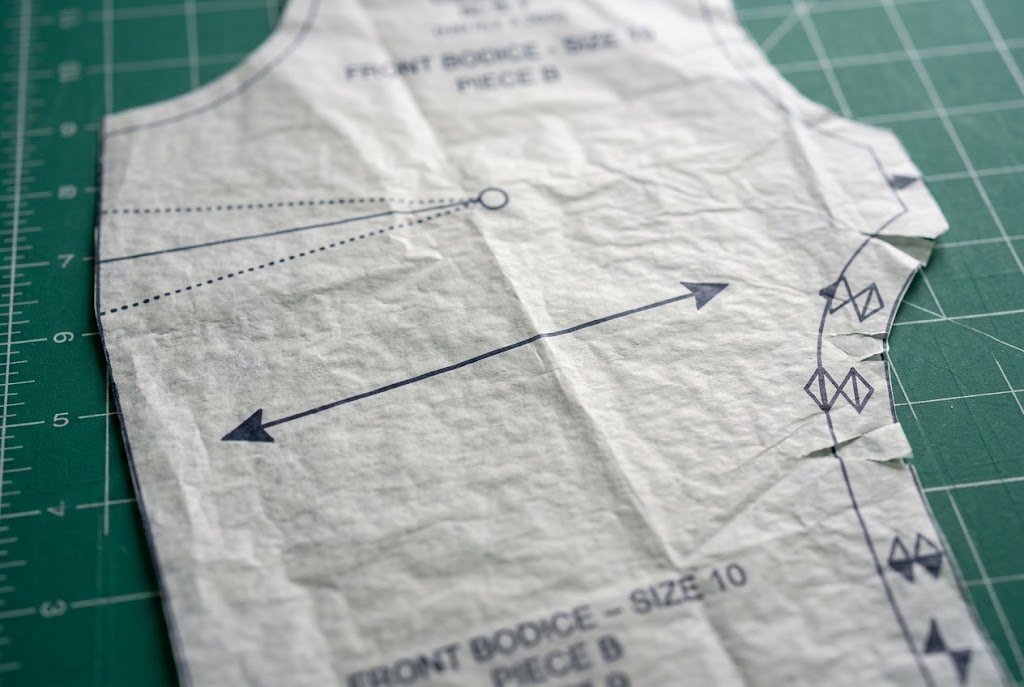
Pattern symbols are the visual language of a sewing pattern. They show where to cut, fold, match, shape, or place parts of the project. Once common markings are familiar, pattern pieces become easier to understand.
Grainline
The grainline is usually a long line with arrows at one or both ends. Place it parallel to the fabric’s lengthwise grain unless the pattern gives other instructions.
Following the grainline correctly helps the finished garment hang and fit as intended.
Notches
Notches are small marks along the edges of pattern pieces. They help match one piece to another during construction.
A pattern may use single, double, or triple notches to distinguish pieces or matching points. Transfer them carefully to the fabric before removing the pattern pieces.
Fold Line
A line marked “Place on Fold” means that edge must sit against the folded fabric edge. When opened, the piece forms a complete shape.
Check the cutting layout carefully to make sure the fold edge is positioned correctly.
Darts
Darts shape flat fabric around the body, often at the bust or waist. They may appear as two lines that meet at a dart point or as a combination of lines and dots.
Transfer relevant markings accurately before removing the pattern. Even a small change in dart position can affect the fit.
Also Read: What Is a Basting Stitch in Sewing? Easy Guide
Seamline and Seam Allowance
The seamline is where two fabric pieces meet when sewn. The cutting edge lies outside the seamline when the pattern includes a seam allowance.
Check the pattern instructions to confirm the included allowance. Not all patterns use the same measurement.
Also Read: How to Sew a Seam by Hand? Easy 5-Step Guide
Lengthen and Shorten Lines
These horizontal markings show where to adjust the length of a pattern piece. They provide a controlled area to lengthen or shorten the garment while keeping the shape balanced.
Follow the pattern’s adjustment instructions rather than cutting through an arbitrary section.
Button and Buttonhole Markings
Button and buttonhole markings show where closures should be positioned. Transfer these marks carefully since small spacing differences can affect the garment’s appearance.
Also Read: How to Sew an Invisible Zipper? Full Guide
Common Pattern Markings Explained
| Pattern marking | What it means |
|---|---|
| Grainline arrow | Align the piece with the fabric grain |
| Notch | Match adjoining pattern pieces |
| Place on Fold | Position the edge against the fabric fold |
| Dart | Shapes the garment around the body |
| Large dot | Marks a construction or matching point |
| Button marking | Shows button placement |
| Buttonhole marking | Shows buttonhole placement |
| Stitching line | Indicates where a seam may be sewn |
| Lengthen/shorten line | Shows where to adjust pattern length |
| Cutting line | Shows the edge for the selected size |
Symbols can vary slightly between pattern companies. When a marking seems unclear, check the key or the instructions supplied with the pattern rather than relying on assumptions.
How to Read Sewing Pattern Instructions
Once the pattern pieces and markings make sense, turn to the instruction sheet. Read the construction sequence before sewing to know what happens at each stage.
Identify Your View and Pattern Pieces
Find the instructions for the view you selected. If the pattern includes several versions, you may not need every piece or instruction.
Match the piece numbers and names with the instruction sheet. Common pieces are:
Set aside pieces for other views to keep the workspace organized.
Also Read: How to Sew a Pocket Square? Two Easy Methods
Follow the Construction Order
Pattern instructions usually arrange the steps in a logical order. A garment may begin with darts, pockets, or other preparation before the main sections are joined.
Read each step completely before sewing. Watch for instructions on transferring markings, stay-stitching, interfacing, pressing, or attaching another piece first.
Also look for notes such as “View A only” or “Views B and C.” These details can change which pieces or steps apply to your project.
Also Read: 10 Best Iron for Sewing: Top-Rated Picks 2026
Fabric Requirements for Sewing Patterns
The fabric requirements show how much material is needed for the selected size and view. The amount varies by fabric width, garment size, design details, and fabric direction.
Before purchasing fabric, check the correct column on the pattern envelope instead of relying on a general yardage estimate.
Check the Fabric Width
A pattern may provide separate yardage amounts for different fabric widths, such as 45 inches and 60 inches. Select the amount that matches the fabric being purchased.
Do not assume the same yardage works for every width. Narrower fabric may require more yardage because pattern pieces cannot fit as efficiently across the width.
Consider Directional Fabric
Some fabrics have a noticeable direction. Velvet, corduroy, brushed fabrics, and many printed materials are examples.
Pattern pieces may need to face the same direction with these fabrics. Stripes, plaids, and large prints may also require extra fabric to match the design across seams.
For a first project, a fabric that behaves similarly to the pattern’s recommendations is usually easier to handle.
How to Lay Out Fabric for a Sewing Pattern
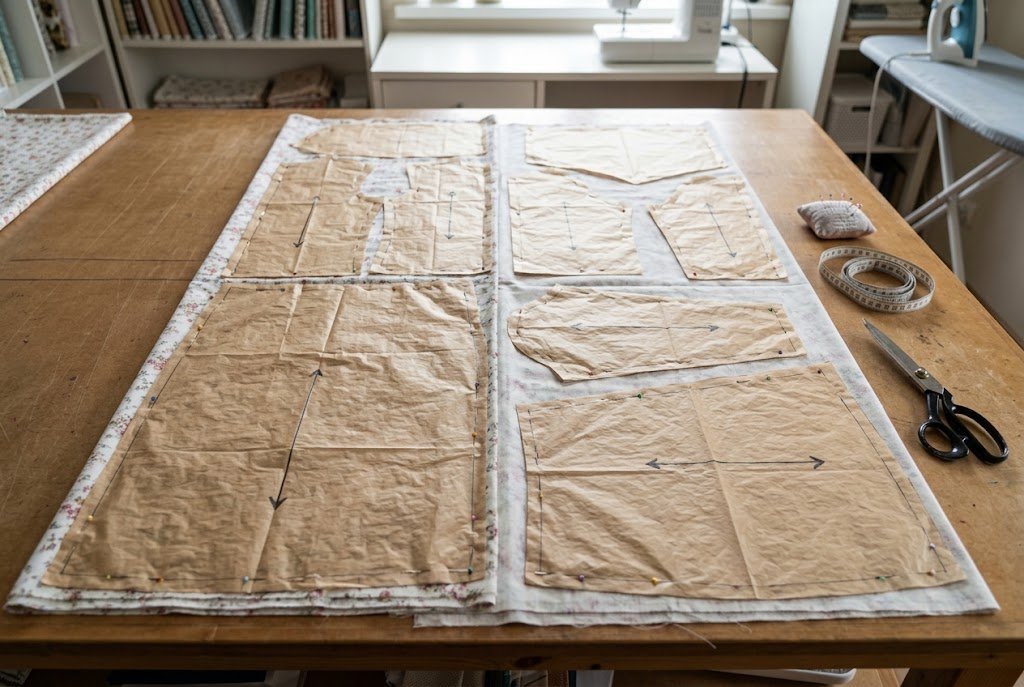
The sewing pattern layout shows how to position pattern pieces on fabric before cutting. It helps maintain the correct grain direction and uses the material efficiently.
Follow the Layout Diagram
Before cutting, identify:
Arrange pieces according to the appropriate diagram. If the pattern has several layouts, choose the one matching your size, view, and fabric width.
Pay close attention to pieces marked “Place on Fold.” Position the indicated edge against the fabric fold so the finished piece has the intended shape.
Check the Grainline
The grainline should run parallel to the selvage unless the pattern says otherwise. Use a ruler or tape to check the distance from both ends of the grainline to the fabric edge.
Do not start cutting until pieces are positioned correctly. A quick layout check can prevent incorrect cuts and fabric waste.
Also Read: Do You Need Safety Goggles When Sewing?
How to Use a Sewing Pattern Before Cutting
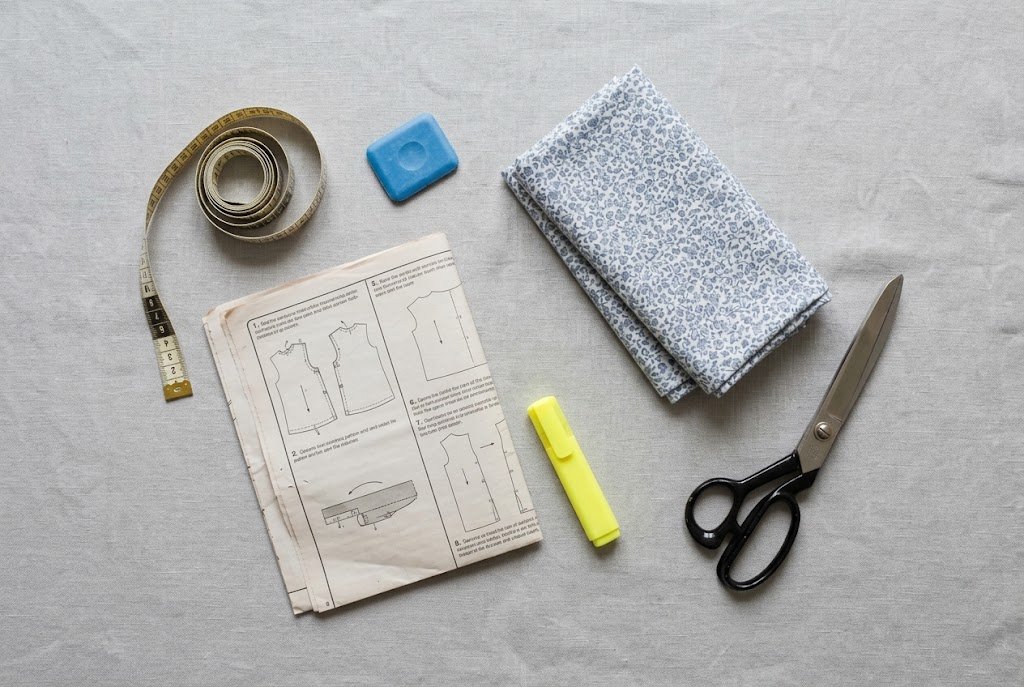
A short preparation routine can make the project easier to manage, especially for beginners.
A Simple 10-Minute Pattern Routine
- Choose the view. Decide which version of the pattern you plan to sew.
- Take your measurements. Record the body measurements required by the pattern.
- Select the size. Compare your measurements with the pattern’s size chart and finished measurements.
- Check the fabric. Confirm the recommended fabric type, width, and required yardage.
- Identify the pieces. Gather only the pieces needed for your selected view.
- Review the markings. Locate grainlines, notches, darts, fold lines, and other important symbols.
- Study the layout. Choose the diagram that matches your fabric width and project.
- Read the instructions. Understand the basic construction order before beginning.
- Arrange the pieces. Place them on the fabric and check the grainlines and fold positions.
- Make a final check. Confirm the size, view, pieces, markings, and layout before cutting.
This routine turns pattern preparation into simple decisions. It also lets beginners catch problems before they become hard to fix.
Common Mistakes When Reading Sewing Patterns
Even experienced sewists sometimes miss a marking or overlook a small instruction. Beginners can avoid many problems by slowing down before cutting fabric.
Choosing the Wrong Size
A ready-to-wear clothing size is not a reliable guide for sewing patterns. Always compare body measurements with the pattern’s size chart and check finished garment measurements if available.
Ignoring the Chosen View
Patterns often include several versions of the same design. It is easy to cut pieces for one view and accidentally follow instructions for a different one.
Mark the selected view on the instruction sheet before starting and separate any unused pattern pieces.
Confusing Multi-Size Cutting Lines
Many commercial patterns include several size lines on the same piece. Following the wrong line can change the fit of the finished garment.
A colored pencil or highlighter can help make the selected cutting line easier to follow.
Skipping the Grainline
The grainline affects how a garment hangs, stretches, and fits. Treat it as an essential instruction rather than a suggestion.
Forgetting Notches and Markings
Notches, dots, darts, and placement markings help pieces align correctly during construction. Transfer them carefully before removing the pattern.
Overlooking Seam Allowances
Check if the pattern includes seam allowances and confirm the amount. Different pattern companies and independent designers may use different measurements.
Cutting Before Checking the Layout
Cutting fabric before reviewing the layout can waste material or cause missing pieces. Arrange all pattern pieces first and confirm grainlines, fold lines, and fabric direction before cutting.
Also Read: Best Sewing Scissors: Top Picks 2026
Assuming Every Pattern Works the Same Way
Pattern companies may use different symbols, instructions, and formatting styles. If a marking seems unclear, refer to the guide supplied with that specific pattern.
Consider a Test Garment for Fitted Projects
For tailored garments or expensive fabric, making a simple test version can help identify fitting or construction issues before cutting the final material.
How to Read a Sewing Pattern Step by Step
A consistent routine makes pattern reading easier. Instead of trying to understand everything at once, work through the pattern in the same order each time.
Start With Four Questions
What am I making? Read the envelope and choose the view you want to sew.
What size should I cut? Use your body measurements and compare them with the pattern’s size chart and finished measurements.
Where do the pieces go? Use the grainlines, notches, fold lines, markings, and cutting layout to position each piece correctly.
What do I sew first? Follow the numbered instructions and complete the construction steps in order.
Follow the Pattern in Order
Once those four questions are clear, follow this simple workflow:
- Read the pattern envelope.
- Check the size chart.
- Review the fabric recommendations and yardage.
- Study the instruction sheet.
- Identify the pieces needed for your selected view.
- Review the symbols and markings.
- Follow the appropriate fabric layout.
- Double-check everything before cutting.
You do not need to understand every marking immediately. Start with the common symbols and the information needed for the current step. With practice, the pattern becomes easier to read and the sewing process feels more natural.
People Also Ask
Conclusion
Learning to read a sewing pattern is easier when you take the information one section at a time. Start with the envelope, choose the right view and size, study the markings, check fabric requirements, and read the instructions before cutting.
Some preparation makes the sewing process more accurate and less frustrating. With practice, grainlines, notches, darts, sizing, and layout diagrams become familiar parts of every project.
The pattern guides the process, not makes it harder. Take time to understand each section before cutting. Soon, those once-confusing sheets will feel like a clear plan for turning fabric into something useful and well-fitted.
Also Read: Top 10 Best Sewing Machines for Intermediate Sewers