How to Sew Gloves? Easy Guide for Beginners
Learning how to sew gloves is easier when the pattern matches the hand and the sewing order is planned before cutting the fabric. The fingers and thumb need careful handling. The basic construction is manageable.
For beginners, a soft stretch knit is a practical starting point because it provides comfort and flexibility when fitting the glove. A custom pattern also allows adjusting finger length, thumb position, and wrist opening for a comfortable fit.
This guide covers the process from tracing the hand and creating a glove pattern to cutting, sewing, fitting, and finishing the pair. The same basic method can also be adapted for fleece, knit fabrics, and other suitable materials.
Key Takeaways
How to Sew Gloves
The simplest way to make gloves at home is to create a pattern from the wearer’s hand. A custom outline provides a better starting point than a generic size, especially when finger length, palm width, or thumb position differs from standard patterns.
For beginners, a medium-weight stretch knit is a practical choice. Jersey, cotton-spandex blends, and lightweight stretch fleece are generally easier to work with than leather or rigid woven fabrics.
Gloves can also be sewn by hand when a sewing machine is unavailable. A machine makes narrow seams quicker to sew, while careful hand stitching works well for small projects and fitting adjustments.
Before You Start
Wash and dry the fabric according to its care instructions before cutting. Prewashing helps prevent unexpected shrinkage after the gloves are finished.
Press the fabric gently so it lies flat but avoid stretching it. Keep the fabric relaxed while preparing the pattern and cutting the pieces.
Have the basic supplies ready, including paper for the pattern, fabric scissors, pins or clips, matching thread, a ruler, and a pencil or fine fabric marker.
Keep the hand relaxed when preparing the pattern. Fingers should sit naturally rather than spread as widely as possible since an exaggerated position can produce an unnecessarily large glove.
The detailed tracing and pattern-drafting process comes next. Once the outline is accurate, the remaining steps become much easier to manage.
Materials and Tools
You do not need many supplies for this project. Having everything ready before cutting and sewing makes the process easier, especially when working with small finger and thumb areas.
Basic Supplies
Also Read: 10 Best Thread for Sewing: Ultimate Guide 2026
Also Read: Best Sewing Scissors: Top Picks 2026
For stretchy fabric, choose a ballpoint or stretch needle that suits the material. These needles help reduce skipped stitches and fabric damage when working with knits.
A standard presser foot works for most home sewing machines. Test the stitch and needle combination on a fabric scrap before sewing the gloves.
If you plan to make several pairs, keep the successful pattern. Mark the size, fabric type, seam allowance, and any fitting adjustments. This record can save time when making another pair later.
For hand sewing, use a sharp needle that passes easily through the fabric and matching polyester thread. Keep stitches small and even, especially around the fingers and thumb.
Also Read: How to Replace a Sewing Machine Needle? Easy Guide
Also Read: How to Load Bobbin in Sewing Machine? Easy Steps
Choose the Right Fabric
Fabric choice affects comfort, fit, and sewing difficulty. For a first pair, moderate-stretch fabric is usually easier to handle because it accommodates small fitting differences and moves comfortably with the hand.
Best Fabric for Beginners
Look for fabric that stretches across the hand and returns to its original shape. Stretch jersey, cotton-spandex blends, and lightweight stretch fleece can work well depending on the type of glove being made.
A fabric with good recovery helps the finished glove stay close to the hand without loosening after use. Before cutting, gently stretch a fabric sample to check if it returns to its original shape.
If you are learning how to sew stretch gloves, avoid extremely thin knits for your first project. Lightweight fabric can curl along the cut edges and may be harder to control around the fingers.
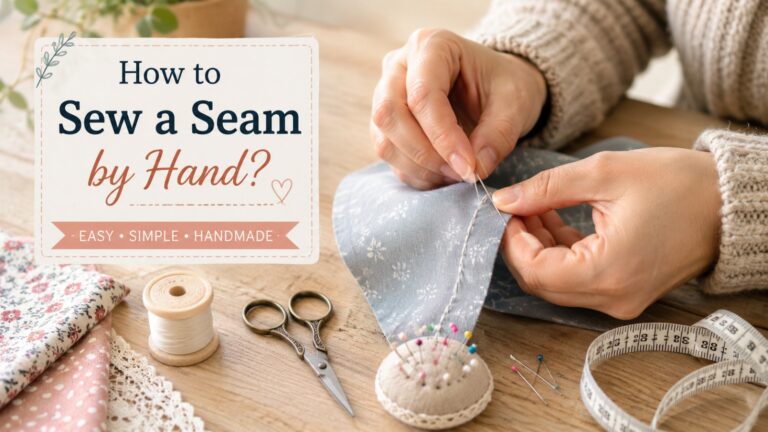
Also Read: How to Sew a Seam by Hand? Easy 5-Step Guide
Other Fabric Options
When learning how to sew knit gloves, test the needle and stitch on a scrap of the actual fabric. The seam should remain secure when the material stretches gently without causing the stitches to break or the fabric to pucker.
How to Make a Glove Pattern
Creating a glove pattern from the hand is one of the most important parts of the project. A careful pattern makes the fingers easier to sew and gives you a better starting point for adjusting the fit.
Trace Your Hand
Place your hand flat on pattern paper with fingers relaxed and slightly separated. Keep the wrist straight and avoid spreading the fingers wider than their natural position.
Trace around the hand with a pencil or fine marker. Hold the pencil upright and move smoothly around each curve instead of pressing tightly against the skin.
Take extra care around the spaces between the fingers. Mark each finger valley clearly so the pattern shows where the seams need to curve.
Remove your hand and inspect the outline. Smooth any sharp corners while keeping the natural shape of the fingers.
For a more accurate fit, compare the pattern with your hand before cutting fabric. Check finger length, palm width, wrist opening, and thumb position.
Add the Seam Allowance
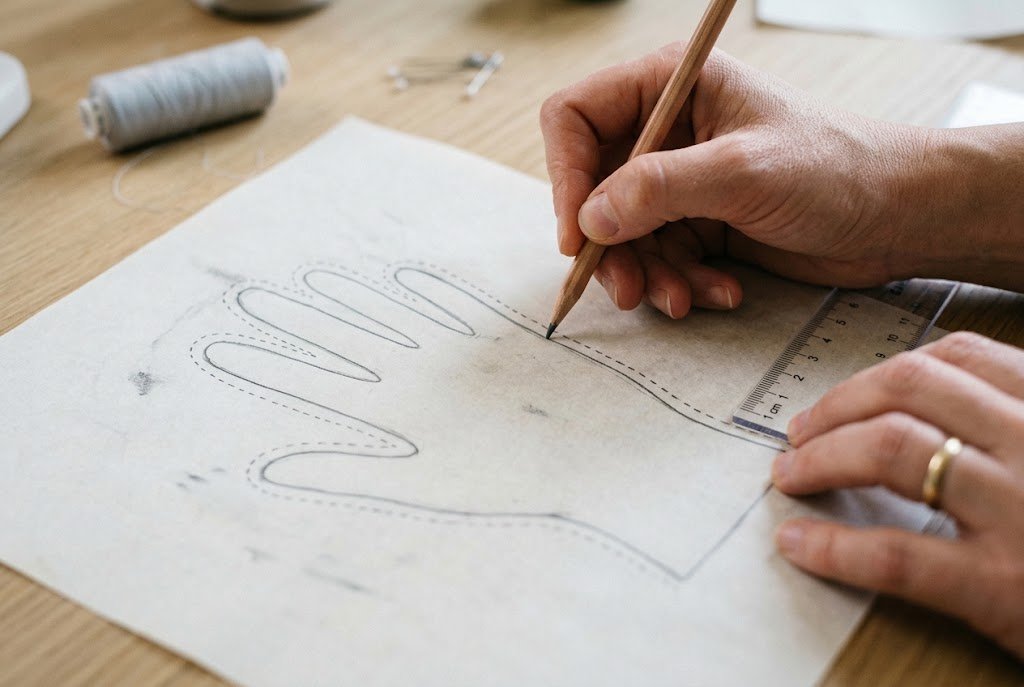
Add a consistent ¼- to ⅜-inch seam allowance around the pattern, depending on fabric and construction method. A wider allowance can make a first sample easier to handle and adjust.
Keep the allowance even around fingers, palm, thumb, and wrist. Uneven allowances can alter finished finger width and make the two glove pieces harder to match.
Do not make the traced outline too tight. The finished glove needs enough room for natural finger movement, and the fabric’s stretch adds flexibility.
Create the Thumb
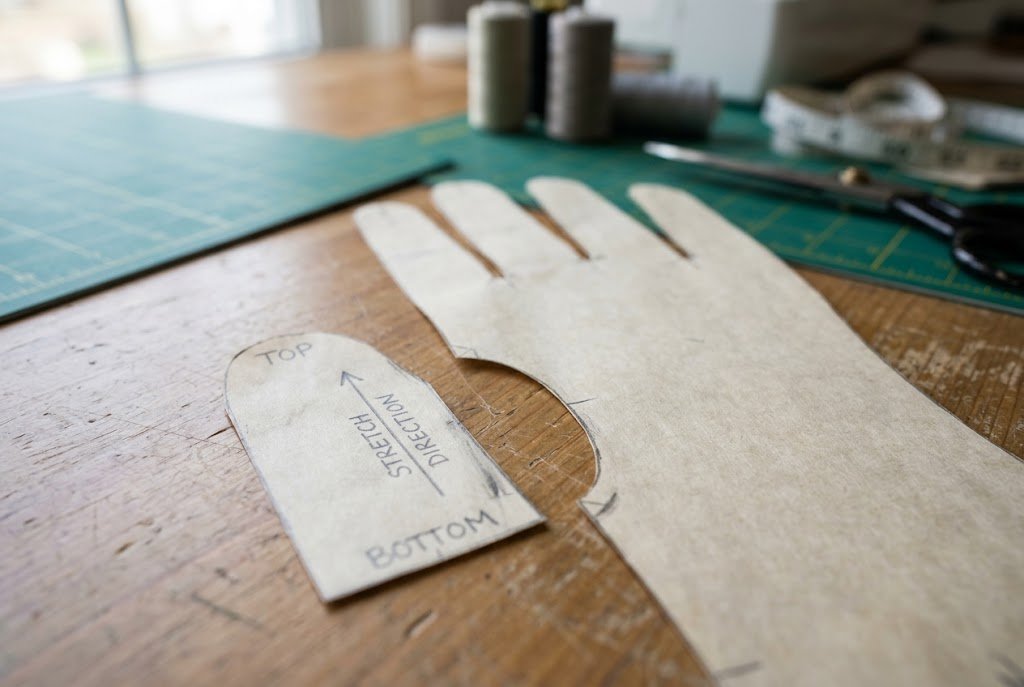
The thumb needs careful attention because its position affects both comfort and movement.
Mark the thumb base clearly on the hand outline. If the design uses a separate thumb piece, draft it to match the opening and include clear alignment marks.
When learning how to make a glove pattern, label the thumb piece with its top, bottom, and direction of stretch. These markings help prevent the piece from being attached upside down or in the wrong direction.
Cut the paper pattern and test the pieces before cutting the final fabric. Hold the pattern against your hand and check that the thumb moves naturally.
If the thumb feels too high, low, or narrow, correct the paper pattern first. A small adjustment now can make a noticeable difference in the finished glove.
Cut the Fabric Pieces
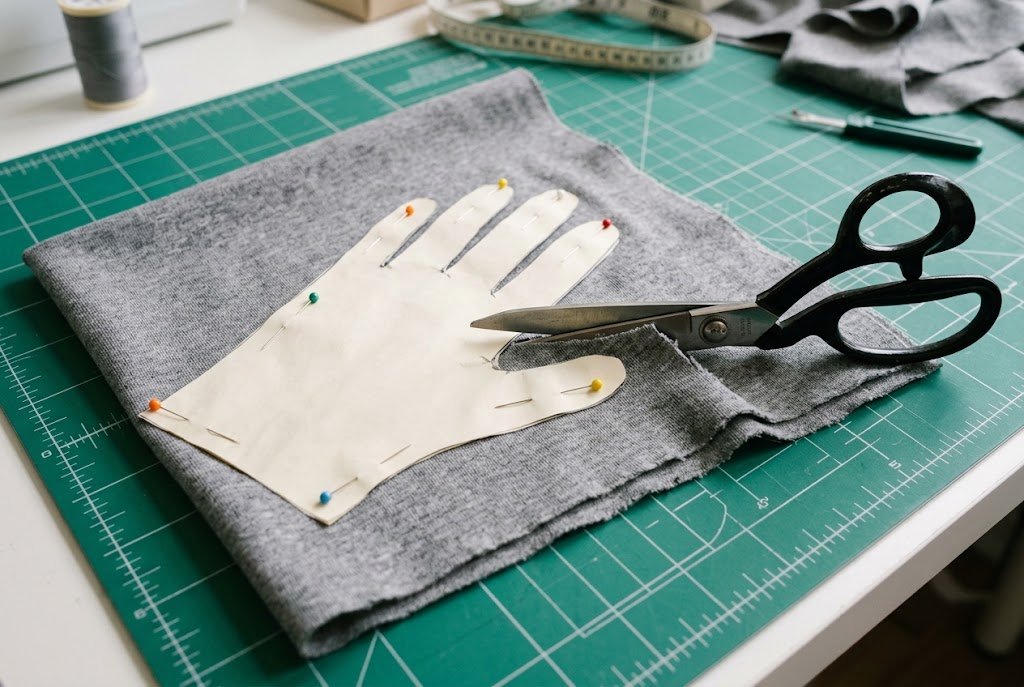
Fold the fabric with right sides together and check stretch direction before placing the pattern. For most stretch knit gloves, the greater stretch runs around the hand, not from fingertips to wrist.
Place the pattern carefully and secure it with clips or pins. Avoid pulling or stretching the fabric while cutting since distortion changes piece size.
Cut the required hand pieces according to the pattern. If the pattern uses a separate thumb, cut those pieces as well.
Mark Important Points
Before removing the paper pattern, transfer the key markings to the fabric:
These markings make sewing easier because the small finger sections look very similar once separated from the fabric.
If the fit is uncertain, make a test glove from inexpensive fabric first. Check the fingers, palm, thumb movement, and wrist before cutting the final material.
Sew the Fingers and Thumb
The sewing order matters because the narrow finger sections become harder to reach after the main glove seams are joined. Start with the smallest areas first, then move toward the thumb and larger seams.
Sew Between the Fingers
Place the matching glove pieces with their right sides facing each other. Align the finger sections and the marked valleys carefully.
Sew the narrow spaces between the fingers with a stretch-friendly stitch. A narrow zigzag or stretch stitch works well for many knit fabrics.
Keep the seam allowance consistent throughout the finger sections. Slow the machine as you approach the curves and fingertips. Careful stitching matters more than speed in these small areas.
If sewing gloves with a machine, test the chosen needle and stitch on a scrap of the same fabric first. The sample should stretch gently without stitches breaking or fabric puckering.
Also Read: Best Sewing Machine for Apparel: Top 10 Picks
Check the Fingertips
Turn the glove right side out carefully after sewing the finger sections. Check each fingertip before moving to the thumb.
Look for:
If a fingertip feels too tight, do not enlarge the entire glove immediately. The problem may come from the fingertip curve, seam allowance, or fabric stretch.
Correct the pattern or stitching before making the second glove. This check can prevent repeating the same fitting problem.
Attach the Thumb
Match the thumb piece with the thumb opening using the markings transferred from the paper pattern. Align the center points and curves before stitching.
Clip around the curved section instead of pulling the fabric into place. Ease the material gradually as you sew to keep the edges aligned.
This step requires particular care when learning how to sew gloves with thumb piece construction. The thumb should extend naturally from the palm without pulling toward the fingers or sitting too high on the hand.
Sew around the opening while maintaining the seam allowance. Then turn the glove right side out and gently move the thumb through its opening.
Check the movement before continuing. If the thumb feels twisted, restricted, or poorly positioned, adjust the pattern before completing the remaining seams.
Assemble the Glove Body
Once the fingers and thumb are secure, align the remaining outer edges of the glove. Match the palm, side seams, and wrist edges carefully to keep the fabric smooth and the glove shaped.
Place the pieces right sides together and clip the edges before stitching. Use the same seam allowance throughout the pattern.
For knit fabric, choose a stitch that allows the seam to stretch with the material. A narrow zigzag or suitable stretch stitch can work well on many home sewing machines.
Check the Seams
After stitching, turn the glove right side out and check the seams carefully. Gently stretch the glove by hand to make sure the stitches flex without opening.
Do not pull aggressively. A light stretch is enough to check if the seam can handle normal hand movement.
Trim bulky seam allowances carefully, particularly around the fingers and thumb. Keep scissors away from the stitching line to keep the seam secure.
If the fabric frays, finish raw edges with a suitable stitch. Knit fabrics usually require less edge finishing than woven materials.
When sewing gloves by hand, use small, even stitches and moderate thread tension. The seam needs enough flexibility to move comfortably with the hand.
Also Read: How to Do a Whip Stitch? Quick Guide
Also Read: How to Do Mattress Stitch? Easy 7-Step Guide
Finish the Wrist Opening
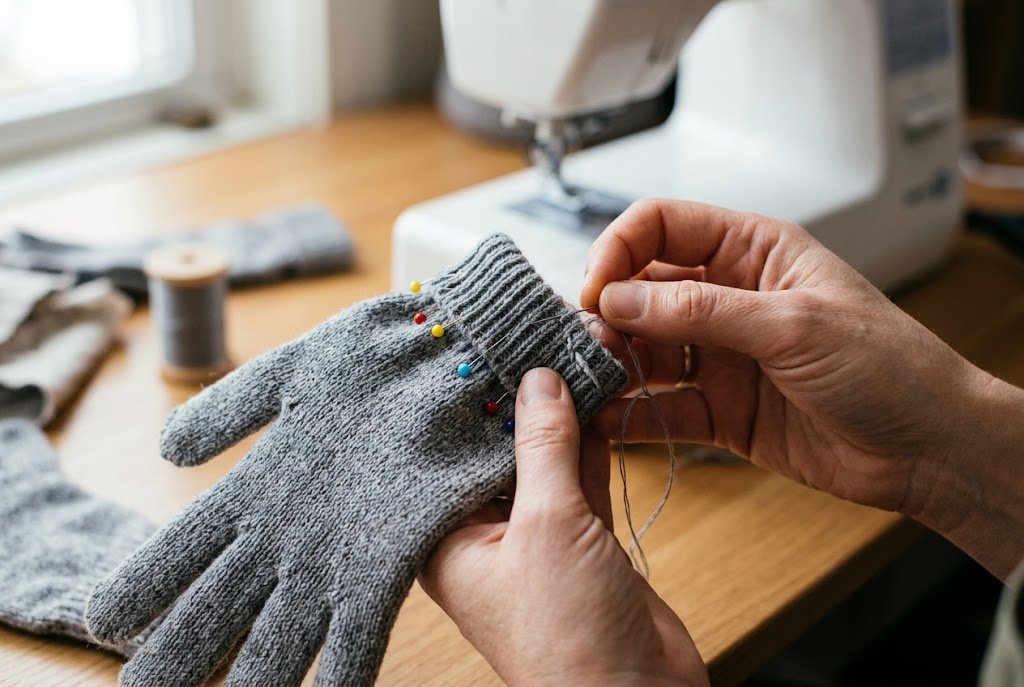
The wrist opening is easy to customize to suit the fabric and style of the glove.
For a simple finish, turn the raw edge inward and stitch it down with a suitable stitch. For stretch fabric, choose a stitch that allows the hem to move without breaking.
Another option is a narrow cuff made from matching rib knit or another suitable stretch fabric. A cuff can create a cleaner finish and help the glove sit securely around the wrist.
Keep the Opening Comfortable
The wrist should feel secure without uncomfortable pressure. Try the glove on before final stitching and move the wrist and fingers naturally.
If the opening feels too tight, enlarge it slightly or adjust the cuff. If too loose, reshape the cuff rather than reduce the glove size. Use a narrow hem or another edge finish suited to the material. The goal is a smooth edge that does not interfere with hand movement.
Fit and Adjust the Gloves
Learning how to sew gloves that fit depends on testing the pattern rather than relying only on measurements. Try the unfinished glove on carefully and assess the fingers, thumb, palm, and wrist separately.
Tight Fingers
If one finger feels restrictive, check its width and seam placement first. A small adjustment to that section may solve the problem without changing the rest of the glove.
Also check the fabric’s stretch. A pattern that works well with one knit may feel tight with a fabric that has less stretch.
Thumb Problems
The thumb should move freely without pulling against the palm.
If it feels too low or too high, compare its position with the original hand tracing. If it pulls toward the index finger, the thumb angle or opening may need adjustment.
Make changes to the paper pattern before cutting another pair. This keeps the correction consistent.
Loose Palm
A loose palm usually means excess width in the pattern. While wearing a test glove, mark where extra fabric gathers, then transfer that adjustment to the paper pattern.
Avoid removing too much at once. Small changes are easier to evaluate and help keep comfortable movement.
Bulky Seams
Thick fleece, layered fabric, and leather can create bulky areas inside the fingers and thumb.
Trim unnecessary seam allowance carefully where construction allows. For thick materials, test the complete seam on a scrap before changing the final glove.
A test version is worth the extra effort. It allows finger width, thumb position, wrist size, and seam bulk to be corrected before the final fabric is cut.
Common Mistakes and Fixes
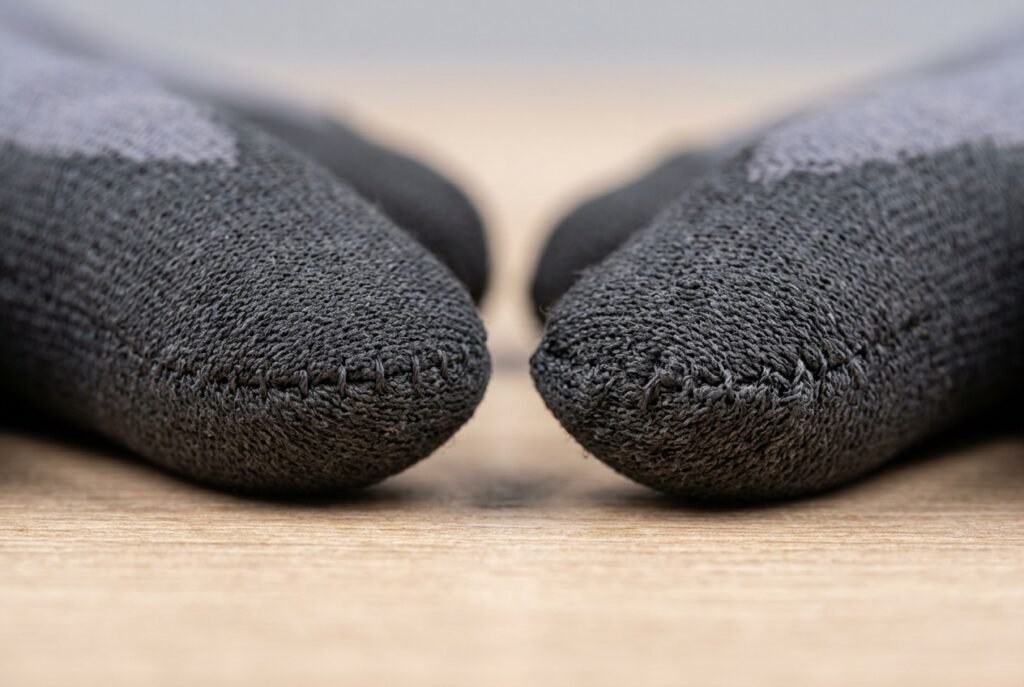
Even a carefully drafted glove pattern can have a few trouble spots. Most problems are easier to solve when the cause is identified before changing the pattern or stitching.
The Fingers Are Too Tight
Cause: The finger sections may be too narrow, the seam allowance may reduce the available space, or the fabric may have less stretch than expected.
Fix: Check the fabric’s stretch first. If the material is suitable, add a small amount of width to the affected finger on the paper pattern and test again.
The Thumb Pulls or Feels Awkward
Cause: The thumb opening may sit at the wrong angle or position.
Fix: Compare the opening with the natural position of the thumb. Adjust the paper pattern gradually and test the revised shape before cutting the final fabric.
The Seams Pop When the Glove Stretches
Cause: The stitch may not provide enough flexibility, or the machine settings may not suit the fabric.
Fix: Test a narrow zigzag or suitable stretch stitch on a fabric scrap. Check needle, stitch length, and thread tension before sewing the glove again.
Also Read: Why Does My Sewing Machine Keep Jamming? Easy Fixes
The Glove Looks Twisted
Cause: The fabric may have shifted during cutting or sewing, or the stretch direction may not be positioned correctly.
Fix: Check fabric orientation and pattern placement. Keep the material flat while cutting and avoid pulling it through the machine.
The Fingertips Look Uneven
Cause: The finger curves may not match between the pattern pieces, or the stitching may have wandered around the small curves.
Fix: Compare the paper pattern pieces and smooth uneven curves. During sewing, slow down around the fingertips and keep the seam allowance consistent.
Also Read: How to Sew a Seam by Hand? Easy 5-Step Guide
The Glove Feels Bulky
Cause: Thick fabric or excessive seam allowance can create uncomfortable ridges inside the fingers and thumb.
Fix: Test a thinner material or trim unnecessary seam bulk where construction allows. Do not cut close to the stitching line.
The Glove Does Not Fit Evenly
Cause: The hand tracing may not accurately reflect the natural position of the fingers, palm, or thumb.
Fix: Use the test glove to identify where the fit is wrong. Transfer each adjustment to the paper pattern instead of changing the finished glove randomly.
FAQs about Sew Gloves
Final Thoughts
Learning to sew gloves becomes easier when the project is divided into manageable stages. A carefully traced pattern, suitable fabric, consistent seam allowance, and patient stitching provide a solid foundation for a comfortable pair.
A first attempt does not need to be perfect. Treating it as a fitting sample makes it easier to adjust the fingers, thumb, palm, and wrist before using the final fabric.
Once the pattern fits well, keep it for future projects. Small changes in fabric, cuff style, or length can turn the same basic pattern into different glove designs.
Also Read: How to Sew a Pillow: Easy Guide for Beginners
Also Read: How to Sew a Tote Bag With Flat Bottom? Easy Guide
Also Read: 10 Best Sewing Books for Beginners: Top Picks 2026