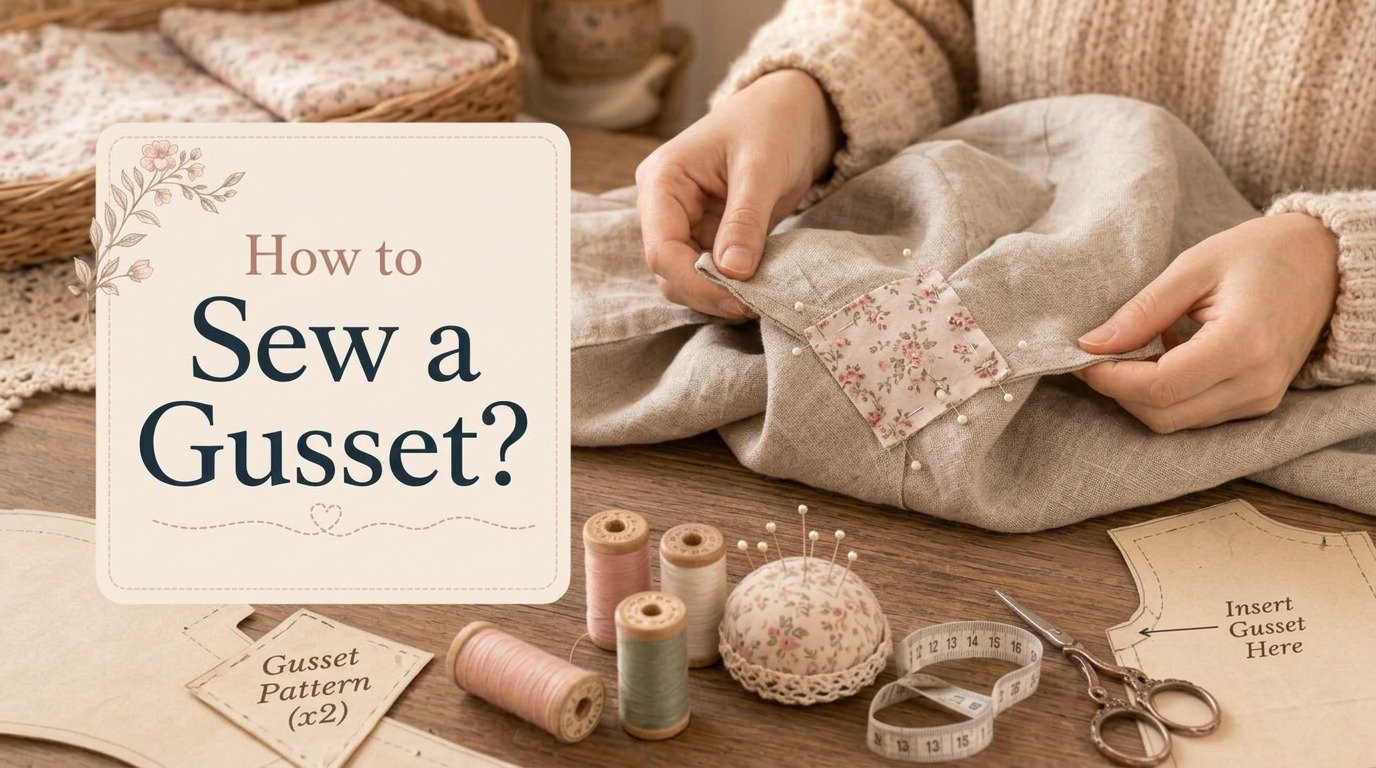
How to Sew a Gusset? Easy Step-by-Step Guide
A gusset may look like a small piece of fabric, but it greatly affects how a sewing project fits and performs. It adds extra room where movement matters most and reduces strain on seams that experience frequent stress, helping your projects fit better and last longer.
Learning how to sew a gusset is a valuable skill for both beginners and experienced sewists. Whether adding comfort to clothing, improving the fit of pants and dresses, or creating depth in a tote bag, a properly sewn gusset enhances both function and durability.
This guide explains what a gusset is, when to use one, how to choose the right fabric, and the step-by-step process for sewing gussets into clothes and bags. It also offers practical tips and common mistakes to help you achieve neat, professional-looking results, so you can sew with more confidence and better outcomes.
Key Takeaways
What Is a Gusset?
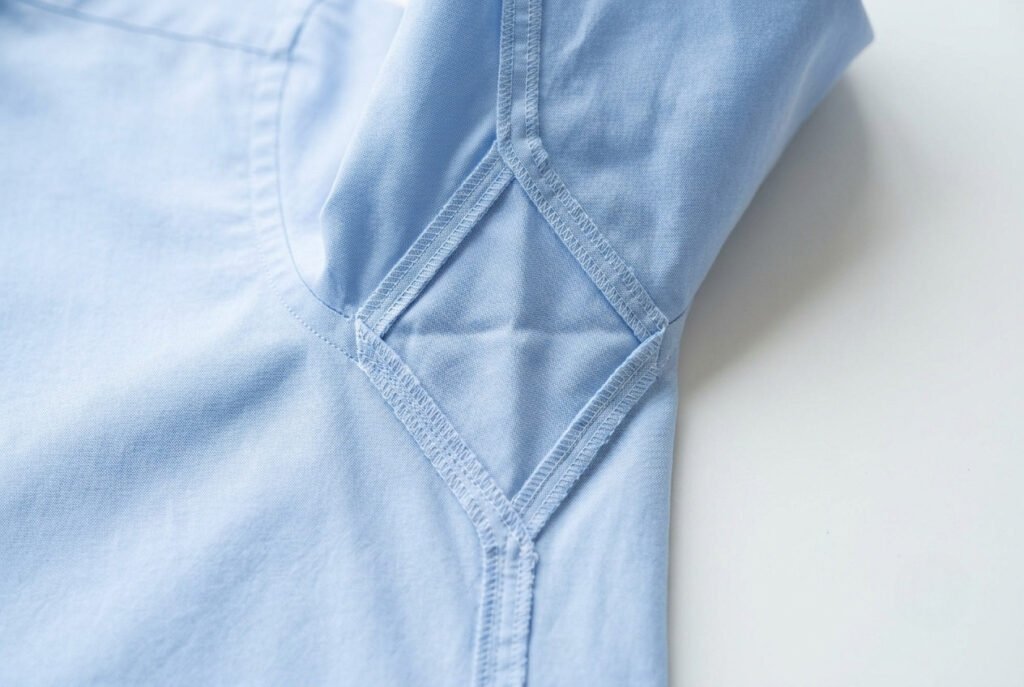
A gusset is a small piece of fabric sewn into a seam to provide extra space where movement is needed. Instead of forcing a seam to stretch beyond its limit, the added fabric lets a garment or bag move more naturally. A gusset distributes stress over a larger area instead of placing strain on a single seam. This improves comfort and extends the life of the finished project.
Gussets are commonly used in areas that experience frequent movement or pressure. They can also improve the shape and function of bags by adding depth and stability.
You’ll often find gussets in:
Besides improving movement, gussets help reduce seam stress and make sewing projects more durable. A well-placed gusset can also solve fit issues without changing the overall pattern.
Common Gusset Shapes
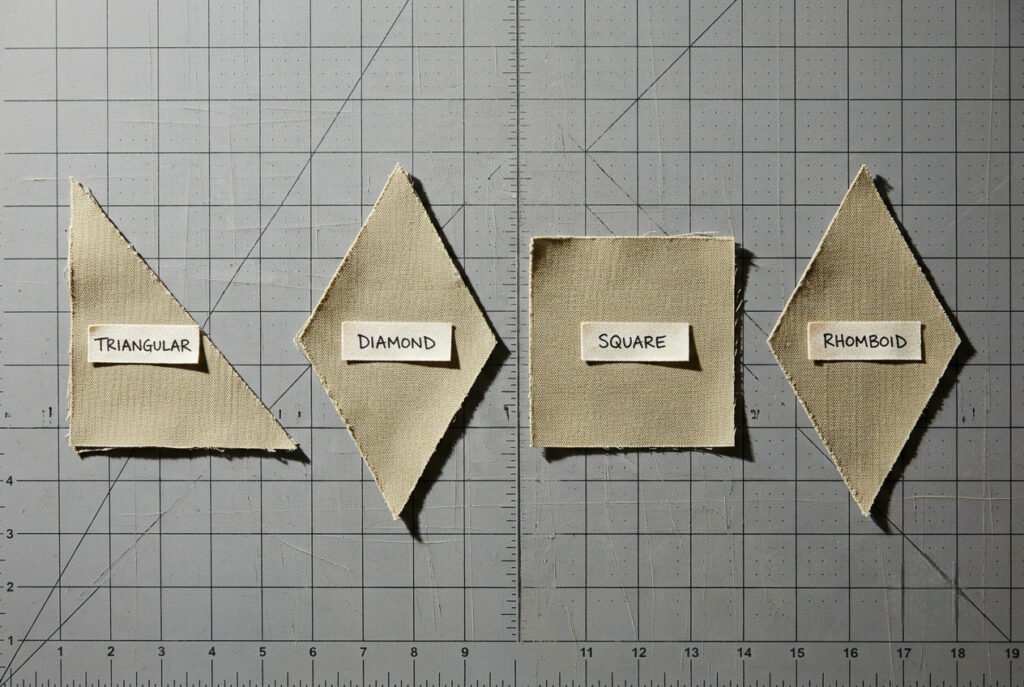
Different projects call for different gusset shapes. Choosing the right one depends on how much extra room or support the project needs.
Triangular Gusset
A triangular gusset works well when only a small amount of extra space is needed. It is commonly used in sleeves, side seams, and garment repairs where flexibility is required without adding bulk.
Diamond Gusset
The diamond gusset is one of the most popular choices for clothing. It allows movement in multiple directions, making it ideal for underarms, crotch seams, and fitted garments that require greater freedom of movement.
Square Gusset
Square gussets are simple to cut and sew, making them a popular option for beginner projects. They are often used in clothing repairs, tote bags, pouches, and other accessories that need added structure or space.
Rhomboid Gusset
A rhomboid gusset, sometimes called an elongated diamond, provides extra flexibility while maintaining a smooth fit. It is commonly used in garments and structured projects needing additional movement without adding bulk.
When to Use a Gusset
A gusset is useful whenever a seam needs more room, better flexibility, or added strength. Instead of increasing the size of an entire garment or accessory, it adds space only where needed most.
Consider adding a gusset when:
Adding a gusset is often a cleaner, more practical solution than resizing an entire pattern. It improves comfort, reduces seam stress, and helps the finished project last longer.
Underarm Gussets
Underarm gussets increase the range of motion in shirts, jackets, dresses, and other fitted garments. They reduce pulling when raising the arms and help prevent stress on the sleeve seams.
Crotch Gussets
Pants, leggings, activewear, and children’s clothing benefit from crotch gussets because they improve comfort and allow greater freedom of movement. They also distribute stress across multiple seams, reducing the chance of seam failure.
Dresses and Fitted Garments
A gusset can provide extra room in fitted dresses without changing the overall style or silhouette. It is especially helpful when more ease is needed around the underarms or hips.
Bags and Accessories
Adding a gusset increases the depth and capacity of tote bags, handbags, backpacks, and storage pouches. It also helps the bag maintain its shape when carrying heavier items.
Lingerie and Athletic Wear
Stretch garments experience frequent movement during everyday wear and exercise. A gusset improves comfort, supports natural movement, and strengthens high-stress areas subject to repeated use.
Tools and Materials
You don’t need expensive equipment to sew a gusset. Most projects require only a few basic sewing tools, many of which are included in a standard sewing kit.
Essential Tools
Gather these supplies before you begin:
Also Read: 10 Best Thread for Sewing: Ultimate Guide 2026
Also Read: Best Sewing Scissors: Top Picks 2026
Also Read: Can You Embroider With a Sewing Machine? Easy Guide
Helpful Extras
These tools aren’t essential, but they can make the process easier:
Also Read: How to Sew a Rip? Easy 6- Step Guide
Before You Sew
Choosing the right fabric is just as important as using the right tools. Whenever possible, match the gusset fabric to the main project in weight, stretch, texture, and drape. Similar fabrics create smoother seams, improve comfort, and help the finished project wear evenly over time.
If you’re working with slippery, stretchy, or unfamiliar fabric, sew a few test stitches on a scrap piece first. This quick step lets you check the stitch length, thread tension, and needle choice before sewing the final project.
How to Sew a Gusset Step by Step
Now that the gusset is cut and the opening is ready, it’s time to start sewing. The process is easier than it may seem when each step is completed carefully. Working slowly and sewing one seam at a time helps keep the gusset aligned and prevents puckering.
Whether adding extra room to a garment or creating depth in a bag, the same basic method applies. The only differences are fabric type and seam finish.
Step 1: Prepare and Measure the Opening
Begin by measuring the section where the gusset will be inserted. The opening should match the gusset closely for a smooth fit.
If altering an existing garment, compare the opening with the gusset before cutting. For new projects, follow the measurements provided in the sewing pattern.
Double-check every measurement before moving forward. Even a small difference can affect the finished fit.
Step 2: Cut the Gusset
Transfer the gusset shape onto the fabric using tailor’s chalk or a washable fabric marker. Cut carefully along the marked lines to keep every edge smooth and accurate.
Remember to include the seam allowance if it is not already part of the pattern. Most sewing patterns use a ⅜-inch or ½-inch seam allowance, but always follow your pattern’s instructions.
If the fabric frays easily, finish the raw edges before sewing with a zigzag stitch, serger, or pinking shears.
Step 3: Mark the Center Points
Fold the gusset gently to find the center of each side, then mark those points with chalk or small clips.
Next, mark the matching center points on the garment or bag opening.
These reference marks make it much easier to align the fabric evenly and achieve neat, symmetrical seams.
Step 4: Pin the First Side
Place the right sides of the fabric together and match the center marks first. Then pin toward each corner, smoothing the fabric as you work.
Avoid stretching the fabric during this step. If you’re working with slippery or stretchy material, sewing clips often provide better control than traditional pins.
Before stitching, check that the fabric lies flat without folds or twisting.
Step 5: Sew One Side at a Time
Begin stitching at one end using the recommended seam allowance. Sew slowly toward the first corner, keeping the fabric flat instead of pulling it through the machine.
When you reach a corner or seam intersection, stop with the needle in the fabric, lift the presser foot if needed, and carefully pivot or reposition the fabric before sewing the next side. This technique helps create sharp corners and keeps the gusset properly aligned.
Repeat the same process for each remaining side. Sewing one seam at a time gives better control and reduces the chance of twisting or uneven stitching.
Backstitch at the beginning and end of each seam to reinforce areas under frequent stress.
Also Read: How to Sew a Seam by Hand? Easy 5-Step Guide
Step 6: Clip the Seam Allowances
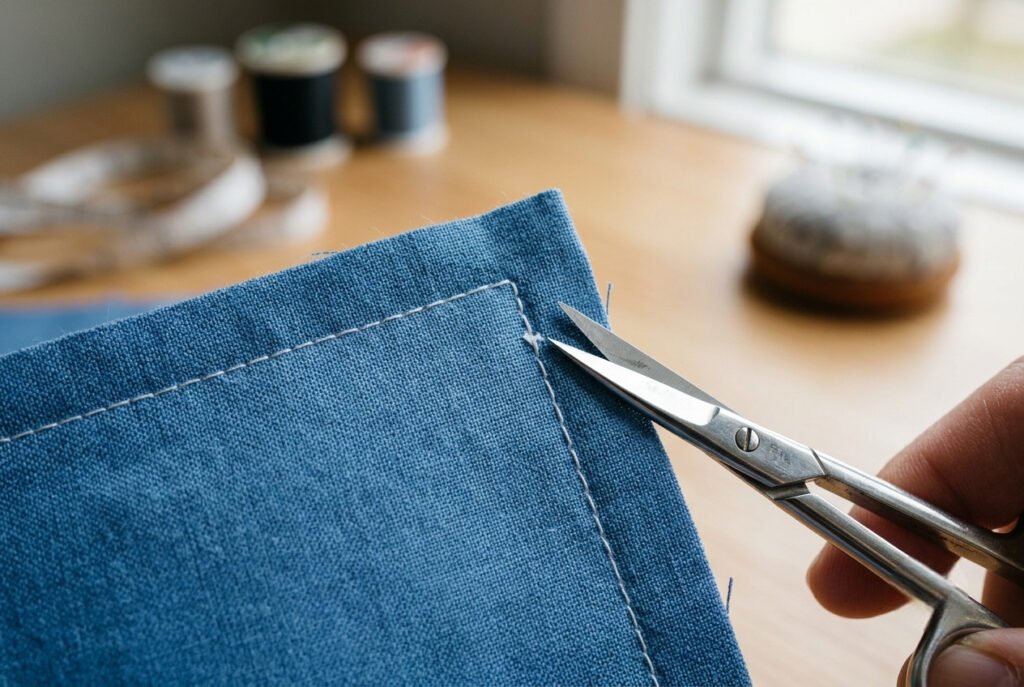
Once all sides are attached, carefully clip into the seam allowance at each corner without cutting through the stitches.
These small clips allow the fabric to spread naturally, reduce bulk, and help the gusset lie flat after turning.
For heavier fabrics, grading the seam allowances by trimming each layer to a different width can further reduce bulk.
Step 7: Press Every Seam
Press each seam as soon as it is sewn using an iron suitable for the fabric type.
Instead of sliding the iron across the fabric, lift and press. This preserves the gusset’s shape and prevents stretching.
Regular pressing creates flatter seams, improves accuracy during sewing, and gives the finished project a more professional appearance.
Also Read: 10 Best Iron for Sewing: Top-Rated Picks 2026
Step 8: Finish the Raw Edges
Finish the seam allowances using the method that best suits the fabric.
Common finishing techniques include:
Finishing the raw edges helps prevent fraying and improves project durability, especially in areas with frequent wear.
Also Read: How to Sew Binding on a Quilt? Step-by-Step Guide
Tips for Sewing a Gusset Successfully
Small adjustments during sewing can make a noticeable difference in the final result.
Work Slowly Around Corners
Corners require careful stitching. Reducing your sewing speed gives better control and helps maintain accurate seam lines.
Use Plenty of Pins or Clips
Secure the fabric well before sewing. Extra pins or clips help prevent shifting, particularly when working with slippery fabrics or knit materials.
Press After Every Seam
Don’t wait until the project is finished. Pressing each seam keeps the fabric flat and makes the following steps easier.
Reinforce High-Stress Areas
Underarms, crotch seams, and bag corners experience repeated movement. Extra reinforcing stitches can improve durability.
Test Your Stitch Settings First
Practice on a scrap of the same fabric before sewing the final project. Testing helps confirm the correct stitch length, thread tension, and needle choice while reducing the risk of puckering or skipped stitches.
Trim Excess Bulk
Several seam allowances meeting at one point can create unnecessary thickness. Trim or grade the seam allowances to help the gusset lie flatter without weakening the seam.
Match the Fabric Grain
Whenever possible, cut the gusset so the grain direction matches the main fabric. This helps the finished project drape naturally and minimizes twisting after washing.
Check the Finished Gusset
Before continuing with the project, inspect the gusset carefully.
Make sure:
Taking a few minutes to inspect the work now makes it much easier to correct small issues before completing the project.
How to Sew a Gusset in Clothes
A gusset can improve the fit of many garments without changing their design. Adding extra fabric where movement is needed most improves comfort, reduces strain on seams, and helps clothing last longer.
Although the sewing technique remains similar across most projects, the shape and placement of the gusset depend on the garment. You’ll commonly find gussets in:
When sewing a new garment, leave the gusset opening unstitched until ready to insert it. When altering finished clothing, remove existing stitches with a seam ripper and trim loose threads before attaching the new fabric.
How to Sew a Gusset in a Shirt or Blouse
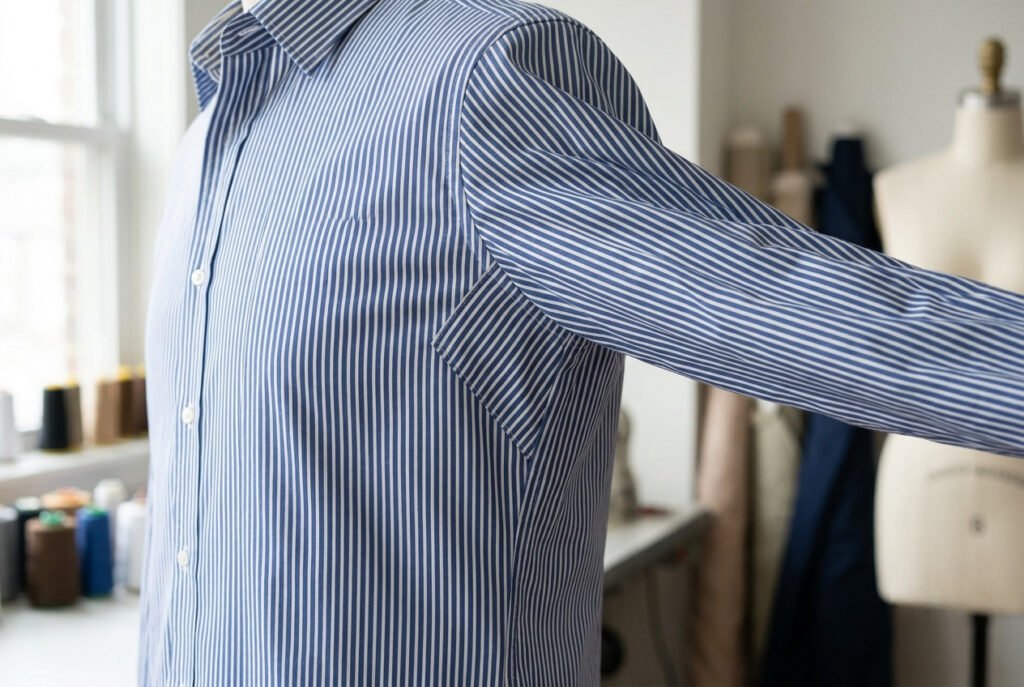
Fitted shirts and blouses often feel restrictive when reaching, lifting, or stretching. An underarm gusset creates additional space where the sleeve joins the body, allowing greater freedom of movement.
Match the center points of the gusset with the opening and pin the fabric evenly. Sew one side at a time using a consistent seam allowance, then press each seam before attaching the next side.
Once finished, check that the sleeve hangs naturally and that the underarm area lies flat without puckers.
Underarm Gusset Sewing Tips
Underarm seams undergo constant movement, so careful sewing improves comfort and durability.
For the best results:
A well-sewn underarm gusset increases mobility while maintaining the garment’s original appearance.
Sewing Tips for Clothing Gussets
Small details make a noticeable difference in the finished garment.
Taking a little extra time during these steps helps produce a cleaner finish and a more comfortable garment.
How to Sew a Gusset in Pants
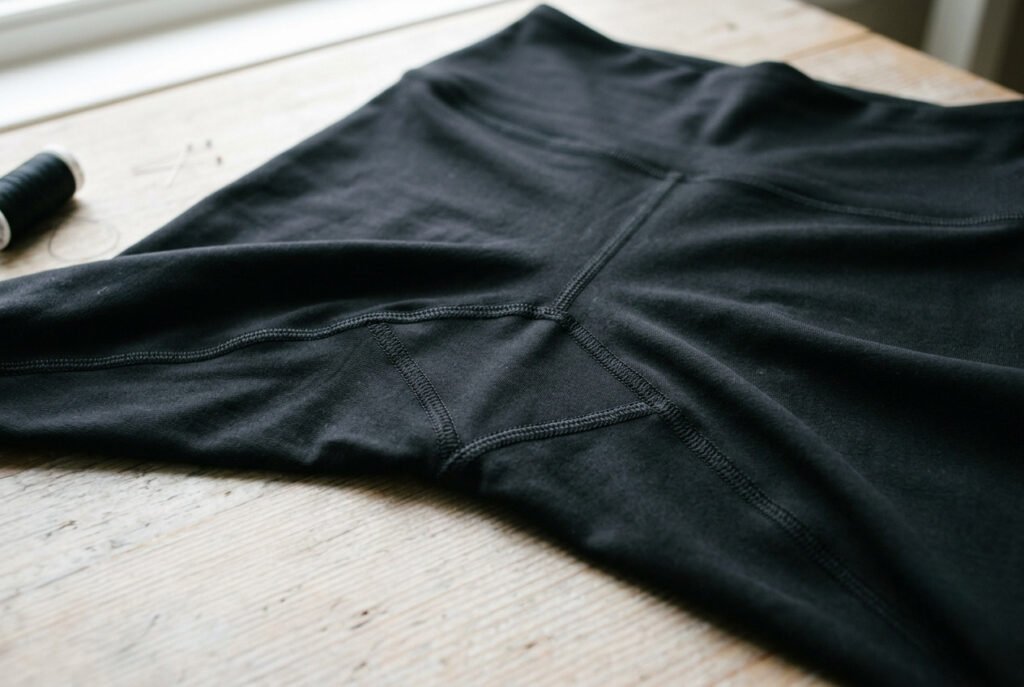
Pants and leggings move constantly while walking, sitting, bending, and stretching. These motions place repeated stress on the inseams, making them some of the first areas to wear out. Adding a gusset distributes stress across multiple seams, improving comfort, mobility, and garment longevity.
If you’re altering finished pants, carefully open the existing inseam with a seam ripper. For new garments, insert the gusset before sewing the inseams completely.
Position the gusset between the front and back crotch seams, matching all center points and seam intersections. Pin or clip the fabric securely, then sew one side at a time using an even seam allowance. Avoid pulling the fabric through the machine, especially when working with knit or stretch materials.
After stitching, check that the inseams are symmetrical and the crotch seam forms a smooth curve. Reinforce the start and end of each seam with backstitching to improve durability in this high-stress area.
Crotch Gusset Tutorial for Better Comfort
A crotch gusset is commonly used in leggings, athletic wear, cycling shorts, workwear, children’s clothing, and underwear because it provides greater freedom of movement while reducing stress on the seams.
For knit fabrics, choose a gusset with similar stretch and recovery to the main garment. Matching the fabric helps maintain the original fit and prevents twisting during wear.
Use a stretch stitch or a narrow zigzag stitch when sewing stretch fabrics. These stitches move with the fabric and reduce the risk of popped seams.
Finish the seam allowances with a serger or zigzag stitch to improve durability, especially on garments that receive frequent use.
How to Sew a Gusset in a Dress
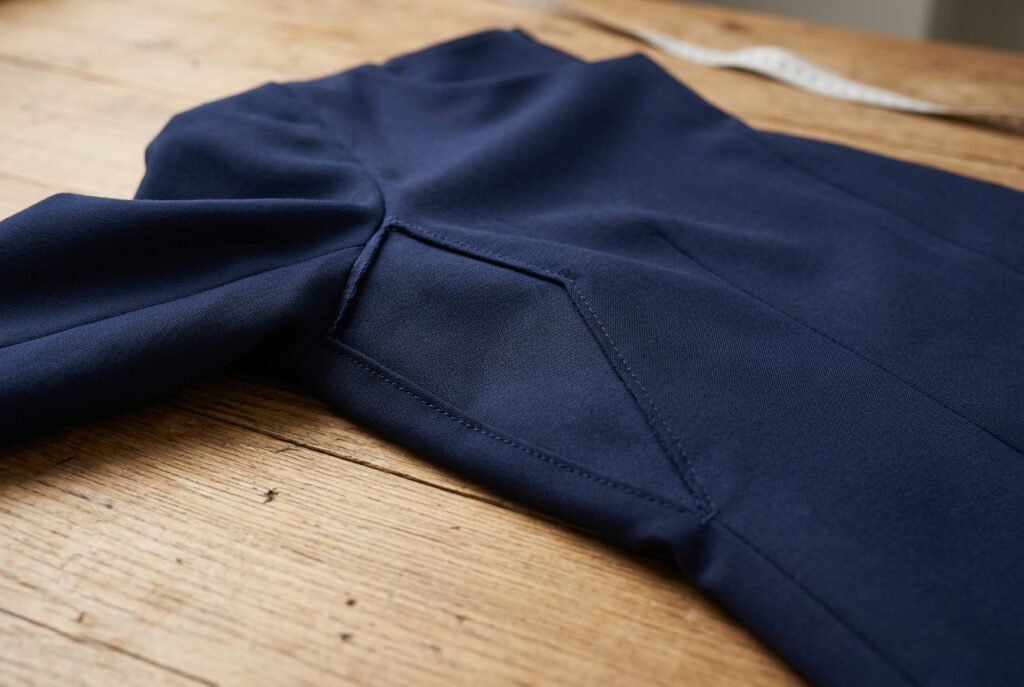
A fitted dress may feel tight around the underarms, hips, or side seams even when the size is correct. Instead of resizing the entire garment, a gusset adds extra room exactly where needed while preserving the original design.
Begin by carefully opening the seam where the gusset will be inserted. Match the center points, pin the gusset evenly, and sew one side at a time to maintain accurate alignment.
Depending on the fit adjustment, a gusset can be added to:
Choose fabric that closely matches the original garment in color, weight, texture, and drape. If an exact match isn’t available, a coordinating fabric can create an attractive design feature and maintain a balanced appearance.
After sewing, press each seam thoroughly and check that the neckline, armholes, and side seams remain even before completing the garment.
How to Sew a Bag Gusset
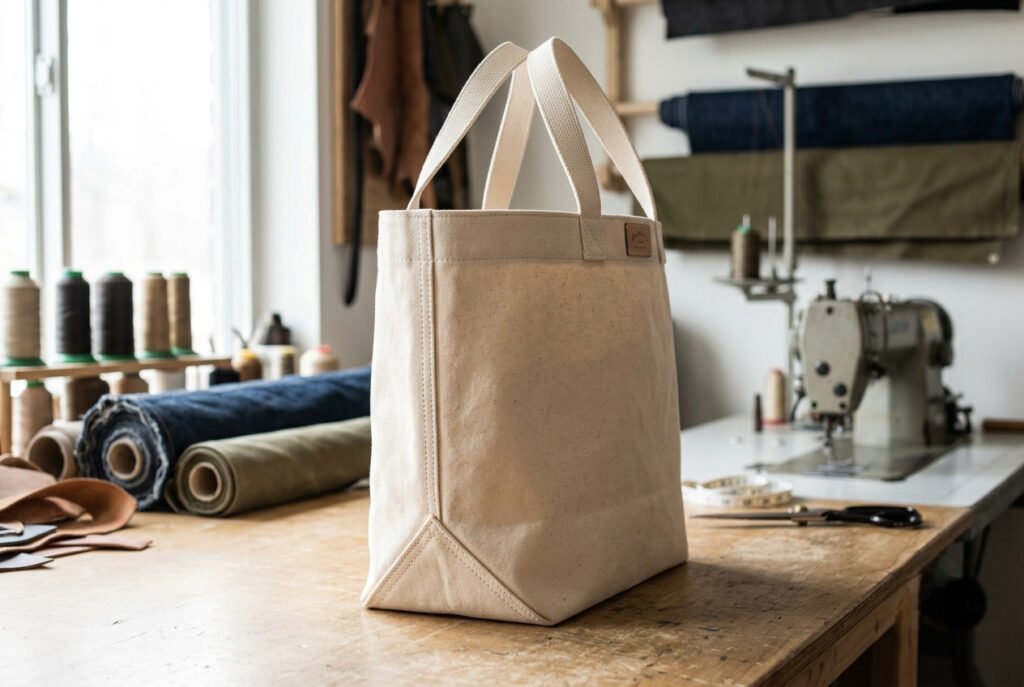
A bag gusset adds depth, structure, and storage space. Without one, many bags remain flat and hold fewer items. Whether you’re making a tote bag, backpack, cosmetic pouch, or reusable shopping bag, a gusset helps the finished project keep its shape while increasing its capacity.
Although the sewing method is similar to garment gussets, bags often use heavier fabrics and need extra reinforcement.
Choose the Right Fabric
Select a fabric that matches the body of the bag in weight and durability.
Popular choices include:
If you’re using lightweight fabric, apply interfacing to the gusset before sewing. This provides additional structure and helps the bag maintain its shape over time.
Also Read: How to Sew a Pocket Square? Two Easy Methods
Determine the Gusset Width
The gusset width determines the finished bag’s depth. Choose the width based on your sewing pattern or desired storage space.
Before cutting the fabric, measure both sides carefully so the gusset remains even and the finished bag stays symmetrical.
Sew the Gusset to the Bag Panels
Place the gusset and bag panels with the right sides together. Match the center points first, then pin or clip the remaining edges.
Sew one side at a time, slowing down as you approach each corner. Pivot carefully at the corners to keep the seams smooth and accurately aligned.
Once both sides are attached, trim any excess bulk from the seam allowances before pressing the seams flat.
Reinforce High-Stress Areas
Bag corners carry most of the weight during everyday use, making reinforcement especially important.
Strengthen these areas by:
These simple steps improve durability without affecting the bag’s appearance.
Finish the Inside of the Bag
Finish the raw edges with a serger or zigzag stitch to reduce fraying.
If the bag includes a lining, attach it after completing the outer gusset. A lined interior hides the seam allowances and gives the finished bag a clean, professional appearance.
Expert Tips for Professional Results
Small details often make the biggest difference in the finished project.
Taking a few extra minutes to check these details results in a stronger, cleaner, and more professional-looking sewing project that will hold up well through regular use.
Common Gusset Sewing Mistakes
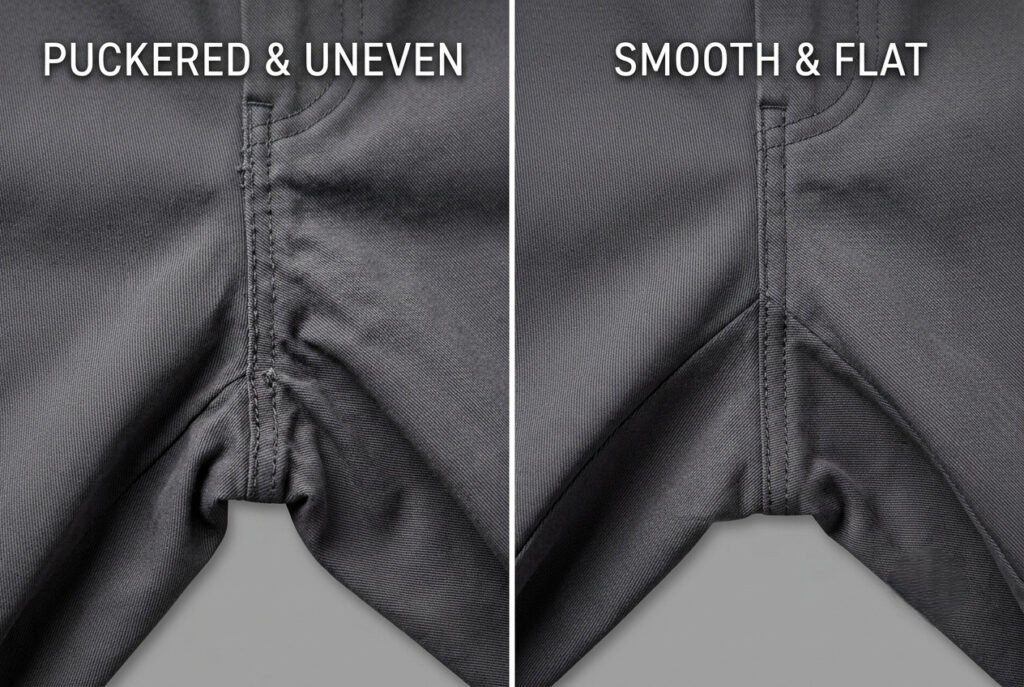
Even experienced sewists sometimes make mistakes when inserting a gusset. Most problems are easy to prevent with careful preparation and accurate stitching.
1. Cutting the Wrong Size
A gusset that is too small can create tight seams, while one that is too large may cause puckering or excess bulk.
How to avoid it: Measure the opening carefully and confirm the gusset, including seam allowance, matches your sewing pattern before cutting.
2. Choosing the Wrong Fabric
A gusset should behave like the surrounding fabric. Using a stiff fabric in a lightweight garment or a stretchy fabric in a woven project can distort the seams and affect fit.
How to avoid it: Choose fabric with a similar weight, stretch, texture, and fiber content whenever possible.
3. Skipping the Center Marks
Without reference points, the gusset can shift during sewing, causing uneven corners or twisted seams.
How to avoid it: Mark the center of both the gusset and the opening before pinning the pieces together.
Also Read: How to Load Bobbin in Sewing Machine? Easy Steps
4. Pulling the Fabric While Sewing
Guiding the fabric too forcefully may stretch seams and create ripples, especially on knit fabrics.
How to avoid it: Let the sewing machine feed the fabric naturally while gently guiding it with both hands.
5. Sewing Too Quickly Around Corners
Corners require patience and accuracy. Rushing often causes missed pivot points, uneven stitching, or bunching fabric.
How to avoid it: Slow down approaching each corner. Stop with the needle down, lift the presser foot if needed, and pivot carefully before continuing.
6. Forgetting to Clip the Seam Allowances
Corners need room to spread after sewing. Without clipping, the gusset may look bulky or pull on surrounding fabric.
How to avoid it: Clip close to the stitching line without cutting through the seam. For thicker fabrics, grade the seam allowances to reduce bulk.
7. Ignoring Seam Reinforcement
Underarms, crotch seams, and bag corners experience repeated stress during everyday use. Weak seams can wear out quickly in these areas.
How to avoid it: Backstitch at the beginning and end of each seam and use a strong, good-quality thread for added durability.
8. Skipping Pressing
Pressing is not just a finishing step. It shapes seams, improves accuracy, and gives the project a cleaner appearance.
How to avoid it: Press each seam as you sew using the appropriate heat setting instead of waiting until the project is complete.
Tips for Sewing Long-Lasting Gussets
A well-sewn gusset should remain comfortable, durable, and secure through regular wear and repeated washing. These simple habits help improve the finished result and extend the life of your sewing project.
Conclusion
Learning to sew a gusset is a valuable skill that improves the fit, comfort, and durability of many sewing projects. Though the fabric insert seems small, it adds room where garments and bags experience the most movement and stress.
A successful gusset begins with careful preparation. Choosing fabric that matches the original project, marking center points accurately, and sewing one seam at a time help create smooth, balanced seams. Pressing each seam and reinforcing high-stress areas strengthen and improve the appearance of the finished project.
Whether adding an underarm gusset to a shirt, improving pants comfort, or creating extra depth in a tote bag, the same basic technique applies. With regular practice, sewing gussets becomes more accurate and efficient, making it useful for many clothing and bag projects.
The next time a garment feels restrictive, or a bag needs additional depth, you’ll have the skills and confidence to solve the problem with a neatly sewn gusset.