How to Sew an Invisible Zipper? Full Guide
An invisible zipper creates a smooth, professional finish that blends neatly into a garment seam. Unlike a regular zipper, only the pull tab remains visible after installation, making it the preferred choice for dresses, skirts, formal wear, cushion covers, and other projects where a clean appearance matters.
If sewing an invisible zipper feels intimidating, there is good news. The process is simpler than many beginners expect. Success depends more on careful preparation, accurate alignment, and the right technique than on sewing speed.
This beginner-friendly guide explains how to sew an invisible zipper step by step, from selecting the right supplies to finishing the seam below the zipper. You will also learn practical tips experienced sewists use to achieve a neat, professional-looking result while avoiding common mistakes.
Whether the project is a handmade dress, a simple skirt, or a decorative cushion cover, these techniques will help build confidence and produce a polished finish.
Key Takeaways
What Is an Invisible Zipper?
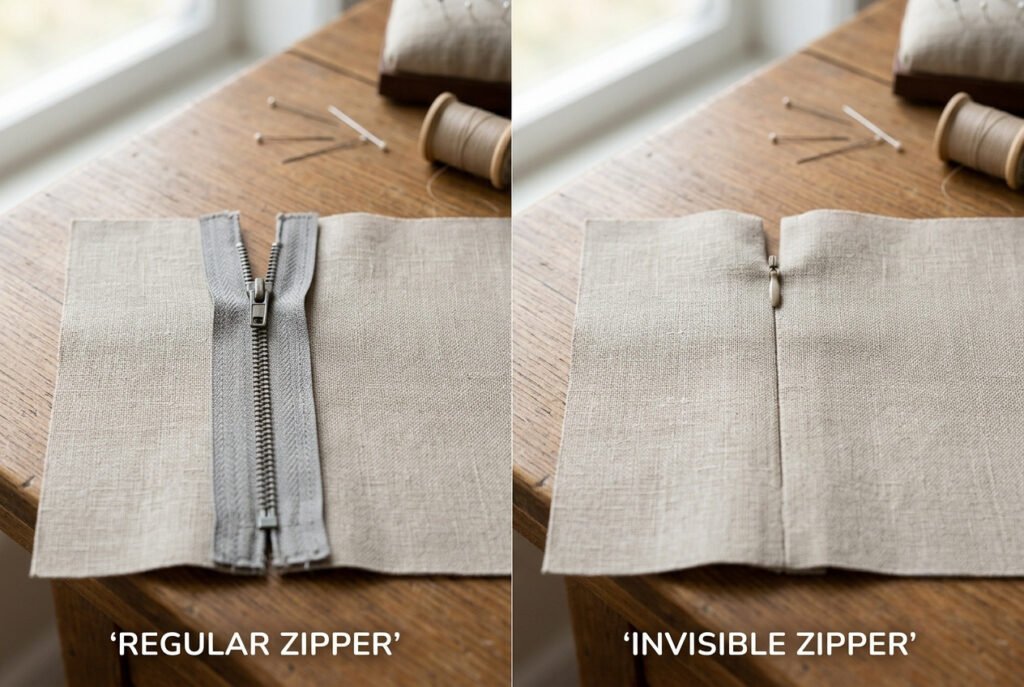
An invisible zipper is designed so its teeth remain hidden inside the seam after installation. From the outside, only the zipper pull is visible, giving garments and sewing projects a smooth, uninterrupted appearance.
Unlike standard zippers, invisible zippers are sewn from the back of the zipper coils instead of beside exposed teeth. This requires a different sewing method but produces a cleaner finish.
Because the closure almost disappears into the seam, invisible zippers are widely used in garments where appearance is just as important as function.
Benefits of Using an Invisible Zipper
An invisible zipper offers several advantages:
When Should You Use an Invisible Zipper?
Invisible zippers work best when the closure should blend into the garment rather than become part of the design.
They’re commonly used in:
Dresses
Fitted dresses use invisible zippers along the center back or side seam to maintain a smooth silhouette.
Skirts
Hidden zippers create clean waistlines and uninterrupted seam lines.
Blouses and Tops
Woven tops often include invisible zippers to make dressing easier without affecting the design.
Cushion Covers
Invisible zippers provide removable covers while keeping decorative pillows neat and attractive.
Formal Wear
Wedding gowns, evening dresses, cocktail dresses, and special occasion garments use invisible zippers because they preserve elegant lines.
Why Choose an Invisible Zipper Instead of a Regular Zipper?
Choosing the right zipper depends on the project.
An invisible zipper is an excellent option when:
A standard zipper may be a better choice for:
Using the right zipper for the fabric improves both appearance and durability.
Tools and Materials You Need
Gathering your supplies before you begin makes the installation process much smoother. Having everything within reach allows you to focus on accurate stitching instead of stopping to look for tools midway through the project.
Also Read: Do You Need Safety Goggles When Sewing?
Essential Tools
For most projects, you’ll need:
A well-organized workspace helps reduce mistakes and makes it easier to achieve neat, even stitching.
Also Read: Best Sewing Scissors: Top Picks 2026
Also Read: 10 Best Thread for Sewing: Ultimate Guide 2026
Also Read: 10 Best Iron for Sewing: Top-Rated Picks 2026
Choosing the Right Invisible Zipper
Selecting the right zipper before sewing can make installation much easier and improve the finished appearance.
Length
Follow your sewing pattern’s recommended zipper length whenever possible.
If you’re sewing without a pattern, choose an invisible zipper that extends slightly beyond the opening. A longer zipper provides better control and keeps the pull out of the way. Many invisible zippers can be shortened after installation by following the manufacturer’s instructions.
Color
Choose a zipper that closely matches your fabric.
Although the zipper teeth remain hidden inside the seam, the pull tab and top edge may still be visible when the garment is worn. A matching color helps create a cleaner, more professional finish.
Material
Most invisible zippers feature lightweight polyester coils, making them suitable for many woven fabrics, including:
For heavyweight materials like canvas, upholstery fabric, or heavy denim, check your sewing pattern before using a standard invisible zipper. A stronger zipper style may provide better durability.
Why an Invisible Zipper Foot Matters
Many beginners wonder if a special presser foot is necessary.
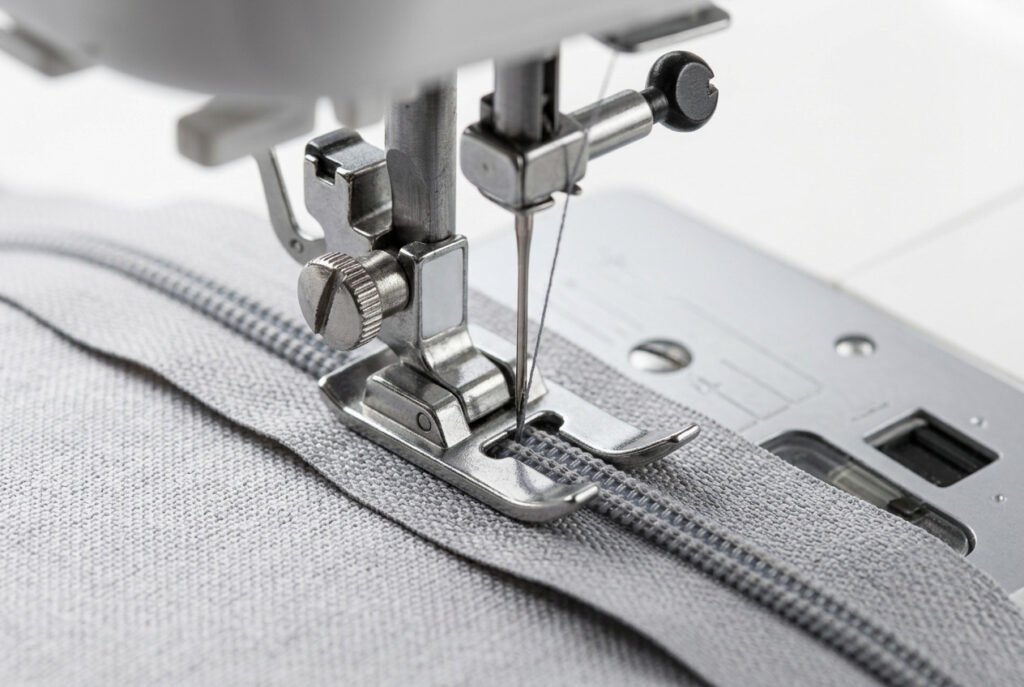
A regular zipper foot can be used, but an invisible zipper foot makes the job easier and usually produces better results.
The grooves underneath the foot guide the zipper coils while gently rolling them open. This allows the needle to stitch very close to the coils without sewing over them. The closer the stitches are to the coils, the more effectively the zipper disappears into the seam.
Using an invisible zipper foot offers several advantages:
If garment sewing will become a regular hobby, an invisible zipper foot is a worthwhile addition to your sewing toolkit.
Also Read: Best Mechanical Sewing Machine: Our Top Pick 2026
How to Prepare the Fabric and Zipper
Taking a few extra minutes to prepare both the fabric and the zipper makes installation much easier. Good preparation improves alignment, reduces puckering, and helps create the clean, professional finish that invisible zippers are known for.
Press the Fabric First
Begin by pressing both fabric pieces completely flat.
Wrinkles can affect measurements and make it difficult to keep the zipper aligned. Use the correct iron setting for your fabric to avoid damage while creating a smooth surface that’s easier to sew accurately.
Sew the Seam Below the Zipper Opening
If your sewing pattern instructs you to close part of the seam before inserting the zipper, sew the seam below the zipper opening first.
Backstitch where the zipper will begin, leaving the opening unstitched. Then press the seam allowances open to create a flat foundation for the zipper.
Finish the Raw Edges
Finish the seam allowances before attaching the zipper to prevent fraying.
Common finishing methods include:
Completing this step early keeps the inside of the garment neat and durable.
Mark the Seam Allowance
Use tailor’s chalk or a removable fabric marker to mark the seam allowance and the zipper opening on both fabric pieces.
If your project includes waist seams, pockets, or pattern matching, mark those reference points as well. These guides make it much easier to align both sides of the zipper accurately.
Lightly Press the Zipper Coils
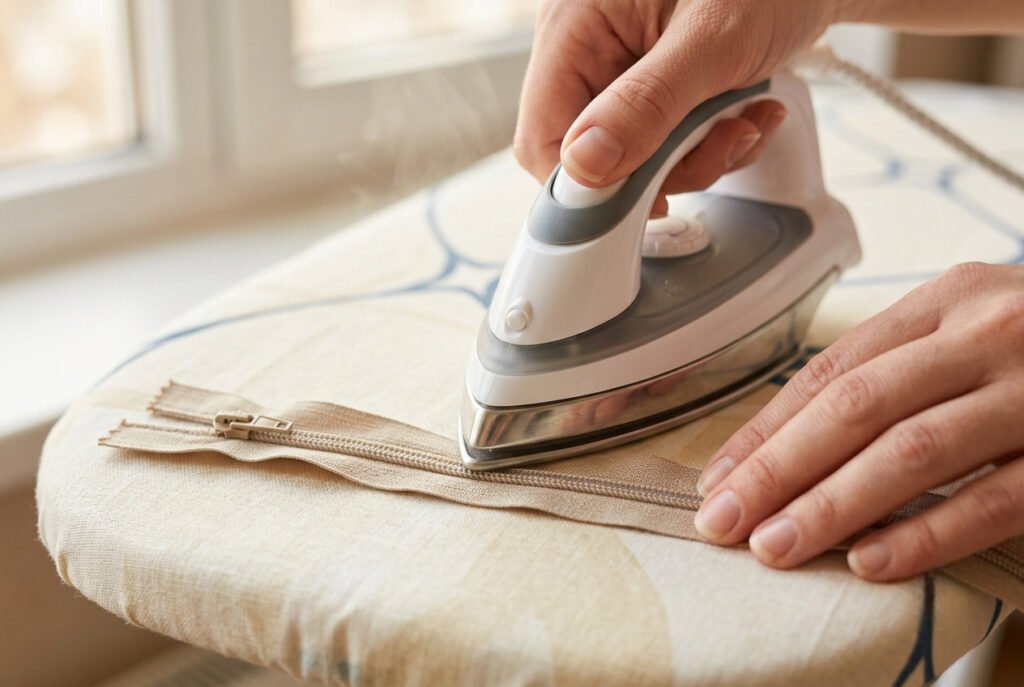
This is one of the most helpful techniques for achieving a nearly invisible finish.
Lay the zipper wrong side up on the ironing board and gently press the zipper coils outward using a low-heat iron. The goal is to encourage the coils to open slightly so the needle can stitch closer to them.
Avoid pressing directly on the plastic coils or using high heat, as excessive heat may warp or melt the zipper.
Position the Zipper
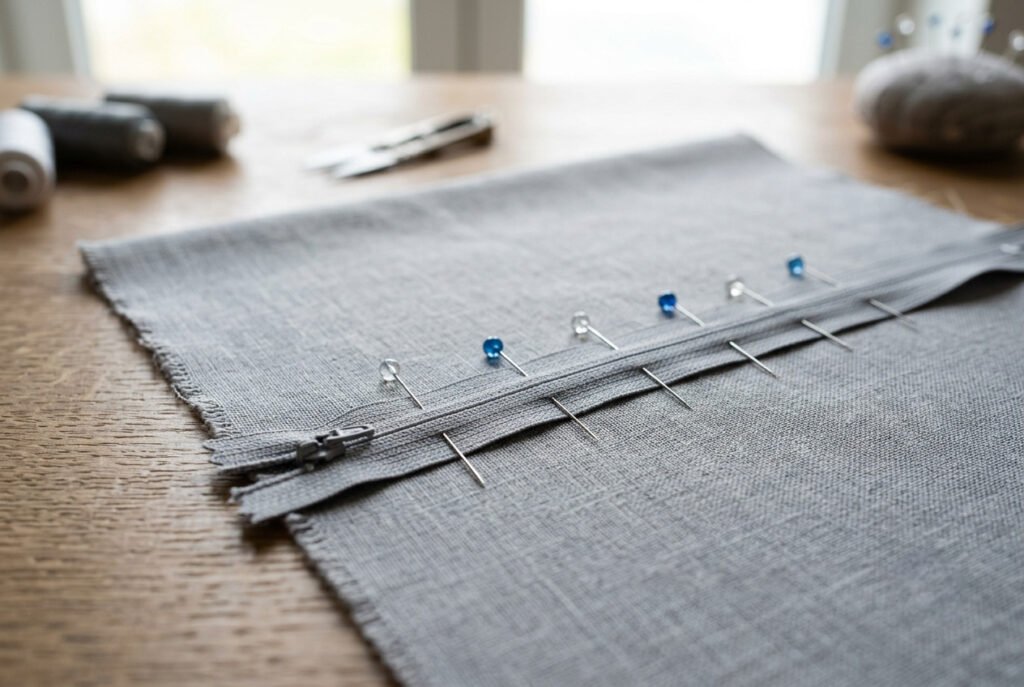
Place the zipper face down on the right side of one fabric edge with the zipper coils aligned along the seam line.
Match the zipper’s top edge to the fabric’s top edge, then secure it with fine pins or sewing clips placed perpendicular to the edge. Keeping the zipper flat helps prevent twisting during sewing.
Double-Check the Alignment
Before stitching, close the zipper and inspect the placement.
Confirm that:
Spending a minute checking alignment now can prevent a common invisible zipper mistake—uneven placement discovered after both sides are sewn.
Step-by-Step: Sew the First Side
With the fabric and zipper prepared, you’re ready to begin the installation. Take your time in this step, as accurate placement on the first side makes the rest easier.
Position the First Zipper Half
Open the invisible zipper completely.
Place one side of the zipper right side down on the right side of the fabric, aligning the zipper tape with the raw edge of the seam allowance. Make sure the top of the zipper lines up with the top edge of the fabric or with the placement marked in your sewing pattern.
Secure the zipper with fine pins, sewing clips, or hand-basting stitches if you’re working with slippery fabric. Keeping the zipper flat at this stage helps prevent shifting while sewing.
Attach the Invisible Zipper Foot
Install the invisible zipper foot on your sewing machine according to the manufacturer’s instructions.
Position the zipper coil inside the groove under the foot. The grooves roll the coil open, allowing the needle to stitch close without sewing through the teeth.
Before you begin, turn the handwheel manually for the first few stitches to make sure the needle clears the zipper safely.
Also Read: How to Load Bobbin in Sewing Machine? Easy Steps
Sew the First Side
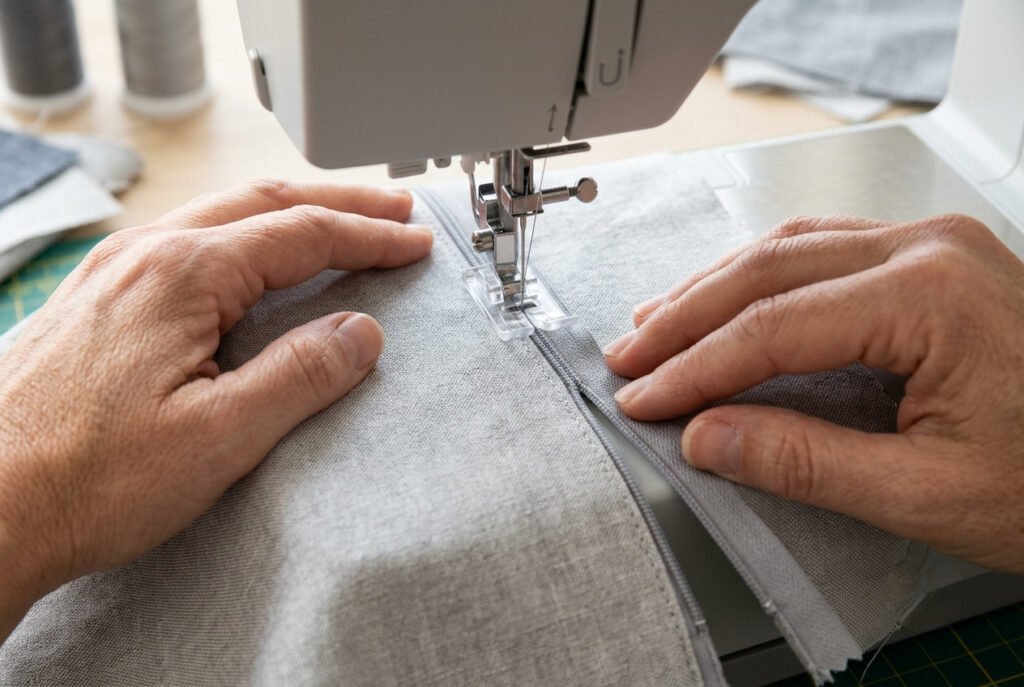
Begin stitching from the top of the zipper using a straight stitch with a medium stitch length.
Guide the fabric gently and allow the feed dogs to move it naturally. Avoid pulling or stretching the fabric, as this can cause puckering later.
Sew until you reach the zipper pull near the bottom. Stitch as close to the zipper coil as possible without crossing it to create the nearly invisible finish.
Check Your Work
Before moving to the second side, inspect the stitching carefully.
Make sure:
If the zipper feels tight or doesn’t move freely, adjust the stitching now before attaching the second side.
Step-by-Step: Sew the Second Side
The second side requires careful alignment because it determines if the finished seam looks balanced. Taking a few extra minutes helps prevent uneven waistlines, mismatched patterns, or twisted zipper placement.
Match the Fabric
Before pinning the zipper, align any important reference points, including:
Mark these points with tailor’s chalk or a removable fabric marker if needed.
Position the Second Zipper Half
Open the zipper completely again.
Place the remaining zipper tape right side down on the opposite seam allowance, keeping the raw edges aligned.
Before pinning, close the zipper briefly to confirm both top edges and matching seams line up. Once satisfied, unzip and secure the zipper with pins or clips.
Check that the zipper tape lies flat and isn’t twisted before sewing.
Also Read: What Is a Basting Stitch in Sewing? Easy Guide
Sew the Second Side
Position the second zipper coil inside the groove of the invisible zipper foot.
Starting at the top, sew slowly using the same stitch length as the first side. Guide the fabric gently and maintain an even seam allowance throughout.
Stop stitching at the same point where the first side ended to keep both sides balanced.
Test the Zipper
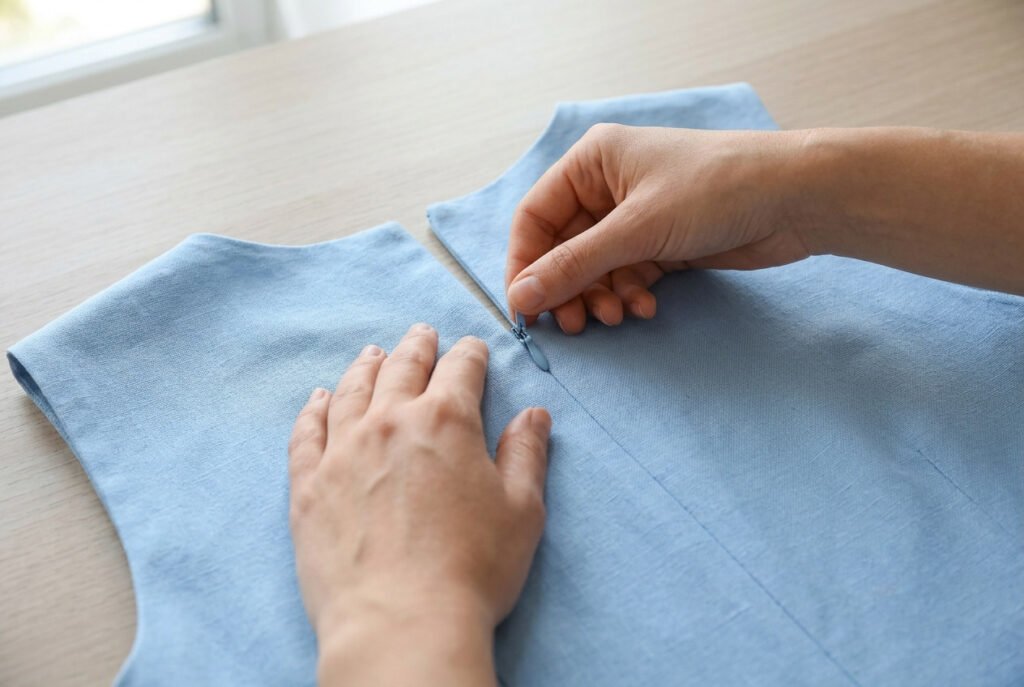
After both sides are attached, remove any pins or temporary basting stitches and close the zipper.
Check that:
If something doesn’t line up perfectly, adjust it now before sewing the remaining seam below the zipper.
How to Finish the Seam Below the Zipper
With both sides of the invisible zipper securely attached, the final step is to close the remaining seam below the zipper opening. This stage completes the garment and creates a smooth transition between the zipper and the rest of the seam.
Take your time during this step. Even a well-installed zipper can look uneven if the lower seam does not connect neatly with the zipper stitching.
Close the Zipper
Before sewing the remaining seam, zip the invisible zipper completely.
Place the fabric with right sides together, making sure the seam allowances are aligned. Move the zipper tail away from the stitching area so it does not get caught under the presser foot.
Checking the zipper while it is closed also confirms both sides are aligned correctly before sewing the final seam.
Switch to a Regular Presser Foot
Replace the invisible zipper foot with a standard presser foot or regular zipper foot, depending on your sewing machine and the amount of clearance available.
Position the needle as close as possible to the last zipper stitches. The closer these two stitching lines meet, the smoother the finished seam will appear.
Sew the Remaining Seam
Begin sewing just below the point where the zipper stitching ends.
Overlap the previous stitching by two or three stitches to eliminate any small gap between the zipper and the seam. Then continue sewing to the bottom of the garment, maintaining the same seam allowance used throughout the project.
Guide the fabric gently and let the feed dogs move it naturally. Pulling or stretching can create puckering that becomes noticeable once the zipper is closed.
Backstitch at the beginning and end of the seam to reinforce the stitching.
Press the Finished Seam
Pressing is a simple way to improve the appearance of an invisible zipper.
First, press the seam from the wrong side to flatten the seam allowances. Then turn the project right side out and give the zipper area a light press.
If you’re working with delicate fabric, place a pressing cloth between the iron and the garment to protect both the fabric and the zipper tape.
Avoid placing a hot iron directly on the zipper coils because excessive heat can distort the polyester teeth and affect how smoothly the zipper operates.
Pressing Tips for a Professional Finish
Many sewists focus on stitching accuracy but overlook pressing. Careful pressing often makes the difference between an average-looking zipper and one that blends seamlessly into the seam.
Use the Correct Iron Temperature
Invisible zipper coils are usually made from polyester, which can become damaged if exposed to high heat.
Begin with a low heat setting and increase the temperature only if your fabric requires it. Testing the iron on a fabric scrap helps avoid accidental damage.
Press Instead of Sliding the Iron
Rather than moving the iron back and forth across the zipper, lift and press gently in small sections.
This method helps prevent stretching the fabric, shifting the zipper tape, or creating unwanted ripples along the seam.
Use a Pressing Cloth for Delicate Fabrics
A lightweight cotton pressing cloth provides an extra layer of protection when working with fabrics that are sensitive to heat.
It is especially useful for:
A pressing cloth also helps prevent shiny marks on darker fabrics.
Check Your Finished Zipper
Before considering the project complete, inspect the zipper carefully from both the right and wrong sides of the fabric.
Ask yourself the following questions:
If every answer is yes, the invisible zipper has been installed successfully.
If you notice a small alignment issue or the zipper does not operate smoothly, adjust it before finishing the garment. Correcting a minor problem now is easier than repairing a completed project later.
Common Invisible Zipper Mistakes
Even experienced sewists occasionally make mistakes when installing an invisible zipper. Most problems are easy to prevent with careful preparation and patience.
Sewing Too Far from the Zipper Coils
One of the most common mistakes is stitching too far from the zipper coils. When this happens, the zipper teeth remain visible from the outside instead of disappearing into the seam.
Using an invisible zipper foot helps position the stitches close to the coils without sewing through them, creating the clean finish this zipper style is known for.
Forgetting to Press the Zipper Coils
Many beginners skip pressing the zipper before sewing.
Lightly pressing the zipper coils with a low-heat iron encourages them to roll open slightly, making it easier to stitch close to the teeth. Avoid excessive heat because it can damage synthetic zipper coils.
Twisting the Zipper Tape
A twisted zipper tape can prevent the zipper from lying flat and may cause the fabric to pull after installation.
Before sewing, check that both zipper tapes are positioned correctly and lie flat against the seam allowance.
Uneven Seam Matching
Misaligned waist seams, stripes, or horizontal design lines can make an otherwise neat zipper stand out.
Mark important reference points before pinning the second side, and always close the zipper temporarily to confirm that everything lines up before stitching.
Skipping the Test Before Finishing
After attaching both sides, close the zipper and inspect the seam before sewing the remaining opening.
Finding a small problem at this stage is easier than removing stitches after the garment is completed.
Pulling the Fabric While Sewing
Let the sewing machine feed the fabric naturally.
Pulling or stretching the fabric while sewing can cause puckering and distort the zipper installation.
Troubleshooting Common Problems
Even with careful preparation, small issues can occasionally appear. Identifying the cause makes them much easier to correct.
The Zipper Won’t Close Smoothly
If the zipper feels tight or catches while closing, the stitches are often too close to the zipper coils.
Remove only the affected stitches and sew again slightly farther from the coils while keeping the stitching close enough to maintain an invisible finish.
The Zipper Is Still Visible
Visible zipper teeth usually mean the stitching line is too far away from the coils.
Press the coils open again if needed. Reinstall the zipper, sewing closer to the coils with an invisible zipper foot.
Fabric Is Puckering Around the Zipper
Puckering may occur because of:
Press the fabric before sewing. Allow the feed dogs to move it naturally and adjust the thread tension if necessary.
Seam Lines Don’t Match
Uneven waistbands or horizontal seams are usually caused by incorrect alignment before stitching.
Mark matching points, pin carefully, and zip the closure before sewing the second side to confirm everything lines up correctly.
A Gap Appears Below the Zipper
A small opening where the zipper ends usually happens when the lower seam doesn’t meet the zipper stitching.
Overlap the first few stitches of the remaining seam with the last zipper stitches to create a smooth, continuous transition.
Also Read: How to Sew a Rip? Easy 6- Step Guide
Tips for a Clean Professional Finish
Professional-looking results often come from consistent sewing habits rather than complicated techniques.
Press After Every Major Step
Pressing keeps the fabric flat, maintains accurate seam allowances, and improves the overall appearance of the finished zipper.
Use Matching Thread
A thread that closely matches the fabric helps hide the stitching, even if a small portion becomes visible near the zipper.
Replace Worn Sewing Machine Needles
A dull or bent needle can skip stitches or snag delicate fabrics.
Choose a needle that matches your fabric weight for smoother, more consistent stitching.
Hand-Baste Slippery Fabrics
Silk, satin, rayon, velvet, and other slippery fabrics can shift while sewing.
Hand-basting the zipper before machine stitching provides better control and improves accuracy.
Also Read: How to Sew a Seam by Hand? Easy 5-Step Guide
Sew at a Comfortable Pace
Working slowly gives you better control around the zipper coils and helps prevent crooked stitching or uneven seam allowances.
Practice on Scrap Fabric
Before installing an invisible zipper in a finished garment, practice on fabric scraps with a similar weight and weave.
This allows you to become familiar with your sewing machine, zipper foot, and fabric without risking your project.
Using an Invisible Zipper in Different Projects
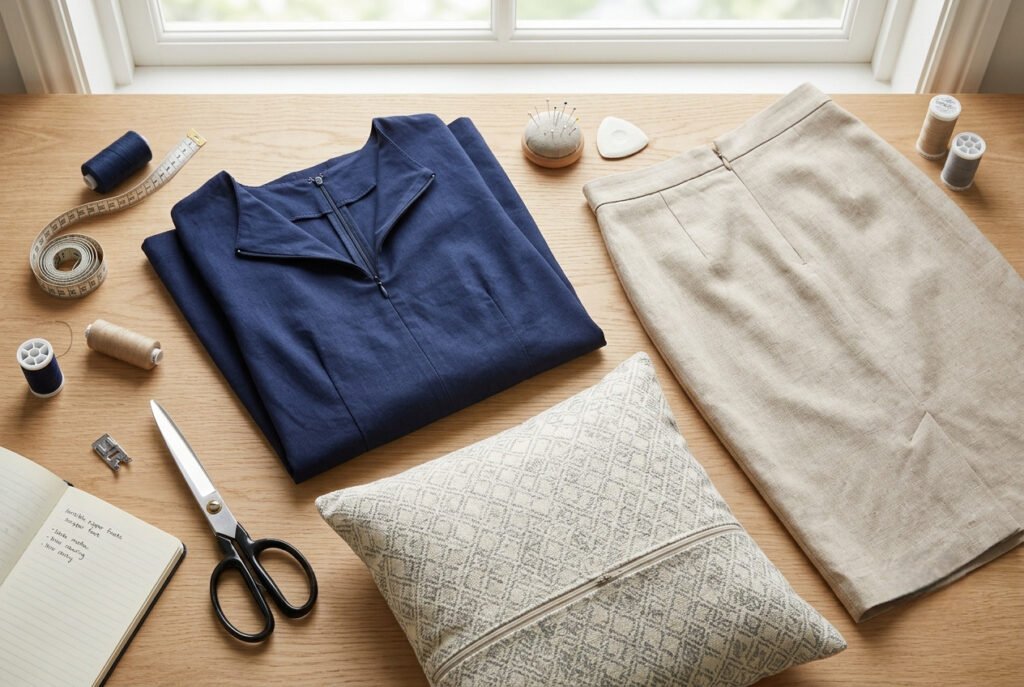
Once you’ve mastered the basic technique, the same installation method can be adapted to many sewing projects with only minor adjustments.
Dresses
Invisible zippers are commonly used in dresses because they create a smooth, uninterrupted silhouette.
For the best results:
Skirts
A hidden zipper gives skirts a clean, professional appearance without adding bulk.
Pay close attention to waistband alignment and side seams before stitching the second zipper side.
Cushion Covers
Invisible zippers are also popular in home décor projects.
For cushion covers:
Also Read: How to Sew a Pillow: Easy Guide for Beginners
Practice Makes the Process Easier
Installing an invisible zipper may feel challenging the first time, but each project builds confidence and improves accuracy.
Practicing on leftover fabric before working on a garment helps you become familiar with your sewing machine, the invisible zipper foot, and how different fabrics behave during installation.
With consistent practice, inserting an invisible zipper becomes a straightforward technique that adds a polished, professional finish to dresses, skirts, cushion covers, and many other sewing projects.
Final Thoughts on How to Sew an Invisible Zipper
Learning to sew an invisible zipper is a valuable skill that can improve the finish of handmade garments and home décor projects. Although the process may seem challenging at first, success comes from careful preparation, accurate alignment, and steady stitching rather than speed.
As you practice, focus on the techniques that make the biggest difference. Lightly press the zipper coils with a low-heat iron, align both sides carefully before sewing, and use an invisible zipper foot to stitch as close to the coils as possible.
These small steps help create a smooth, nearly hidden closure that looks neat and operates smoothly. Don’t be discouraged if your first attempt isn’t perfect. Every zipper you install builds confidence and improves your technique.
Start with a simple project, practice on fabric scraps when needed, and take your time with each step. Soon, sewing an invisible zipper will become a dependable skill that adds a clean, professional finish to dresses, skirts, cushion covers, and many other sewing projects.