How to Hand Sew a Hem: Easy Step-by-Step Guide
If you want to learn how to hand sew a hem, you can start without a sewing machine. You need a hand-sewing needle, matching thread, basic measuring tools, and patience. The key is to mark the finished length accurately, prepare the fabric edge, and choose a stitch that suits the garment.
For a hem with stitches that are difficult to see from the outside, a slip stitch is a useful starting point. For a garment needing more give, a catch stitch may be more suitable. This tutorial explains a simple hand-sewn hem, then shows when to adjust the method for pants, dresses, and different fabrics.
Key Takeaways
What Is a Hand-Sewn Hem?
A hem is the finished lower edge of fabric, such as the bottom of pants, a skirt, a sleeve, or a curtain. The extra fabric is turned to the wrong side and secured so the edge looks tidy and resists fraying.
Hand hemming is useful for small alterations, repairs, and garments where visible machine stitching would be distracting. The most suitable finish depends on the fabric, the shape of the edge, and how much the garment needs to stretch.
What You’ll Need to Hand Sew a Hem
Also Read: 10 Best Hand Sewing Needles for Every Sewing Project
Choose a finer needle and suitable fine thread for delicate cloth. Use a needle strong enough for dense fabric without forcing it through heavy layers. Test the needle, thread, marker, and iron on an inconspicuous area or scrap first.
How to Hand Sew a Hem: Step by Step
The following method uses a double-fold hem secured with small slip stitches on stable woven fabric. This is a beginner-friendly example, not a universal method for every garment. Thick denim, very curved edges, slippery fabrics, and stretchy knits may need a different edge finish or stitch.
Step 1: Decide on the Finished Length
If the garment might shrink, launder it according to its care label before altering the length. Press out wrinkles. Try the garment on and mark where you want the finished bottom edge to sit. For pants, check the length while wearing the shoes you plan to wear with them. For skirts and dresses, check the entire circumference while the garment hangs naturally.
Remove the garment, lay it flat, and recheck the marks. Mark the finished fold line clearly. This line is not the cutting line.
Step 2: Plan the Hem Allowance Before Cutting
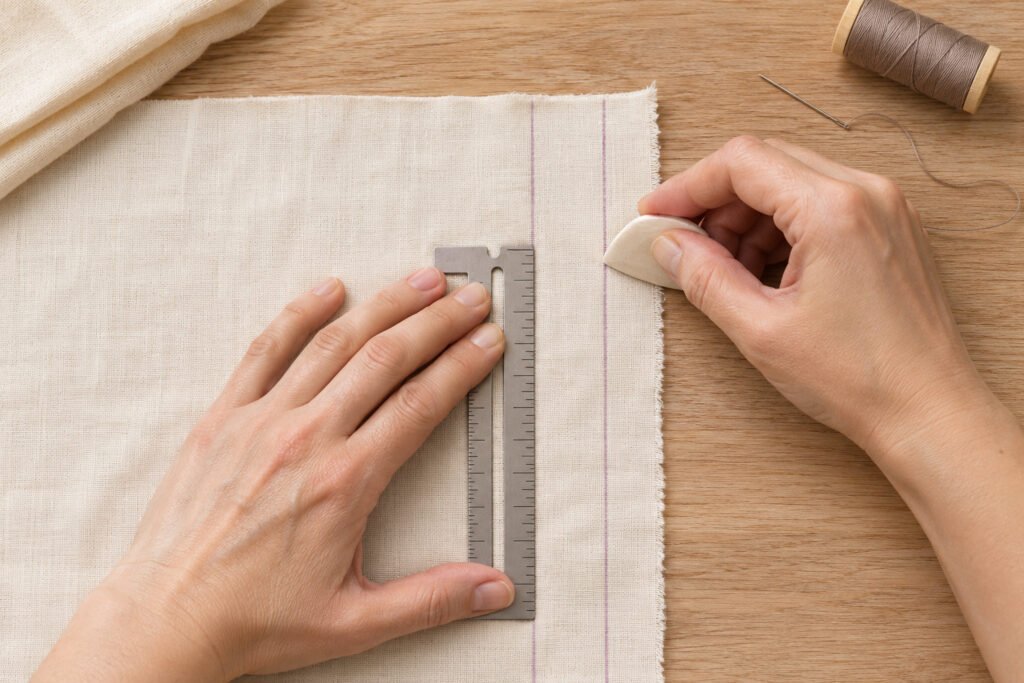
Decide how much fabric will turn up inside. The amount depends on the garment, fabric weight, and desired finish. For a double-fold hem, you need enough extra fabric for both turns: the small first turn hiding the raw edge and the wider second turn creating the hem.
For example, if you choose a 1/4-inch first turn and a 1-inch second turn, you need approximately 1 1/4 inches of fabric below the finished fold line. These are example dimensions, not required allowances for every garment. Mark the cutting line separately and verify measurements around the garment before trimming.
If you’re shortening an existing garment, inspect the original construction first. Preserve the original hem where appropriate; you may not need to cut anything. When in doubt, leave extra fabric until you check the length on the body.
Step 3: Fold and Press the Edge
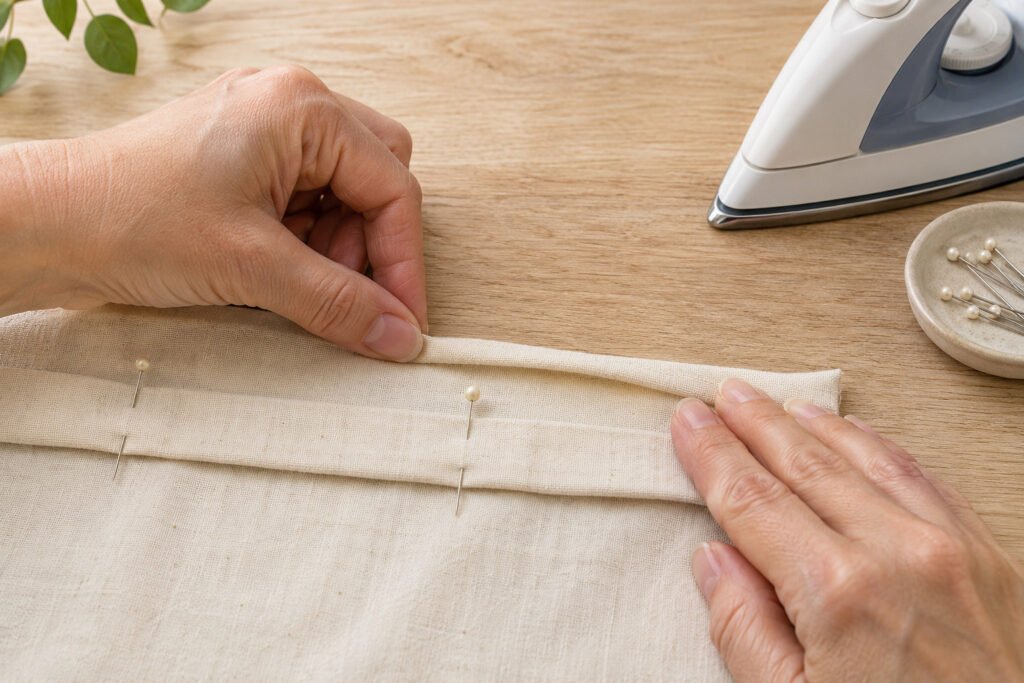
With the wrong side facing you, turn the raw edge inward by the planned first-turn amount and press. Turn the fabric again along the finished fold line to enclose the raw edge; press again.
Pin or clip the hem at regular intervals without stretching the fabric. On delicate materials, use a pressing cloth and the temperature recommended by the care label. Avoid creating a permanent crease until the measurements are correct.
For curved or full hems, a wide double fold can create excess bulk or puckering. A narrower hem, careful easing, or a different edge finish may work better. Test the fold before cutting or stitching.
Also Read: What Is a Basting Stitch in Sewing? Easy Guide
Step 4: Thread the Needle and Anchor the Thread
Cut a manageable length of matching thread, roughly 18–20 inches as a convenient starting point. Thread the needle and secure the end with a small knot or another appropriate anchoring method. Place the anchor inside the folded hem allowance so it is concealed from the right side.
Use a single strand when appropriate for the fabric and thread. A doubled strand can create extra bulk in fine hems. If the thread begins to twist or knot, pause and let the needle hang freely to untwist it.
Also Read: 10 Best Thread for Sewing: Ultimate Guide 2026
Step 5: Sew the Hem With a Slip Stitch
Work from the wrong side of the garment:
- Bring the needle out through the inner folded edge of the hem allowance.
- Just above that edge, take a tiny bite of one or two threads from the garment body, trying not to carry the needle visibly through the right side.
- Slide the needle a short distance through or along the folded hem allowance, then bring it out again.
- Repeat the tiny bite into the garment body and the concealed stitch along the fold, keeping the spacing consistent.
- Every few stitches, smooth the fabric and inspect the right side for visible thread or puckering.
Pull the thread only enough to settle the stitch. Tightening it too much can create dimples. A good result has a secure fold and minimal visible stitching on the outside. The exact appearance depends on fabric thickness and stitch placement.
Step 6: Secure the Thread and Finish
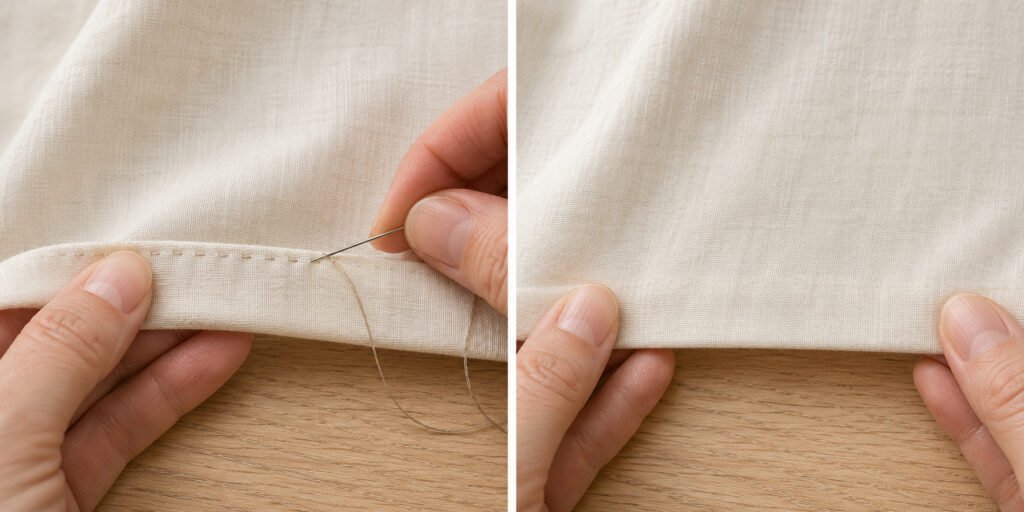
When you reach the starting point, anchor the thread securely with small stitches or a knot concealed inside the hem allowance. Trim the thread without cutting the finished stitches. Remove remaining pins, check both sides, and give the hem a final press using fabric-safe heat and pressure.
Try on the garment again. Confirm that the hem hangs evenly and that it does not pull, twist, or restrict movement.
Which Stitch Should You Use to Hand Sew a Hem?
1. Slip Stitch
Best for: Woven garments that need a discreet finish.
Main tradeoff: Requires small, carefully controlled stitches to keep the thread difficult to see from the outside.
2. Blind Hem Stitch
Best for: Garments where you want stitching to be minimally visible.
Main tradeoff: The folding method and needle path depend on the particular blind-hemming technique.
3. Catch Stitch (Herringbone Stitch)
Best for: Some stretchy fabrics, wool garments, and hems that need flexibility.
Main tradeoff: Crossed stitches are visible on the inside of the garment.
4. Whip Stitch
Best for: Quick repairs and casual hems where visible stitching is acceptable.
Main tradeoff: Stitches can be more noticeable than a carefully worked slip stitch.
Terminology note: “Catch stitch” and “herringbone stitch” commonly refer to the same crossed-stitch family; they should not be presented as two completely unrelated hemming stitches. “Blind hem” can describe a low-visibility result or a particular stitch method, so instructions should explain the actual needle path instead of relying on the name alone.
Catch Stitch for Flexible Hems
A catch stitch crosses diagonally between the hem allowance and the garment body. Take small bites of fabric on alternating sides, working in a consistent direction so the thread forms a loose series of crosses. Keep the thread relaxed to allow some movement. Before using it on a knit, sew a scrap sample and stretch it gently to confirm the stitches do not snap or distort the fabric.
When to Use a Whip Stitch
A whip stitch can hold a folded edge in casual repairs, but its diagonal passes are often easier to see. If an almost invisible garment finish is the goal, start by testing a slip stitch or an appropriate blind-hemming method instead.
Also Read: How to Do a Whip Stitch? Quick Guide
How to Hem Pants by Hand
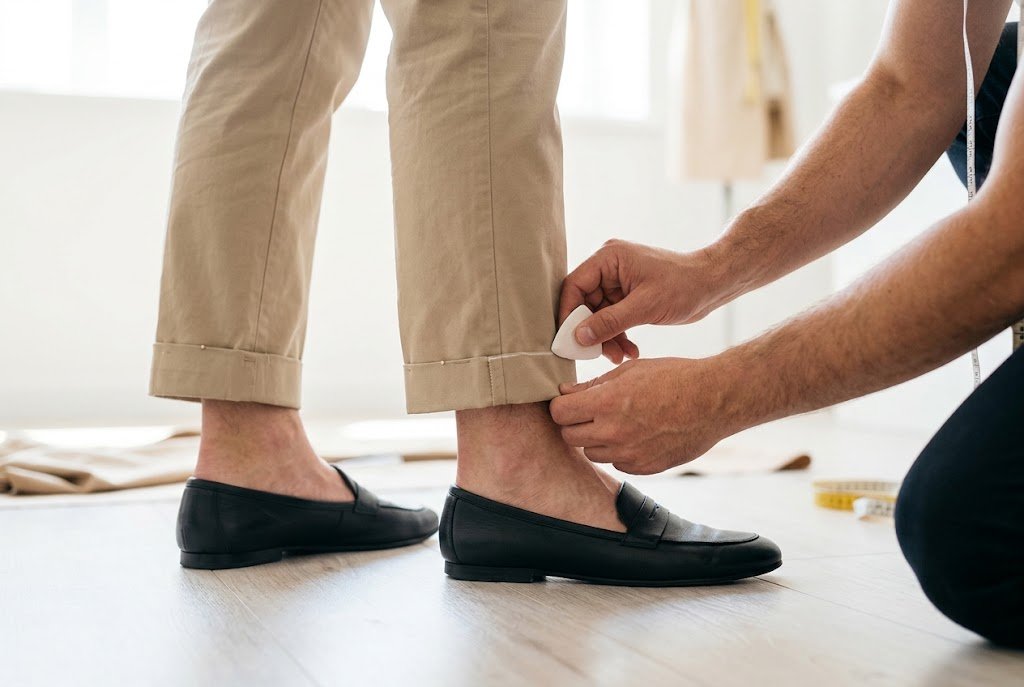
Try the pants on and mark the desired length on both legs. Check the marks while standing naturally, then remove the pants and compare the legs before changing the fabric. Inspect the original hem, especially on jeans or pants with a distinctive factory finish.
If a conventional folded hem suits the fabric, measure the allowance, fold, press, pin, and sew using a discreet stitch. This is also how to hand sew a hem on pants when their construction allows a simple folded finish. Avoid forcing a fine needle through bulky denim seams; a heavy seam intersection may require another approach. Recheck both leg lengths after pressing.
How to Hem a Dress or Skirt by Hand
Let the garment hang naturally before marking. Bias-cut and full skirts can hang unevenly as the fabric relaxes. Extra time and repeated measurements may be needed. Mark the finished hem all the way around while the garment is hanging as it will be worn.
For a curved edge, a deep double fold may not lie flat. Try a narrower fold or an alternative finished-edge treatment on a sample. Choose a discreet stitch for stable woven dresses and a more flexible method when the fabric stretches. Check the right side often while sewing.
How to Adjust the Method for Different Fabrics
Lightweight or Delicate Fabrics
Use a fine needle and compatible thread. Test for needle marks and pressing damage on scrap fabric. Small stitches and a narrow, carefully controlled finish help limit bulk. Very slippery fabrics may benefit from temporary basting.
Medium-Weight Woven Fabrics
Cotton, linen, and similar stable wovens often work well with the double-fold method shown above. Choose the hem width to suit the garment’s design and press without distorting the fabric.
Stretch and Knit Fabrics
A hand-sewn hem needs enough flexibility for the fabric’s intended movement. A relaxed catch stitch can work for some knits, but no one stitch suits every knit. Test the result on a sample and stretch it gently before committing to the garment.
Thick or Bulky Fabrics
Multiple folded layers may produce a stiff ridge. Depending on the garment, finishing the raw edge separately and making a single turn can reduce bulk. Use suitable tools and avoid forcing a needle through excessive resistance.
Common Hand-Hemming Problems and Fixes
| Problem | Likely cause | What to try |
|---|---|---|
| Stitches show on the outside | Too much garment fabric caught, or contrasting thread | Take smaller bites and use matching thread |
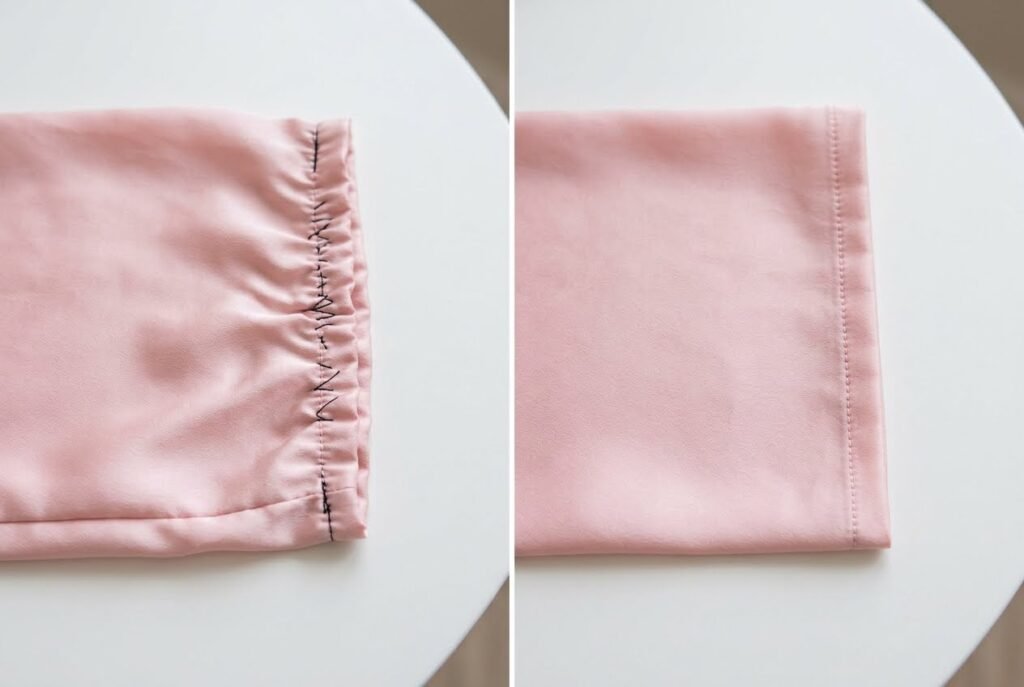
| Fabric puckers | Thread pulled too tightly | Relax stitch tension and press gently |
| Hem looks uneven | Finished line marked inconsistently | Recheck length on the hanging garment before sewing |
| Curved hem forms ripples | Too much fabric forced into a wide fold | Use a narrower or differently finished hem |
| Stretch hem feels tight | Stitch cannot give with fabric | Test a more flexible stitch and looser tension |
| Fabric shows holes or snags | Needle too large or inappropriate | Test a finer, suitable needle on scrap fabric |
Tips for a Neater Hand-Sewn Hem
Final Thoughts
Once you understand how to hand sew a hem, the process involves three tasks: measure the final length, prepare a fold that suits the fabric, and secure it with an appropriate stitch. Start on a woven fabric scrap, check the outside often, and keep the thread tension gentle. With careful preparation, you can create a tidy hem without a sewing machine.
Also Read: How to Sew a Seam by Hand? Easy 5-Step Guide