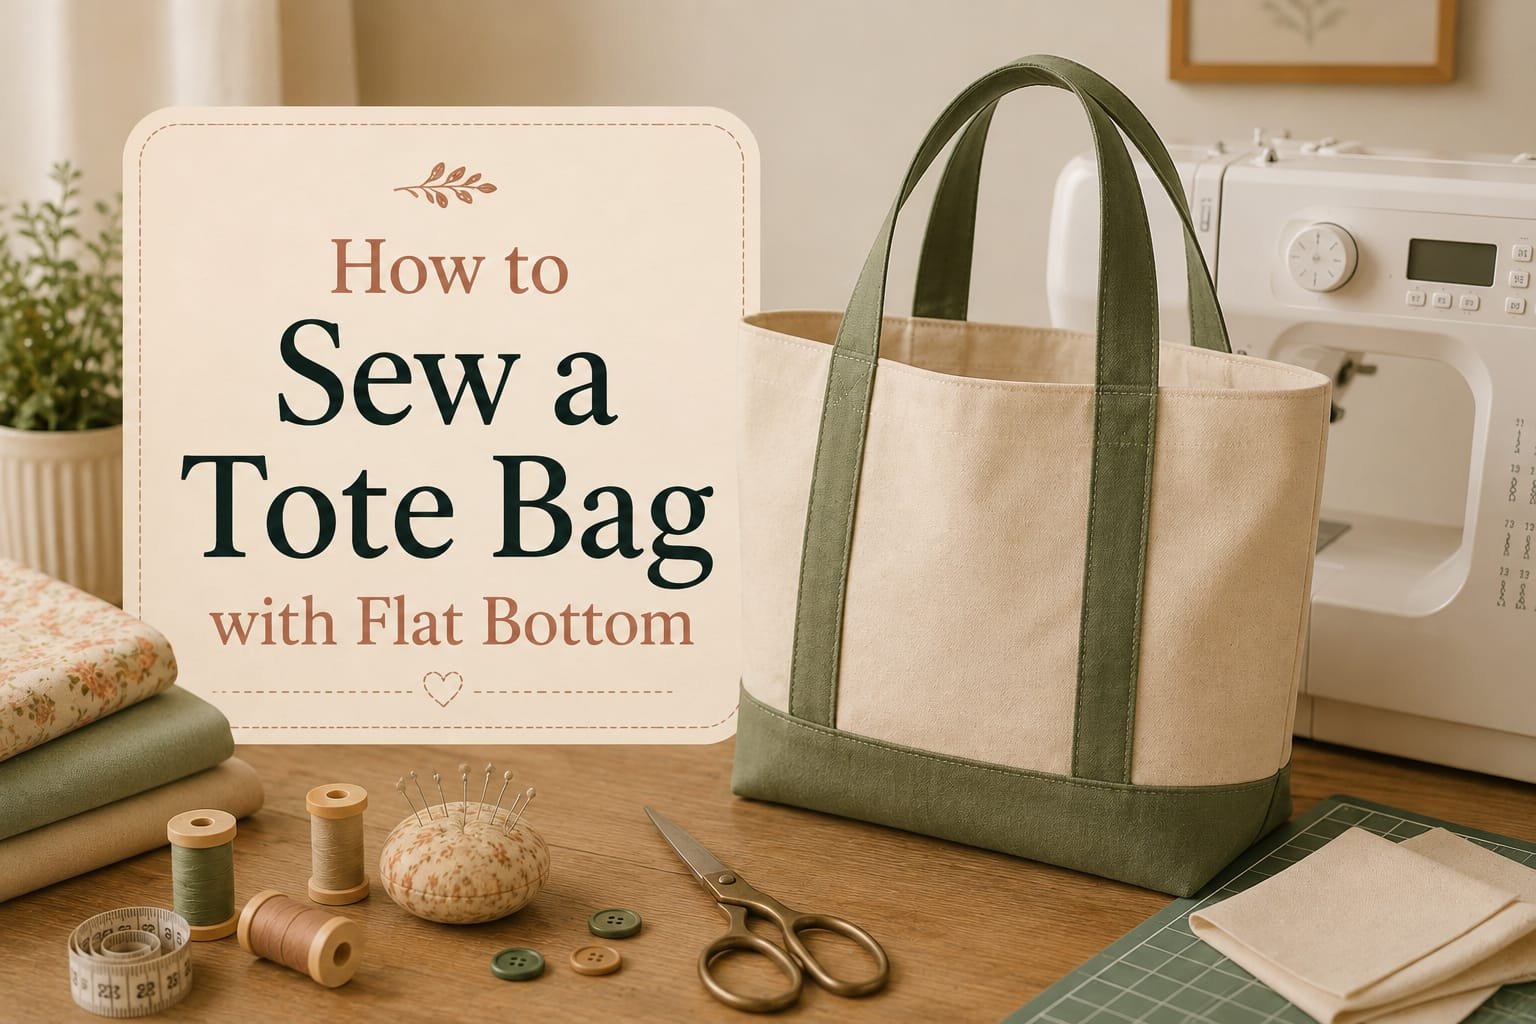
How to Sew a Tote Bag With Flat Bottom? Easy Guide
A tote bag is one of my favorite sewing projects because it is useful, forgiving, and easy to customize. When I want a bag that holds its shape instead of collapsing on a table, I add a flat bottom. That small change noticeably improves both capacity and stability.
Learning how to sew a tote bag with flat bottom does not require a complicated commercial pattern. This tutorial uses simple fabric rectangles and boxed corners to create a roomy base that allows the finished tote to stand upright.
The project makes a medium-sized tote measuring approximately 14 inches wide, 15 inches tall, and 4 inches deep. Along the way, the tutorial covers boxed corners, lining, an optional pocket, secure handles, and simple reinforcement for a more structured finish.
Key Takeaways
What Is a Flat-Bottom Tote Bag?
A flat-bottom tote has a three-dimensional base rather than two flat fabric panels joined at the bottom. The added depth gives the bag more room. It also allows the bag to sit upright instead of collapsing when placed on a table or floor.
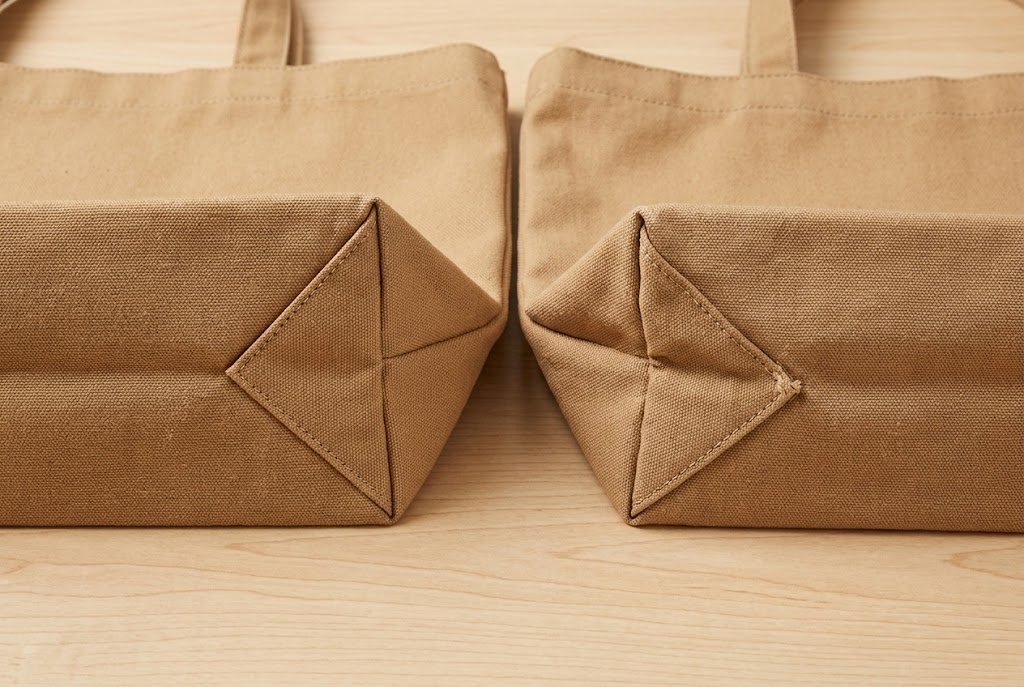
For a beginner project, boxed corners provide one of the simplest ways to create that shape. Equal squares are removed from the lower corners of the fabric. After the side and bottom seams are sewn, the resulting openings are flattened so the side seam meets the bottom seam. Sewing across those points creates the bag’s three-dimensional base.
There are three common ways to create a flat bottom:
For this tutorial, boxed corners are the most practical choice. The method uses basic fabric rectangles, requires fewer pieces, and makes it easy to adjust the finished depth by changing the corner cut-out.
Materials and Tools
Choosing the right materials affects how the finished tote looks and feels. Lightweight fabric works well for a casual bag, while a shopping or book tote benefits from stronger fabric and added support.
Fabric and Sewing Supplies
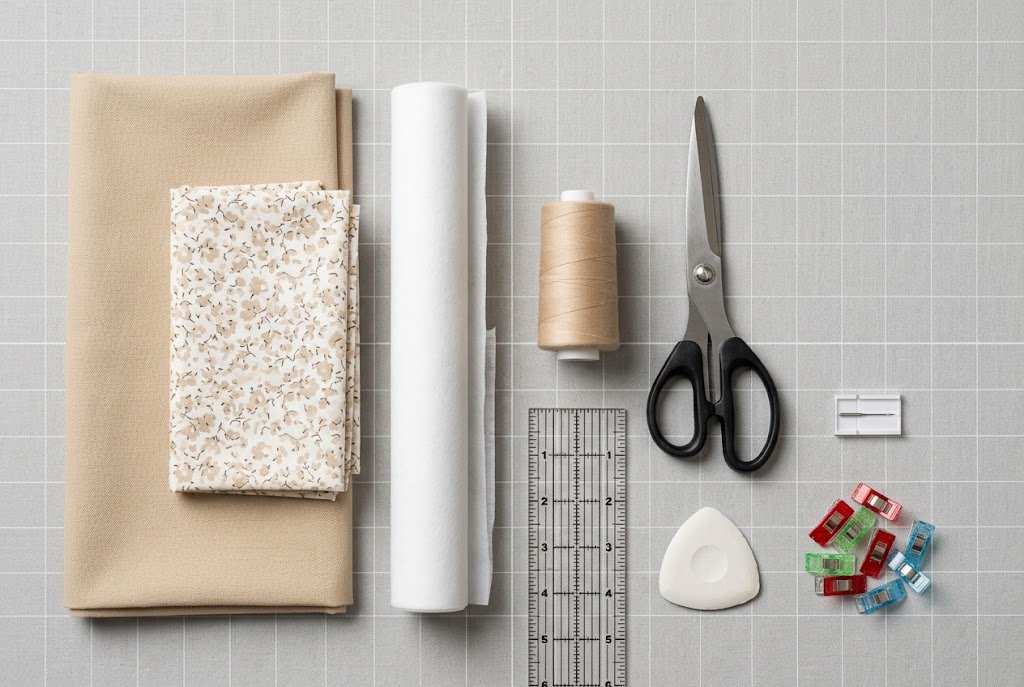
For the medium-sized tote in this tutorial, gather:
Optional supplies include a magnetic snap, firm interfacing, removable plastic canvas, or a bag base.
Also Read: Best Sewing Scissors: Top Picks 2026
Also Read: 10 Best Iron for Sewing: Top-Rated Picks 2026
Also Read: 10 Best Thread for Sewing: Ultimate Guide 2026
What Is the Best Fabric for a Sturdy Tote Bag?
For an everyday tote, canvas, denim, heavyweight cotton, and upholstery-weight cotton are reliable choices. These fabrics provide more body than lightweight quilting cotton and work well for bags carrying books, groceries, or craft supplies.
Lightweight cotton can make an attractive tote. Add fusible interfacing or another stabilizer to support the fabric.
For a first project, medium-weight canvas is easier to manage than stiff fabric. Very heavy materials create bulky seams, especially where the boxed corners and handles meet.
Also read: How to Replace a Sewing Machine Needle? Easy Guide
Tote Bag Measurements and Cutting Chart
Using one measurement set keeps the project simple and makes each step easier to follow. The dimensions below create an everyday tote without a commercial pattern.
Finished Bag Size
The approximate finished measurements are:
| Measurement | Finished Size |
|---|---|
| Width | 14 inches |
| Height | 15 inches |
| Base depth | 4 inches |
| Seam allowance | ½ inch |
The finished size may vary slightly because fabric thickness, pressing, and stitching affect final dimensions.
Cutting Measurements
Cut these pieces before beginning construction:
| Piece | Quantity | Cutting Size |
|---|---|---|
| Outer fabric | 2 | 16 × 18 inches |
| Lining | 2 | 16 × 18 inches |
| Corner cut-outs | 4 | 2 × 2 inches |
| Fabric handles | 2 | 4 × 30 inches |
| Optional pocket | 1 | 8 × 10 inches |
The corner squares are marked on the lower corners of both outer and lining pieces. Keeping all four measurements the same helps create a balanced base.
If cotton webbing replaces fabric handles, two pieces about 28 to 32 inches long will work for this size bag.
How to Calculate Boxed Corners for a Tote Bag
The basic calculation is:
Finished base depth ≈ 2 × corner cut-out size
A 2-inch square cut-out therefore creates a base close to 4 inches deep. A 3-inch cut-out creates a base close to 6 inches deep.
The result can vary slightly because seam allowances, fabric thickness, and construction accuracy affect the final measurement.
For an everyday tote, a 4-inch base provides useful space without making the bag unnecessarily bulky. A deeper base can work well for larger shopping bags, storage totes, or projects that need additional capacity.
Before cutting the corners, consider what the finished bag will carry. Choosing the base depth first makes it easier to create proportions that look balanced and feel practical.
How to Cut the Fabric
Accurate cutting makes a noticeable difference in the finished tote. A small difference between fabric pieces can cause the base to sit unevenly.
Prepare the Fabric
Prewash washable fabric before cutting, especially if the finished tote will need washing. Dry it according to the fabric’s care instructions, then press it flat.
Place the fabric on a clean, level cutting surface. Smooth out wrinkles without stretching the material.
Cut the Main Pieces
- Measure two 16 × 18-inch rectangles from the outer fabric.
- Cut two matching 16 × 18-inch rectangles from the lining.
- Measure 2 inches upward from each lower corner.
- Measure 2 inches inward from each lower edge.
- Mark a 2 × 2-inch square at every lower corner.
- Cut along the marked lines.
- Repeat the same process for the lining.
Accuracy matters here. If one corner is slightly larger than the others, the finished base may sit unevenly. I always measure twice before making the first cut.
If using interfacing, cut it per the manufacturer’s instructions and fuse it to the wrong side of the outer pieces before construction.
Also read: Do You Need Safety Goggles When Sewing?
How to Sew the Outer Bag
The outer bag forms the main structure, so take care with the first seams.
Sew the Side and Bottom Seams
Place the two outer pieces right sides together. Match the side and bottom edges and secure them with clips or pins.
Sew the side seams and bottom seam using a ½-inch seam allowance. Backstitch at the beginning and end of each seam.
Press the seams open or toward one side, depending on the fabric. This makes the boxed corners easier to align.
If the fabric frays easily, finish the raw seams with a zigzag stitch or overlocker to keep loose threads under control inside the tote.
Also Read: How to Sew a Seam by Hand? Easy 5-Step Guide
How to Box Corners on a Tote Bag
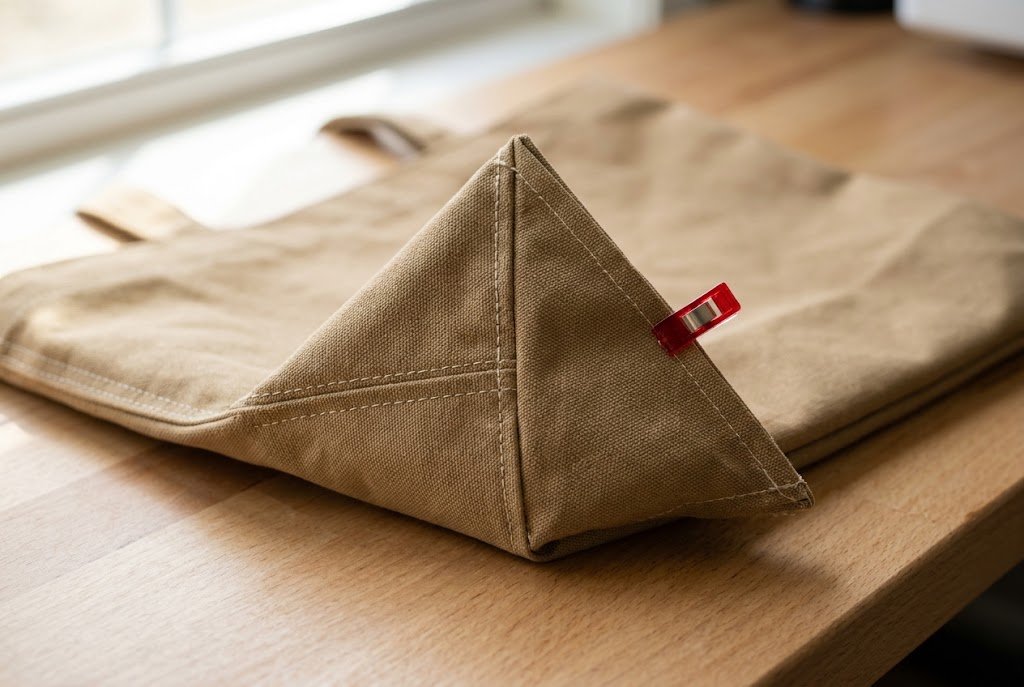
This step creates the flat, three-dimensional base.
- Open one lower corner so the side and bottom seams meet.
- Bring the side seam directly over the bottom seam.
- Flatten the corner into a triangle.
- Match the seams carefully.
- Clip the layers together.
- Sew straight across the triangle using a ½-inch seam allowance.
- Backstitch at both ends.
- Repeat on the opposite corner.
The side and bottom seams should meet neatly at the center. If not, realign them before sewing.
Trim excess fabric, leaving a small seam allowance. If the fabric is thick, grade the seam by trimming one layer slightly shorter than the other.
Turn the outer bag right side out and gently shape the corners with a point turner. Avoid sharp scissors as their tips can puncture the fabric.
Sew the Lining
Assemble the lining like the outer bag, but leave an opening in the bottom seam to turn the finished tote.
- Place the lining pieces right sides together.
- Sew both side seams using a ½-inch seam allowance.
- Sew the bottom seam, leaving a 4–6-inch opening in the center.
- Backstitch at both ends of the opening to secure the stitching.
- Press the seams.
- Box both lower corners using the same 2-inch cut-out as the outer bag.
The opening lets you turn the finished tote right side out after joining the lining and outer bag. Keep it open until final assembly is complete.
The outer bag and lining should have matching corner depths. If the lining has a different cut-out measurement, it may wrinkle, pull, or sit unevenly inside the tote.
How to Add a Pocket to a Tote Bag
An interior pocket gives small essentials such as keys, a phone, cards, or a wallet a dedicated place inside a roomy tote. Adding it before assembling the lining also makes the sewing process easier.
For this project, an 8 × 10-inch pocket provides a practical size without taking up too much space.
Make the Pocket
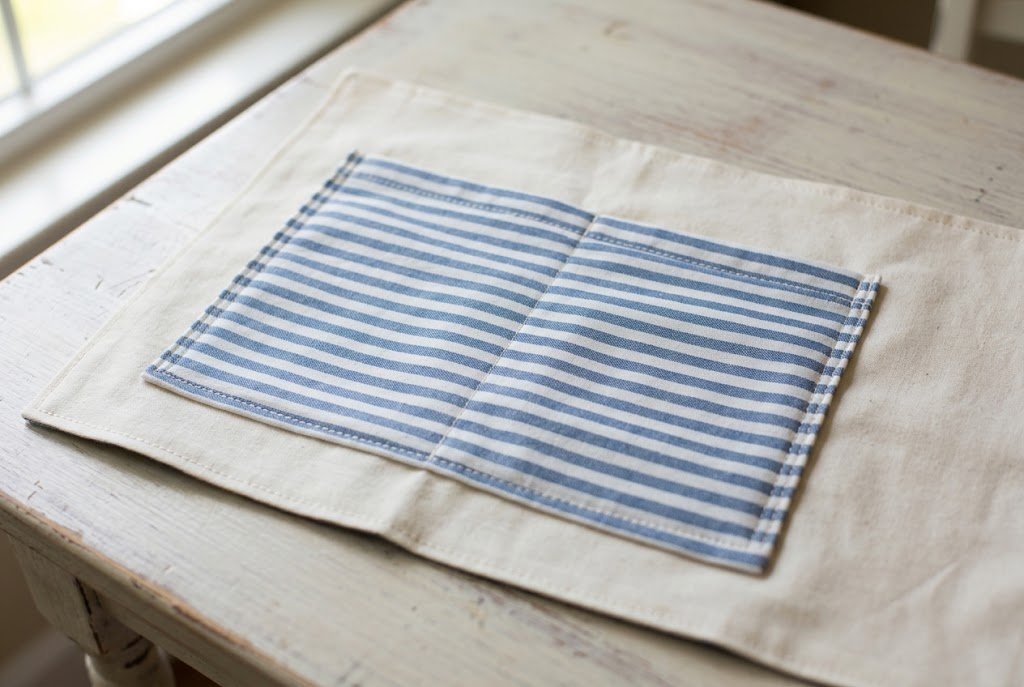
- Fold the pocket rectangle in half with the right sides together.
- Sew along both side edges and the folded bottom edge, leaving a small opening for turning.
- Trim the corners carefully without cutting through the stitches.
- Turn the pocket right side out.
- Push out the corners gently and press the pocket flat.
- Close the turning opening with a narrow machine stitch or ladder stitch.
- Topstitch around the finished edges if desired.
- Position the pocket on the right side of one lining piece.
- Stitch along both sides and the bottom edge, leaving the upper edge open.
Also Read: How to Sew a Pocket Square? Two Easy Methods
Before sewing the pocket to the lining, check its position against the finished top edge. Keep it several inches below the opening so it remains easy to reach and avoid interfering with the top seam.
For extra organization, divide the pocket into two sections by sewing a straight vertical line from the bottom edge to the top. One section can hold a phone while the other keeps keys, cards, or a small wallet in place.
How to Sew Tote Bag Handles Securely
Strong handles are essential when a tote needs to carry groceries, books, craft supplies, or other everyday items. The attachment method matters as much as the handle material.
Make the Fabric Handles
For fabric handles:
- Fold each 4-inch strip in half lengthwise and press.
- Open the strip and fold both long edges toward the center crease.
- Press the folds.
- Fold the strip in half again to enclose the raw edges.
- Press the handle firmly.
- Stitch along both long edges.
The finished handle should have enclosed raw edges and a firm, even shape.
Cotton webbing provides another practical option. It eliminates several folding steps and works especially well for a utility tote.
Position and Reinforce the Handles
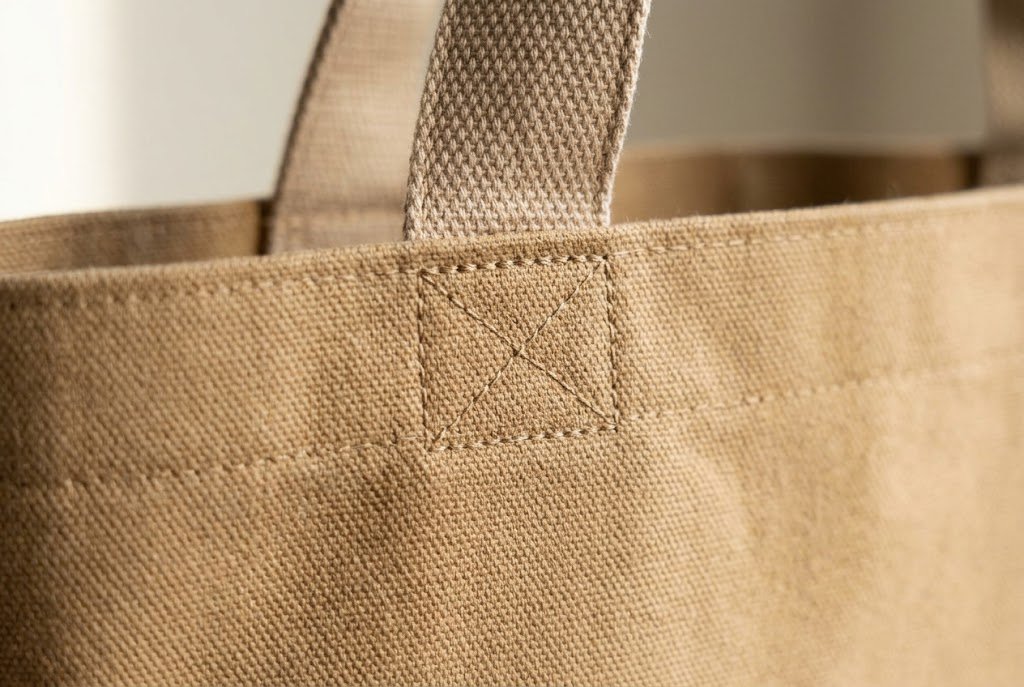
Place each handle about 3 to 4 inches from the nearest side seam. Measure both sides carefully to keep the handles balanced.
Before sewing, check that both handles are the same length, sit at the same height, and are not twisted.
Baste the handles within the seam allowance. Then sew a box-X reinforcement on each handle attachment point.
A box-X consists of a stitched rectangle with diagonal lines crossing the center. It distributes pulling force across a larger area and helps keep the handle firmly attached.
For a heavier tote, add a small piece of interfacing or fabric behind the handle attachment area before sewing.
Also Read: What Is a Basting Stitch in Sewing? Easy Guide
Join the Outer Bag and Lining
Finish the Top Edge
Topstitching gives the tote a cleaner appearance and keeps the lining in position. Sew around the upper edge about ⅛ to ¼ inch from the edge. Keep the fabric flat as you sew for an even finish.
A second line of stitching can be added slightly farther from the first for a more structured appearance.
If making an unlined tote, fold the upper edge toward the wrong side about ½ inch. Press it, fold again to enclose the raw edge, and stitch around the opening. This creates a simple double-fold hem.
How to Make a Tote Bag With a Reinforced Bottom
A reinforced bottom is useful when the tote will carry books, groceries, craft supplies, or other heavier items. The right combination of fabric, stabilizer, and bottom support improves both durability and shape.
Several options can provide additional support:
A removable base is convenient because it can be taken out before washing the tote. Cut the insert slightly smaller than the finished bottom so it fits comfortably without pushing against the side seams.
How to Make a Tote Bag That Stands Up
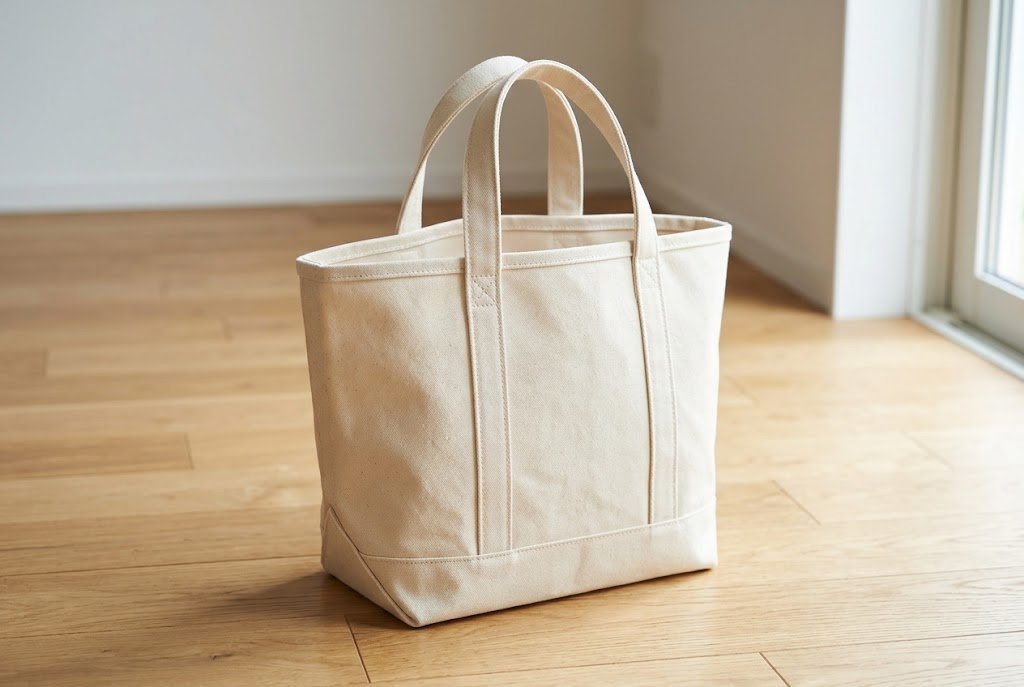
A tote stands upright because several construction details work together. Boxed corners create the depth, while fabric weight and stabilizer determine how much body the bag has.
For a more structured tote:
A soft fabric can still be used but may need interfacing or another stabilizer to prevent the finished tote from collapsing. A removable base is a practical option when extra support is needed without making the entire bag rigid.
Common Sewing Problems and Easy Fixes
The Bottom Is Not Flat
The side and bottom seams may not be aligned evenly. Open the corner, match the seams carefully, and check the measurement before sewing across the triangle.
The Bag Looks Crooked
Compare the two boxed corners and make sure the cut-outs are identical. Also check that both side seams were sewn with the same seam allowance.
The Lining Is Too Small
A lining can feel too small when its dimensions or corner depth do not match the outer bag. Use compatible measurements for both layers and make sure the boxed corners are the same size.
The Handles Pull Away
The handle attachment points need adequate reinforcement, especially when the tote will carry heavier items. Add a box-X stitch and consider a small reinforcement patch behind each attachment point. Cotton webbing is another practical option for a utility tote.
The Fabric Shifts While Sewing
Thick layers can shift under the presser foot. Use clips instead of pins when appropriate, choose a suitable needle, and slow the sewing speed when crossing bulky seams.
Also Read: Why Does My Sewing Machine Keep Jamming? Easy Fixes
Three Ways to Create a Flat Bottom
Different construction methods work well for different tote designs.
| Method | Best For | Main Advantage | Difficulty |
|---|---|---|---|
| Boxed corners | Beginner totes | Simple construction | Easy |
| Fold-and-sew corners | Quick modifications | No separate bottom piece | Easy |
| Separate bottom strip | Structured bags | Precise base dimensions | Intermediate |
For a first tote, boxed corners are the most practical choice. The technique requires only basic measurements and helps build useful bag-making skills.
A separate bottom strip becomes more useful when the exact base width matters or when a more defined bag shape is needed.
How to Sew a Tote Bag With Flat Bottom for Beginners
A first project does not need many complicated features. Start with the basic body, boxed corners, simple handles, and a lining. Once the construction becomes familiar, add a pocket, magnetic snap, reinforced base, or decorative topstitching.
Careful measuring is one of the most important parts of the process. Matching fabric panels and identical corner cut-outs make the finished tote more balanced and easier to assemble.
The same measurement-based approach can also be used when learning how to make a tote bag without a pattern. A cutting mat, ruler, and accurate measurements can be enough for a simple rectangular tote design.
How Deep Should a Tote Bag Bottom Be?
A 4-inch base works well for a medium everyday tote because it adds useful capacity without making the bag bulky. It is practical for books, groceries, craft supplies, and other everyday items.
For a shallower tote, a 2-inch corner cut creates an approximately 4-inch base depth. A 3-inch cut can produce a base close to 6 inches deep.
The ideal depth depends on the intended use. A deeper base provides more capacity, while a shallower one makes a lightweight tote easier to carry. Increasing the depth also changes the bag’s proportions, so the width and height may need to be adjusted.
How to Make a Tote Bag Without a Pattern
A simple tote can be made from fabric rectangles without using a commercial pattern.
Start by deciding the finished width, height, and base depth. Add seam allowance to the body measurements, then choose the corner cut-out based on the desired depth.
This approach makes it easy to customize a shopping or everyday tote. Once the basic measurements are understood, the method can be adapted to create different bag sizes.
Also Read: How to Sew a Curtain? Easy Steps for Perfect Results
How to Make a Structured Shopping Tote
A structured shopping tote depends on several construction details rather than one feature alone.
For better shape retention, consider combining:
Not every option is necessary. Sturdy fabric combined with boxed corners provides good structure, while interfacing or a removable base adds support when needed.
Final Thoughts on Sewing a Tote Bag With Flat Bottom?
Learning to sew a tote bag with a flat bottom is easier once you understand the purpose of boxed corners. The construction may look complicated at first. The three-dimensional base comes from one simple technique: matching the side and bottom seams at the lower corners.
For a first attempt, keep measurements simple. A 2-inch corner cut-out, sturdy fabric, lined interior, and reinforced handles create a useful everyday tote.
I recommend making one basic version before adding decorative details. Once the corners are even and seams straight, there is room to experiment with pockets, magnetic snaps, contrasting fabrics, longer handles, and different base depths.
The best part is the ability to adjust the dimensions according to what the bag needs to carry. That flexibility is what makes a simple tote project genuinely useful.
Also read: How to Sew a Pillow: Easy Guide for Beginners
Also read: 10 Best Sewing Books for Beginners: Top Picks 2026