
How to Replace a Sewing Machine Needle? Easy Guide
A sewing machine needle may be one of the smallest parts, but it directly affects stitch quality. A dull, bent, or incorrectly installed needle can cause skipped stitches, broken thread, uneven seams, fabric snags, and frustration. Fortunately, replacing it is quick and simple, requiring only a few basic steps.
One maintenance habit has consistently prevented most sewing problems: replacing the needle before assuming the machine is faulty. More than once, what seemed like a tension or timing issue disappeared after installing a fresh needle. This small task often makes a noticeable difference in how smoothly a machine performs.
Whether sewing a first pillowcase or finishing a quilt, knowing how to replace a sewing machine needle is essential. This guide explains when to change the needle, how to install it correctly, common mistakes to avoid, and simple checks to ensure everything works properly before starting the next project.
Also Read: Why Does My Sewing Machine Keep Jamming? Easy Fixes
Key Takeaways
When to Replace a Sewing Machine Needle
Many beginners replace the needle only after it breaks. In practice, a needle usually becomes dull long before that. Because the tip wears gradually, poor stitch quality often appears before visible signs of damage.
Making needle replacement part of regular sewing machine maintenance helps produce cleaner stitches and reduces the chance of damaging fabric.
Signs the Needle Needs Replacing
Watch for these common signs:
If one or more of these issues appear, replace the needle as the first troubleshooting step.
Replace the Needle After Certain Projects
Even if the needle still looks fine, replacing it after demanding projects is good practice.
Consider installing a new needle after:
Needles are inexpensive, but using a worn one can affect stitch quality and increase the chance of damaging fabric.
Don’t Continue Sewing With a Bent Needle
Even a slight bend can prevent the needle from forming proper stitches. It may also hit the needle plate or bobbin area, causing more serious machine problems.
If the needle appears bent or has hit a hard object, replace it immediately rather than trying to straighten it.
Tools You Need
Replacing a sewing machine needle requires only a few basic tools. Gathering everything before you begin makes the process quicker and helps prevent small mistakes.
Essential Tools
Helpful Optional Tools
While not required, these items can make needle replacement easier:
Also Read: Best Sewing Scissors: Top Picks 2026
Choose the Correct Needle
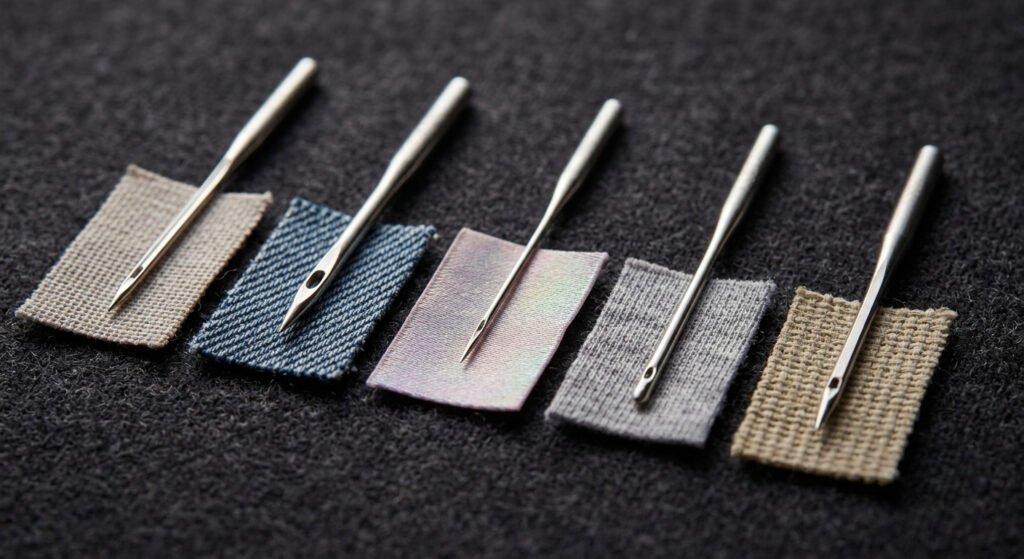
Before opening a new package, make sure the needle matches your fabric.
| Fabric Type | Recommended Needle |
|---|---|
| Lightweight woven | Universal 70/10 |
| Cotton | Universal 80/12 |
| Quilting cotton | Quilting 75/11 or 90/14 |
| Denim | Jeans/Denim Needle |
| Stretch fabrics | Ballpoint or Stretch Needle |
| Silk | Microtex Needle |
| Canvas | Heavy-Duty or Denim Needle |
Using the correct needle helps produce cleaner stitches, reduces thread breakage, and minimizes the risk of fabric damage.
Also Read: 10 Best Thread for Sewing: Ultimate Guide 2026
Safety First
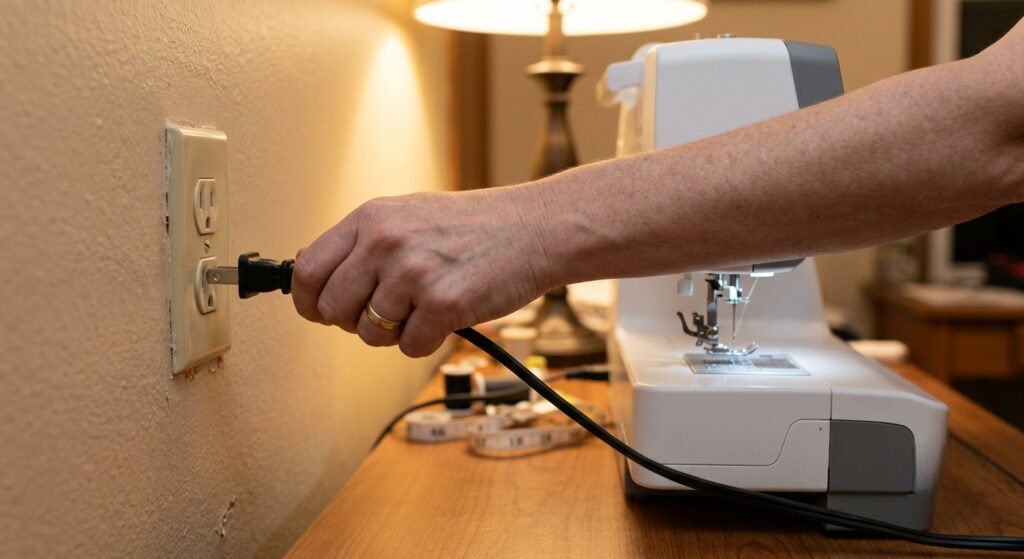
Changing a sewing machine needle takes a few minutes, but a careful setup makes the job safer and easier. One habit proven worthwhile over years of sewing is turning the machine off before touching the needle. It takes only a moment and helps prevent accidental movement near the needle.
Before removing the old needle:
With everything prepared, you’re ready to remove the old needle and install the new one correctly.
Also Read: Do You Need Safety Goggles When Sewing?
How to Remove the Old Needle
Once the sewing machine is prepared, removing the old needle is quick. A careful approach helps protect the needle clamp, prevents the needle from falling into the machine, and makes installing the replacement much easier.
Step 1: Raise the Needle to Its Highest Position
Turn the handwheel toward you until the needle reaches its highest point. This creates enough clearance to remove the needle safely and gives you a clear view of the needle clamp.
Avoid using the foot pedal to raise the needle during maintenance. Turning the handwheel by hand gives you better control and reduces accidental movement.
Step 2: Support the Needle Before Loosening It
Place one hand beneath the needle before loosening the needle clamp screw. The needle may slide out as soon as the clamp releases, and supporting it prevents it from falling into the machine or on the floor.
This habit saves time and helps avoid searching for a loose needle inside the bobbin area.
Step 3: Loosen the Needle Clamp Screw
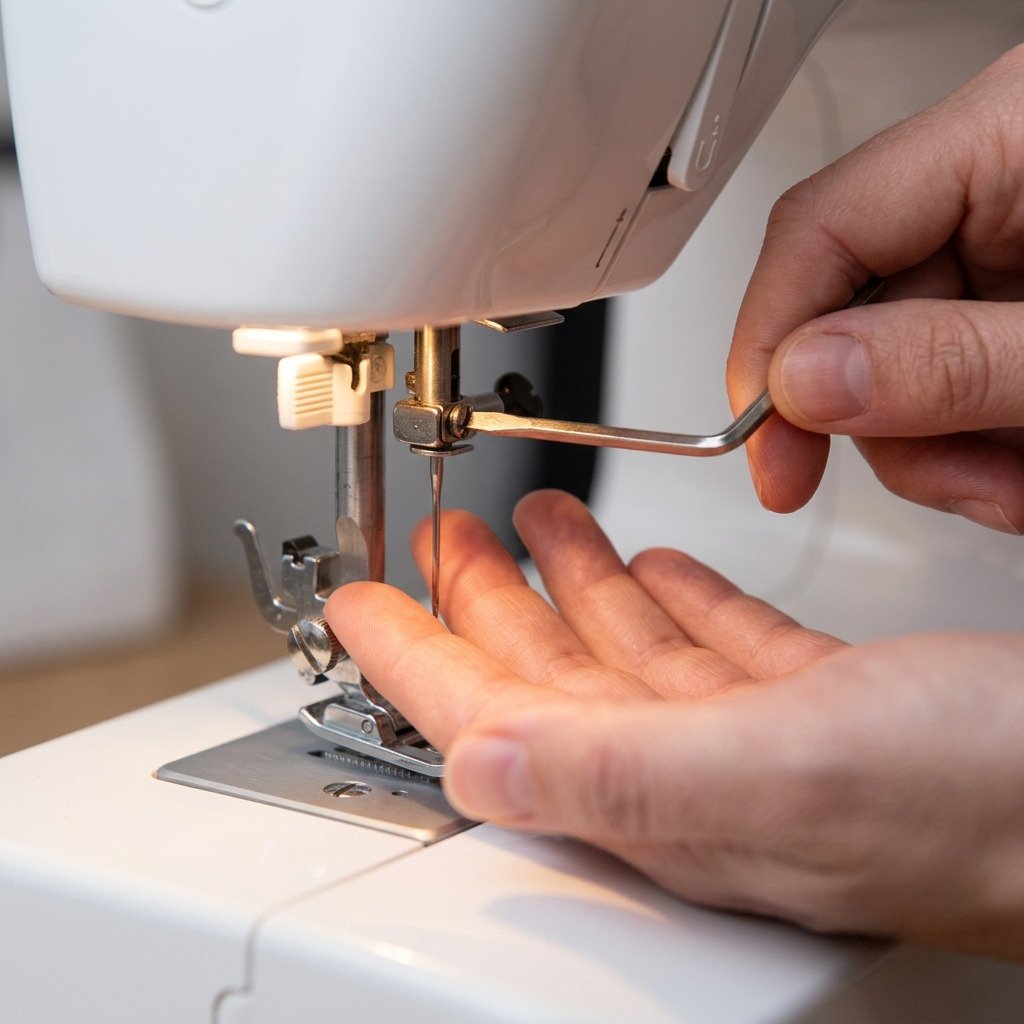
Locate the needle clamp screw, directly above the needle. Turn it counterclockwise just enough to release the needle. Many modern sewing machines allow you to loosen the screw by hand, while some models require the small screwdriver supplied with the machine.
Usually there’s no need to remove the screw completely. Loosening it just enough to free the needle reduces the risk of losing the screw and makes reinstallation quicker.
Step 4: Remove the Needle Carefully
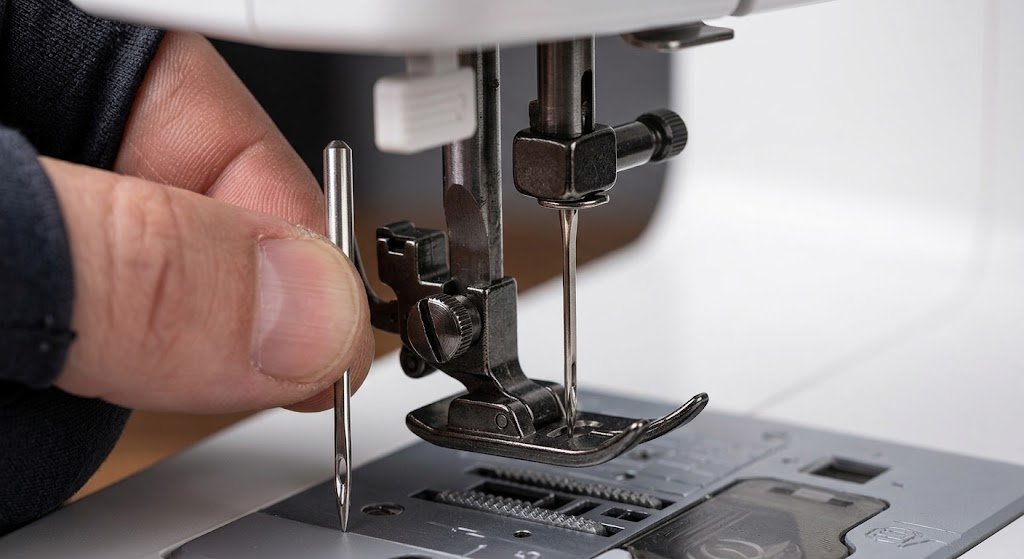
Hold the needle near its center and pull it straight downward. Avoid twisting, bending, or forcing it, as this may damage the needle clamp or make removal more difficult.
If the needle feels stuck, don’t pull harder. Loosen the clamp screw slightly more and try again. The needle should slide out smoothly with little effort.
Dispose of the Old Needle Safely
Used sewing machine needles remain sharp even when dull for sewing. Instead of placing it directly in the trash, put it in a sharps container or a sturdy, sealed container like an empty pill bottle. If neither is available, wrap the needle securely in thick paper or cardboard before disposal.
Taking a few extra seconds to dispose of used needles safely helps protect anyone handling household waste and keeps the sewing area safer and more organized.
Practical Tip: If the old needle appears bent, has a chipped tip, or shows signs of wear, take a moment to inspect the needle plate and presser foot before installing a new one. A damaged needle can sometimes leave small burrs that may affect stitch quality on future projects.
Also Read: Can You Embroider With a Sewing Machine? Easy Guide
How to Check if the Needle Is Installed Properly
Taking one minute to inspect the installation before sewing can prevent many common stitching problems.
Inspect the Needle Position
Before threading the machine, confirm that:
Turn the Handwheel by Hand
Slowly rotate the handwheel toward you and watch the needle pass through the needle plate.
The needle should move smoothly without touching the plate or bobbin area. If you notice resistance or hear a clicking sound, stop and reinstall the needle before using the machine.
Test on Scrap Fabric
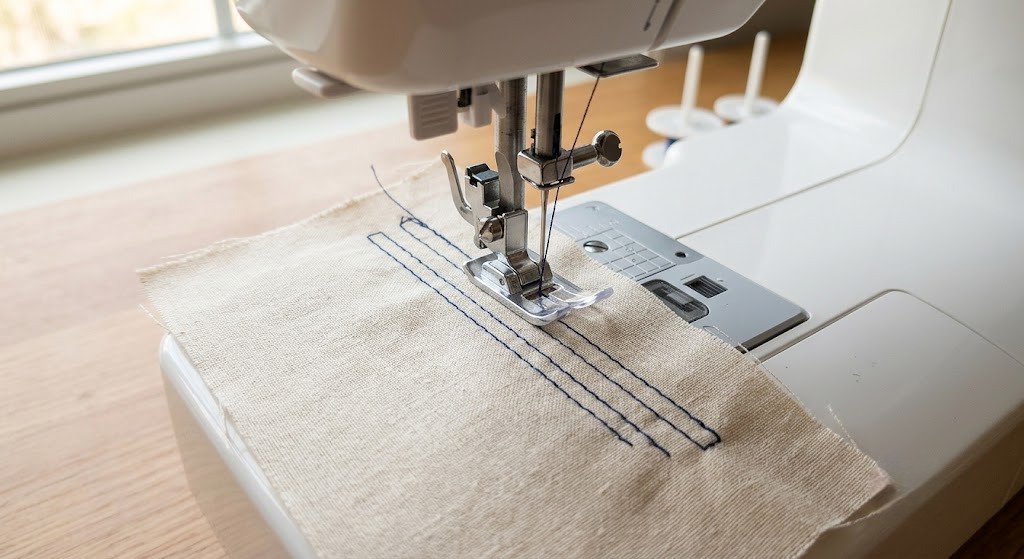
Always test the new needle before starting your project.
Thread the machine and sew several lines on a scrap piece of fabric similar to your project material. Check for:
If the stitches look clean and the machine runs smoothly, the needle has been installed correctly, and you’re ready to begin sewing.
One habit that consistently improves stitch quality is replacing the needle before starting a large project or switching to a different fabric type. A fresh needle often solves problems that are easily mistaken for tension or threading issues, saving time and producing more consistent results.
Common Mistakes to Avoid
Replacing a sewing machine needle is simple, but some common mistakes can affect stitch quality or damage the machine. Double-checking each step helps prevent unnecessary troubleshooting later.
Installing the Needle Backward
The needle must face the correct direction for the machine to form stitches properly. On most household sewing machines, the flat side of the needle shank faces the back. If the needle is installed backward, the machine may skip stitches, break the thread, or fail to pick up the bobbin thread.
If you’re unsure about the correct orientation, check your sewing machine manual before tightening the needle clamp screw.
Not Inserting the Needle Fully
A needle not fully inserted into the clamp may appear secure, but even a small gap can affect stitch formation.
Before tightening the clamp screw, gently push the needle upward until it stops. A fully seated needle helps the hook and bobbin work together correctly, producing smooth and even stitches.
Leaving the Needle Clamp Screw Too Loose
The needle clamp screw holds the needle firmly in place while the machine is sewing. If it’s too loose, the needle can slip downward, wobble, or even fall out during stitching.
Tighten the screw until it feels secure, but avoid using excessive force that could damage the threads.
Using the Wrong Needle for the Fabric
Not every sewing machine needle is designed for every fabric. Using the wrong type can lead to skipped stitches, puckered seams, thread breakage, or fabric damage.
For example:
Matching the needle to your fabric improves stitch quality and reduces unnecessary wear on both the needle and the machine.
Also Read: How to Sew Binding on a Quilt? Step-by-Step Guide
Continuing to Sew With a Damaged Needle
A bent, chipped, or dull needle rarely gets better with continued use. Instead, it often causes more sewing problems over time.
If you notice repeated skipped stitches, unusual noises, fabric snags, or frequent thread breaks, replace the needle before adjusting thread tension or other machine settings. Often, a fresh needle resolves the problem immediately.
Troubleshooting Needle Problems
Even after replacing the needle, you may occasionally experience stitching issues. Most problems have simple causes that can be corrected without major machine repairs.
The Needle Keeps Falling Out
If the needle slips out during sewing, check these points:
Remove the needle, reinstall it carefully, and tighten the clamp screw before sewing again.
The Machine Is Skipping Stitches
Skipped stitches after replacing the needle usually indicate an installation or compatibility issue.
Check that:
If everything looks correct, install another new needle since even new needles can be defective.
Also Read: How to Load Bobbin in Sewing Machine? Easy Steps
Thread Keeps Breaking
Broken thread isn’t always caused by thread tension. It can also result from a damaged or incorrect needle.
Inspect the needle for:
Replacing the needle is often the quickest solution before making tension adjustments.
Also Read: How to Sew an Invisible Zipper? Full Guide
Fabric Snags or Pulls
A needle with a rough point or small burr can catch fabric fibers and leave visible damage.
If delicate fabrics begin snagging, replace the needle immediately and test on a scrap piece before continuing your project.
The Needle Hits the Needle Plate
Stop sewing as soon as you hear the needle hit the needle plate.
Possible causes include:
Replace the damaged needle before sewing again, as continuing with it may damage other machine parts.
The Needle Doesn’t Fit Properly
If the new needle won’t slide into the clamp, do not force it.
Instead:
Cleaning around the needle bar often solves the problem.
Simple Tips for Longer Needle Life
Sewing machine needles are inexpensive, but proper care helps them perform at their best and reduces stitching problems.
Conclusion: How to Replace a Sewing Machine Needle
One habit that produces better results is replacing the needle when changing to a very different fabric type, such as moving from denim to lightweight cotton or silk. A fresh, fabric-appropriate needle often improves stitch quality immediately and prevents many issues commonly mistaken for machine or tension problems
Learning how to replace a sewing machine needle is one of the simplest ways to keep a sewing machine performing at its best. The process takes only a few minutes; it can prevent many common sewing problems, including skipped stitches, broken thread, uneven seams, and fabric damage.
Following a consistent routine—turning off the machine, removing the old needle carefully, installing the new needle correctly, and testing it on scrap fabric—helps ensure smooth, reliable stitching on every project.
From years of sewing various fabrics and projects, one habit has made the biggest difference: replacing the needle before it causes problems. A fresh needle often restores stitch quality immediately and helps avoid troubleshooting issues caused by normal needle wear rather than the machine.
Make needle replacement a regular part of your sewing machine maintenance, especially before starting a new project or switching to a different fabric type. It’s a simple step that helps protect your machine, improves stitch quality, and gives every project a cleaner, more professional finish.
Also read: Best Mechanical Sewing Machine: Our Top Pick 2026

One Comment