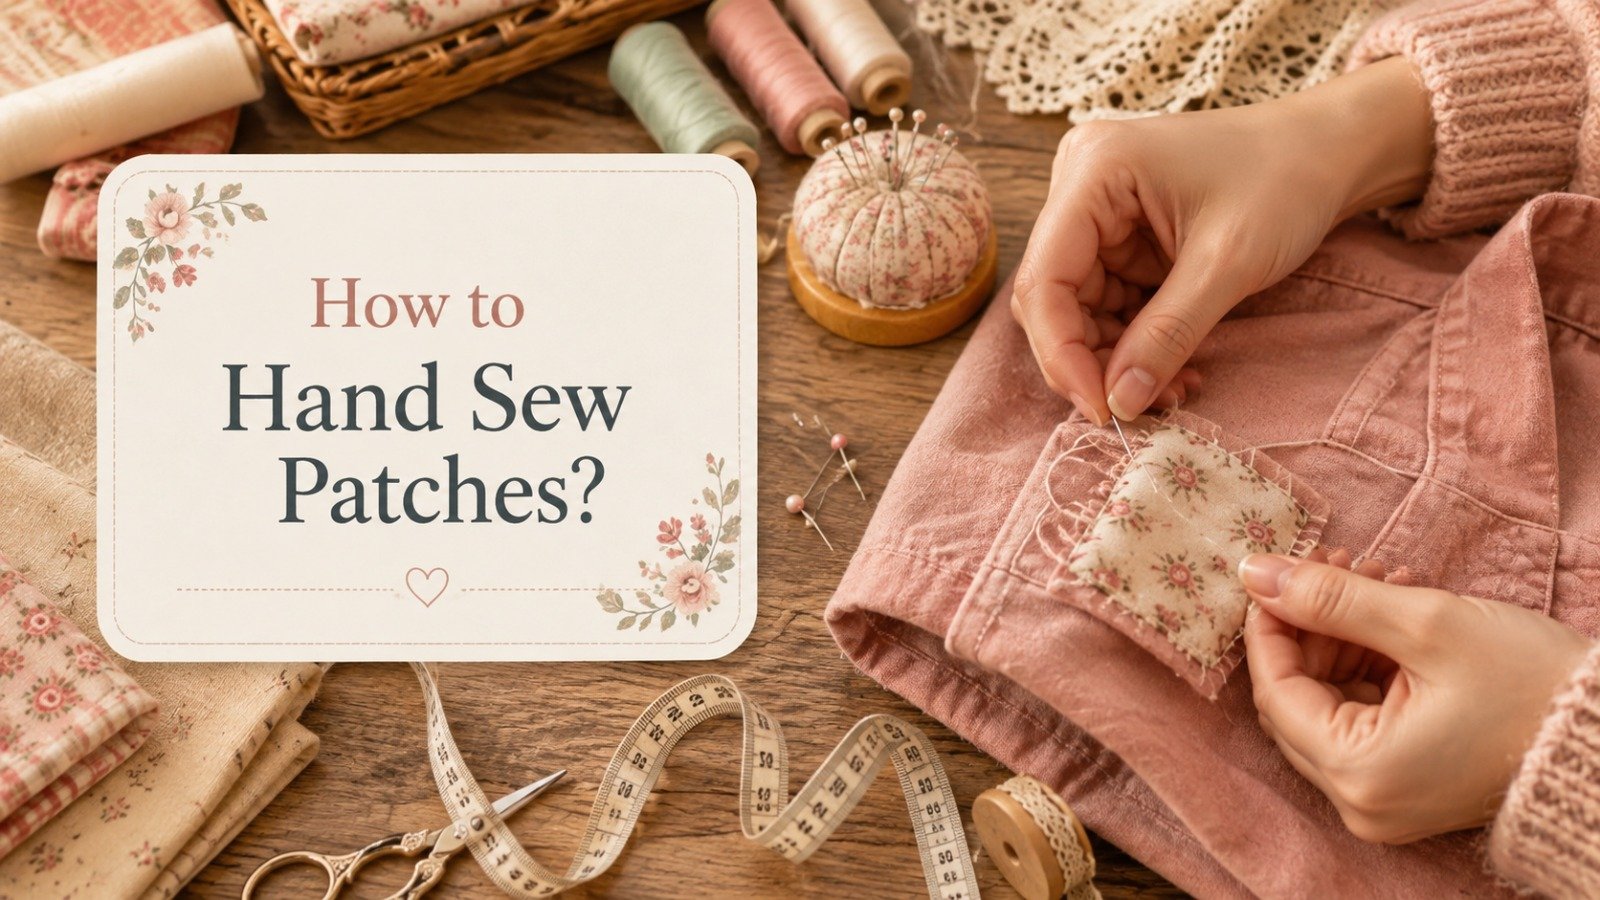
How to Hand Sew Patches? An Easy Guide
Whether repairing worn jeans, personalizing a denim jacket, or attaching an embroidered badge to a backpack, learning to hand sew patches is a practical skill every sewist can use. It requires no sewing machine or experience.
With a few basic tools, the right stitch, and patience, you can attach a patch that looks neat and stays secure through everyday wear. Over the years, I’ve sewn patches onto everything from jeans and canvas tote bags to children’s jackets and work aprons. One lesson remains the same: careful preparation matters as much as the stitches.
Taking an extra minute to position the patch correctly, choosing strong thread, and reinforcing the edges has helped my hand-sewn patches stay firmly attached after repeated washing and regular use. This guide explains how to hand sew patches step by step, from choosing supplies to finishing with clean, secure stitches.
It covers the best hand stitches for different patch types, practical patch placement tips, common mistakes to avoid, and ways to make patches last longer. Whether a first repair or a decorative project, these techniques help create a professional-looking finish without a sewing machine.
Also Read: Top 10 Best Sewing Machines for Intermediate Sewers
Key Takeaways
What You Need to Hand Sew Patches
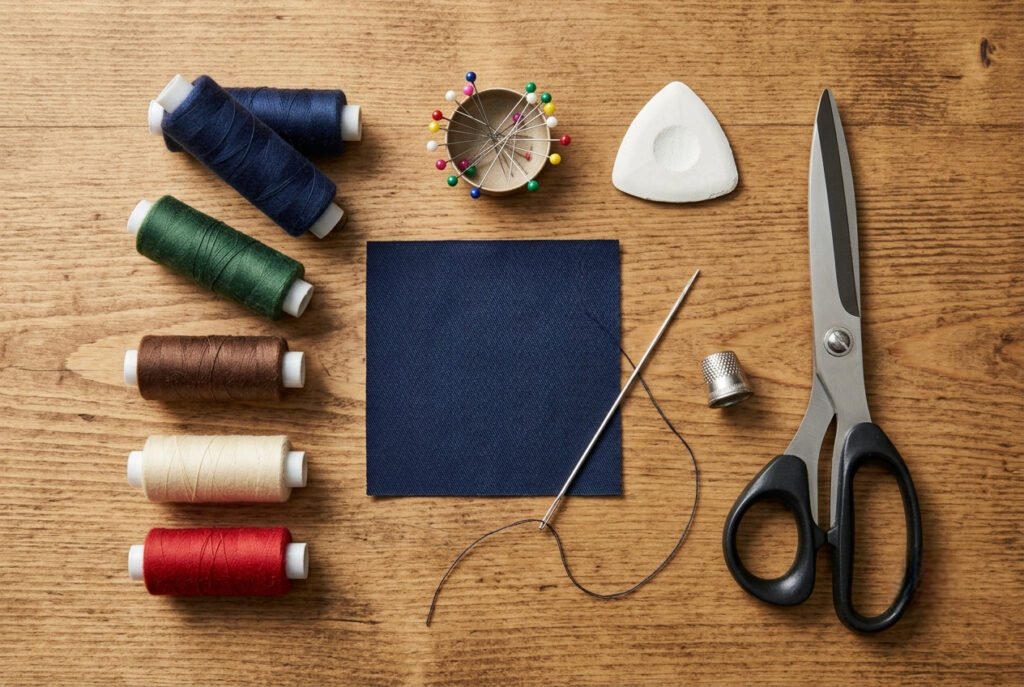
Before starting this patch sewing tutorial, gather all the necessary supplies. Having everything within reach makes the sewing process smoother and helps produce more consistent stitches.
Basic Sewing Supplies
Prepare the following items before beginning:
I usually match the thread to the border of the patch rather than the garment. This simple trick helps the stitches blend naturally, especially when sewing embroidered patches.
Also Read: Best Sewing Scissors: Top Picks 2026
Choosing the Right Needle
The needle should suit both the patch and the fabric.
Using the correct needle makes stitching easier, reduces hand fatigue, and creates evenly spaced stitches without damaging the fabric.
Choosing the Best Thread
Strong polyester thread is the best choice for most projects because it resists stretching, abrasion, and repeated washing.
Depending on the project, consider using:
Avoid old or brittle thread, as it can snap during sewing or weaken over time. Fresh, high-quality thread is one of the easiest ways to improve the durability of a hand-sewn patch.
Also Read: 10 Best Thread for Sewing: Ultimate Guide 2026
Best Fabrics and Patch Types
Not every patch or fabric behaves the same. Choosing the right combination before sewing creates a cleaner finish and improves durability. I’ve found that matching the stitch, needle, and thread to the fabric makes hand sewing easier and keeps patches securely attached longer.
Sew-On Embroidered Patches
Sew on embroidered patches are one of the easiest options for hand stitching. Their thick, finished borders provide a sturdy edge that holds stitches well while helping hide the thread.
These patches are commonly used on:
A simple whip stitch or backstitch usually provides enough strength for everyday use.
Also Read: Can You Embroider With a Sewing Machine? Easy Guide
Fabric Repair Patches
Fabric patches are designed to repair holes, worn areas, or tears while blending naturally with the original garment. They remain flexible after washing and are an excellent choice for clothing that needs to stay comfortable.
When repairing damaged fabric, choose a patch that extends ¼ to ½ inch beyond the damaged area on every side. This provides enough surface for secure stitching and helps prevent the tear from spreading.
Also read: How to Sew a Rip? Easy 6- Step Guide
Iron-On Patches
Iron-on patches offer convenience because the adhesive backing temporarily holds the patch in place. However, the adhesive may weaken over time with repeated washing and wear.
For the most durable repair, lightly iron the patch per the manufacturer’s instructions, then sew around the entire edge by hand. This creates a stronger attachment and helps prevent the edges from lifting.
Also Read: 10 Best Iron for Sewing: Top-Rated Picks 2026
Choosing the Right Fabric
Most woven fabrics are easy to work with because they stay stable while sewing. Stretchy fabrics require a little more care since they can shift or pucker if the stitches are pulled too tightly.
The following fabrics work especially well for hand stitching patches:
If you’re sewing patches on thick fabric like denim or canvas, use a heavy-duty hand-sewing needle, strong polyester thread, and a thimble to push the needle through multiple layers comfortably.
For lightweight fabrics, use shorter stitches and avoid pulling the thread too tightly. This keeps the fabric smooth and reduces puckering around the edges of the patch.
How to Hand Sew Patches Step by Step
Now that the supplies are ready, it’s time to attach the patch. These steps work for most embroidered, fabric, and iron-on patches. Spending a few extra minutes at each stage creates a cleaner finish that stays secure through everyday wear and washing.
Step 1: Decide the Patch Placement
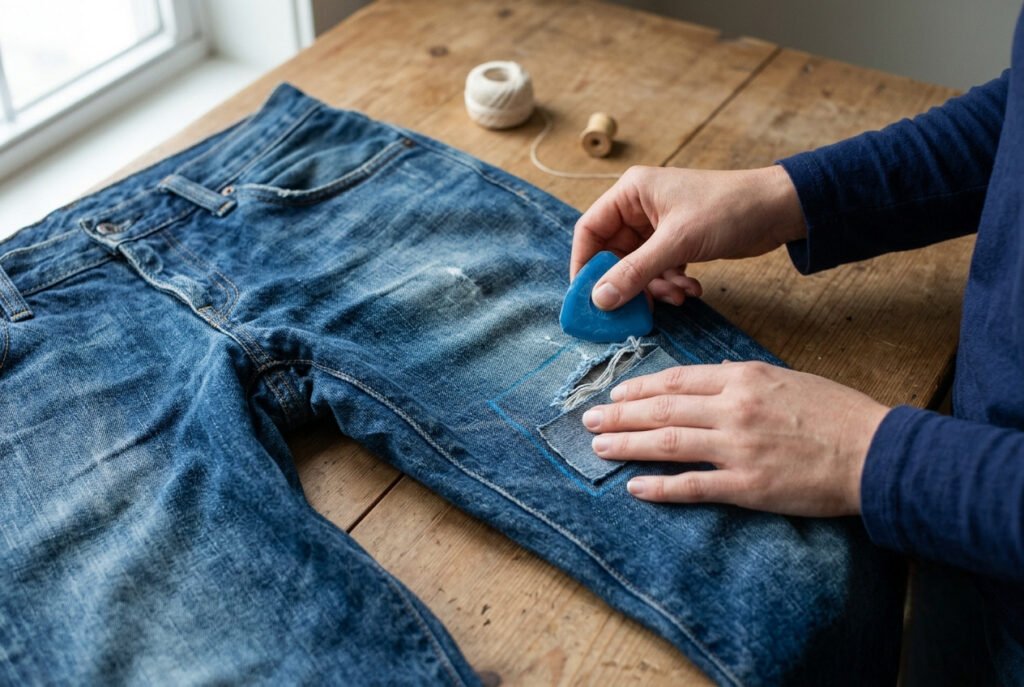
Before threading the needle, position the patch exactly where it belongs. If covering a hole or tear, make sure it extends at least ¼ inch beyond the damaged area on every side.
For decorative patches, try the garment on or lay it flat in front of a mirror to check placement. I always measure from nearby seams or pockets when adding matching patches because even a small difference becomes noticeable once stitched in place.
Helpful patch placement tips:
Step 2: Secure the Patch
Hold the patch firmly in place before sewing. Straight pins work well for most fabrics, while sewing clips are better for thick materials like denim or canvas.
If the patch has an iron-on backing, lightly press it per the manufacturer’s instructions. I do this to keep the patch from shifting while stitching, but still sew around the entire edge for durability.
Also Read: What Is a Basting Stitch in Sewing? Easy Guide
Step 3: Thread the Needle
Cut about 18 to 24 inches of thread. Longer pieces tend to knot and twist, slowing the sewing process and causing frustration.
Thread the needle, then tie a small, secure knot at one end. Matching the thread to the patch border usually hides the stitches better than matching the garment color.
Step 4: Sew Around the Patch
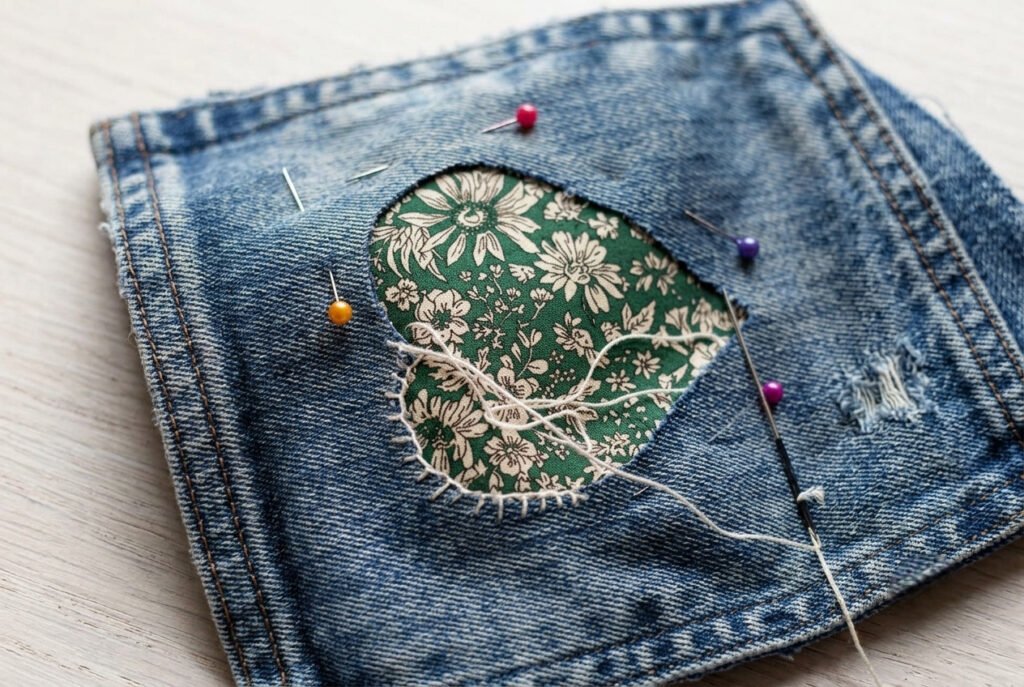
Insert the needle from the inside of the garment whenever possible so the starting knot stays hidden beneath the patch.
Begin stitching close to the edge using small, evenly spaced stitches. Whether using a whip stitch, blanket stitch, or backstitch, consistency is more important than speed. Slow, even stitches create a stronger hold and give the finished patch a much neater appearance.
Also Read: How to Sew a Seam by Hand? Easy 5-Step Guide
Step 5: Reinforce High-Stress Areas
Corners, curves, and frequently handled areas experience the most wear. Add two or three extra stitches where the patch is likely to catch or pull.
I always reinforce:
These few extra stitches can significantly increase the life of the repair.
Step 6: Finish the Stitching Neatly
After sewing completely around the patch, pass the needle underneath several nearby stitches on the back of the fabric. Tie two small knots close to the material, then trim the excess thread without cutting the knot.
Run your fingers around the patch to check that every edge sits flat. If you notice a loose section, add a few more stitches before using or washing the item. An extra minute now helps prevent the patch from lifting later.
Best Hand Stitches for Patches
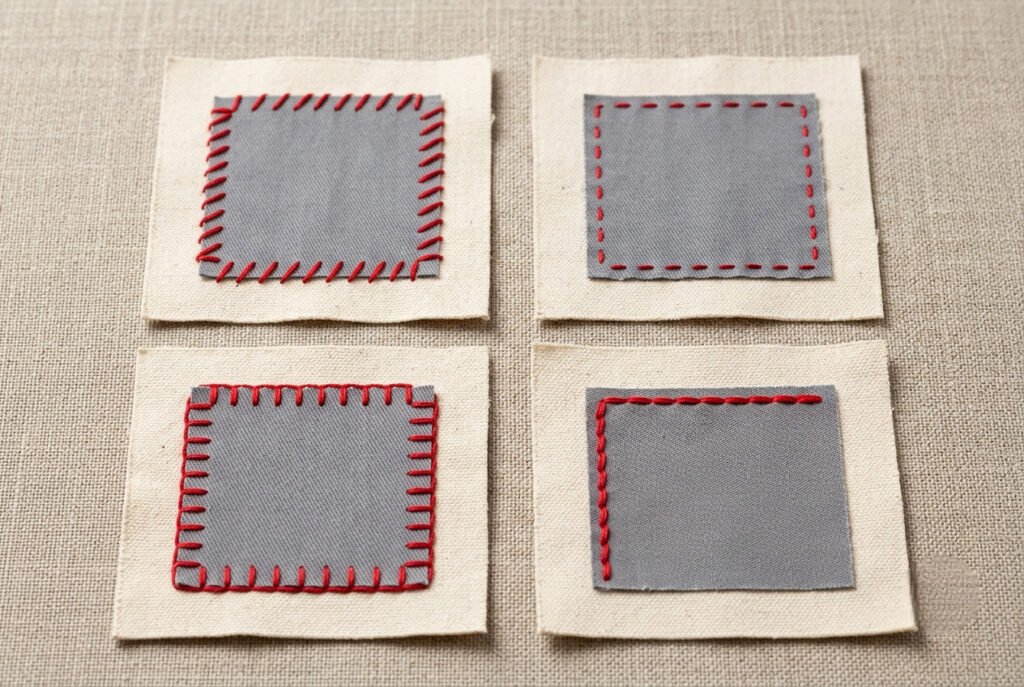
The stitch you choose affects both the appearance of the patch and how well it holds up over time. Some stitches are quick and nearly invisible, while others create a decorative border or add extra strength for frequently used items.
After sewing patches on everything from denim jeans to canvas bags, I’ve found no stitch is perfect for every project. The best choice depends on the patch type, fabric, and item use.
Whip Stitch for Patches
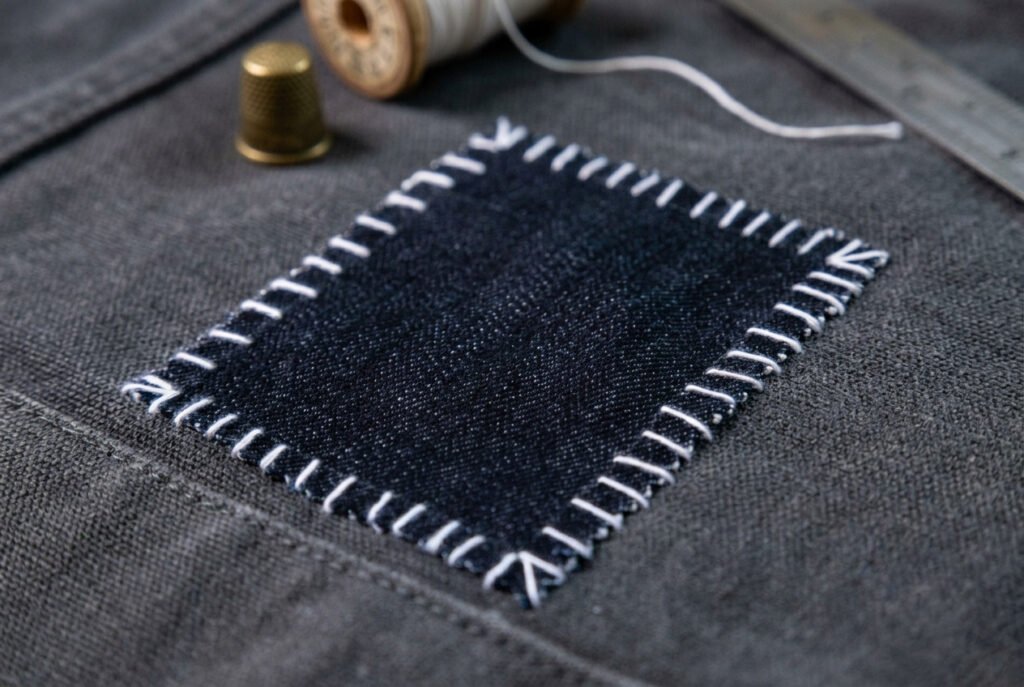
The whip stitch for patches is one of the most popular methods because it’s simple, secure, and easy to learn. The needle passes over the edge of the patch in a diagonal motion, wrapping the border tightly against the fabric.
I use this stitch most often for embroidered patches because the thread blends neatly into the raised border and creates a clean finish.
Also Read: How to Do a Whip Stitch? Quick Guide
Best for:
Advantages:
Running Stitch for Patches
The running stitch for patches is one of the simplest hand-sewing techniques. It creates a straight line by passing the needle in and out of the fabric at even intervals.
Though not as strong as a whip stitch or backstitch, it works well for lightweight garments and decorative projects that won’t get heavy wear.
Best for:
For a stronger hold, keep the stitches short and evenly spaced rather than making long gaps between each stitch.
Blanket Stitch Patches
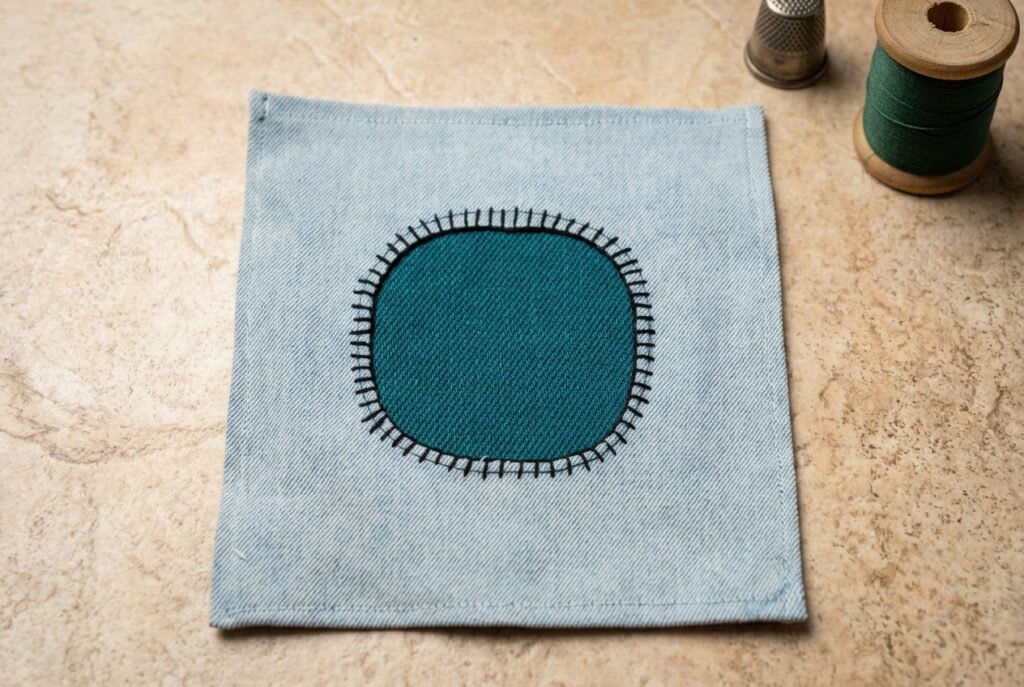
The blanket stitch combines durability with decoration. Instead of hiding the stitches, it creates an attractive looped border that becomes part of the finished design.
I often choose this stitch for handmade felt patches because it prevents the edges from fraying while adding a decorative touch.
Best for:
Backstitch
If strength is the priority, the backstitch is difficult to beat. Each new stitch overlaps the previous one, creating a continuous seam that holds up well under frequent movement and washing.
This stitch takes a bit longer than a whip stitch but is an excellent choice for workwear, backpacks, and clothing with regular use.
Best for:
Which Is the Best Stitch to Hand Sew Patches?
Each stitch has strengths, so the right choice depends on the project.
| Stitch | Best For |
|---|---|
| Whip stitch | Embroidered patches, jackets, uniforms |
| Backstitch | Repairs and heavy-use clothing |
| Blanket stitch | Felt and decorative patches |
| Running stitch | Lightweight fabrics and temporary patches |
For most everyday repairs, I choose a whip stitch because it balances strength, speed, and appearance. When repairing jeans, backpacks, or work clothing that will get constant wear, I switch to a backstitch for extra durability.
How to Sew Patches on Different Items
The same sewing technique doesn’t always work well on every project. Fabric thickness, flexibility, and daily wear influence how a patch should be attached. Adjusting your approach to suit the material creates a cleaner finish and keeps the patch secure.
How to Sew Patches on Jeans
Denim is common for patch repairs because it is durable and easy to reinforce. However, multiple layers can make hand sewing challenging.
When learning how to hand sew a patch on denim, I recommend:
If you’re repairing a hole, make sure the damaged fabric lies flat before attaching the patch. This prevents puckering and helps the repair look more natural.
How to Sew Patches on a Jacket
Jackets often have linings, pockets, and thick fabric layers, so careful planning is important before sewing.
Before stitching:
A whip stitch or backstitch usually works best because jackets experience frequent movement around shoulders and sleeves.
Also Read: How to Sew a Hood? Step-by-Step Guide 2026
How to Sew Patches on a Backpack
Backpacks receive constant friction from carrying, so durability matters more than appearance.
For how to sew patches on backpack projects:
These steps help prevent the patch from lifting after regular use.
How to Sew Patches on Thick Fabric
Canvas, workwear, heavy flannel, and winter coats require more patience because of their thickness.
For successful results:
Taking your time produces neater stitches and reduces the risk of bending or breaking the needle.
Common Mistakes to Avoid
Even a well-chosen patch can fail if basic sewing mistakes are overlooked. Most problems, like loose edges or puckered fabric, are easy to prevent with careful preparation and consistent stitching. After repairing everything from children’s jackets to worn denim, I’ve found that avoiding these common mistakes noticeably improves both appearance and durability.
Using the Wrong Thread
Thread should match the weight of the fabric. Thin or worn thread can break under tension, especially on denim, canvas, or backpacks that receive frequent use.
A strong polyester thread is usually the most reliable choice because it resists stretching, abrasion, and repeated washing.
Making Stitches Too Large
Large gaps between stitches leave the patch edges unsupported, making them more likely to lift over time.
Use short, evenly spaced stitches around the entire border. Smaller stitches distribute tension more evenly and create a cleaner finish.
Skipping Patch Placement
One of the easiest mistakes to avoid is sewing without checking the patch position first.
Before making the first stitch:
Checking placement takes a minute and is easier than removing a whole row of stitches later.
Forgetting to Reinforce High-Stress Areas
Corners, curves, pocket openings, and backpack straps experience the most movement during everyday use.
Adding two or three extra stitches in these areas helps prevent the edges from loosening and significantly extends the life of the repair.
Pulling the Thread Too Tightly
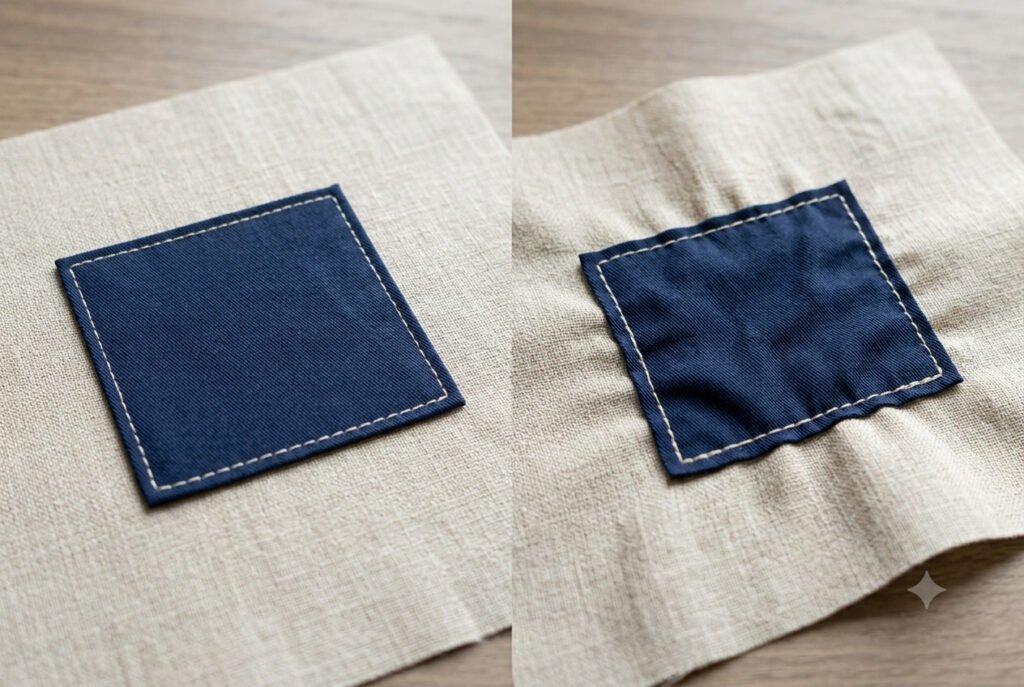
Many beginners pull each stitch too tightly, which often causes the surrounding fabric to wrinkle or pucker.
Pull the thread firmly enough to hold the patch flat while allowing the fabric to keep its natural shape. Smooth, flat stitching almost always looks more professional.
How to Make Patches Last Longer
A carefully sewn patch can last for years when attached properly and cared for after sewing. Small habits before and after washing often affect durability more than the stitch itself.
Use High-Quality Thread
Strong polyester thread resists wear better than weak or aging thread. Choosing quality materials from the beginning helps prevent broken stitches later.
Reinforce High-Stress Areas
Before finishing the project, sew an extra pass around corners, curved edges, or any area that receives frequent movement.
I almost always reinforce:
Those extra stitches add little sewing time but greatly improve long-term durability.
Wash Patched Clothing Carefully
Proper washing helps protect both the fabric and the stitching.
For the best results:
Inspect Patches Regularly
Check the patch after every few washes, especially on clothing that gets heavy use.
If you notice a loose stitch or a lifting corner, repair it immediately. A quick touch-up takes only a few minutes and prevents a much larger repair later.
Store Clothing Properly
Storage also affects how well patches hold up over time.
Avoid folding garments directly across large decorative patches whenever possible. Jackets and backpacks generally keep their shape better when hung, while folded clothing should be stored without placing excessive pressure on patched areas.
How to Keep Hand Sewn Patches From Falling Off
If you’re wondering how to keep hand sewn patches from falling off, the answer is usually consistent sewing and proper care, not complicated techniques.
Remember these simple habits:
Following these practices has helped many of my own hand-sewn patches remain securely attached through years of regular washing and everyday wear.
Conclusion
Learning how to hand sew patches is a practical sewing skill that helps repair damaged clothing, personalize everyday items, and extend garments’ life without a sewing machine. With the right needle, quality thread, and a stitch suited to the fabric, even beginners can achieve a secure, professional-looking finish.
From my own sewing projects, I’ve learned that patience always produces better results than rushing. Taking a little extra time to position the patch carefully, keep the stitches even, and reinforce high-stress areas creates repairs that continue to look neat after regular wear and repeated washing.
If this is your first patch, start with a simple project like jeans, a tote bag, or a denim jacket. As your confidence grows, hand sewing patches becomes a quick and reliable skill for both repairs and creative customization.