What Is Interfacing in Sewing? Easy Guide
If a collar feels floppy, a waistband loses shape, or a button placket lacks stability, interfacing may be what the garment needs. This sewing material adds support without showing in the finished design.
What is interfacing in sewing? It is a support layer attached to the wrong side of fabric to add structure, stability, body, or shape. Depending on the type, it can make fabric firmer while still allowing the garment to drape naturally.
For beginners, choosing between weights, materials, and application methods can be confusing. This guide explains how interfacing works, where it is used, how to choose the right option for different fabrics, and how to apply fusible interfacing correctly.
Also Read: 10 Best Sewing Books for Beginners: Top Picks 2026
Key Takeaways
Why Interfacing Is Used in Sewing
Fabric has its own drape, flexibility, and strength. These qualities work well in some garment parts but may not provide enough support in others.
A lightweight cotton shirt may need extra stability around the collar, cuffs, and button placket. Soft fabric used for a waistband may also need support to prevent wrinkling or losing shape during wear.
This is where interfacing in sewing becomes useful. It acts as an internal support layer rather than a decorative element.
What Does Interfacing Do in Sewing?
The main purpose is to control how fabric behaves. A suitable product can provide anything from gentle stabilization to firm structure.
Common benefits include:
The goal is not always to make fabric stiff. In many garments, the best result comes from adding just enough support while preserving the fabric’s natural drape.
Adding Structure and Stability
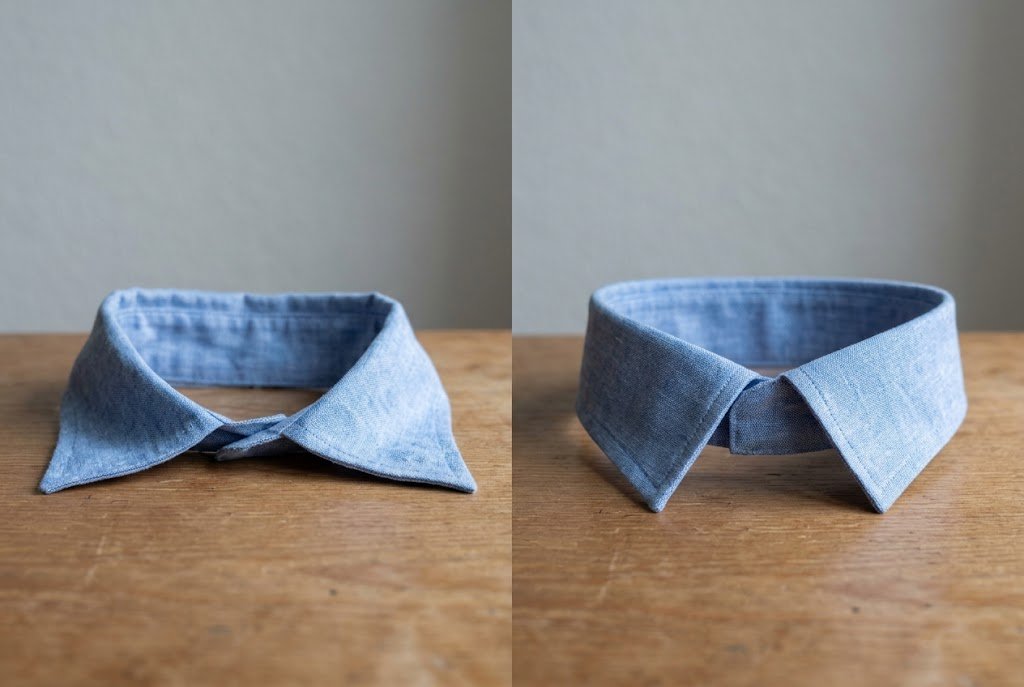
Some garments depend on crisp edges or defined shapes. A collar, for example, needs enough body to sit neatly around the neckline.
A suitable support layer makes these details easier to construct and helps them retain their intended appearance. The finished garment should still feel appropriate for the fabric.
Supporting Stress Areas
Certain sections experience more pulling and handling than others. Button plackets, cuffs, collars, and waistbands are common examples.
Additional support helps these areas resist distortion. It also makes details like buttonholes easier to sew on fabrics that tend to stretch or shift.
Improving Shape Retention
A garment can change shape through regular wear, pressing, and washing. The right support layer can help selected sections maintain their intended form.
The effect depends on the product and fabric combination. A lightweight option provides subtle stabilization, while a firmer product creates a more structured finish.
Types of Sewing Interfacing
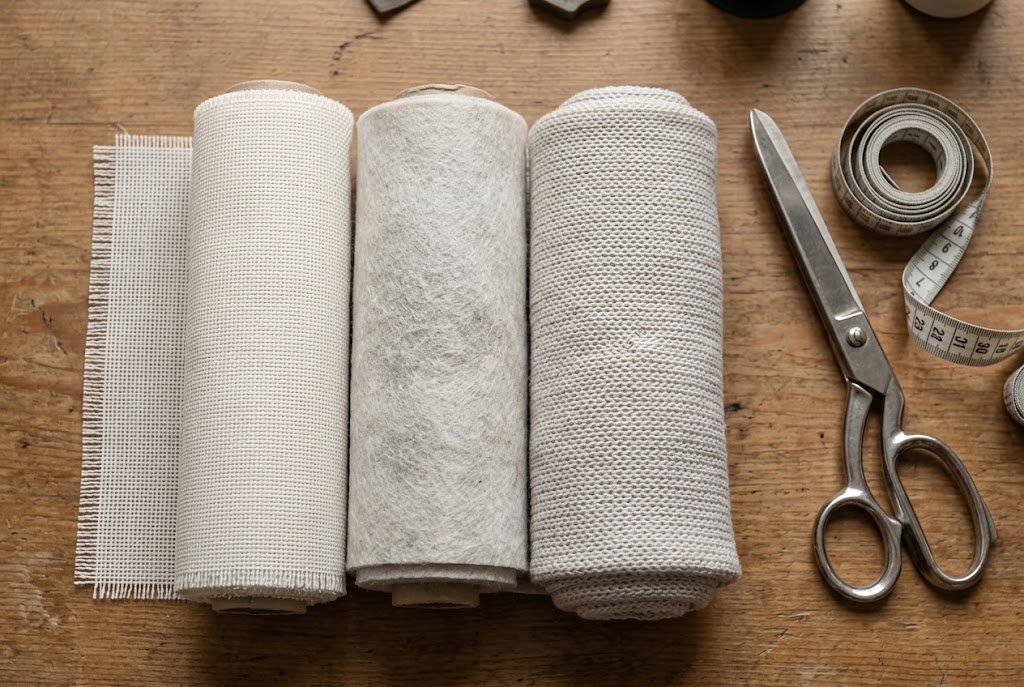
There are two main categories beginners should understand: fusible interfacing and sew-in interfacing. Both provide support but attach differently to fabric.
Interfacing varies in weight, construction, and flexibility. Some options provide gentle stabilization, while others create a firmer, more structured finish. The best choice depends on the fabric, garment, and support needed.
Fusible Interfacing
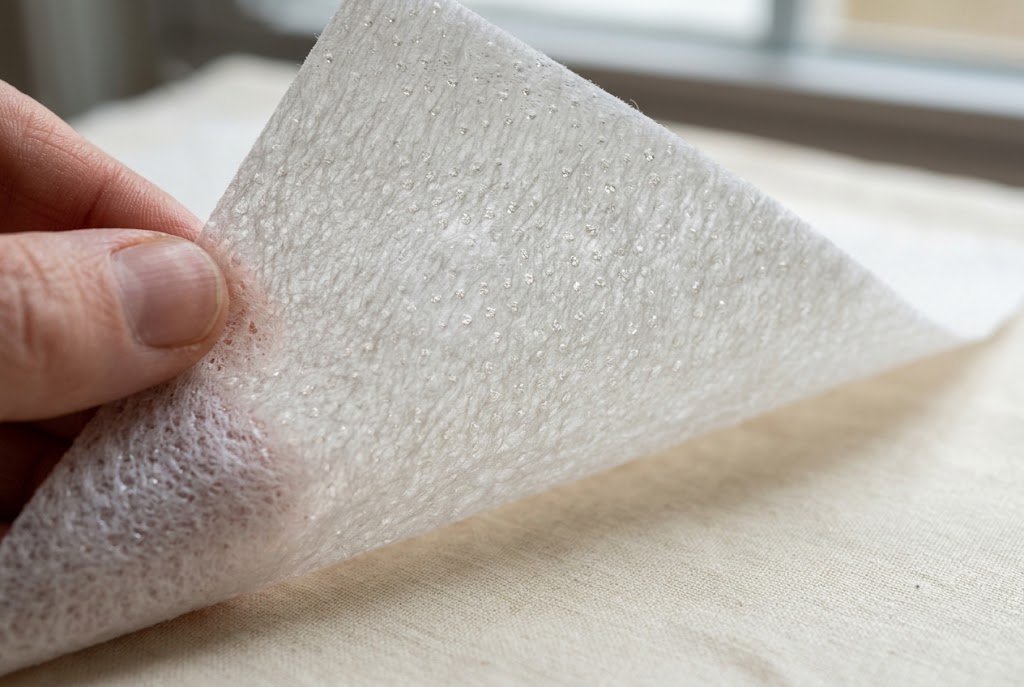
Fusible interfacing has an adhesive coating on one side. Heat and pressure activate the adhesive, allowing the material to bond to the wrong side of the fabric.
It is popular for home sewing because it is quick to apply and stays in place during construction. However, the fabric must tolerate the required heat. Always follow the manufacturer’s instructions and test the product on a scrap before applying it to the garment.
Sew-In Interfacing
Sew-in interfacing does not contain heat-activated adhesive. Instead, it is positioned behind the fabric and secured through stitching.
This method is useful for heat-sensitive fabrics or projects where a particular type of movement and construction is preferred. It may also give the sewer more control over the final feel of the garment.
The main trade-off is that the layers can shift before they are stitched together. Basting, or temporary stitches, helps keep them aligned.
Also Read: What Is a Basting Stitch in Sewing? Easy Guide
Woven, Nonwoven, and Knit Options
Interfacing varies in construction.
Always check product instructions because application methods and suitable fabrics vary between products.
Also read: How to Read a Sewing Pattern
Fusible vs. Sew-In Interfacing
Neither type is better by default. The right choice depends on the fabric, pattern, construction method, and finished result.
| Feature | Fusible Interfacing | Sew-In Interfacing |
|---|---|---|
| Attachment | Heat-activated adhesive | Secured with stitching |
| Application | Usually quicker | Requires additional sewing |
| Position during construction | Bonds to fabric before sewing | Can shift if not secured |
| Heat sensitivity | Requires careful testing | Avoids fusible heat |
| Construction | Convenient for many projects | Offers more control over the layers |
For many everyday garments, fusible interfacing provides a convenient way to add support before construction. Sew-in interfacing is better for heat-sensitive fabric or when construction calls for a separate support layer.
The fabric should guide the decision rather than choosing a type just because it is easier to use.
Interfacing in Garments
Knowing when to use interfacing is as important as knowing how to apply it. It is generally used in areas needing additional stability, structure, or shape retention rather than across the entire garment.
Collars and Cuffs
Collars often need support so they maintain their intended shape around the neckline. Cuffs can benefit from similar stabilization, particularly on structured shirts and blouses.
The best interfacing for collars should provide enough body to support the design without making the collar unnecessarily stiff. A lightweight blouse may need a softer option than a structured jacket.
Waistbands
Waistbands need enough stability to maintain their shape around the body. Without support, a soft fabric may wrinkle, stretch, or fold during wear.
Interfacing for cuffs and waistbands should complement the fabric and pattern. The finished waistband should feel stable and comfortable.
Facings and Necklines
Facings finish areas such as necklines and armholes. A suitable support layer can help them lie flatter and make them easier to handle during construction.
The amount of support needed depends on the fabric. Lightweight materials benefit from a lighter option, while more structured garments may require additional body.
Button Plackets and Button Areas
Button plackets receive repeated handling, so extra support helps prevent stretching and distortion.
Interfacing can also provide a more stable foundation for buttonholes, particularly when working with lightweight or less stable fabrics.
Pockets and Other Details
Depending on the pattern, interfacing may be used for pocket openings, flaps, belts, tabs, lapels, and other details.
It can also be useful in bags, fabric baskets, pouches, and other sewing projects where the finished item needs additional body.
When a commercial pattern specifies an interfacing type or placement, follow those instructions first. The recommendation is usually based on the fabric, construction, and intended shape of the design.
Also Read: How to Sew a Pocket Square? Two Easy Methods
Also read: How to Sew a Tote Bag With Flat Bottom? Easy Guide
How to Choose the Right Interfacing
Choosing the right interfacing starts with the fabric, but the garment section and desired result also matter. The goal is to add enough support without making the fabric stiff, bulky, or rigid.
Match the Fabric Weight
Lightweight fabrics usually work best with lightweight interfacing. Medium-weight fabrics can handle medium support, while heavier garments and structured projects may require firmer options.
Fabric weight alone does not determine the best choice. A loosely woven fabric and a tightly woven fabric can respond differently to the same product. The pattern instructions and manufacturer’s recommendations should also be considered.
Consider the Desired Drape
Think about how you want the finished fabric to behave.
A soft blouse may need gentle stabilization to preserve its natural drape. A shirt collar may need more body to hold a defined shape. A structured waistband may require firmer support.
The right product should complement the fabric rather than overpower it.
Consider Fabric Stretch
Stretch fabrics require additional care when selecting interfacing. A rigid product can restrict movement or change the way the garment fits.
For knits and other fabrics that need to retain flexibility, choose a compatible stretch or knit interfacing when appropriate. Consider both the amount and direction of stretch before applying the product.
Consider the Garment Section
The same fabric may need different levels of support in different areas.
A lightweight option may work well for a facing, while a collar or waistband may need more body. Pattern instructions often specify where interfacing is required and may recommend a particular type or weight.
Test Before Applying
Testing a small fabric sample is one of the simplest ways to avoid problems.
Cut a scrap of the garment fabric and apply interfacing according to the manufacturer’s instructions. Allow it to cool completely, then check the bond, texture, drape, flexibility, and appearance.
If the finished garment will be washed, laundering the test sample can also help reveal changes before the actual garment is constructed.
How to Apply Fusible Interfacing
Knowing how to use interfacing in sewing is especially important when working with fusible products. The process is straightforward, but incorrect heat, pressure, or handling can lead to weak bonding or fabric damage.
Step 1: Prepare the Fabric
Start with clean, dry fabric that has been pressed smooth. Follow the pattern instructions for prewashing and preparation.
Remove wrinkles before positioning the interfacing. A smooth surface helps the layers make proper contact during pressing.
Step 2: Cut the Interfacing
Cut the interfacing according to the pattern instructions. In some constructions, the interfacing piece is slightly smaller than the fabric piece so it remains inside the seam allowance.
Do not assume this method applies to every project. Follow the specific pattern and product instructions.
Also Read: Best Sewing Scissors: Top Picks 2026
Step 3: Identify the Adhesive Side
Fusible interfacing usually has adhesive on one side. Depending on the product, the adhesive may appear as small dots or have a slightly rough or textured surface.
Check the manufacturer’s instructions before positioning it. Place the adhesive side against the wrong side of the fabric.
Step 4: Apply the Recommended Heat and Pressure
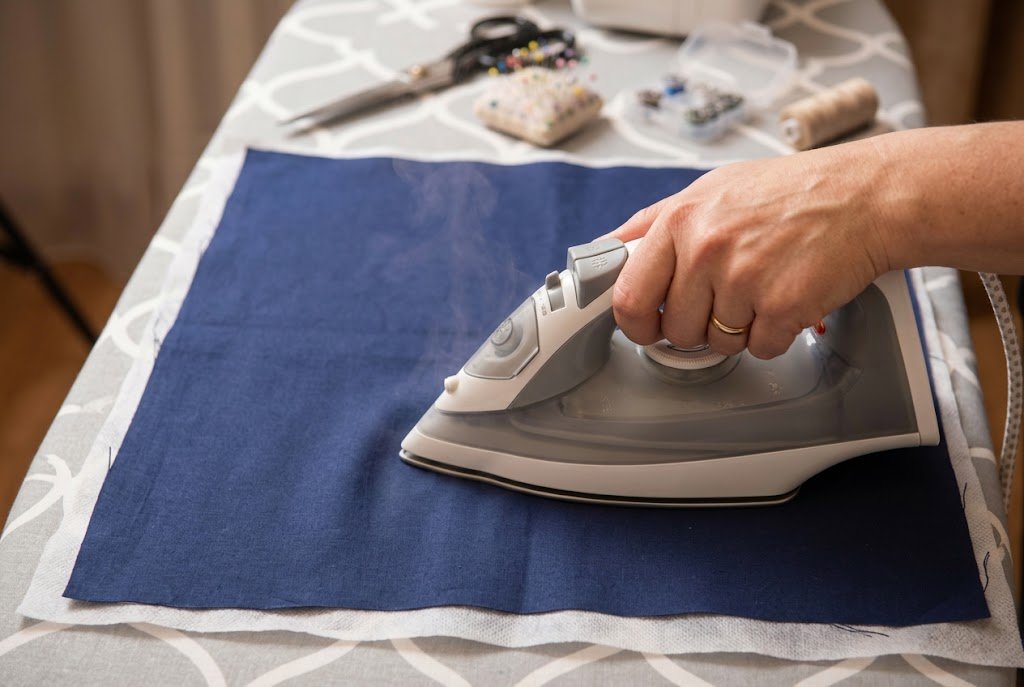
Set the iron to the temperature specified by the interfacing manufacturer.
Place the iron over the section and apply the recommended pressure and pressing time. Some products require steam, while others specify dry heat, so the product instructions should take priority.
Avoid dragging the iron across the fabric. Pressing in sections helps keep the interfacing correctly positioned.
Also Read: 10 Best Iron for Sewing: Top-Rated Picks 2026
Step 5: Allow the Interfacing to Cool
Leave the fabric flat and undisturbed after pressing. Cooling allows the adhesive to set properly.
Moving or folding the piece too soon can cause the interfacing to shift or contribute to bubbles and uneven bonding.
Step 6: Check the Bond
Once the fabric has cooled completely, inspect the entire area.
Look for loose edges, bubbles, wrinkles, or sections that have not bonded. If the manufacturer’s instructions permit additional pressing, correct the problem using the recommended technique.
If the fabric shows scorching, shine, distortion, or adhesive residue, stop and reassess the heat setting and pressing method before continuing.
Common Mistakes to Avoid
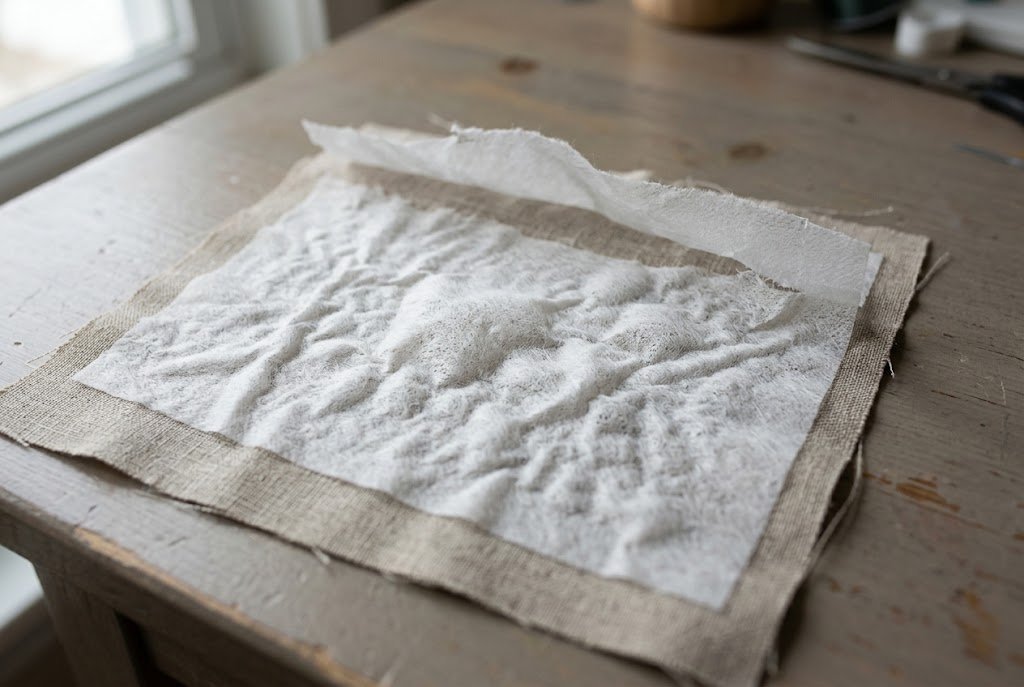
Even a straightforward interfacing project can go wrong if the product does not match the fabric or the application instructions are overlooked. A few simple precautions can prevent most common problems.
Choosing the Wrong Weight
Interfacing that is too heavy can make lightweight fabric feel stiff, bulky, or unnatural. It may also change the fabric’s original drape.
Start with the amount of support the garment section actually needs rather than automatically choosing the firmest option.
Skipping the Fabric Test
Different fabrics react differently to heat and adhesive. A product that works well on cotton may behave differently on rayon, silk, synthetics, or textured fabric.
Test a small fabric sample before applying interfacing to the finished garment. Check the bond, texture, drape, and appearance after the sample cools.
Also Read: How to Sew a Seam by Hand? Easy 5-Step Guide
Using the Wrong Heat Setting
Fusible products require the correct temperature and pressing time. Too little heat may result in weak bonding, while excessive heat can damage some fabrics or affect the adhesive.
Always follow the manufacturer’s instructions rather than relying on one iron setting for every product.
Moving the Iron Too Much
Sliding the iron across the fabric can shift the interfacing before the adhesive has set.
Use controlled pressing motions and work in sections when the product instructions call for this method.
Ignoring Cooling Time
The adhesive needs time to cool and set after pressing. Moving, folding, or stretching the piece too soon can lead to shifting, bubbles, or uneven bonding.
Allow the fabric to cool flat before handling it extensively.
Ignoring Grain or Stretch
Some interfacing has a grain or a specific direction of stretch. Cutting it without considering those properties can change how the finished garment behaves.
Check the pattern layout and manufacturer’s instructions before cutting.
Applying Interfacing Where It Is Not Needed
More support is not necessarily better. Applying interfacing to every piece can make a garment stiffer than intended and alter its natural movement.
Use it where the pattern or construction requires additional stability, structure, or shape retention.
Fusible vs. Sew-In Interfacing: Quick Comparison
| Type / Weight | Best For | Key Benefit | Trade-Off |
|---|---|---|---|
| Fusible | Many everyday garments and sewing projects | Quick, convenient application | Requires suitable heat and pressing |
| Sew-in | Heat-sensitive fabrics and selected garment constructions | More control during construction | Requires additional stitching |
| Lightweight | Blouses, lightweight cotton, delicate fabrics | Adds subtle support while preserving drape | Provides less structure |
| Medium-weight | Collars, facings, cuffs, everyday garments | Balanced support and flexibility | May be too firm for very delicate fabric |
| Firm | Structured collars, waistbands, bags, and crafts | Creates stronger body and shape | Can make fabric stiff if overused |
Conclusion: What Is Interfacing in Sewing?
Interfacing is a simple sewing material, but choosing and applying it correctly can noticeably affect how a garment looks and behaves. It supports areas needing stability while helping the fabric maintain flexibility and drape.
The best choice depends on several factors, like fabric weight, stretch, garment construction, and the amount of structure required. Fusible interfacing offers convenient application for many projects, while sew-in interfacing is an alternative when heat isn’t suitable, or you prefer a different construction method.
For beginners, the most reliable approach is to follow pattern and product instructions, test interfacing on a fabric scrap, and choose only the support the project needs. These steps make interfacing a practical part of sewing rather than a confusing extra material.