How to Sew a French Seam: Easy Step-by-Step Guide
A French seam is one of my favorite ways to create a neat, professional finish without using a serger. If you are learning how to sew a French seam, the technique may look complicated at first. However, it is quite simple once the steps become familiar.
The seam is sewn twice, the raw edges are trimmed, and the fabric is folded so those edges disappear inside the finished seam. I especially like this finish for delicate garments and lightweight projects.
It works beautifully with silk, chiffon, crepe, viscose, cotton shirting, and similar fabrics that fray or look untidy when raw edges are exposed. This guide will walk you through sewing a French seam, from choosing the right seam allowance to trimming, stitching, and pressing the finished seam.
We will also explain how the technique works on curved seams and armholes, common mistakes to avoid, and when another seam finish may be a better choice.
Key Takeaways
What Is a French Seam?
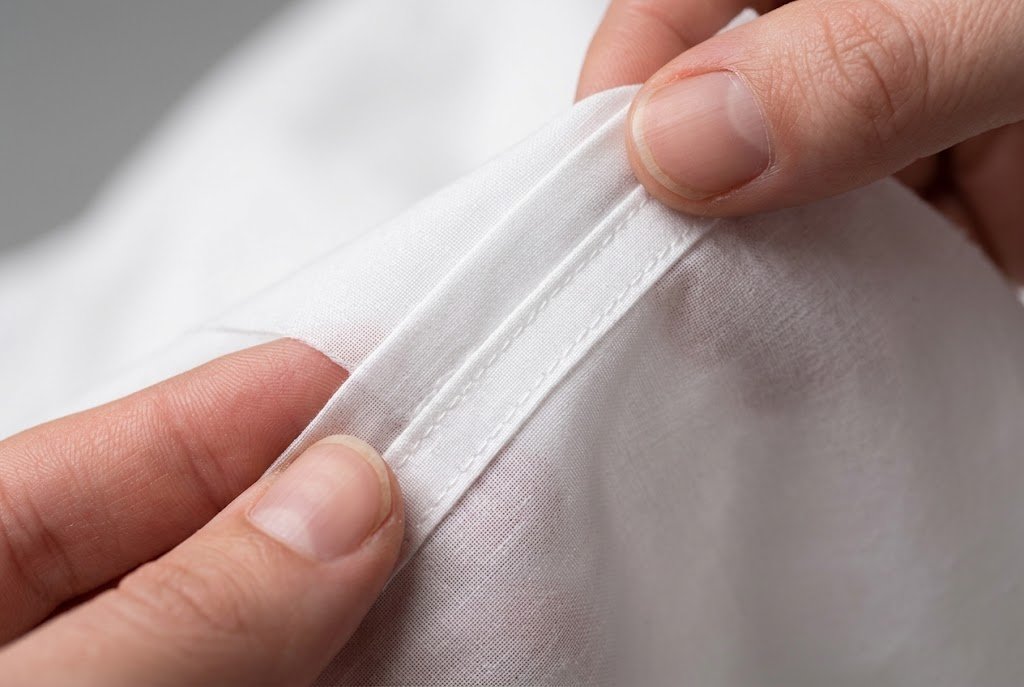
A French seam is an enclosed seam finish that hides raw fabric edges inside the seam. Unlike a standard seam, it uses two stitching passes to create a clean interior without exposed edges.
The first pass joins the fabric with wrong sides together. After trimming the seam allowance, the fabric is folded so the right sides face each other. A second line of stitching encloses the trimmed edges.
When pressed, the finished seam forms a narrow, tidy strip of fabric. This makes it especially useful for lightweight garments where exposed edges can fray or look unfinished.
Also Read: What Is a Basting Stitch in Sewing? Easy Guide
Why Use a French Seam?
The main advantage is its clean interior finish. A serger is not required, making this technique useful for home sewing projects with a regular sewing machine.
I especially like French seams for delicate blouses, nightwear, and sheer garments. Fabrics such as chiffon, silk, cotton lawn, lightweight crepe, and fine linen can benefit from having their edges enclosed rather than left exposed.
The technique adds some bulk because the seam allowance is folded and stitched twice. For that reason, I would not use it on every project.
When to Use a French Seam
French seams work best when the fabric is lightweight enough to accommodate the enclosed layers and the garment benefits from a neat interior finish.
They are particularly suitable for:
A French seam is also a useful technique for beginners because the basic construction is straightforward. Starting with a straight seam makes it easier to learn the trimming, folding, stitching, and pressing sequence.
When to Avoid It
I generally avoid this finish on heavy denim, thick canvas, bulky wool, fleece, and other fabrics that create substantial thickness when folded.
Very tight curves can also be challenging. The additional layers may prevent the seam from lying smoothly around a sharp curve.
For those situations, a serged edge, zigzag finish, bound seam, or another suitable method may provide a cleaner result.
Supplies You Need
A French seam does not require many specialist tools. Basic sewing equipment is enough to create a clean, enclosed seam.
Basic Tools
Also Read: Best Sewing Scissors: Top Picks 2026
Choose the needle based on the fabric. A universal needle works well for many lightweight woven fabrics, while delicate materials may need a finer needle.
Thread choice also matters. Lightweight fabric benefits from a fine thread that does not add bulk to the finished seam.
Before starting the garment, test the complete seam on a scrap of the same fabric. This checks the needle, thread, stitch length, tension, and seam width before sewing the final piece.
Also Read: 10 Best Thread for Sewing: Ultimate Guide 2026
How to Sew a French Seam Step by Step
The easiest way to learn how to sew a French seam is to understand what happens during each stitching pass. The first seam joins the fabric wrong sides together, and the second seam encloses the trimmed raw edges.
Step 1: Check the Seam Allowance
Start by checking the seam allowance required by the pattern.
A common garment seam allowance is 5/8 inch, although some patterns use 1/2 inch or 3/8 inch. Since a French seam uses two stitching passes, the first seam is sewn narrower than the final seam allowance.
For a pattern with a 5/8-inch seam allowance, a common method is to sew the first seam about 3/8 inch. After trimming, position the second stitching line so the completed seam matches the pattern’s allowance.
For a 1/2-inch allowance, you can use a narrower first seam, with the second stitching line establishing the final width.
These measurements are useful starting points, not fixed rules. Fabric’s thickness, fraying, and the seam allowance provided by the pattern can affect the best approach. Test the complete seam on a scrap of the same fabric before sewing the garment.
Step 2: Place the Fabric Wrong Sides Together
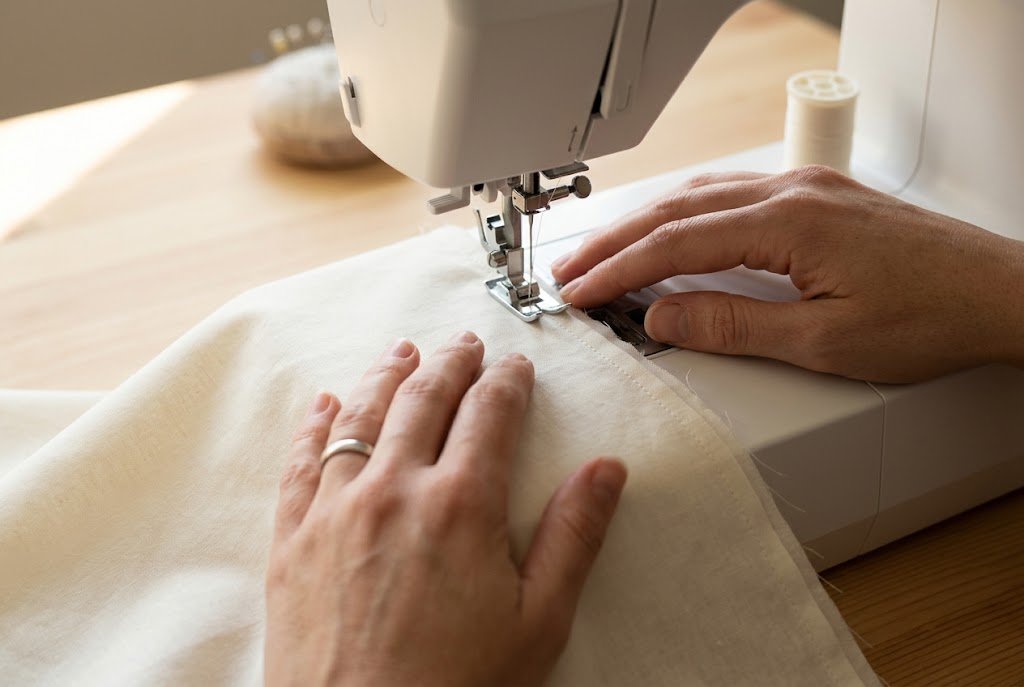
French seam construction starts differently from a standard seam.
Place the fabric pieces wrong sides together and align the raw edges. Match notches, corners, and pattern markings before securing the layers with pins or clips.
Slippery fabrics like chiffon and silk can shift easily. Use enough pins or clips to keep edges aligned but avoid stretching the fabric when positioning it.
Check that the fabric is oriented correctly before sewing. The first seam is sewn with the wrong sides together because the raw edge will be enclosed during the second stitching pass.
Step 3: Sew the First Seam
Stitch the first seam using the narrower allowance you selected.
For example, with a pattern requiring a 5/8-inch seam allowance, a first seam about 3/8 inch leaves enough fabric for trimming and the final enclosed seam.
Keep the fabric flat as it moves beneath the presser foot. Avoid pulling lightweight material from either side as this can stretch the fabric and create a wavy seam.
Backstitch or secure the stitching at the beginning and end according to your usual sewing method.
At this stage, the raw edge is still visible, which is expected. The first stitching line joins the fabric pieces and prepares the seam for trimming and enclosure.
Also Read: How to Replace a Sewing Machine Needle? Easy Guide
Step 4: Trim the Seam Allowance
After stitching, trim the seam allowance evenly.
This step reduces bulk and lets the trimmed edge fit neatly inside the second seam. Use sharp scissors and make controlled cuts to avoid cutting into the stitching.
The amount you trim depends on the original seam allowance and fabric. For lightweight fabrics, the allowance is often reduced to a narrow edge around 1/8 inch to 1/4 inch. The important point is to remove excess bulk while leaving enough fabric to protect the first stitching line.
If the fabric frays easily, take extra care when trimming. Cutting too close to the stitching weakens the seam and exposes the first line of stitches.
Remove loose threads before moving to the pressing stage.
Step 5: Press the First Seam
Press the seam carefully according to the fabric’s care requirements.
First, press the seam flat as sewn. Then position the fabric for the next fold and press again if needed.
For silk, chiffon, and other delicate fabrics, use the right temperature and consider a pressing cloth. Avoid dragging the iron across lightweight material as this can stretch or distort the fabric.
Good pressing at this stage helps the seam fold neatly and makes it easier to keep the second stitching line straight.
Step 6: Fold the Fabric Right Sides Together
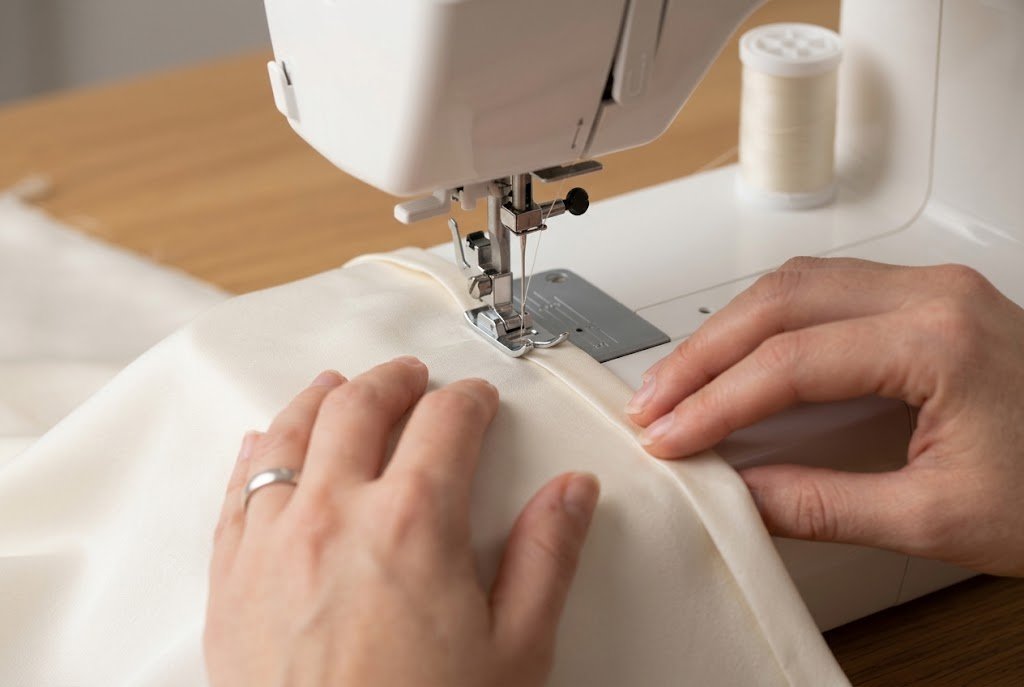
Turn the fabric so the right sides are now together.
The first stitching line should sit close to the folded edge with the trimmed raw edges inside the fold. Align the seam carefully and press the fold to create a clean, defined edge.
The seam may look unusual at this point because the first stitching line is close to the fold. This is normal.
Before sewing the second seam, check the entire edge to make sure the trimmed raw fabric is tucked inside. Any threads or fabric extending beyond the folded edge can remain visible after the final stitching.
Step 7: Sew the Second Seam
Stitch the second seam far enough from the folded edge to completely enclose the trimmed raw edges.
The second stitching line establishes the final seam allowance, so use the pattern’s required measurement as your guide. For a 5/8-inch seam allowance, position the stitching line about 5/8 inch from the original seam edge or follow the construction method used.
Keep the stitching line consistent and guide the fabric gently through the machine. Do not stretch lightweight material when sewing.
The second pass creates the enclosed seam. When finished, the trimmed raw edges should be completely contained within the stitching.
If any threads extend beyond the second seam, stop and fix the problem before continuing.
Step 8: Press the Finished Seam
Turn the fabric right side out and inspect the seam.
Check that the raw edges are completely enclosed and the seam lies flat without puckering, twisting, or bulk. Press in the direction the pattern or project requires.
Use moderate heat and gentle pressure for delicate fabrics. A pressing cloth can protect silk, chiffon, or heat-sensitive synthetics.
A properly finished French seam should look narrow and smooth from the outside while keeping the inside neat and enclosed.
The basic process is simple: sew, trim, press, fold, sew again, and press. Practicing these steps on a fabric scrap first makes it easier to achieve consistent results on the finished garment.
How to Choose the Right Seam Allowance
Understanding the French seam allowance helps prevent uneven seams, exposed raw edges, and unnecessary bulk.
Seam allowance is the distance between the fabric’s raw edge and the stitching line. A sewing pattern may specify 5/8 inch, 1/2 inch, or 3/8 inch. The allowance determines how to divide the two stitching passes.
The first seam is sewn narrower and then trimmed. The second stitching line encloses the trimmed edge and establishes the finished seam allowance.
Also read: How to Read a Sewing Pattern? Easy Step-by-Step Guide
5/8-Inch Seam Allowance
A 5/8-inch seam allowance is common on commercial sewing patterns in the US and provides enough fabric for a French seam on many lightweight woven fabrics.
One practical approach is to sew the first seam at about 3/8 inch. After trimming the allowance to a narrow, even edge, sew the second seam so the completed seam reaches the pattern’s required 5/8-inch allowance.
The exact first-seam width can vary depending on the fabric and construction method. The important point is that the second stitching line must completely enclose the trimmed raw edge without creating unnecessary bulk.
1/2-Inch Seam Allowance
A 1/2-inch seam allowance provides less fabric for the enclosed seam, so accuracy becomes more important.
A first seam of about 1/4 inch can suit some fabrics, followed by trimming and a second stitching line positioned to produce the required 1/2-inch finished allowance.
With less room to work, test the complete seam on a scrap before sewing the garment. Check that the trimmed edge is fully enclosed and the seam does not become bulky.
3/8-Inch Seam Allowance
A 3/8-inch seam allowance creates a narrower finished seam and leaves less room for error.
For lightweight fabrics, a first seam around 1/4 inch can provide enough material for trimming and enclosure. Position the second stitching line to achieve the required 3/8-inch allowance.
Work carefully with a narrow allowance. If the first seam is too wide or trimming is uneven, the second seam may not fully contain the raw edge.
Seam Allowance Guide
These measurements are useful starting points, not fixed rules for every fabric.
| Pattern Allowance | Example First Seam | Typical Trimmed Edge |
|---|---|---|
| 5/8 inch | About 3/8 inch | About 1/8–1/4 inch |
| 1/2 inch | About 1/4 inch | About 1/8–3/16 inch |
| 3/8 inch | About 1/4 inch | About 1/8 inch |
The second stitching line should always be positioned so that the trimmed raw edge is completely enclosed and the finished seam matches the pattern’s required allowance.
Adjust for the Fabric
Fabric thickness and fraying can affect how you construct a French seam.
Very lightweight fabrics usually accommodate a narrow enclosed seam without much bulk. Slightly heavier fabrics may require more careful trimming because folded layers can become thick.
If the fabric frays easily, do not trim so close to the first stitching line that the seam weakens. If too much fabric remains, the finished seam may feel bulky or stop the second stitching line from enclosing the raw edge neatly.
Test Before Sewing the Garment
Always test the complete construction on a scrap of the same fabric.
Sew the first seam, trim it, fold the fabric, and sew the second seam. Then measure the finished seam and inspect the inside for any exposed threads.
This simple test allows you to adjust the first stitching width, trimming amount, needle, thread, or stitch settings before working on the finished garment.
How to Press a French Seam
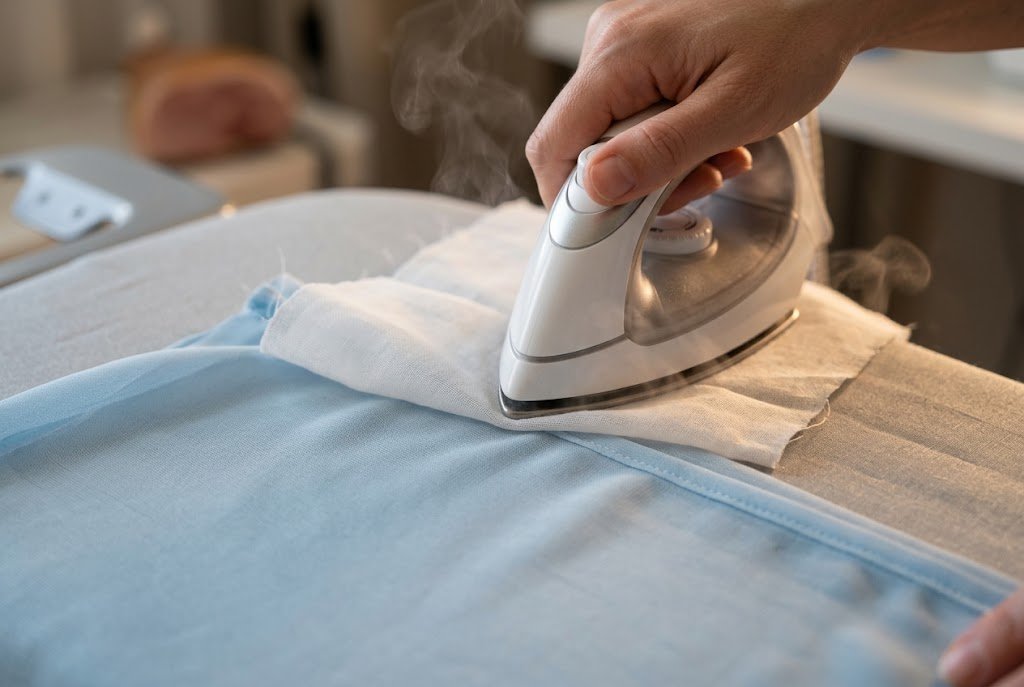
Pressing is not just a final cosmetic step. It shapes the seam, keeps the enclosed edge in place, and gives the finished French seam a smooth appearance.
Press throughout construction rather than waiting until the end. After the first stitching pass, press the seam flat. After trimming and folding the fabric, press the new fold before sewing the second seam. Once the second seam is complete, give the finished seam another careful press.
Also Read: 10 Best Iron for Sewing: Top-Rated Picks 2026
Pressing Delicate Fabrics
Delicate fabrics such as silk, chiffon, and viscose need a lighter touch.
Avoid pulling the fabric while warm. Lightweight materials can easily stretch or distort during pressing.
For fabrics like cotton or linen that tolerate more heat, a firmer press can help set the seam. A tailor’s clapper can also hold a pressed seam flat as it cools.
Press the Seam in the Right Direction
The finished French seam is generally pressed in the direction specified by the pattern or garment construction. For some projects, this means pressing the seam toward the back or the garment’s center.
With sheer fabrics, use particular care because excessive pressure can flatten the fabric’s texture or leave unwanted marks.
The goal is not simply to make the seam flat. Good pressing helps the seam retain its shape while keeping the fabric’s natural appearance intact.
Common Mistakes to Avoid
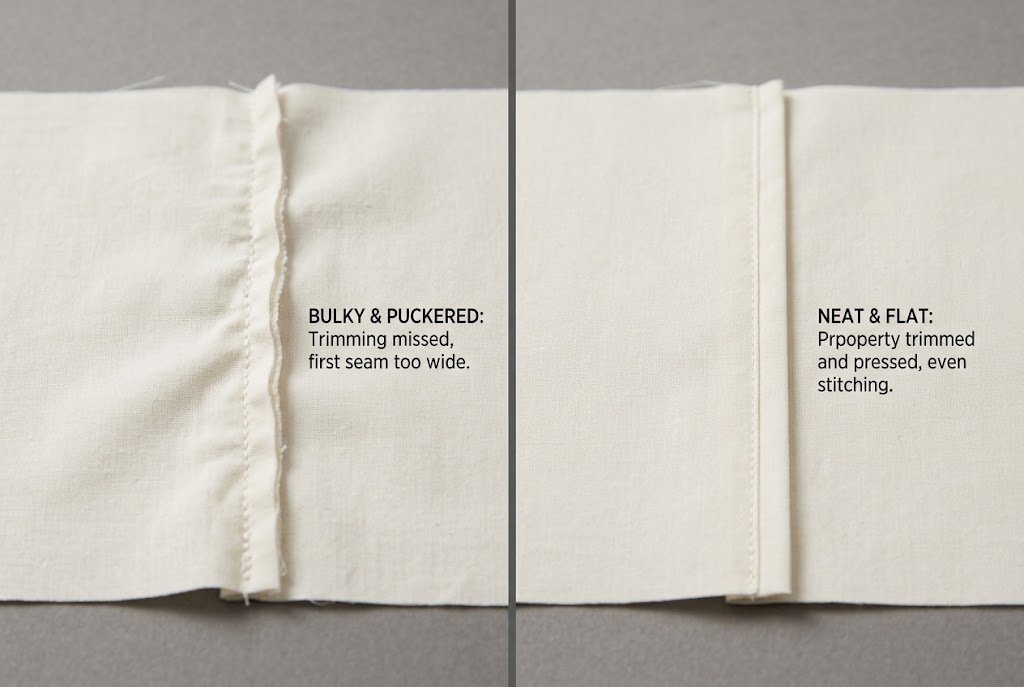
A French seam is simple once the construction is familiar, but small errors can affect how neatly the finished seam sits. Most problems come from inaccurate stitching, uneven trimming, or skipping pressing steps.
Making the First Seam Too Wide
The first stitching line needs to be narrower than the finished seam. If it is too wide, there may not be enough fabric left to enclose the raw edge during the second pass.
Check the seam allowance before sewing and test measurements on a fabric scrap. This is especially important with a narrow allowance like 3/8 inch.
Trimming Too Close to the Stitching
The first seam should be trimmed neatly, but cutting directly against the stitches can weaken the seam.
Leave enough fabric to protect the stitching while removing excess bulk. Sharp scissors make it easier to create an evenly trimmed edge without cutting into the seam.
Skipping the Pressing Steps
Pressing helps the seam fold correctly and keeps the second stitching line easier to control.
Press after the first seam, after folding the fabric, and again after completing the second seam. Do not pull or stretch lightweight fabric while pressing.
Leaving Raw Edges Exposed
The purpose of a French seam is to enclose the raw edges. If threads or fabric extend beyond the second stitching line, the seam has not been fully enclosed.
Before sewing the second pass, check that the trimmed edge is fully tucked inside the fold. Correcting this before stitching is easier than repairing an exposed edge afterwards.
Pulling Lightweight Fabric
Silk, chiffon, viscose, and other lightweight fabrics can shift or stretch while being sewn.
Guide the fabric gently instead of pulling it toward or away from the machine. If the material is hard to control, use a suitable fine needle, appropriate stitch length, and test on a scrap before starting the garment.
Using a French Seam on Bulky Fabric
A French seam creates several layers of fabric inside the finished seam. Heavy denim, canvas, fleece, and thick wool can therefore become bulky when enclosed.
For these fabrics, a serged edge, bound seam, flat-felled seam, or another suitable finish may produce a cleaner result.
Can You Sew French Seams on Curves or Armholes?
French seams can work on gentle curves, but curved construction requires more care than a straight seam. The enclosed layers need enough room to follow the shape without creating puckering or unwanted bulk.
French Seam on Curved Seams
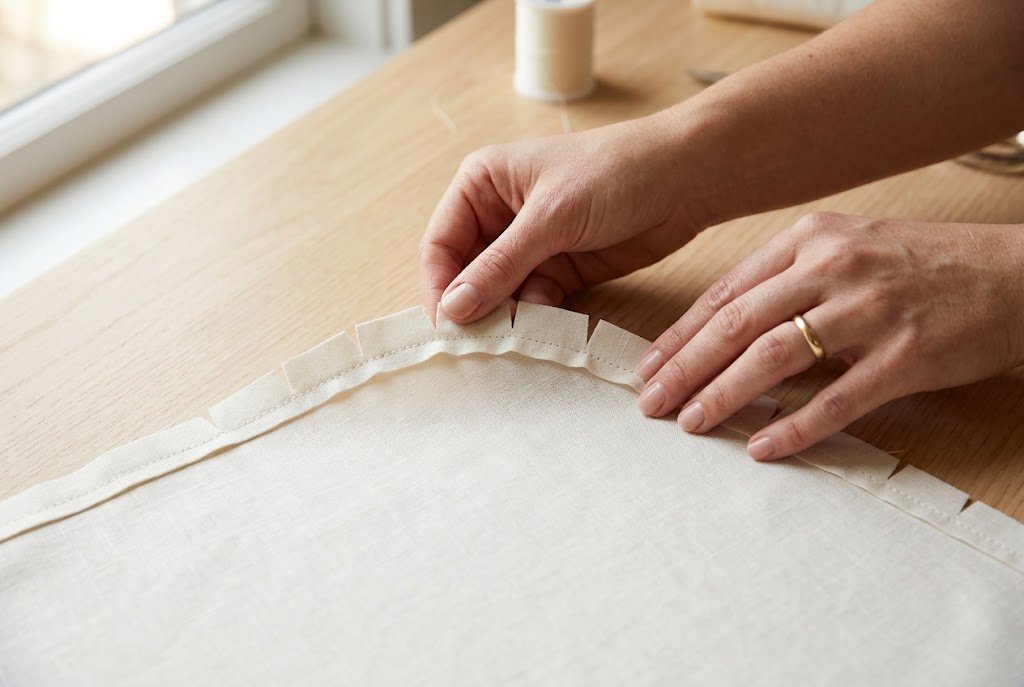
For a gentle curve, sew the first seam normally and trim the allowance evenly. Small, careful clips may help the seam allowance spread around the curve before the fabric is folded and the second seam is sewn.
Avoid making deep clips that reach the stitching line. They can weaken the seam and may allow the raw edge to become exposed.
After folding the seam, press it gradually instead of forcing the fabric into shape. This helps the finished seam follow the curve more smoothly.
French Seam on Armholes
An armhole is more challenging because the curve is tighter and the seam needs to remain flexible.
A French seam may work on a gentle armhole curve in a lightweight woven fabric, particularly when the pattern construction allows enough room for the enclosed layers. However, a very tight armhole curve can become bulky or difficult to turn neatly.
For a sharply curved armhole, bias binding, a serged finish, or another suitable seam treatment is often more practical.
Fabric and garment design should determine the finish rather than using a French seam on every curved edge.
Best Fabrics for French Seams
French seams are especially useful on lightweight woven fabrics because they enclose raw edges without requiring a serger.
Lightweight Cotton
Cotton lawn, voile, batiste, and fine shirting are good choices for this technique. They are easy to sew and press while remaining light enough for the enclosed seam.
Silk and Chiffon
Silk and chiffon can benefit from a French seam because their raw edges may fray easily and remain visible inside a garment.
Use a fine suitable needle and lightweight thread. Test the complete seam on a scrap first because these fabrics can shift while being stitched.
Viscose and Lightweight Crepe
Lightweight viscose and crepe can produce a soft neat result with an enclosed seam. Since some viscose fabrics are slippery, accurate cutting and gentle handling are important.
Fine Linen
Lightweight linen can also work well, particularly for blouses, dresses, and other garments where a clean interior is desirable.
Heavier linen should be tested first as the folded layers can create more bulk.
Fabrics to Avoid
French seams are generally less suitable for heavy or bulky materials such as thick denim, canvas, fleece, and substantial wool.
Very loosely woven fabrics may require testing because trimming the first seam too closely can weaken the construction. In such cases, another seam finish may provide better support.
Also read: What Is Interfacing in Sewing? Easy Guide
How to Finish Seams Without a Serger
A serger is useful for quickly enclosing or overlocking raw edges but is not essential for achieving a neat seam finish.
A French seam is one practical way to finish seams without a serger, particularly when working with lightweight woven fabrics.
French Seam vs. Serged Finish
A serger trims and finishes the raw edge with an overlock stitch. A French seam instead encloses the raw edge inside a second line of straight stitching.
A serged finish is generally faster and works across a wider range of fabric weights. A French seam creates a clean enclosed interior and can be especially attractive on lightweight garments.
French Seam vs. Zigzag Finish
A zigzag stitch can be used along a raw edge to reduce fraying. It is quick and accessible on a standard sewing machine but the finished edge remains visible.
A French seam takes more time but hides the raw edge completely.
French Seam vs. Bias-Bound Seam
Bias binding covers the raw edge with a separate strip of fabric. It works well on curves and can add a decorative finish to garments.
French seams use the garment fabric itself, making them useful when a simple enclosed finish is preferred.
Also Read: How to Sew Binding on a Quilt? Step-by-Step Guide
French Seam vs. Flat-Felled Seam
A flat-felled seam also encloses raw edges, but its construction is different and usually creates a stronger, flatter finish.
It is commonly associated with areas such as shirt seams and durable garments. A French seam is better suited to lightweight fabrics where a softer enclosed finish is wanted.
French Seam for Beginners
A French seam is a useful technique for beginners because the basic process follows a repeatable sequence:
Sew → trim → press → fold → sew again → press.
Start with two fabric scraps and practice on a straight seam. Use lightweight woven fabric rather than slippery chiffon for the first attempt.
After sewing the first seam, inspect the trimmed edge before folding the fabric. Then sew the second seam and check that no raw edges remain visible.
Once the basic construction feels comfortable, move on to lightweight garments like simple blouses or pillowcases. Practicing on scraps first helps develop accuracy without risking the finished project.
Also Read: 10 Best Sewing Books for Beginners: Top Picks 2026
Troubleshooting French Seams
Even when the basic steps are correct, a French seam can look bulky, wavy, or uneven. Most problems trace back to seam allowance, trimming, fabric handling, or pressing.
Why Is My French Seam Bulky?
Excess fabric inside the seam is the most common reason for unwanted bulk.
Check if the first seam was too wide or if too much allowance was left after trimming. For lightweight fabric, trim the first allowance evenly while leaving enough material to protect the stitching.
Why Are the Raw Edges Showing?
The trimmed edge may not have been fully enclosed by the second stitching line.
Before sewing the second seam, check the entire length and make sure the raw edge is tucked inside the fold. Trim stray threads and refold the seam if necessary before continuing.
Why Is My French Seam Wavy?
A wavy seam can result from stretching lightweight fabric while sewing or pressing.
Guide the fabric gently through the machine and avoid pulling it from either side. Check stitch length and tension on a scrap before continuing with the garment.
Also Read: Why Does My Sewing Machine Keep Jamming? Easy Fixes
Why Is My Curved French Seam Lumpy?
Tight curves can be difficult because the enclosed layers need to spread around the shape.
Use careful trimming and small clips where appropriate, then press the curve gradually. If the seam still does not lie smoothly, a bias-bound or serged finish may be a better option for that curve.
Conclusion
Learning how to sew a French seam gives you a simple way to create a neat, enclosed finish with a regular sewing machine. The technique is especially useful for lightweight woven fabrics such as silk, chiffon, cotton lawn, viscose, and fine linen, where exposed raw edges can detract from the finished garment.
The key is to keep the first seam narrow, trim the allowance carefully, fold the fabric correctly, and ensure the second stitching line fully encloses the raw edge. Pressing carefully at each stage also helps the finished seam lie smoothly.
French seams are not suitable for every fabric or construction, particularly bulky materials and very tight curves. Once you understand where the technique works best, it becomes a reliable finishing method for garments and other lightweight sewing projects.