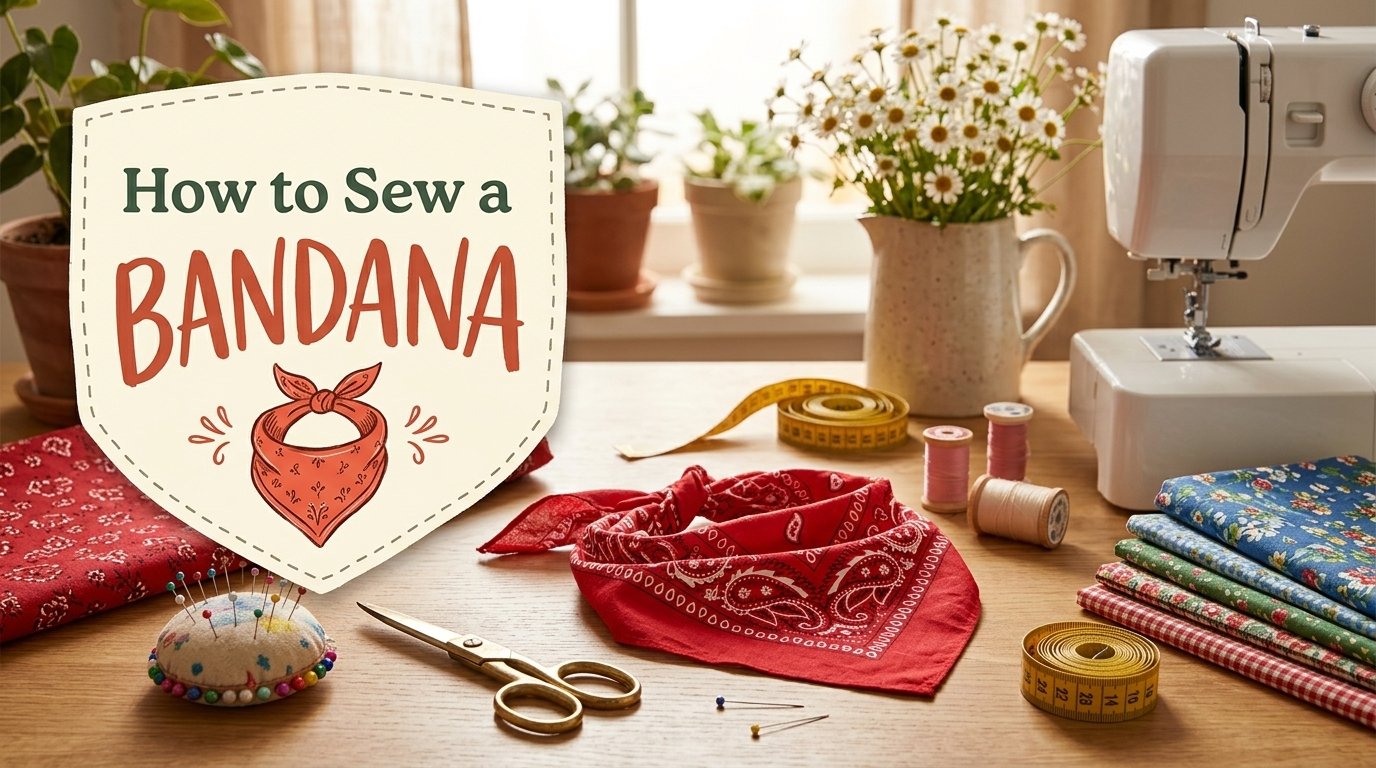
How to Sew a Bandana? 8 Simple Steps
If you enjoy simple sewing projects, learning how to sew a bandana is a practical place to start. A bandana requires little fabric, takes little time to make, and offers plenty of room to experiment with colors, prints, and sizes.
I enjoy projects like this because they are useful and creative. A simple square can become a neckerchief, headscarf, bag accessory, or pet bandana. The basic version does not require a complicated pattern or advanced sewing skills.
In this tutorial, I will show you how to make a bandana from a fabric square. This includes choosing the fabric, determining the size, preparing the edges, and sewing a neat hem. I will also cover hand sewing, no-sew options, reversible styles, headbands, and pet bandanas.
Key Takeaways
What Is a Bandana and Why Sew Your Own?
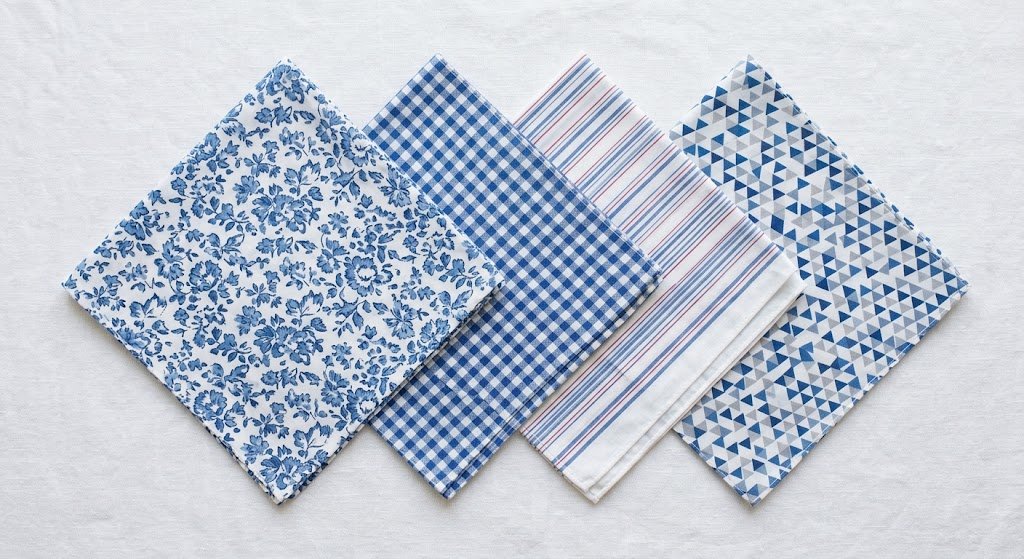
A bandana is a small piece of fabric, usually square, that you can wear or use as an accessory. It can work as a headscarf, neckerchief, wrist tie, bag accent, or pet accessory.
When I make one at home, I can choose the exact fabric and size I want. This is a main advantage of making a homemade bandana. You don’t have to settle for the colors, prints, or measurements in stores.
A DIY bandana is a useful beginner sewing project because the design relies mostly on straight lines. There is no complicated shaping, zippers, buttonholes, or fitted seams.
I like this project when I have a small amount of attractive fabric left from another project. A larger piece can provide enough fabric for several smaller bandanas depending on size and design.
The finished piece can also reflect personal style. Floral cotton creates a soft everyday look, while stripes, checks, and geometric prints can give a cleaner appearance.
Materials and Tools You’ll Need
You do not need many sewing supplies for this project. Gather everything before you begin to keep the cutting and sewing process simple.
Best Fabric for Bandana
For a comfortable everyday bandana, I usually recommend a lightweight woven fabric. Cotton is especially easy to work with because it cuts cleanly, presses well, and holds its shape during stitching.
Good options include:
For a beginner project, avoid fabrics that stretch heavily or shift easily while cutting. They make it harder to keep the square accurate and the finished edges even.
Choose a print that suits the project size. Large designs look beautiful on an adult bandana but may lose impact on a small child’s or pet’s version.
Tools to Sew a Bandana
You will need:
Optional supplies include bias tape, a narrow hem foot, fabric glue, fusible hem tape, elastic, fabric markers, embroidery supplies, and decorative thread.
Also Read: Best Sewing Scissors: Top Picks 2026
Bandana Sizes and Cutting Dimensions
Getting the dimensions right is an easy way to make a finished bandana look neat. The fabric becomes slightly smaller after folding and stitching the edges.
For a basic square design, use the following measurements as practical starting points:
| Size | Finished Size | Suggested Cut Size |
|---|---|---|
| Small child | 16–18 in | 17–19 in |
| Kids’ bandana | 18–20 in | 19–21 in |
| Adult | 22–27 in | 23–28 in |
| Small pet | Measure to suit collar | Add hem allowance |
| Larger pet | Measure to suit collar | Add hem allowance |
These measurements are starting points, not strict standards. The right size depends on how you wear and tie the bandana and how much coverage you want.
How Big to Cut Fabric for a Bandana?
If you want a finished square close to 24 inches and plan to use a narrow double-fold hem, start with a slightly larger square. The amount depends on the width of the finished hem.
For example, a 23-inch cut square can finish close to 22 inches with a narrow hem. A larger cut gives more room for a wider hem while still maintaining the desired finished size.
The key is to account for fabric used in the folded edges. Cutting the exact finished measurement makes the final bandana smaller than planned.
How Big to Cut Fabric for a Pet Bandana?
Pet sizing needs more attention because collar and neck measurements vary widely. Measure around the collar where the fabric will sit, then decide how far the bandana should extend below it.
For a collar-slot design, make the top edge wide enough for the collar to pass through comfortably. For a tie-on version, allow enough fabric for secure ties without creating long, loose ends.
Always check the fit while supervising the pet. The finished accessory should sit comfortably without restricting movement or interfering with breathing.
Preparing Your Fabric
Good preparation makes the finished bandana cleaner and easier to sew. Before cutting, wash and dry the fabric according to its care instructions, especially if you will wash the finished piece regularly.
Pre-washing accounts for shrinkage before cutting. After washing, press the fabric thoroughly so wrinkles do not affect your measurements.
Next, check the fabric edges and grain. If the fabric sits unevenly, straighten it before marking your square. This matters more with woven fabrics that have shifted during washing or handling.
Place the fabric on a flat surface. Use a ruler to mark equal measurements from the edges based on the finished size you want. Check measurements in both directions before cutting.
A slightly uneven square can affect the finished shape. Taking a few extra minutes to prepare and measure the fabric makes sewing much easier.
Also Read: 10 Best Iron for Sewing: Top-Rated Picks 2026
How to Sew a Basic Square Bandana
This is my favorite method for making a straightforward bandana. It uses a simple double-fold hem and works well with a standard sewing machine. The method suits lightweight woven fabrics such as quilting cotton, cotton lawn, linen, and chambray.
Step 1: Cut Your Square
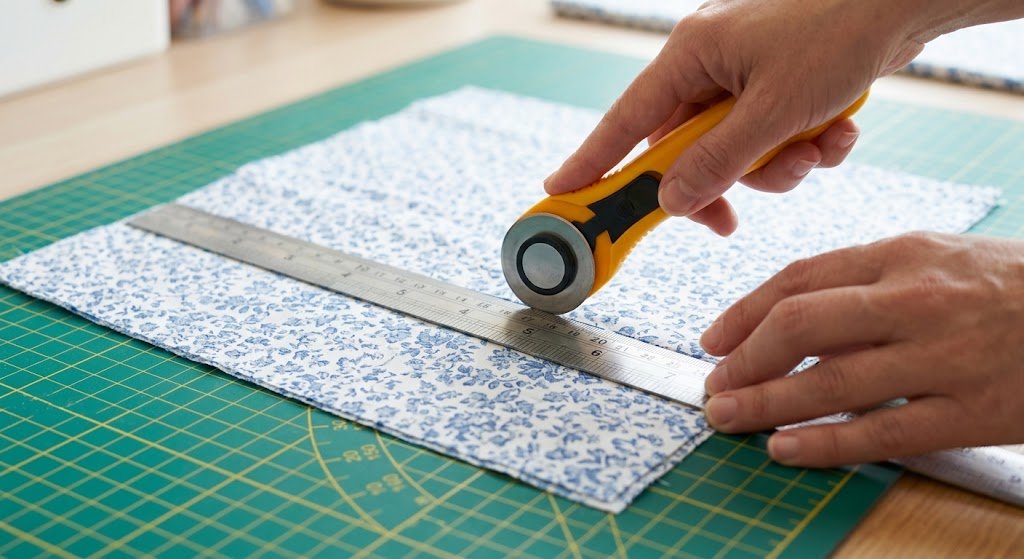
Measure and cut your fabric to the finished size you selected. Double-check the length and width before moving on.
Keep the fabric flat while measuring. If it has shifted off-grain, straighten it before cutting. An accurate square helps the finished bandana sit evenly when folded into a triangle.
Before sewing, check all four edges for loose threads or uneven areas. Trim if needed, but avoid removing fabric from the measured square.
Step 2: Press the First Fold
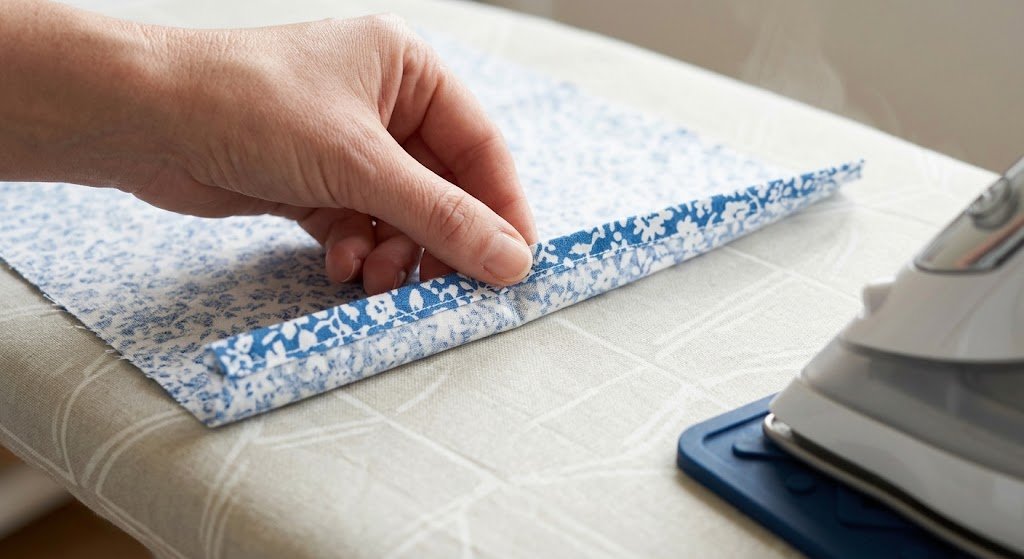
Place the fabric with the wrong side facing you. Fold each raw edge toward the wrong side about ¼ inch.
Press the fold with your iron. Repeat the process around all four sides.
Do not skip pressing. It creates a clear folding line and makes the narrow hem much easier to control while sewing.
If the fabric moves, press one edge at a time instead of preparing all four sides at once.
Step 3: Fold the Edge Again
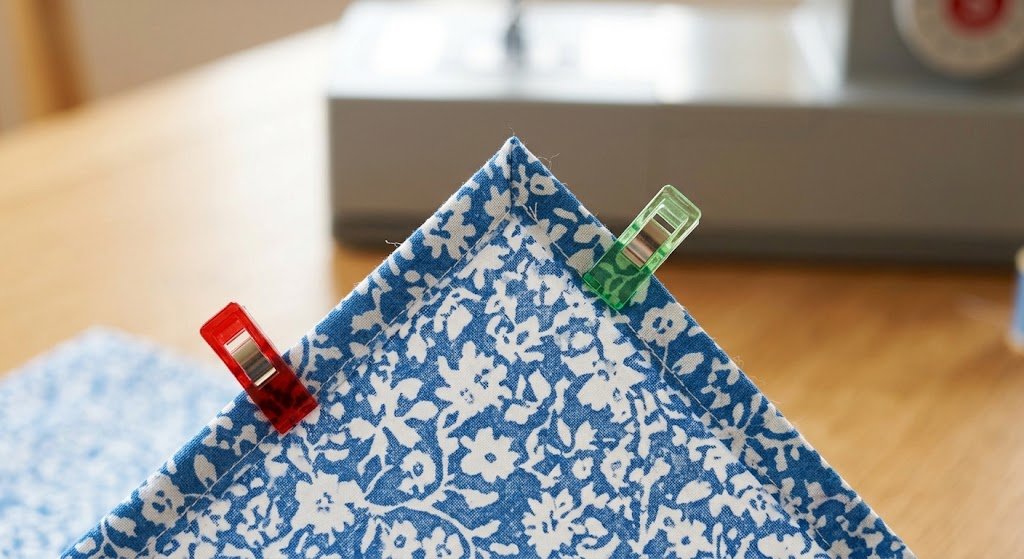
Fold each pressed edge over again by approximately ¼ inch. This second fold encloses the raw edge inside the hem.
Press each side again. Use pins or fabric clips to hold the folds in position.
Pay special attention to the corners. Fold them neatly so the fabric does not form a thick lump where two hems meet.
If you notice bulk at a corner, carefully trim a small amount from the inside of the folded allowance. Do not cut through the outer fold.
Step 4: Set Up Your Sewing Machine
Thread the machine with a thread that matches the fabric. A regular all-purpose sewing thread works well for most lightweight woven fabrics.
Select a straight stitch with a medium stitch length around 2.5 to 3 mm. Test the setting on a scrap of the same fabric before starting the bandana.
Check that the thread tension looks balanced on both sides. If the fabric puckers during the test, adjust the settings before sewing the finished piece.
Also Read: 10 Best Thread for Sewing: Ultimate Guide 2026
Also Read: How to Load Bobbin in Sewing Machine? Easy Steps
Step 5: Start Sewing
Place the bandana under the presser foot and begin sewing close to the inside edge of the folded hem.
Use a steady, comfortable speed. Let the machine feed the fabric naturally rather than pulling it from behind.
Keep the folded edge aligned with the same point on the presser foot or needle plate. Consistent spacing gives the finished border a cleaner appearance.
Step 6: Sew the Corners
When you reach a corner, slow down and stop with the needle down.
Lift the presser foot and turn the fabric 90 degrees. Lower the presser foot again and continue stitching.
Before turning, check that the needle will land close enough to the corner to catch both layers of the folded hem.
Take a few slow stitches after each turn to maintain control and prevent the corner from rounding or becoming uneven.
Step 7: Secure the Stitching
Continue sewing around all four sides until you reach the starting point. Overlap the stitching slightly to secure the join.
Backstitch at the beginning and end if your machine allows. Trim any loose thread ends.
Inspect the entire edge before pressing. Make sure the stitching caught the folded hem and no raw edge slipped out.
Step 8: Press the Finished Bandana
Give the finished bandana a light final press. Pay particular attention to the hems and corners so they lie flat and even.
Avoid pressing back and forth aggressively over the stitching. A controlled press is enough to settle the folds and improve the final shape.
At this stage, check the bandana from both sides. The hem should look consistent, the corners should lie flat, and the stitching should remain secure.
If this is your first attempt, practice the corner turn on a fabric scrap before sewing the actual piece. A little practice with the needle-down pivot can make the four corners much easier to handle.
Alternative Edge Finishes
A double-fold hem is not the only way to finish a bandana. Different edge treatments change the appearance, weight, and feel of the finished accessory.
Rolled Hem Bandana
A rolled hem bandana has a very narrow folded edge that gives lightweight fabrics a delicate finish. A narrow-hem presser foot makes this method easier once you are comfortable guiding the fabric through it.
You can create a narrow hem by hand on lightweight cotton or linen. Press the edge carefully and keep the fold consistent around all four sides.
This finish works especially well when you want the bandana to feel light and have a less noticeable edge.
Bias Tape Edge
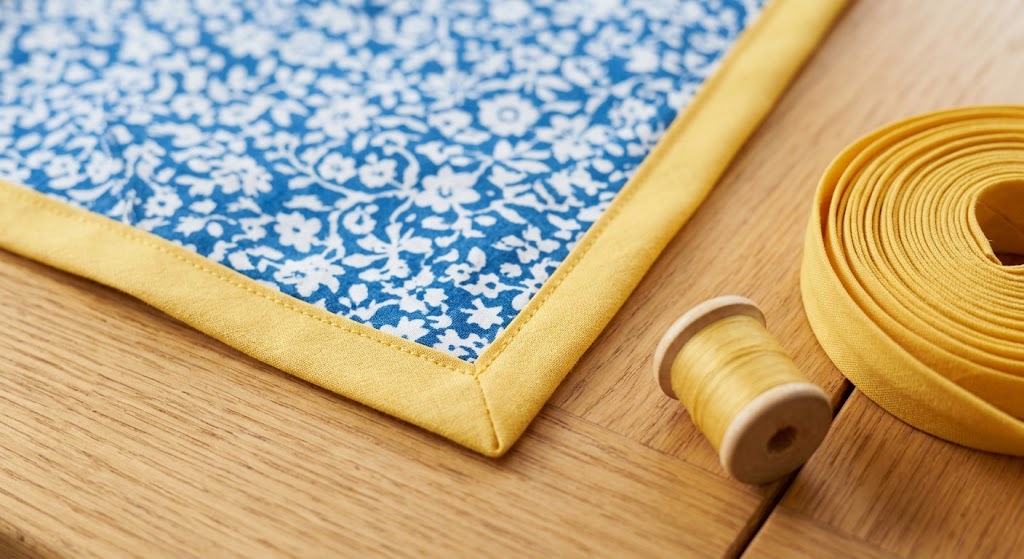
Bias tape covers the raw edge and adds either a subtle or decorative border. Choose tape that matches the fabric for a clean finish or use a contrasting color to make the edge stand out.
To attach it, align the raw edge of the tape with the edge of the bandana and stitch along the fold line. Wrap the tape around the raw edge, then stitch it in place from the other side.
Take extra care around the corners so the tape sits smoothly without bunching. Lightweight bias tape creates less bulk, especially on thin fabrics.
Also Read: How to Sew Binding on a Quilt? Step-by-Step Guide
Basting Guideline
If you have trouble keeping a narrow hem even, sew a temporary basting line about ¼ inch from the raw edge before folding. Use this line as a visual guide while pressing and stitching.
This small preparation step can be particularly helpful when working with a larger square or fabric that shifts easily.
Also Read: What Is a Basting Stitch in Sewing? Easy Guide
How to Hand Sew a Bandana
A sewing machine is convenient but not essential. You can hand sew a bandana using the same narrow double-fold hem and a few basic hand-sewing supplies.
Prepare the fabric and press the edges as described in the machine method. Fold each raw edge twice and use pins or fabric clips to hold the hem in place.
Thread a hand-sewing needle with matching or coordinating thread and knot the end securely. Bring the needle through the folded edge from the wrong side so the knot remains hidden.
Use a small, even running stitch along the inside edge of the fold. Keep the stitches similar in length and spacing as you work around the bandana.
A small whip stitch is another option. It wraps over the folded edge and creates a more visible line, suitable when you want the stitching to be part of the design.
Also Read: How to Do a Whip Stitch? Quick Guide
Take extra care at the corners. Add a few reinforcing stitches where the folded edges meet, then secure the thread with several small stitches before trimming the excess.
Hand sewing takes longer than machine stitching but works well for small projects or when you lack a sewing machine. It also gives more control over stitching lightweight fabric.
Also Read: How to Sew a Seam by Hand? Easy 5-Step Guide
No-Sew Bandana Options
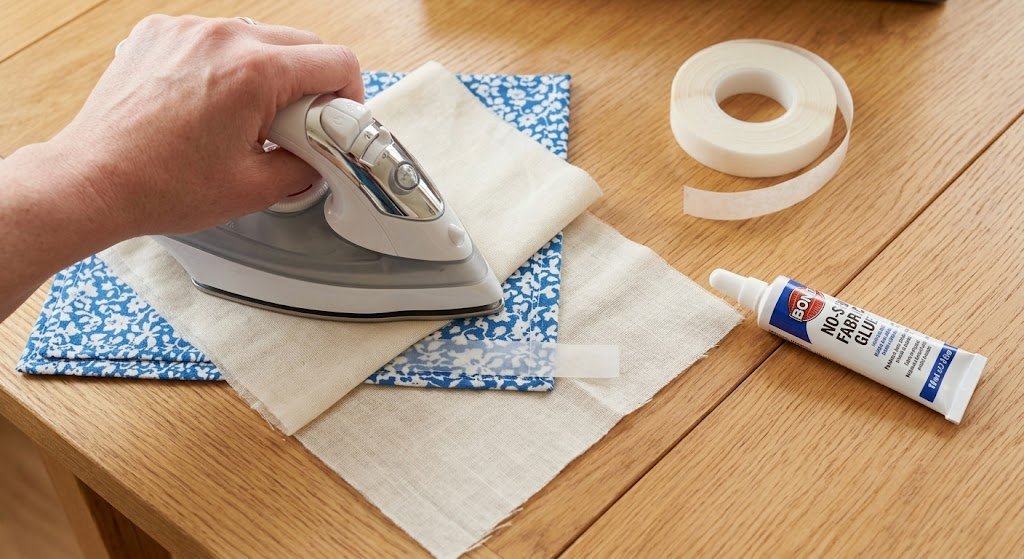
If you want to make a no-sew bandana, fusible hem tape or fabric glue can provide an alternative to stitched hems.
Fabric Glue Method
Fold and press the edges as for a sewn hem. Apply a thin, even line of fabric glue inside the fold and press the layers together.
Use clips to hold the hem while the glue dries. Follow the manufacturer’s instructions for drying time and washing since products vary in recommended care.
Fusible Hem Tape
Fusible hem tape can also secure a folded edge without stitching. Cut the tape to fit each side and place it inside the fold, following the product instructions.
Cover the fabric with a pressing cloth if recommended. Then press with an iron using the required heat and pressure. Do not move the iron back and forth unless the product instructions allow it.
These methods are useful for temporary accessories, quick crafts, or supervised children’s projects. Their durability depends on the adhesive, fabric, washing method, and handling.
For a bandana that will be washed frequently or used regularly, a stitched hem generally provides a more secure and durable finish.
Variations and Fun Ideas
Once you are comfortable with the basic square, a few changes can turn it into several different accessories.
Reversible Bandana
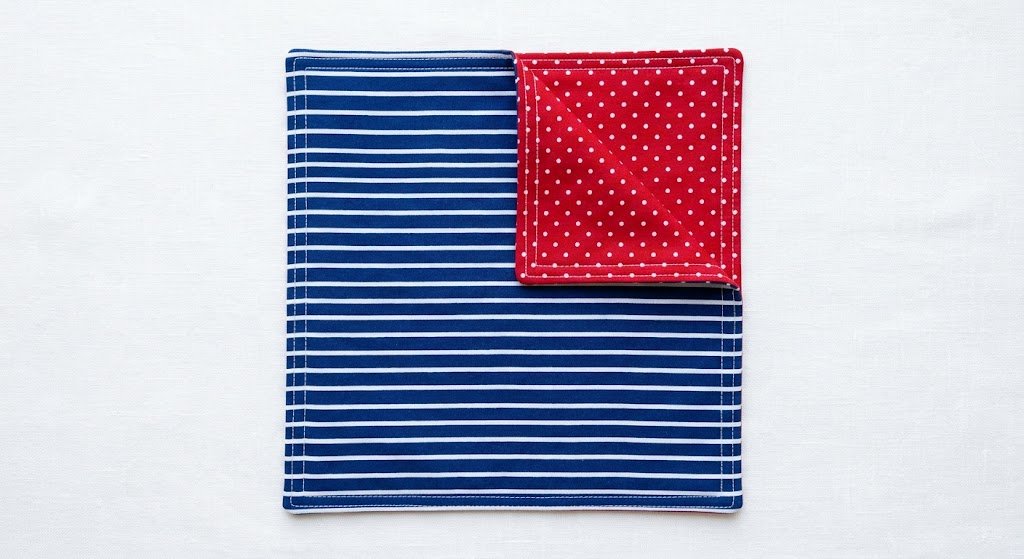
A reversible bandana gives you two coordinated prints in one accessory.
Cut two fabric squares of the same size and place them right sides together. Stitch around the edges, leaving a small opening on one side for turning.
Carefully trim the corners without cutting through the stitching. Turn the piece right side out through the opening, then press the edges flat.
Topstitch around the outside edge to close the opening and create a neat border. Choose fabrics with similar weights so the finished bandana lies flat instead of twisting.
Bandana Headband With Elastic
You can also make a bandana headband with elastic. Instead of cutting a square, use a long fabric piece suited to the width and fit you want.
Fold the fabric lengthwise with the right sides together and stitch along the long edge. Turn it right side out and press the seam flat.
Add a short section of elastic at the ends for a flexible fit. Measure the elastic against the wearer rather than pulling it tightly, as excessive tension can make the headband uncomfortable.
This variation works well with a coordinating fabric when you want a matching accessory.
Personalized Bandana
A personalized bandana is an easy way to give a simple project its own character.
You can add:
Plan the placement before completing the final hem. Small designs often look cleaner when they are kept away from the edges and corners.
For children’s accessories, choose decorations that are securely attached and appropriate for the intended use. A pet version can feature a name or simple design that coordinates with a collar or seasonal theme.
Pet Bandana
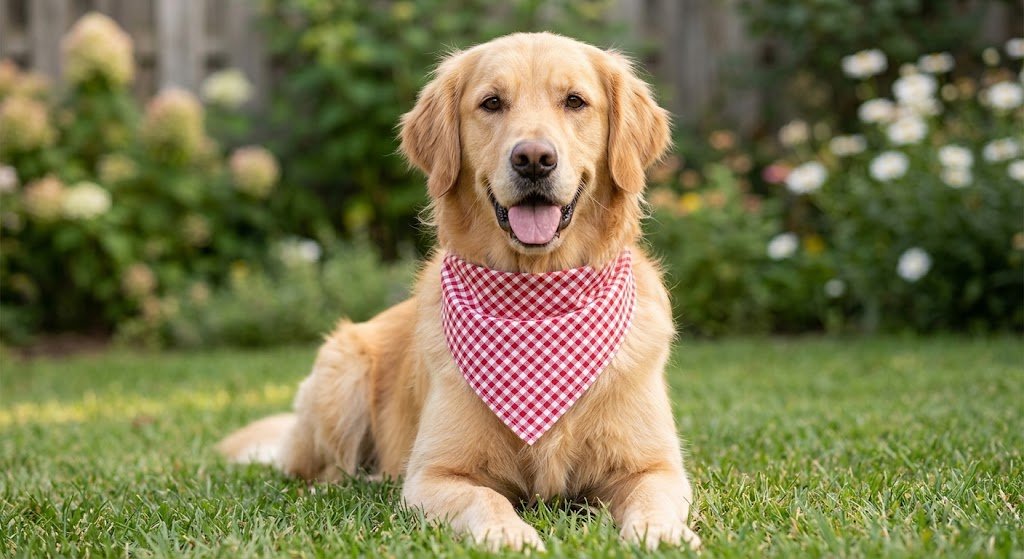
A dog bandana sewing tutorial can follow the same basic sewing techniques, but the shape and sizing need to suit the pet.
One simple option is a square that folds into a triangle. Another is a triangular piece with a channel along the top that slides over the collar.
Measure the collar area before cutting and decide how far the bandana should extend. The finished accessory should sit comfortably without being so loose it can catch on nearby objects.
For active pets, washable fabric and secure stitching are practical choices. Avoid long, loose ties, sharp decorations, or small attachments that could become a hazard.
Always supervise your pet while it wears a handmade accessory, especially during active play or outdoor activities.
Styling and Uses for Your Homemade Bandana
You can use a finished bandana in several ways beyond wearing it around your neck. Size, fabric, and print all influence how you style it.
Try wearing it as:
A smaller print works well on a small bandana because more of the design remains visible after folding. Larger prints make a stronger statement on an adult-sized square.
I like making several bandanas from coordinating fabrics. This works well when sewing for a family because each person can have a different print while the overall style stays connected.
Caring for Your Bandana
Follow the care instructions for your fabric. Cotton is generally easy to wash, while linen may need more attention when pressing.
If you added embroidery, fabric paint, heat-transfer vinyl, or other decorations, check the care requirements for those materials as well.
After washing, press the bandana at the appropriate heat setting for the fabric. A light press helps restore crisp edges and keeps the finished piece looking neat.
Troubleshooting and Tips for Perfect Results
A few small adjustments can noticeably improve the finished bandana. Most problems come from uneven folding, excess bulk, or forcing the fabric while sewing.
Wavy Hems
A wavy edge happens when you pull or stretch the fabric while sewing. Let the machine feed the fabric naturally instead of pushing or pulling it.
Press the folded edge before stitching so the hem has a clear crease to follow. If part of the edge looks uneven, remove the affected stitches, re-press the fold, and sew that section again.
Puckered Corners
Corners can look bulky when several layers of folded fabric meet in the same small area.
Slow down as you approach each corner and stop with the needle down. Lift the presser foot, turn the fabric, then continue sewing along the next edge.
If there is too much fabric inside the fold, trim a small amount from the excess before stitching. Do not cut through the outer fold or stitching line.
Uneven Stitching
If the stitching does not stay the same distance from the edge, use a seam guide or mark a temporary guideline before sewing.
Fabric clips can also help keep the narrow hem in position. Before starting the bandana, test your stitch length and fabric tension on a scrap of the same material.
A short practice line can help you get comfortable with the fabric and machine before sewing the finished piece.
Also Read: Why Does My Sewing Machine Keep Jamming? Easy Fixes
Choosing the Right Print
Consider the finished size when selecting your fabric. A large floral or geometric design may look striking on a full-size adult bandana but be hard to recognize on a smaller child’s or pet version.
Small prints, checks, and simple geometric patterns tend to remain easy to see after the fabric is folded. If the fabric has a large motif, place the square on your cutting surface and consider where the main design will appear before cutting.
How Long Does the Project Take?
A basic machine-sewn version can be a quick sewing project under 30 minutes once the fabric is washed, pressed, and ready to cut.
Your first attempt may take longer because measuring, pressing, and handling corners require more attention. Hand sewing, embroidery, reversible construction, or other decorative details also add to the working time.
More Easy Sewing Projects for Beginners
Once comfortable with this project, small fabric accessories can help you practice the same basic skills.
Some beginner-friendly ideas include:
These projects give you more practice with measuring, cutting, straight stitching, pressing, and finishing. They are also useful ways to work with smaller amounts of fabric before moving on to more involved garments.
Also Read: How to Sew a Pillow: Easy Guide for Beginners
Conclusion
Learning to sew a bandana is a simple way to practice useful sewing skills while creating something you can use. Cutting an accurate square, pressing a narrow hem, controlling a straight stitch, and sewing clean corners are techniques that help with future projects.
Start with lightweight cotton and a simple double-fold edge. Once you are comfortable with the basic method, try a rolled hem, reversible design, elastic headband, or pet version.
A handmade accessory does not need complicated construction to feel special. The right fabric, accurate measurements, careful pressing, and steady stitching turn a simple square into something personal and practical.