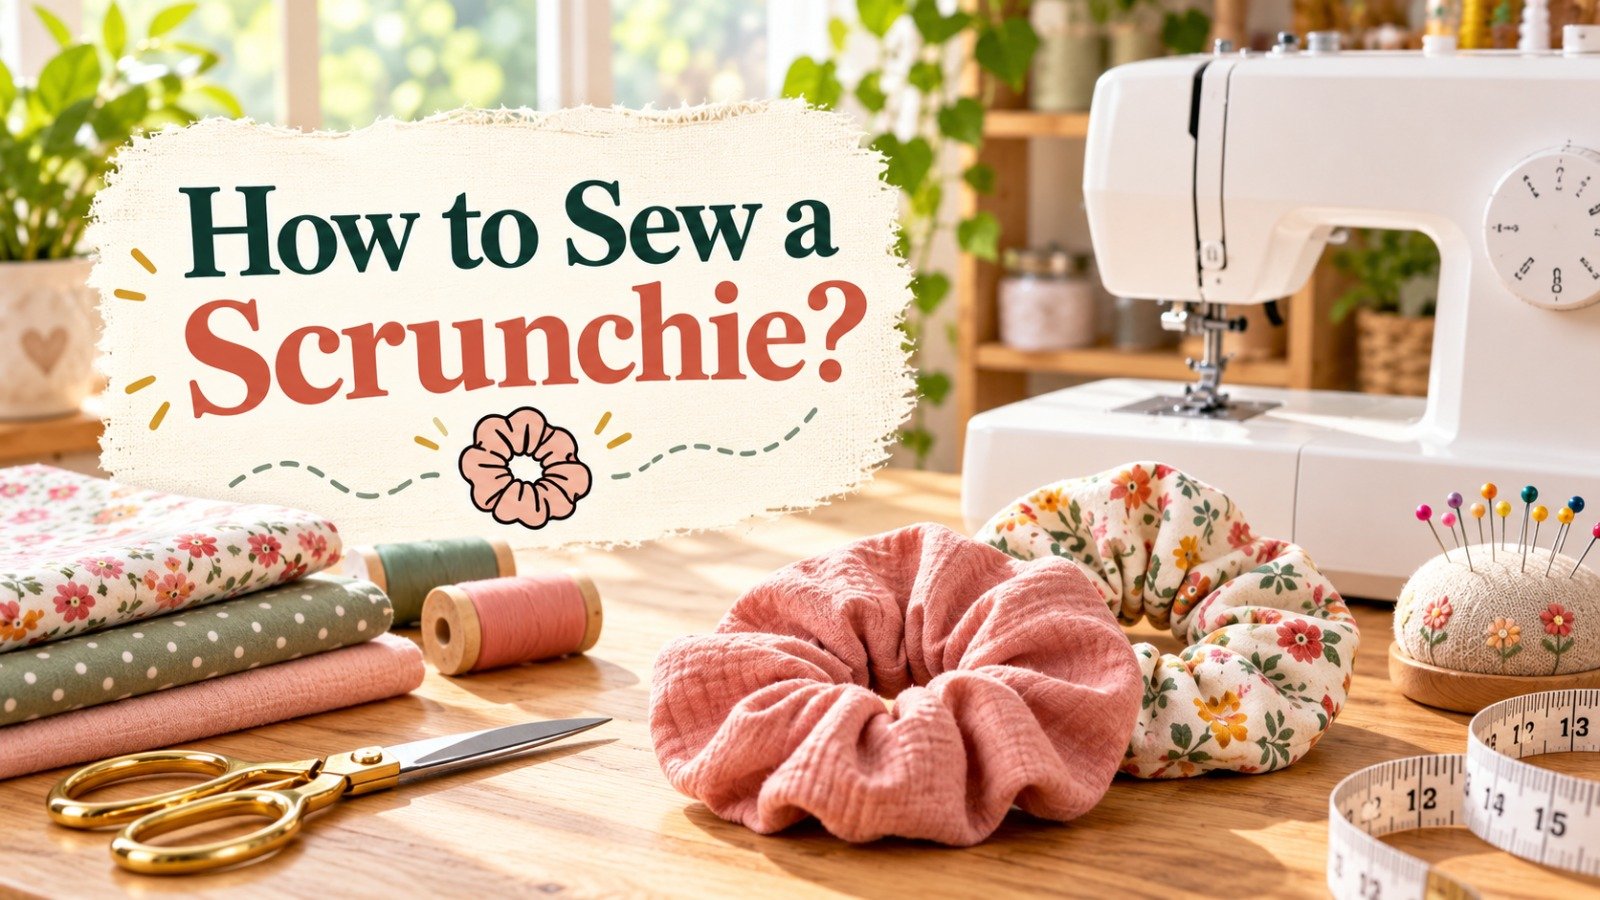
How to Sew a Scrunchie: Easy Step-by-Step Guide
Making a scrunchie is a small sewing project that feels useful as soon as you finish it. You can use leftover fabric, pick a color that matches your clothes, and adjust the size for your hair. For beginners, it offers simple practice with straight seams, turning fabric, and working with elastic.
In this tutorial, I’ll show you how to sew a scrunchie step by step with a sewing machine. I’ll also cover hand sewing, fabric and elastic choices, and simple measurements for different sizes.
Whether you prefer a cotton scrunchie for everyday use or a fuller satin or velvet style, the basic construction is the same. Once you’re familiar with the method, fabric scraps can become useful handmade hair accessories instead of ending up in the scrap bin.
Key Takeaways
Why Make Your Own Scrunchie?
Making a scrunchie gives you control over fabric, size, fullness, and elastic. It also provides a practical way to use small leftover pieces from other sewing projects.
For beginners, the project introduces useful techniques without requiring much fabric. Straight stitching, turning a narrow tube, joining elastic, and closing a small opening are skills you can use in larger sewing projects later.
Fabric choice also changes the finished look. Cotton works well for an everyday accessory, while satin creates a smoother finish and velvet gives the scrunchie extra texture and fullness.
I like making scrunchies from leftover fabric because even a small piece can become something useful. Matching the fabric to an outfit, making a smaller size for a child, or adding a bow can turn the same basic construction into a different accessory.
The project is also easy to customize for different hair types. A smaller design can suit fine hair, while a wider fabric strip and appropriately sized elastic can create a fuller option for thicker hair.
Materials and Tools You’ll Need
Before starting, gather everything in one place. Having fabric, elastic, thread, and basic sewing tools ready makes the project easier to manage.
Also Read: Best Sewing Scissors: Top Picks 2026
Fabric Options
Cotton is one of the easiest fabrics for beginners. It stays stable while cutting and sewing and comes in many colors and prints. Medium-weight cotton is a practical choice for a first project.
Satin gives a smooth, shiny finish and works well for a dressier accessory. It can shift during cutting and sewing, so use sharp scissors, secure layers carefully, and avoid pulling the fabric.
Velvet creates a soft, textured scrunchie with visual fullness. Because velvet has a nap, or directional surface, keep the fabric facing the same direction when cutting.
Lightweight knits can also work when you want a softer, stretchier accessory. However, woven cotton is usually easier for a beginner to control and press.
For a first fabric scrunchie tutorial, I recommend starting with medium-weight cotton. Once the basic construction feels familiar, satin, velvet, and other fabrics are easier to handle.
Elastic and Notions
A 1/4-inch elastic works well for many standard scrunchies. A 3/8-inch option can provide more support, depending on the fabric and finished size.
Choose elastic that bends easily and returns to its original shape after stretching. The final length matters more than width because it affects how firmly the scrunchie holds the hair.
A safety pin makes it easier to thread the elastic through the fabric tube. Use thread that matches or coordinates with the fabric and keep a seam ripper nearby in case a seam needs correcting.
If you plan to try a no-sew variation later, fabric glue or suitable hem tape can also be useful. For the main method, however, stitched seams provide the most straightforward construction.
Also Read: 10 Best Thread for Sewing: Ultimate Guide 2026
Scrunchie Measurements and Sizes
Getting the fabric and elastic measurements right makes the sewing process easier. The size also affects how full the finished scrunchie looks and how comfortably it sits in the hair.
The measurements below provide practical starting points. They are not fixed rules because elastic stretch, fabric weight, hair thickness, and personal preference can change the final fit.
| Size | Fabric Strip | Elastic Length | Best For |
|---|---|---|---|
| Kids’ | 3 × 14 inches | 6–7 inches | Smaller ponytails |
| Standard adult | 4 × 18 inches | 7–8 inches | Everyday use |
| Full adult | 5 × 20 inches | 7–8 inches | More gathered fullness |
| Oversized | 6 × 22–24 inches | 8–9 inches | Larger, fuller styles |
These fabric measurements allow room for a 1/4-inch seam allowance. If you use a different seam allowance, adjust the cutting dimensions accordingly.
Fabric width mainly affects fullness. A wider strip creates a deeper gathered effect, while a narrower strip produces a slimmer scrunchie. Fabric length affects how much material is available to gather around the elastic.
How Much Fabric Do I Need to Sew a Scrunchie?
For a standard adult version, a 4 × 18-inch fabric rectangle is a practical starting point. One strip makes one basic scrunchie, making the project useful for small fabric leftovers.
If the fabric has a directional print, nap, or pattern that needs matching, allow extra material before cutting. Satin and velvet require careful measuring because mistakes are more noticeable once gathered.
For a fuller style, increase the length or width of the fabric strip instead of adding more elastic. More fabric creates additional gathers, while the elastic controls how firmly the finished accessory holds the hair.
How to Measure Elastic for a DIY Hair Scrunchie
For a standard adult scrunchie, 7–8 inches of elastic is a useful starting range. A slightly longer piece creates a looser fit, while a shorter piece creates more tension.
Elastic strength varies by brand and material, so length alone doesn’t determine the final fit. Gently stretch the elastic before cutting, and consider how comfortably it should sit around the intended ponytail or wrist.
For thick hair, test a slightly longer elastic before permanently joining the ends. For thin or fine hair, a shorter length may hold more securely without making the scrunchie too tight.
If the first version feels too tight or loose, record the measurement and adjust the next one. Keeping notes makes it easier to repeat a comfortable size when making several scrunchies.
How to Sew a Scrunchie with a Sewing Machine
Now it is time to combine the measurements and materials. The standard method uses a fabric tube, elastic, and a small opening to turn it right side out. Work slowly through each stage, especially when turning the narrow tube and joining the elastic.
Also Read: How to Load Bobbin in Sewing Machine? Easy Steps
Step 1 – Cut Your Fabric
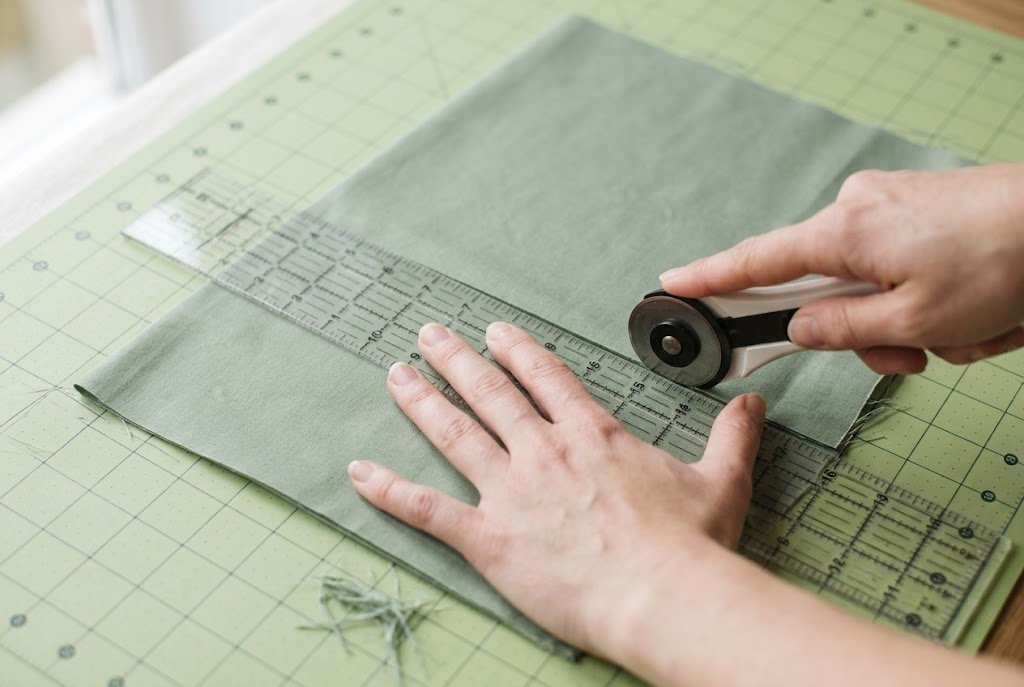
For a standard adult scrunchie, cut one fabric rectangle measuring 4 × 18 inches.
Place the fabric on a flat surface and smooth out any wrinkles. Measure carefully and cut clean, straight edges.
If the fabric has a directional print, nap, or obvious pattern, check the design before cutting. This matters particularly with velvet because its surface runs in one direction.
Step 2 – Fold and Sew the Long Edge
Place the fabric with the right side facing up. Fold it lengthwise so the two long edges meet, with right sides together and the wrong side facing outward.
For satin or other slippery fabrics, sew slowly and guide the fabric gently. Avoid pulling it through the machine.
Also Read: What Is a Basting Stitch in Sewing? Easy Guide
Step 3 – Turn the Tube Right Side Out
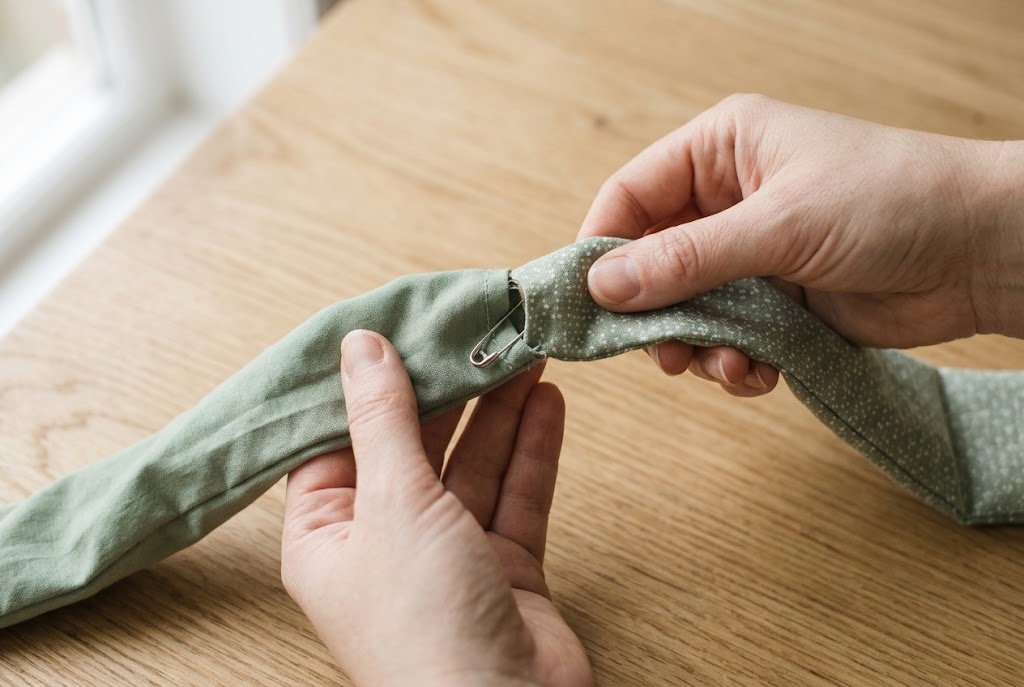
Carefully turn the fabric tube through the opening.
A safety pin or fabric-turning tool can help pull the tube through. A blunt knitting needle can also help push out the edges, but avoid using a sharp point that could pierce the fabric.
Once the tube is completely turned, gently straighten the seam and push out the edges.
Press the tube lightly if the fabric allows. Keep the iron temperature appropriate, especially for satin or velvet.
Also Read: 10 Best Iron for Sewing: Top-Rated Picks 2026
Step 4 – Join the Short Ends to Form a Loop
Bring the two short ends together so the right sides face each other. Align the edges carefully.
Sew across the joined ends with a 1/4-inch seam allowance. Stitch over the seam again if the fabric frays easily or you want additional reinforcement.
The fabric should now form one continuous loop.
This part can feel awkward because the tube is narrow. Avoid pulling hard on the fabric while sewing. Check that the tube has not twisted before stitching.
Also Read: Why Does My Sewing Machine Keep Jamming? Easy Fixes
Step 5 – Insert and Secure the Elastic
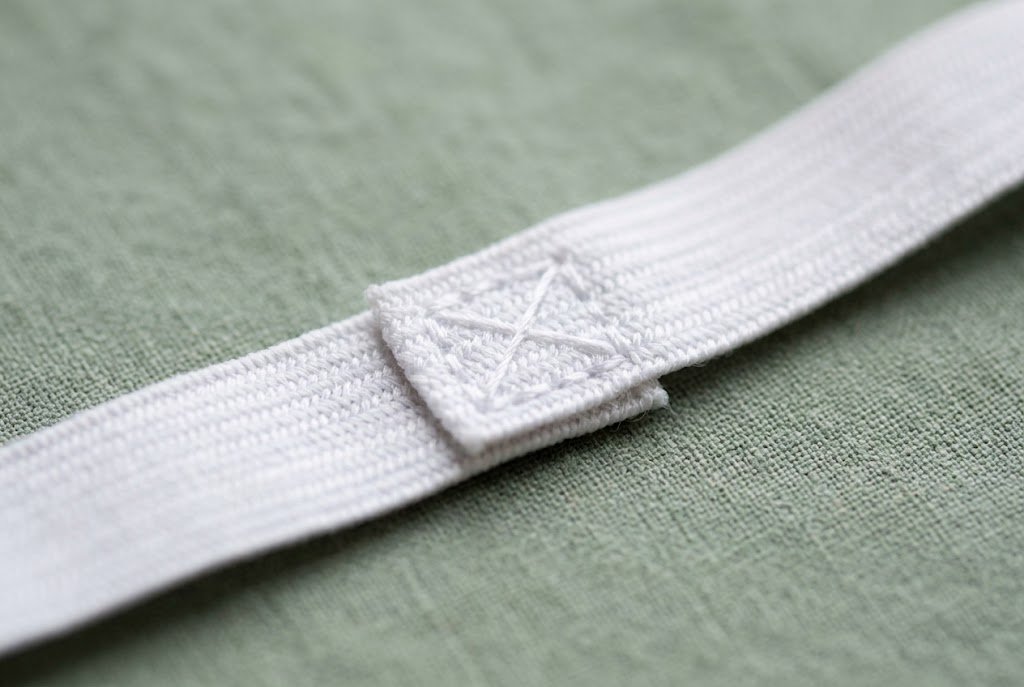
Cut the elastic according to the size you selected. For a standard adult version, 7–8 inches is a practical starting range.
Attach a safety pin to one end of the elastic. Feed the pin through the fabric tube and gently pull it around the entire loop.
Hold the other elastic end so it does not disappear inside the tube.
When both ends meet, overlap them by about 1/2 inch. Sew across the overlap several times to create a secure join. A small box stitch or several narrow zigzag passes can provide additional reinforcement.
Before closing the fabric, gently stretch the elastic around the loop. Check that it gathers the fabric evenly and is not too tight.
Also Read: How to Sew Elastic in Waistband: 3 Easy Methods
Step 6 – Close the Opening
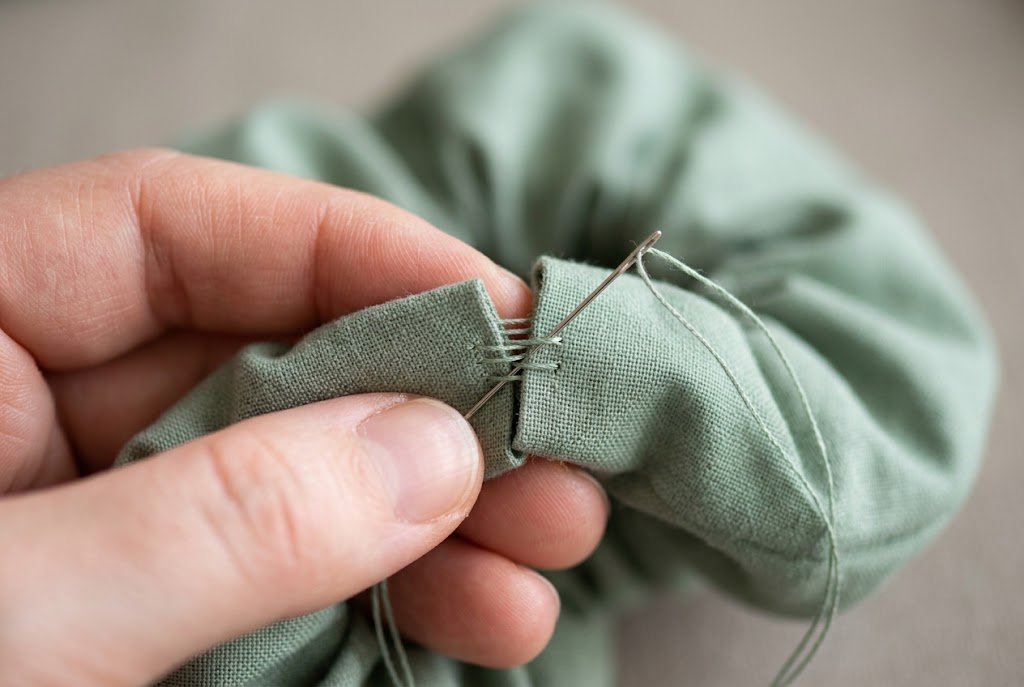
Tuck the raw edges of the turning gap toward the inside by about 1/4 inch. Press the fold lightly if needed.
For the neatest finish, close the opening with a ladder stitch. Take small stitches from one folded edge to the other, then gently pull the thread to close the gap.
Tie off the thread securely and hide the thread tail inside the seam.
Gently stretch the finished scrunchie and distribute the gathers evenly around the elastic. The fabric should move freely, with no large puckers or exposed elastic.
You have now completed a simple handmade version using a sewing machine. Once this method feels familiar, you can adapt the same construction for different fabrics, sizes, bows, ruffles, and fuller styles.
How to Hand-Sew a Scrunchie Without a Machine
You do not need a sewing machine to make a scrunchie. The same basic construction works by hand with a needle, thread, scissors, and patience.
- Cut the fabric to the desired size. Fold it lengthwise with right sides together. Use small, even running stitches along the long edge, leaving a 1½–2-inch opening to turn the fabric.
- Turn the tube right side out and gently straighten the seam. Bring the short ends together and stitch them securely by hand to form a continuous loop.
- Thread the elastic through the fabric tube using a safety pin. For a standard adult size, use the 7–8-inch elastic range from the measurements section. Overlap the elastic ends by about ½ inch and stitch through them several times to reinforce the join.
- Tuck the raw fabric edges into the turning gap and close the opening with a ladder stitch. Secure the thread, hide the tail inside the seam, and stretch the finished scrunchie to distribute the gathers.
Hand sewing takes longer than using a machine but is useful when traveling, working in a small space, or preferring slow sewing. It is practical for making one or two accessories without setting up a machine.
Also Read: How to Sew a Seam by Hand? Easy 5-Step Guide
Also Read: How to Do a Whip Stitch? Quick Guide
Optional: No-Sew Scrunchie Method
A no-sew scrunchie can be made with fabric adhesive or suitable iron-on hem tape when stitching is not an option.
Cut the fabric strip to size and follow the adhesive manufacturer’s instructions to create the fabric tube. Test the adhesive on a scrap first, especially with satin, velvet, or fabrics that may react differently to heat or glue.
Allow the adhesive to cure completely before inserting and securing the elastic. Check the finished join carefully before wearing the scrunchie.
This method is useful for decorative projects, children’s crafts, or occasional use. For accessories you stretch often, stitching provides a more secure, controllable finish.
Scrunchie Variations to Try
Once the basic construction feels familiar, you can change fabric dimensions or add simple details to create different styles.
Bow or Bunny-Ear Scrunchie
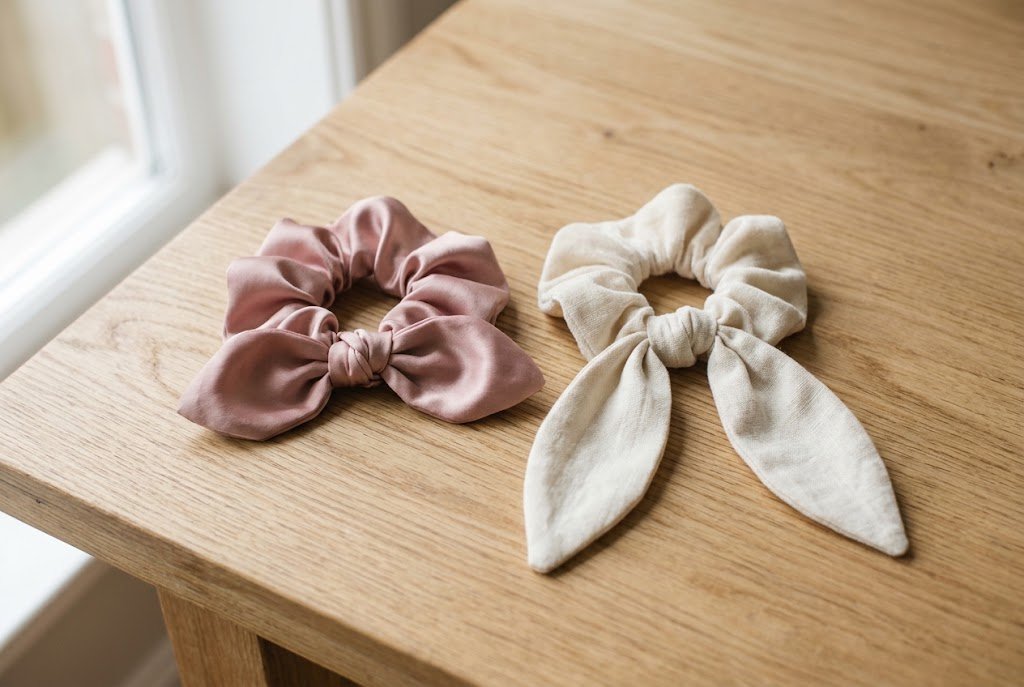
For a bow version, make the standard scrunchie first and prepare a separate fabric piece for the bow. Fold and sew the piece into shape, turn it right side out, then attach it securely to the finished scrunchie.
For a bunny-ear style, make the bow pieces longer and give the ends a pointed or rounded shape. Lightweight cotton or satin works well when you want the tails to drape instead of stand upright.
Keep the attachment stitches secure so the bow does not pull away from the scrunchie during use.
Ruffled or Extra-Full Scrunchie
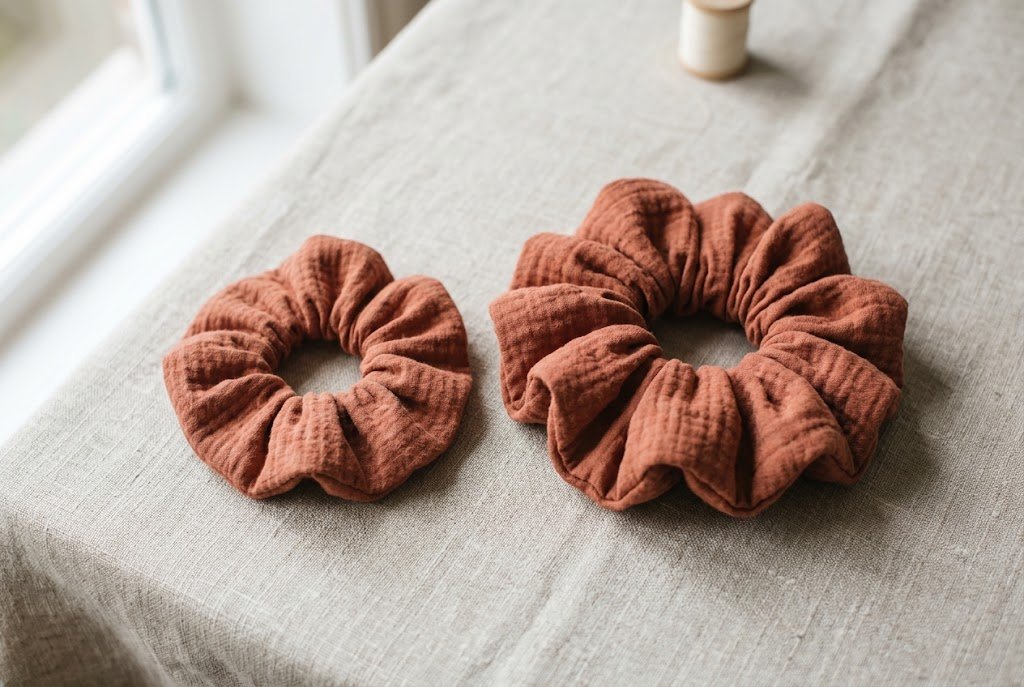
For more fullness, increase the fabric length, width, or both. A longer strip creates more gathers around the elastic. A wider strip gives the finished accessory a deeper, fuller appearance.
A fabric strip about 20–24 inches long can provide more gathers than the standard 18-inch strip. Lightweight cotton, rayon, or similar fabrics create fullness without bulky seams.
When increasing fabric, make sure the elastic is still long and strong enough to stretch comfortably around the intended ponytail.
Reversible Scrunchie
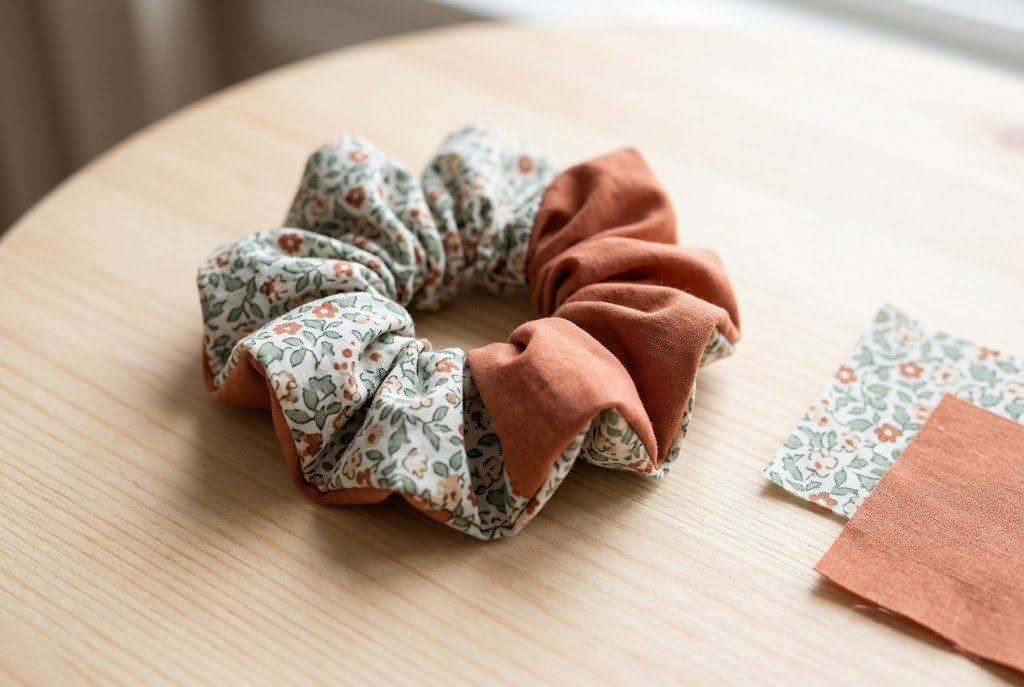
A reversible version uses two coordinating fabrics instead of one. Sew the fabrics together before forming the main tube so that both sides can show in the finished accessory.
Two lightweight cottons are a practical combination because they are easy to cut, sew, and press. Choose prints or colors that work well together and avoid bulky fabrics, which can make seams thick.
This design also works when you have two smaller fabric scraps that aren’t large enough for a standard scrunchie on their own.
Jumbo Scrunchie
For a jumbo scrunchie, increase fabric dimensions to create a larger, fuller accessory. A 24-by-5-inch strip is a useful starting point, though you can adjust the final size based on how much fabric you have. Lightweight cotton, satin, and soft velvet can work for a larger style.
Keep in mind that a wider or longer fabric strip adds bulk, so choose the elastic length and strength accordingly.
If the finished jumbo scrunchie is difficult to stretch around the hair, adjust the elastic rather than adding more. The goal is to create fullness without making the accessory uncomfortable or hard to use.
Troubleshooting and Tips
Small problems with a scrunchie usually come from fabric handling, measurements, or elastic tension. Most are easy to prevent or correct once you know what to check.
Why Is My Scrunchie Too Tight After Sewing?
The elastic may be too short or have stronger recovery than expected. For the next version, add about ½–1 inch to the elastic length and compare the fit before joining the ends permanently.
Elastic behaves differently depending on its width and construction, so test a small piece before making several scrunchies with the same measurement.
How Do I Fix a Twisted Scrunchie Tube?
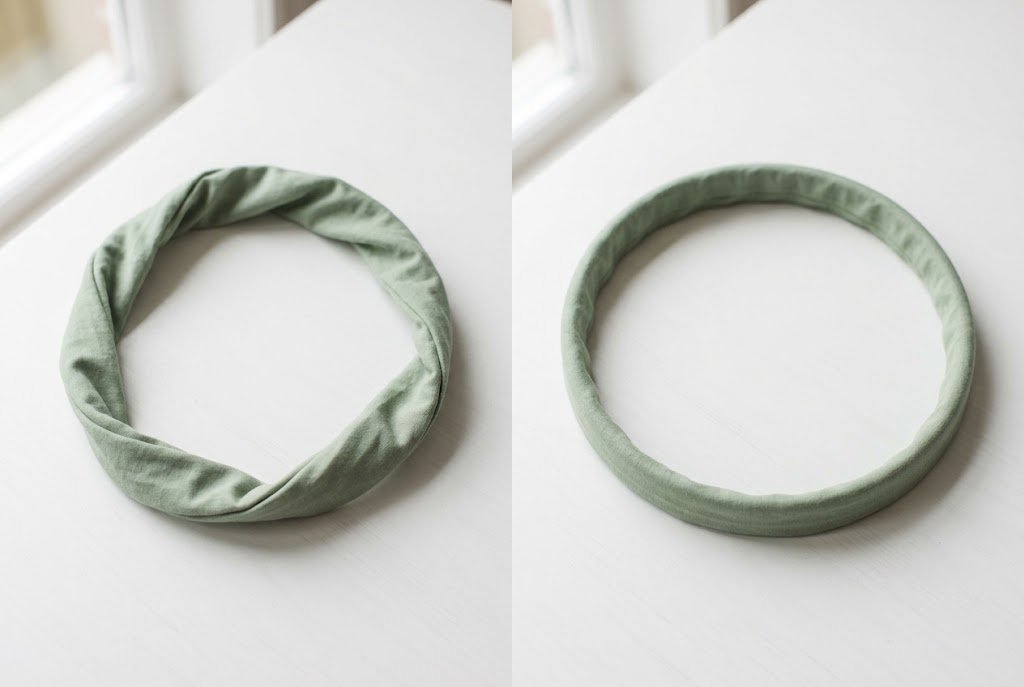
A twisted tube usually happens when the fabric rotates while turning it or before joining the short ends.
Before sewing the ends together, spread the tube flat and check it forms a continuous loop without a twist. Straighten it before stitching since correcting a twist is harder after the loop is closed.
How Do I Make a Scrunchie Less Bulky at the Seam?
Excess seam allowance or thick fabric can create unnecessary bulk. Trim the seam allowance carefully after stitching, but leave enough fabric to protect the seam.
Pressing the seam before turning helps it lie flatter. Accurate cutting and a consistent ¼-inch seam allowance make a noticeable difference, especially with satin, velvet, or fabrics that show uneven seams easily.
How Do I Make a Scrunchie That Doesn’t Slip?
The elastic needs enough recovery to hold the finished scrunchie comfortably around the hair. If it feels loose, try a slightly shorter elastic loop in the next version instead of making the fabric excessively tight.
Fabric choice also affects the finished feel. Lightweight cotton, satin, and other smooth fabrics can create different levels of movement and fullness, so test the combination that works best for the intended hairstyle.
What Fabric Works Well for Thick or Fine Hair?
For thick hair, a fuller scrunchie with suitable elastic length provides enough fabric coverage without excessive tension. Medium-weight cotton is an easy starting point, while lightweight fabrics create a softer, less bulky finish.
For fine hair, a smaller scrunchie with lighter fabric may be easier to manage. The goal is a comfortable hold, not a tighter elastic.
How Do I Reinforce the Elastic Join?
Overlap the elastic ends by about ½ inch and stitch across the join several times. A compact box stitch or narrow zigzag spreads the stress across the connection instead of relying on one straight row of stitches.
Check the join before closing the fabric opening. If the elastic pulls apart easily by hand, reinforce it before finishing the scrunchie.
How Do I Sew a Scrunchie That Lasts Longer?
Use a suitable needle and all-purpose thread for the fabric and keep the seam allowance consistent. Backstitch the beginning and end of the main seams and reinforce the elastic join because it receives repeated tension during use.
Avoid pulling the fabric while sewing. After finishing, trim loose threads and stretch the scrunchie gently to distribute the gathers evenly.
If a particular fabric or elastic combination does not feel comfortable, make a small test version before cutting your best fabric. This simple check can save material and make it easier to adjust the size for future scrunchies.
Also Read: How to Replace a Sewing Machine Needle? Easy Guide
More Easy Sewing Projects for Beginners
Once a basic scrunchie feels comfortable, small accessories make useful practice projects. A simple fabric headband helps you practice narrow hems and fabric handling, while a small pouch introduces skills like lining, turning, and installing a closure.
These projects are also useful for leftover cotton from larger sewing projects. I keep smaller fabric pieces together because they can become practical accessories without needing extra material.
Also Read: How to Sew a Pillow: Easy Guide for Beginners
Also Read: How to Sew a Bandana? 8 Simple Steps
Conclusion
Learning how to make a scrunchie is a simple way to turn small fabric pieces into something useful and personal. The project teaches practical sewing skills such as straight stitching, turning a fabric tube, handling elastic, and neatly finishing a small opening.
Start with a standard cotton version before trying satin, velvet, bows, or oversized designs. Once the basic construction feels familiar, adjusting the fabric and elastic measurements becomes much easier.
One habit that has helped me with small sewing projects is testing the first version with inexpensive fabric. A quick test lets you check whether the elastic feels comfortable, the fabric creates the fullness you want, and the finished size suits the intended hairstyle.